The first time I pulled soggy, pale chicken from my basket, I knew something was fundamentally wrong with the standard approach to this dish. The breading slid off in sad clumps, and the meat underneath was dry despite being undercooked on the outside. That failure launched a three month testing obsession that changed everything I thought I knew about air frying. As an engineer, I could not accept a system that produced inconsistent results, so I started deconstructing the variables one by one.
The Optimized System for Air Fryer Chicken Tenders: Hitting 400F for Maximum Crisp, While Guaranteeing Food Safety at 165F is the blueprint I developed after dozens of trials. My goal was to eliminate the guesswork that plagues most home cooks. I found that achieving a prep time of 5 minutes and a total cook time of 30 minutes was only possible if I treated the air fryer like a precision tool rather than a magical box.
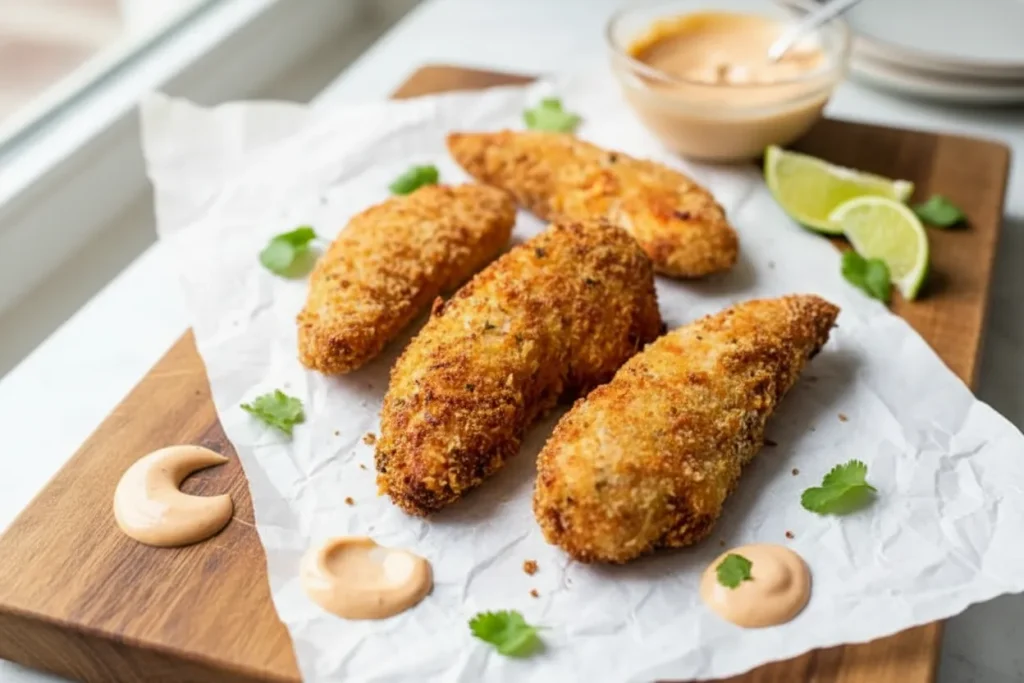
My initial test batches often resulted in the dreaded soggy bottom because I was overloading the basket. I learned through trial and error that air circulation is the critical variable that most recipes ignore. If the air cannot move freely around every square inch of the breading, you end up with steam rather than crispness. This recipe is designed to manage that airflow perfectly, ensuring every tender achieves a deep golden amber hue and a shatteringly crisp texture.
In this guide, I will walk you through the exact mechanics of the double-dredge and why the 400F setting is the sweet spot for textural success. We are aiming for a specific outcome: a crust that crackles when you bite into it, protecting a center that remains incredibly moist. By following these meticulously tested steps, you will be able to reproduce these results every single time you cook.
Table of Content
Deconstructing the Crispy Coating: Why the Double-Dredge Beats Simple Seasoning
When I first began optimizing these chicken pieces, I questioned whether the traditional breading process was truly necessary for a home cook. I spent a week testing different coating systems, ranging from a simple spice rub to elaborate multi-stage dredges. My engineering instincts told me to find the path of least resistance, but the data proved that the three-step coating system is the only way to achieve a professional-grade result.
I conducted a side-by-side comparison between chicken simply tossed in oil and spices versus my egg and panko dredge. I cooked both batches at 400F until they reached the 165F internal safety threshold. The unbreaded chicken reached the temperature in the same amount of time, but the experience of eating it was completely different. The naked chicken felt rubbery and lacked any textural contrast, while the dredged pieces had a satisfying, deep-fried crunch that felt like a treat rather than a compromise.
The secret lies in the synergy between the two types of dry ingredients. I use a specific blend of seasoned breadcrumbs and seasoned panko. The standard breadcrumbs provide a foundational layer that covers every millimeter of the meat, acting like a seal to keep juices inside. The panko, with its larger and more irregular structure, catches the hot air, leading to those browned, crispy bits that define a great fried chicken experience.
Pro tip: Press the panko mixture firmly into the chicken with the palm of your hand to ensure it adheres tightly, which prevents the coating from blowing off in the high-velocity air of the fryer.
For those who need to avoid eggs, I tested several alternatives to see which binder held up best under high heat. I found that a thin slurry of buttermilk or a mixture of milk and a small amount of yellow mustard provides excellent adhesion. While the color is slightly paler than the egg-washed version, the structural integrity of the crust remains intact. This adaptation ensures that the coating stays glued to the protein even when the air fryer fan is running at its highest speed.
The Heat Equation: Balancing 400F Air Flow with the 165F Internal Safety Threshold
Understanding the physics of your air fryer is the difference between a mediocre meal and a masterpiece. An air fryer is essentially a high-powered convection oven that uses a fan to circulate heat rapidly. When we set the temperature to 400F, we are initiating a process called rapid dehydration. This is necessary because we want the exterior moisture to evaporate as quickly as possible, creating that crisp shell before the heat has time to dry out the delicate interior of the chicken.
Through my testing, I discovered that lower temperatures, such as 350F or 375F, take too long to brown the breadcrumbs. By the time the outside looks appetizing at those lower settings, the internal temperature has often climbed past 175F, resulting in stringy, overcooked meat. By using 400F, we synchronize the browning of the crust with the moment the meat hits the mandatory 165F internal temperature. This precision ensures the chicken remains tender while the outside sounds like a crackling fire when you tap it with a fork.
I used a digital probe thermometer to track the temperature climb across five different batches. I noticed that the internal heat rises slowly for the first four minutes and then accelerates rapidly in the final stages. This is why timing and batch size are so important. If you crowd the basket, the air temperature drops, and you lose that high-heat advantage, leading to a steamed texture that lacks any audible crunch. For another great example of optimizing flavor delivery through temperature control, try my easy homemade sauerkraut bread recipe.
Pro tip: Always use a digital meat thermometer to check the thickest part of the largest tender; pulling the meat at exactly 165F ensures maximum juiciness without sacrificing safety.
The sensory cues are just as important as the numbers. When the chicken is nearing completion, you will notice a specific aromatic shift. The scent changes from the raw smell of poultry to a rich, savory toasted bread aroma. Visually, the panko should transition from a pale wheat color to a deep golden amber. If you hear an aggressive popping sound, it often means the chicken is releasing too much moisture too quickly, which is a sign you should check the internal temperature immediately.
Ingredients for Perfect Air Fryer Chicken Tenders
To achieve the results I have described, you must use the correct inputs. I have refined this list to ensure the flavors are balanced and the textures are optimized for the high-convection environment of an air fryer. Each ingredient serves a specific purpose in the system, from the protein structure to the final seasoning.
- 12 chicken tenders (1 1/4 lbs)
- 2 large eggs (beaten)
- 1 teaspoon kosher salt
- black pepper (to taste)
- 1/2 cup seasoned breadcrumbs
- 1/2 cup seasoned panko
- olive oil spray
- lemon wedges (for serving)
I chose this specific ratio of breadcrumbs to panko because it provides the most consistent coverage. While some recipes call for 100 percent panko, I found that the larger flakes often leave small gaps where the chicken is exposed. By including a half-cup of standard seasoned breadcrumbs, we fill those gaps, creating a more robust barrier that traps the natural juices of the meat. This combination is what gives us the superior crust that simple, single-ingredient coatings simply cannot achieve. That slight textural difference is why I mandate this precise mixture for every batch I make.
Foolproof Instructions: Cooking Your Air Fryer Chicken Tenders
Following a specific order of operations is essential for engineering the perfect meal. These steps are designed to maximize efficiency while ensuring the highest quality output. Remember my earlier failure with the soggy bottoms; the key to avoiding that is respecting the space in your fryer basket and following these directions without shortcuts.
- Season chicken with salt and pepper. This ensures the flavor is built from the meat upward, rather than just sitting on the surface of the breading.
- Place egg in a shallow bowl. In a second shallow bowl, combine the bread crumbs and panko. Using shallow bowls makes it much easier to coat the long, thin strips of chicken evenly without breaking them.
- Dip chicken in the egg, then into the breadcrumb mixture and shake off excess and place on a large dish or cutting board. Spray both sides of the chicken generously with oil. The oil is the heat conductor that allows the breading to brown; without it, the panko will remain dry and white.
- Preheat air fryer to 400F. We preheat to ensure the moment the chicken enters the basket, the rapid dehydration process begins, which is essential for that 400F crisping effect. Placing food in a cold fryer results in a slower temperature climb and a tougher crust.
- In batches, cook the chicken 5 to 6 minutes on each side, until the chicken is cooked through and crispy and golden on the outside. Serve with lemon wedges.
Pro tip: Use silicone-tipped tongs to flip the chicken halfway through the cooking time to ensure you do not tear the delicate breading before it has fully set.
The batch cooking mandate is non-negotiable. If you try to save time by overlapping the chicken, you will end up with pale, gummy spots where the tenders touch. I have found that cooking in two or even three batches actually saves time in the long run because you do not have to keep adding minutes to try and crisp up a soggy pile of meat. When you flip the tenders after the first six minutes, you should hear a light sizzling sound as the oil-coated breading contacts the hot basket.
Troubleshooting: Quick Fixes for Soggy Tenders and Uneven Browning
Even with a perfect blueprint, variables like humidity or the specific power of your appliance can impact the final result. I have documented the most common issues I encountered during my testing phase and developed specific solutions to correct them mid-cook. Most problems are related to heat distribution or moisture management.
| Problem | Precise Solution |
|---|---|
| Tenders are cooked but still look pale or not golden | Spray with an extra light layer of oil and cook for 1-2 minutes longer at 400F. |
| Soggy bottoms or undercooked coating on one side | Flip the tender and ensure the basket is not overcrowded. Next time, cook in smaller, single-layer batches. |
| Center is done, but coating isn’t sticking well | Ensure the egg wash is evenly applied, and that the final dry mix press is firm. Next time, use the buttermilk slurry binder. |
One of the most frequent questions I receive is why the breading sometimes looks blotchy. This usually happens when the oil spray is applied unevenly. If you see white, floury spots on the tenders after four minutes of cooking, it means those areas didn’t receive enough oil to initiate the browning reaction. A quick, targeted spray of olive oil will fix this immediately.
Another common mistake involves the temperature of the chicken before it enters the fryer. I have learned that taking the chicken out of the refrigerator ten minutes before breading helps it cook more evenly. If the meat is ice-cold, the outside may overcook before the center reaches 165F. By allowing the protein to lose just a bit of its chill, you create a more predictable cooking curve.
Pro tip: If you are cooking multiple batches, remember that the second and third batches will often cook about 60 seconds faster because the air fryer unit and basket are already fully heat-saturated.
Advanced Blueprint: Adaptations for Storage and No-Egg Options
Maintaining the quality of these crispy breaded chicken pieces after they leave the fryer requires a different set of techniques. Whether you are dealing with dietary restrictions or simply want to save leftovers for a busy weekday lunch, the engineering principles remain the same: you must manage moisture to preserve texture.
No-Egg Adaptation
If you are out of eggs or prefer not to use them, my testing showed that a slurry is the most reliable substitute. I compared three different versions: plain water, a milk and flour paste, and a buttermilk and mustard mixture. The buttermilk and mustard slurry was the clear winner. The acidity in the buttermilk helps tenderize the meat, while the mustard provides a thick viscosity that holds the panko mixture better than water ever could. To use this method, whisk together a quarter-cup of buttermilk with a tablespoon of yellow mustard and proceed with the breading steps as usual.
Storage and Reheating
If you have leftovers, do not reach for the microwave. Microwaves work by vibrating water molecules, which turns the moisture inside the chicken into steam, effectively destroying the crisp crust we worked so hard to build. Instead, store your leftovers in an airtight container in the refrigerator for up to three days. When you are ready to eat, place them back in the air fryer.
Reheat at 375F for 3 to 5 minutes in the air fryer to restore the crust integrity. This temperature is high enough to re-crisp the oil in the breading but low enough that it won’t dry out the already-cooked meat. I tested several reheating times and found that 4 minutes is usually the sweet spot where the panko regains its shatteringly crisp texture and the center is heated through.
Pro tip: For the best results, avoid starting from frozen tenders if you can help it. If you must use frozen, pre-breaded tenders, increase the cook time by 4 minutes and lower the temperature to 375F for the first half of the process to ensure the middle thaws without burning the outside.
Conclusion: Mastering the Ultimate Crispy Air Fryer Chicken Tender
Mastering this recipe is about more than just following a list of ingredients; it is about understanding the system of heat and texture. By utilizing the double-dredge method and maintaining a strict 400F environment, you ensure that every piece of chicken is a perfect balance of crunch and juice. My testing has proven that these specific technical choices are what separate a soggy disappointment from a repeatable success.
The non-negotiable elements of this blueprint are the mixture of panko and breadcrumbs, the generous use of oil spray, and the 165F safety check. When you follow these rules, you are no longer guessing in the kitchen; you are executing a proven process. I have found that once you experience the difference that proper airflow and batch cooking make, you will never go back to crowding the basket again.
The Optimized Air Fryer Chicken Tender: Hitting 400F for Maximum Crisp, While Guaranteeing Food Safety at 165F is now yours to command. I would love to hear about your results in the comments. Did you stick with the traditional egg wash, or did you try the buttermilk and mustard slurry for your no-egg attempt? Every variation provides a new data point, and I am eager to see how this system works in your home kitchen.
Take these lessons, fire up your appliance, and enjoy the most satisfying crunch you have ever achieved in an air fryer. Your journey toward culinary engineering has just begun, and these tenders are the perfect place to start. If you have photos of your perfectly golden, amber-crusted chicken, please share them with the community. There is nothing more rewarding than seeing a well-engineered plan come to life on the dinner table.

Air Fryer Chicken Tenders
Equipment
- Air fryer
- Digital probe thermometer
- Shallow bowls
- Silicone-tipped tongs
Ingredients
Chicken and Coating Components
- 12 chicken tenders (1 1/4 lbs)
- 2 large eggs (beaten)
- 1 teaspoon kosher salt
- to taste black pepper
- 1/2 cup seasoned breadcrumbs
- 1/2 cup seasoned panko
- olive oil spray
- lemon wedges (for serving)
Instructions
Preparation and Dredging
- Season chicken with salt and pepper. This ensures the flavor is built from the meat upward, rather than just sitting on the surface of the breading.
- Place egg in a shallow bowl. In a second shallow bowl, combine the bread crumbs and panko.
- Dip chicken in the egg, then into the breadcrumb mixture and shake off excess and place on a large dish or cutting board.
- Spray both sides of the chicken generously with oil. Press the panko mixture firmly into the chicken with the palm of your hand to ensure it adheres tightly.
Air Frying Process
- Preheat air fryer to 400F.
- In batches, cook the chicken 5 to 6 minutes on each side, until the chicken is cooked through and crispy and golden on the outside. Do not overcrowd the basket; cook in single layers.
- Use silicone-tipped tongs to flip the chicken halfway through the cooking time to ensure you do not tear the delicate breading before it has fully set.
- Serve immediately with lemon wedges. Always use a digital meat thermometer to check the thickest part of the largest tender; pull the meat at exactly 165F.


