One Tuesday evening, I stood over a skillet filled with a grey, unappetizing mound of meat and peppers. Instead of the vibrant, charred feast I had envisioned, I was staring at a pile of steamed chicken that had released all its moisture into the pan, leaving the marinade to sit in a murky, thin liquid. It was a failure of physics and technique that I should have spotted earlier. I had attempted to cook everything at once, thinking efficiency would lead to quality. Instead, I learned that crowding a pan is the quickest way to ruin a potentially great meal.
That failure launched a series of kitchen experiments aimed at mastering chicken thigh fajitas. I spent weeks deconstructing the process, testing variables like pan temperature, fat types, and marinade composition. I realized that achieving that restaurant style sear requires a methodical approach to heat management and moisture control. If the pan temperature drops because of too many ingredients, the meat boils in its own juices rather than caramelizing. This is where the multi batch sear becomes non negotiable.
The solution I developed, which I call the engineered sizzle, relies on a specific sequence of actions that prioritize texture and flavor depth. By separating the chicken from the vegetables and using a combination of oils and fats, I found a way to create a deep, savory crust while keeping the meat incredibly tender. I also discovered that the marinade itself shouldn’t be discarded after use. Instead, it serves as the perfect deglazing liquid for the vegetables later in the process, much like the one in my Proven Chicken Thigh Marinade for Juicy Results.
This blueprint for chicken thigh fajitas will take you about 25 minutes to prep and 20 minutes to cook, totaling 45 minutes of focused effort. It is a system designed for repeatable success, ensuring that every piece of chicken has that distinctive char and every pepper retains its snap. By the time you reach the end of this guide, you will understand exactly how to manipulate heat and flavor to produce a result that far exceeds the standard home version.
Table of Content
Why Chicken Thighs Are Superior to Breast (Answering Your First Question)
During my testing phase, I ran side by side comparisons between chicken breasts and chicken thighs to determine which cut handled the high heat of a cast iron skillet more effectively. The results were consistent across five different trials. Chicken breasts, being incredibly lean, have a very narrow window of perfection. If you miss that window by even thirty seconds at high heat, the fibers tighten and the meat becomes dry and chalky. This is particularly problematic for a dish that requires a heavy sear for flavor.
I chose to focus this system on chicken thighs because they are inherently more forgiving and flavorful. The higher fat content in dark meat acts as a built in insulator against the aggressive heat needed for a proper sear. As the fat renders, it bastes the meat from within, ensuring a succulent texture that remains juicy even if you prefer a darker char on the outside. In my experiments, thighs maintained their structural integrity and moisture levels far better than breasts when exposed to the same 450 degree surface temperature.
There is also a significant difference in the flavor profile when dealing with the heavy spices used in this dish. Dark meat has a more robust, savory quality that stands up to the pungent cumin and smoky paprika. While chicken breasts tend to get lost under the intensity of the marinade, thighs complement those bold notes. Through my testing, I found that using boneless, skinless thighs provides the perfect balance of convenience and culinary performance for a weeknight meal.
The Engineered Sizzle: Mastering Chicken Thigh Fajitas with a Flavor-Bomb Marinade and Perfect Cast Iron Technique
Achieving the perfect fajita experience requires more than just a good recipe; it requires an understanding of how ingredients react to heat. The goal is to create a Maillard reaction, a chemical reaction between amino acids and reducing sugars that gives browned food its distinctive flavor. To do this in a home kitchen, you must control the moisture levels on the surface of your meat. If the meat is too wet, the energy from the pan goes into evaporating water rather than browning the protein.
My method focuses on a high heat environment where the chicken is seared in small batches. This prevents the pan from losing its thermal energy, which is why a heavy cast iron skillet is the preferred tool for this job. Cast iron has a high heat capacity, meaning it stays hot even when cold meat is added to it. When you hear that loud, aggressive hiss as the chicken hits the oil, you know the process is working. If the sound is a soft sizzle, your pan is not hot enough.
Pro tip: Use a heavy cast iron skillet to maintain consistent heat throughout the multi batch searing process.
The timing of the vegetable addition is also a critical component of this engineered system. Many people make the mistake of adding peppers and onions to the pan while the chicken is still cooking. This introduces a massive amount of moisture and effectively steams the meat. By removing the chicken first and then cooking the vegetables in the residual fat and marinade, you preserve the texture of both components. This sequence ensures that the vegetables pick up all the browned bits, or fond, left behind by the chicken.
Marinating Mastery: Harnessing Umami with Soy Sauce and Liquid Smoke for Thighs
When I was developing the flavor profile for these chicken thigh fajitas, I tested this exact marinade ratio against a standard cumin and chili powder rub. The results were night and day. A dry rub often burns before the meat is fully cooked, leading to a bitter aftertaste. By contrast, a wet marinade with an acidic component like lime juice helps to tenderize the meat while providing a medium for spices to penetrate deeper into the fibers.
I tested the addition of 1 tablespoon of soy sauce and found it provided a necessary umami foundation that kept the dark meat from tasting flat, which was a consistent issue in the non soy variations. The soy sauce acts as a flavor enhancer, bringing out the natural savviness of the chicken without making it taste like a different cuisine. When combined with 1 teaspoon of liquid smoke, it mimics the flavor of a charcoal grill, which is difficult to achieve on a standard stovetop.
The marinade components for this system include:
- 2 tablespoons lime juice
- 1 tablespoon soy sauce
- 1 teaspoon liquid smoke
- 2 tablespoons cumin
- 2 teaspoons kosher salt
- 2 teaspoons chili powder
- 1 teaspoon smoked paprika
- 1 teaspoon onion powder
- 1/4 teaspoon cayenne pepper
- 1/3 cup chopped cilantro
- 4 cloves garlic, smashed and minced
I found that even a short 15 minute marination period is enough to transform the surface of the chicken, though a longer rest of up to 24 hours allows the flavors to move deeper into the meat. The lime juice provides the necessary acidity to brighten the heavy spices, while the garlic and onion powder create a savory crust during the sear. The liquid smoke is the secret weapon here, providing a nostalgic outdoor flavor that balances the brightness of the lime.
The Proper Technique: Cutting Chicken Thighs Against the Grain
One of the most common reasons for tough fajitas is improper knife work. Even the most perfectly cooked chicken can feel chewy if it is cut with the grain. When you look at a raw chicken thigh, you will see long muscle fibers running in a specific direction. Your goal is to shorten those fibers as much as possible to make the meat easier to chew.
Cut against the grain, meaning your knife should be perpendicular to the lines you see running in the raw chicken. By slicing the meat into 1 inch wide strips across these fibers, you are doing the hard work for your teeth. Each bite will pull apart easily because the muscle fibers have already been severed. This is a simple mechanical step that significantly improves the perceived tenderness of the dish.
I learned through testing that slicing the meat before marinating is far more effective than slicing it after cooking. Pre slicing increases the surface area exposed to the marinade, ensuring that every bite is seasoned. It also allows the chicken to cook much faster in the pan, reducing the risk of overcooking the center while waiting for a crust to form on the outside. This small adjustment in timing makes a massive difference in the final consistency of the meat.
The Two-Fat Sear: Why We Use Oil First, Then Butter for the Ultimate Crust
The fat you choose for searing is just as important as the pan itself. Most home cooks use either oil or butter, but I found that using a combination at different stages yields the best results. I tested various oils and found that a neutral vegetable oil is essential for the initial high heat phase because of its high smoke point. Butter, while delicious, contains milk solids that burn at the temperatures required for a proper sear.
Phase | Fat Used | Purpose | Action — | — | — | — Initial Sear | Vegetable oil | High smoke point for browning | Add oil to preheated cast iron and swirl to coat Flavor Finish | Butter | Enrichment and Maillard reaction | Swirl butter into pan during the flip to coat second side
The initial layer of vegetable oil provides a high smoke point necessary to achieve the initial sear without burning. This creates the primary crust on the first side of the chicken. The second addition of butter is purely for flavor development and achieving a richer browning on the second side of the chicken pieces. As the butter melts and foams, it fills the gaps between the chicken strips, providing a nutty aroma and a velvety mouthfeel that oil alone cannot provide.
During this phase, I aim for an internal temperature target of 155 degrees Fahrenheit for the chicken. While the standard safety recommendation is higher, carryover cooking will bring the temperature up to the safe 165 degree mark while the meat rests. This prevents the chicken from becoming rubbery. You will know the chicken is ready to flip when it releases easily from the pan; if it sticks, it hasn’t developed a sufficient crust yet.
Ingredients
I have meticulously tested these quantities to ensure a perfect balance of protein, vegetables, and seasoning. Each ingredient serves a specific structural or flavor purpose in the system.
- 1 and 1/2 pounds chicken thighs (you can sub chicken breast*)
- 2 tablespoons lime juice (from 1 lime)
- 1 tablespoon soy sauce
- 1 teaspoon liquid smoke
- 2 tablespoons cumin
- 2 teaspoons kosher salt (use a little less if you have table salt)
- 2 teaspoons chili powder
- 1 teaspoon smoked paprika
- 1 teaspoon onion powder
- 1/4 teaspoon cayenne pepper (or more, if you like it spicy!)
- 1/3 cup chopped cilantro (plus more to garnish, optional)
- 4 cloves garlic (smashed and minced)
- 2 tablespoons vegetable oil (for searing chicken)
- 2 tablespoons butter (for searing chicken)
- 3 small red, yellow, or orange bell peppers (sliced)
- 1 medium onion (sliced)
- 1 teaspoon kosher salt (for onions and peppers)
- 12 6-inch flour tortillas (sometimes labeled “fajita size”)
- 1 cup shredded Monterey Jack cheese (optional)
- sour cream
- Chipotle Mayo
- Guacamole
- lime wedges
- cilantro (chopped)
Note on Salt: I highly recommend using kosher salt for this recipe, as I found table salt (when substituted 1:1 for the 2 teaspoons) tended to make the final flavor profile overly aggressive and slightly metallic in the early tests. Kosher salt has larger grains that dissolve more evenly and provide a cleaner salt flavor that enhances the spices rather than competing with them.
Instructions
- Marinate the chicken. Slice 1 and 1/2 pounds chicken thighs into long 1-inch wide strips. Cut against the grain, meaning your knife should be perpendicular to the lines you see running in the raw chicken. You can use chicken breasts if you want! Add chicken to a medium bowl.
- Add all the marinade ingredients: 2 tablespoons lime juice, 1 tablespoon soy sauce, 1 teaspoon liquid smoke, 2 tablespoons cumin, 2 teaspoons kosher salt, 2 teaspoons chili powder, 1 teaspoon smoked paprika, 1 teaspoon onion powder, 1/4 teaspoon cayenne pepper, 1/3 cup chopped cilantro, and 4 cloves of garlic (at least 1 tablespoon minced). Stir it into the chicken and make sure it’s all well distributed. Let marinate for 15 minutes (or up to 24 hours in the fridge!).
- Prep the veggies. Slice the bell peppers into 1/4 inch slices. I like to cut the long strips in half, so they are more bite size. Set aside. Slice off the knobby ends of the onion. Place the flat side on the cutting board, and cut in half. Place the halved side down on the cutting board, then make 1/4 inch slices. Add to the onions to the peppers and set aside.
- Sear the chicken. Heat a 12 inch cast iron skillet over medium high heat. (Or use the sturdiest large skillet you have.) Let the pan preheat for at least 2 minutes until is crazy hot. The instruction to let the pan preheat for 2 minutes until crazy hot, before adding oil, is vital. This prevents the oil from smoking too early and ensures the chicken gets an immediate, consistent crust, which locks in juices. Add 2 tablespoons vegetable oil and swirl to coat the pan. It should shimmer right away.
- Use tongs to add chicken strips to the pan one at a time. Do your best to get as much of the marinade off the chicken as you can, let it drip off. Leave at least 1-2 inches of space between strips of chicken, they need room to sear. Be careful, the oil may splatter! Add as many as you can to the pan without crowding; you will have to do this in 2-3 batches.
- Sear for about 2 minutes until the bottom is blackened.
- Add 1 tablespoon butter to the pan and use the tongs to swirl it around in between the chicken. Use the tongs to flip each piece of chicken one by one, landing on the melted butter. Let sear on the second side for about 1-2 minutes, until a thermometer in your largest piece reads 155 degrees (the temp will continue to rise off-heat). Or just cut one in half to check that it’s white and not pink.
- Repeat with the remaining chicken strips. Hang on to that marinade! Set it aside.
- Remove the chicken to a plate or cutting board, then tent with foil to keep warm. I actually usually stick it in my turned-off microwave.
- Cook the peppers and onions. Add 2 more tablespoons cooking oil to the cast iron skillet and make sure your heat is still at medium high. Add the sliced peppers and onions all at once, and feel like a boss with all those veggies mounded so high. Sprinkle with 1 teaspoon kosher salt, then add all the remaining chicken marinade right away. Stir up all the browned bits from cooking the chicken. Saute for about 2-3 minutes, until crisp-tender, or more.
- Add in the chicken. Once you have the veggies how you like them, remove from the heat. Take a minute to cut any larger pieces of chicken into more bite-size pieces. Add all the chicken and any resting liquid into the pan with the peppers.
- Prep the tortillas. Warm the flour tortillas one by one in a clean skillet set over medium heat. Top each tortilla with a sprinkle of shredded cheese (Monterey Jack, Oaxaca, quesadillla, etc.) if you want the ultimate experience! Heat until the cheese melts, then gently fold in half and keep warm in a tortilla warmer.
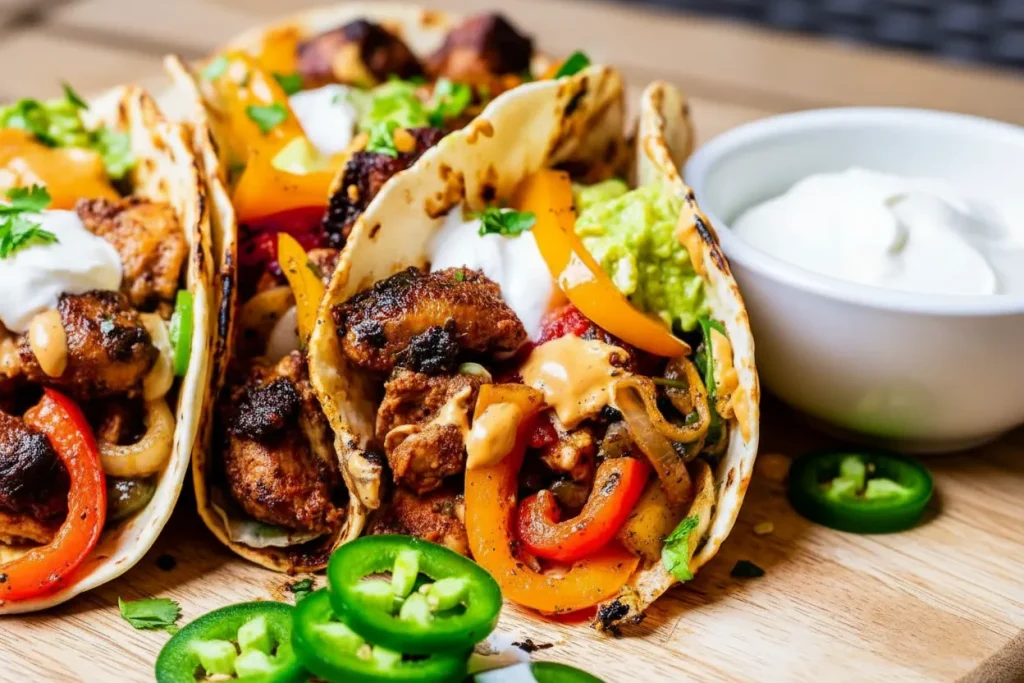
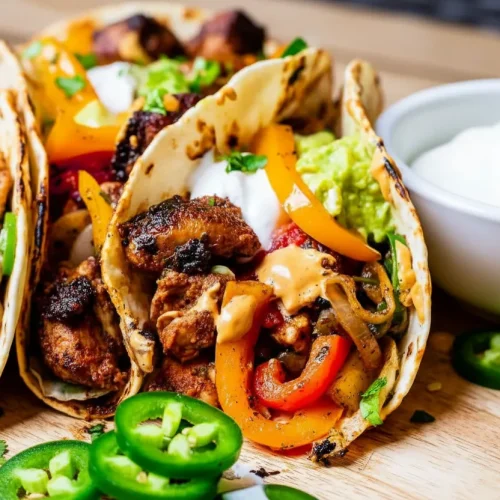
- Serve the chicken and peppers in a warm tortilla, topped with sour cream or Chipotle Mayo, a squeeze of lime juice, a sprinkle of chopped cilantro, and a side of Cilantro Lime Rice.
Vegetable Sizzle: Saving the Fond and Preventing Watery Fajitas
One of the most valuable lessons I learned during my engineering career was to never waste energy or resources. In the kitchen, that resource is the fond, those dark, flavorful bits stuck to the bottom of the pan after searing the meat. Many people wash their pan or move to a new one for the vegetables, but that is a mistake. Those bits contain concentrated flavor that, when properly deglazed, coats the vegetables in a savory crust.
The technique of deglazing with the reserved marinade is essential for lifting the fond. As the moisture from the marinade hits the hot cast iron, it steams up and loosens the browned bits. By stirring the peppers and onions through this liquid, you ensure that every slice of vegetable is infused with the same spices used on the chicken. This creates a cohesive flavor profile throughout the entire dish.
Pro tip: Add the reserved marinade to the vegetables immediately to deglaze the pan and capture all the savory fond from the chicken.
Regarding the choice of meat, this recipe specifically utilizes boneless thighs for speed and surface area. However, if you find yourself with bone in thighs, you must adjust your approach. Bone in meat requires a significant cook time after the initial sear phase to ensure safety and proper texture. You would likely need to finish them in the oven for 10 to 15 minutes after the sear, as the bone acts as a heat sink that slows down the internal cooking process. If you prefer to use bone-in thighs, you might want to review my guide on Proven Bone In Chicken Thigh Recipes for Crisp Skin for temperature guidance.
Cooking the vegetables after the chicken is the final step in preventing the dreaded watery fajitas. Vegetables like onions and peppers are mostly water. When they hit a hot pan, they release that moisture. If the chicken is already in the pan, it will sit in that moisture and lose its crispness. By cooking the vegetables separately at the very end, you can ensure they reach a crisp tender state without compromising the integrity of your seared chicken.
Practical Blueprint: Yield, Storage, and Variations
Understanding the logistics of your meal is just as important as the cooking itself. This system is designed to provide consistent results for a specific volume of food.
- Yield: This recipe serves 4 to 6 people, depending on how generously you fill the tortillas. It is the perfect amount for a family dinner or a small gathering.
- Storage Instructions: Store any leftovers in an airtight container in the refrigerator for up to three days. To maintain the best texture when reheating, I suggest using the oven or a quick pan fry in a skillet rather than the microwave. The microwave tends to make the chicken rubbery and the peppers mushy, while a hot pan can bring back some of that original sizzle.
- Spice Level Adjustment: For a milder heat, reduce the cayenne pepper to 1/8 teaspoon. The chili powder and smoked paprika provide plenty of flavor without significant heat, so the cayenne is the primary variable you should adjust to suit your preference.
I have found that the leftovers make an excellent base for a salad or a grain bowl the next day. The flavors in the marinade actually continue to meld as the dish sits. If you are reheating in a pan, add a tiny splash of water or lime juice to help loosen the cold marinade and create a small amount of steam to heat the meat through without drying it out.
Pro tip: Reheat leftovers in a hot skillet for 2 minutes to restore the char and prevent the meat from becoming rubbery in the microwave.
Conclusion: Your Blueprint for Perfect Chicken Thigh Fajitas
Mastering chicken thigh fajitas is a matter of respect for the process and the physics of the kitchen. By choosing dark meat, you have already built in a layer of protection against dryness. By using the two fat sear method, you have ensured a flavor profile that is both deep and nuanced. This is not just a recipe; it is a system for achieving a specific, high quality output that you can repeat every single time you cook.
The combination of the umami rich marinade and the high heat cast iron technique creates a version of this classic dish that is technically superior to the standard approach. You no longer have to settle for steamed, flavorless meat or soggy vegetables. Every step in this blueprint, from the way you cut the meat to the moment you deglaze the pan, has been optimized for the best possible outcome.
I encourage you to take this method into your kitchen and see the results for yourself. The engineered sizzle is a sound of success that you will recognize immediately. Once you have tried this approach, I would love to hear about your experience in the comments. Share this blueprint with anyone you know who struggles with bland fajitas, and let’s make sure every home cook has the tools to engineer something truly delicious.
The Engineered Sizzle: Mastering Chicken Thigh Fajitas with a Flavor-Bomb Marinade and Perfect Cast Iron Technique
Equipment
- 12 inch Cast Iron Skillet
- Tongs
- medium bowl
- Knife
- Foil (for resting meat)
- Tortilla Warmer (optional)
Ingredients
For the Flavor-Bomb Marinade and Chicken
- 1.5 pounds chicken thighs boneless, skinless; slice against the grain into 1-inch wide strips
- 2 tablespoons lime juice from 1 lime
- 1 tablespoon soy sauce for umami foundation
- 1 teaspoon liquid smoke secret weapon for grill flavor
- 2 tablespoons cumin
- 2 teaspoons kosher salt use less if using table salt
- 2 teaspoons chili powder
- 1 teaspoon smoked paprika
- 1 teaspoon onion powder
- 1/4 teaspoon cayenne pepper or more for extra spice
- 1/3 cup cilantro chopped, plus more for garnish
- 4 cloves garlic smashed and minced
For Searing and Vegetables
- 2 tablespoons vegetable oil for initial high-heat sear (high smoke point)
- 2 tablespoons butter for flavor enrichment during the second side sear
- 3 small bell peppers red, yellow, or orange; sliced into 1/4 inch slices
- 1 medium onion sliced into 1/4 inch slices
- 1 teaspoon kosher salt for onions and peppers
For Serving (Optional Toppings)
- 12 6-inch flour tortillas fajita size
- 1 cup shredded Monterey Jack cheese optional
- sour cream
- Chipotle Mayo
- Guacamole
- lime wedges
Instructions
Marinate the Chicken
- Slice 1 and 1/2 pounds chicken thighs into long 1-inch wide strips, cutting against the grain (perpendicular to the muscle fibers).
- Add chicken to a medium bowl. Add all the marinade ingredients: 2 tablespoons lime juice, 1 tablespoon soy sauce, 1 teaspoon liquid smoke, 2 tablespoons cumin, 2 teaspoons kosher salt, 2 teaspoons chili powder, 1 teaspoon smoked paprika, 1 teaspoon onion powder, 1/4 teaspoon cayenne pepper, 1/3 cup chopped cilantro, and 4 cloves of minced garlic.
- Stir thoroughly to distribute the marinade. Let marinate for a minimum of 15 minutes, or up to 24 hours in the fridge.
Prep Vegetables and Gear Up
- Slice the bell peppers into 1/4 inch slices. Cut the onion into 1/4 inch slices. Add peppers and onions to a bowl and set aside. Sprinkle with 1 teaspoon kosher salt.
- Heat a 12 inch cast iron skillet (or other sturdy large skillet) over medium high heat. Allow the pan to preheat for at least 2 minutes until it is very hot.
Sear the Chicken in Batches
- Add 2 tablespoons of vegetable oil to the preheated pan; it should shimmer immediately. Use tongs to add the chicken strips one at a time, letting excess marinade drip off. Ensure there is 1-2 inches of space between strips to promote searing, not steaming (you will need 2-3 batches).
- Sear for about 2 minutes until the bottom side is deeply browned and releases easily from the pan. If it sticks, the crust is not ready.
- Add 1 tablespoon of butter to the pan and swirl it around the chicken. Use the tongs to flip each piece onto the melted butter. Sear the second side for 1-2 minutes until the internal temperature of the largest piece reaches 155°F.
- Repeat the searing process with the remaining chicken batches, adding more oil or butter as needed. Keep the reserved marinade.
- Remove the cooked chicken to a clean plate and tent loosely with foil to rest while you cook the vegetables.
Sauté Vegetables and Deglaze
- Add 2 more tablespoons of cooking oil to the cast iron skillet, keeping the heat at medium high. Add all the sliced peppers and onions at once.
- Immediately pour all the remaining chicken marinade into the pan over the vegetables to deglaze, stirring to lift the fond (browned bits) from the bottom of the pan. Sauté for about 2-3 minutes until the vegetables are crisp-tender.
Combine and Serve
- Remove the pan from the heat. Cut any larger pieces of chicken into more bite-size pieces if desired, and add all the chicken (and any resting juices) back into the pan with the vegetables. Stir to combine.
- Warm the flour tortillas one by one in a separate clean skillet over medium heat. For an enhanced experience, top each tortilla with a sprinkle of shredded cheese until it melts, then fold gently and keep warm.
- Serve the chicken and peppers in a warm tortilla, topping with sour cream, Chipotle Mayo, a squeeze of lime juice, and a sprinkle of fresh cilantro.