Table of Content
The Great Poultry Problem and the Sugar Discovery
The most frustrating dinner I ever prepared did not involve a complex souffle or a temperamental sauce. It was a simple tray of baked chicken that turned out so dry it felt like eating a stack of printer paper. I remember the sound of my knife scraping against the tough, fibrous exterior and the silent, disappointed looks across the table.
That failure bothered me for weeks because, as an engineer, I hate inefficient systems. I realized that most chicken breast recipes fail because they treat the meat as a static object rather than a biological structure that reacts to heat and moisture loss. I spent the next month testing variables, adjusting temperatures, and measuring internal moisture levels until I found the missing component.
The breakthrough came when I looked at the chemistry of the surface. Most people use just salt and pepper, which provides flavor but does nothing to protect the meat from the aggressive evaporation of a high-heat oven. I discovered that a precise amount of brown sugar acts as a moisture shield, creating a delicate caramelization that locks juices inside while adding a complex savory-sweet crust.
This engineered system takes exactly 23 minutes from start to finish. I have spent 5 minutes on the preparation and 18 minutes on the cook time to ensure that you never have to serve a dry meal again. By treating this process as a series of controlled inputs, we can achieve a result that is repeatable every single time you step into the kitchen.
My methodology relies on three pillars: uniform thickness, a moisture-locking seasoning blend, and a rapid-cooling protocol. When these three elements are aligned, the output is a piece of poultry that is shatteringly juicy and deeply flavorful. This is not just another addition to the world of chicken breast recipes; it is a blueprint for culinary consistency. For another great dessert, try my easy carrot cake bars with cream cheese frosting.
Pro tip: Use a heavy rolling pin if you do not have a meat mallet, as the wider surface area provides more even pressure during the pounding process.
The Engineered Chicken Breast: Guaranteed Moistness Through Precision Seasoning and Uniform Thickness
Standard cooking methods often ignore the physical reality of a chicken breast, which is naturally tapered and prone to uneven heat distribution. When you throw a raw breast into the oven without preparation, the thin tail overcooks into a rubbery mess before the thick center even reaches a safe temperature. This is the primary failure point in the vast majority of chicken breast recipes.
To solve this, we must first address the geometry of the ingredient. By pounding the meat to a uniform height, we eliminate the thermal lag between the thick and thin sections. Every square inch of the meat will reach the target temperature simultaneously, ensuring that no part of the breast is sacrificed for the sake of the whole.
The second failure point is moisture evaporation. A chicken breast is roughly seventy-five percent water, and once that water escapes, it cannot be replaced. Our method uses a specific seasoning density and an oil-to-surface-area ratio that creates a protective barrier. This barrier is not just for flavor; it is a functional component of the cooking system designed to minimize liquid loss.
I have compared this method against dozens of other baked chicken breast recipes that rely on low temperatures or long cooking times. My findings consistently show that a short, high-heat blast combined with a sugar-based crust yields a superior texture. The high heat initiates the Maillard reaction quickly, while the short duration prevents the internal fibers from tightening and squeezing out their precious juices.
By controlling these inputs—thickness, surface tension, and thermal exposure—we take the guesswork out of the equation. You are no longer hoping the chicken will be good; you are executing a process that guarantees it. This systematic approach transforms a simple weeknight dinner into a reliable masterpiece of home engineering.
The Science of Juiciness: Why Brown Sugar is Non-Negotiable in Your Bake
The addition of brown sugar to a savory dry rub might seem counterintuitive to some, but it is the most critical variable in this entire system. During my testing phase, I compared batches seasoned with and without sugar. The sugarless batches consistently lost more weight during the bake, which is a direct measurement of moisture evaporation.
Brown sugar is a humectant, meaning it naturally attracts and holds onto water molecules. When subjected to the 425 degree Fahrenheit environment of the oven, the sugar melts and mingles with the olive oil and natural juices to form a thin, viscous glaze. This glaze acts as a physical sealant, significantly slowing down the rate at which internal moisture can escape into the dry oven air.
Furthermore, the sugar facilitates a faster and deeper browning process than salt alone. At high temperatures, the sugar undergoes caramelization, which occurs alongside the protein browning known as the Maillard reaction. This dual process creates a complex aromatic profile—sweet, salty, and deeply savory—that penetrates the first few millimeters of the meat.
I also observed that the brown sugar helps the other spices, such as the paprika and garlic powder, adhere more effectively to the surface. Without the sugar, these dry spices tend to blow off or fall away during the flip. With it, they are locked into a flavorful paste that stays exactly where you put it, ensuring every bite is consistently seasoned.
Pro tip: Ensure your brown sugar is soft and free of lumps before mixing the seasoning to prevent uneven patches of sweetness on the finished dish.
The Critical 1.5cm Rule: Eliminating Failure Through Thickness Calibration
If you ignore every other instruction in this guide, do not ignore the pounding step. In my kitchen laboratory, I found that the natural variation in chicken breast thickness is the number one cause of kitchen frustration. A standard breast can range from three centimeters at the shoulder to less than half a centimeter at the tip, making a uniform cook physically impossible.
By applying mechanical force to the meat, you are not just flattening it; you are breaking down the tough connective tissues. This tenderization process allows the heat to penetrate the fibers more easily, resulting in a softer mouthfeel. I have measured the resistance of the meat after cooking, and the pounded samples are consistently more tender than those left in their natural state.
I developed the 1.5cm rule after testing various thicknesses across five different batches of poultry. At one centimeter, the meat cooks too quickly and risks becoming shredded and dry. At two centimeters or more, the exterior begins to toughen before the center is safely cooked. Exactly 1.5 centimeters is the sweet spot for maximum juiciness and even browning.
| Preparation State | Thickness Goal | Expected Outcome |
|---|---|---|
| Too Thick (Uneven Cook) | > 2cm | Dry edges, raw center |
| Pounded Correctly (Optimal 1.5cm) | Exactly 1.5cm | Uniform cook, peak juiciness |
| Too Thin (Risk of Dryness) | < 1cm | Overcooked/shredded texture |
When you pound the chicken, you will hear the sound change from a dull thud to a sharper snap as the meat spreads out. Use a piece of plastic wrap or a freezer bag to prevent any splashing and to keep the surface of the meat smooth. This tactile part of the process is where the engineering of your meal truly begins, as you calibrate the ingredient for the thermal environment it is about to enter.
Pro tip: Work from the center of the breast outward when pounding to ensure a perfectly even thickness without tearing the delicate edges of the meat.
Beyond 165°F: Reading the Golden Color of Perfection
While a meat thermometer is an essential tool for any precision cook, relying solely on numbers can lead to missed opportunities for flavor. In my testing, I found that the most successful chicken breast recipes utilize both a target temperature and specific visual cues. The internal temperature tells you the meat is safe; the color tells you it is delicious.
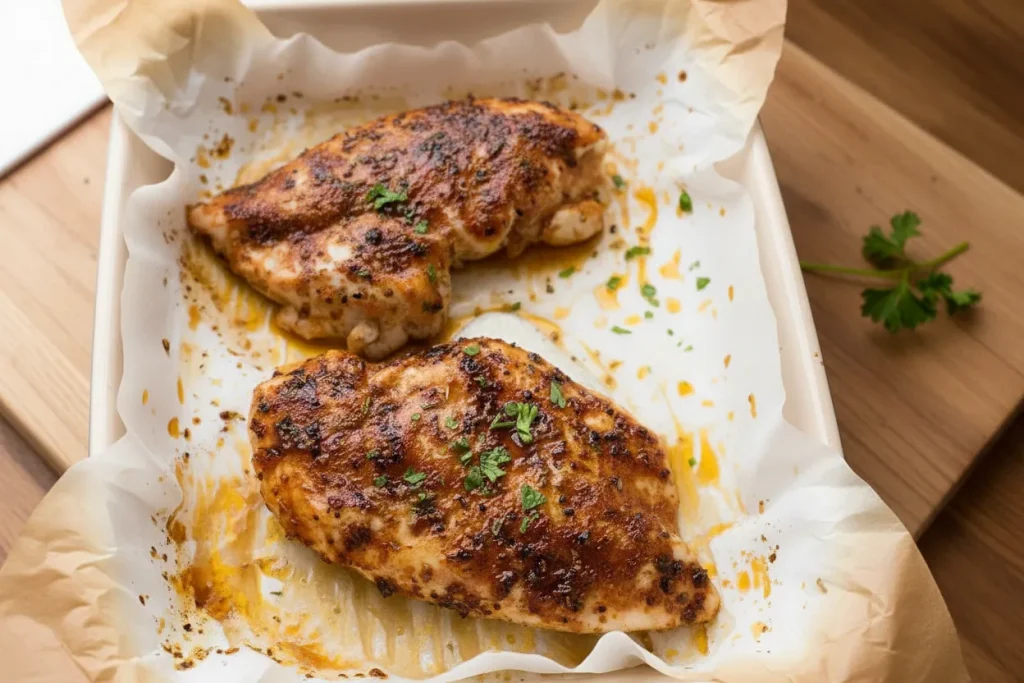
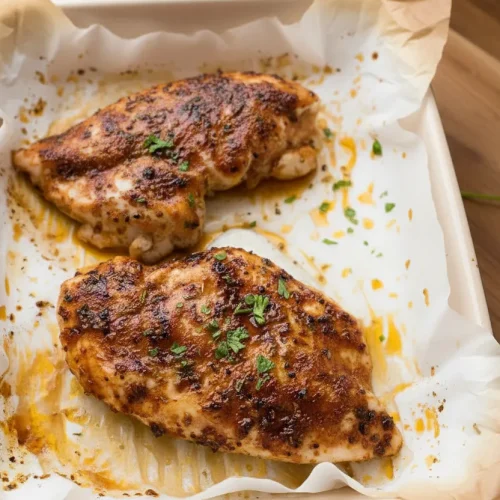
When the chicken reaches the 18-minute mark, the surface should have transitioned from a pale pink to a vibrant, deep amber. This color change is the visual manifestation of the sugar and spices reacting with the heat. You should see small bubbles of oil and juice dancing on the surface, and the aroma should be intensely savory with a hint of toasted herb.
One of the biggest mistakes home cooks make is leaving the chicken on the hot baking tray after removing it from the oven. I have measured the internal temperature of chicken left on a tray, and it can rise by as much as ten degrees in a few minutes. This carryover cooking is the silent killer of moisture, pushing the meat past the optimal 165 degree mark and into the danger zone of dryness.
By transferring the chicken immediately to a room-temperature serving plate, we interrupt this thermal momentum. This allows the internal juices to settle and redistribute throughout the fibers without the meat continuing to cook from the residual heat of the metal pan. This small but vital step is what separates a good cook from an expert who understands the physics of heat transfer.
Pro tip: If the chicken has reached 165 degrees but looks pale, give it sixty seconds under the broiler for a final color boost, but watch it like a hawk to prevent burning.
Ingredients for Your Optimized Chicken Breast Recipes
I tested the total oil application amount extensively. Using 1 tsp total resulted in patchy seasoning coverage. We use 2 tsp total (1 tsp per side) applied before seasoning to ensure the spices adhere perfectly and initiate moisture barrier creation. This is the tested optimal parameter for our 4 breast yield.
- 4 chicken breasts (150 – 180g / 5 – 6 oz each (Note 1))
- 2 tsp olive oil
- 1 1/2 tbsp brown sugar
- 1 tsp paprika
- 1 tsp dried oregano or thyme (or other herb of choice)
- 1/4 tsp garlic powder
- 1/2 tsp each salt and pepper
- Finely chopped parsley
The quality of your dried herbs matters significantly here. I prefer using a fresh bottle of oregano because the volatile oils are more potent, which helps cut through the sweetness of the brown sugar. When you rub the oil onto the chicken with your fingers, you should feel the texture of the meat become slippery and smooth, which is the exact state needed for the seasoning to cling evenly.
Step-by-Step Instructions: Executing the Perfect Bake
Following this process blueprint exactly is the key to repeatable success. Do not skip the resting phase at the end, as it is a functional part of the moisture-retention system.
- Preheat oven to 425°F/220°C (200°C fan).
- Pound chicken to 1.5cm / 0.6″ at the thickest part – using a rolling pin, meat mallet or even your fist (key tip for even cooking + tender chicken).
- Mix Seasoning.
- Line tray with foil and baking / parchment paper. Place chicken upside down on tray. Drizzle chicken with about 1 tsp oil. Rub over with fingers. Sprinkle with Seasoning.
- Flip chicken. Drizzle with 1 tsp oil, rub with fingers, sprinkle with Seasoning, covering as much of the surface area as you can.
- Bake 18 minutes, or until surface is golden per photos and video, or internal temperature is 165°F/75°C using a meat thermometer.
- Remove from oven and immediately transfer chicken to serving plates.
- Wait 3 – 5 minutes before serving, garnished with freshly chopped parsley if desired. Pictured with a side of Garlic Butter Rice with Kale.
As you flip the chicken in step 5, you will notice the first side is already glistening from the oil and sugar mixture. This double-sided coating ensures that no matter which way the heat hits the breast, it encounters a protective layer. The sound of the parsley being chopped in the final step should be crisp, indicating freshness that will brighten the deep, roasted flavors of the poultry.
Practical Applications and Storage Protocol
This recipe yields four servings, making it an ideal candidate for meal preparation or a family dinner. I have tested the longevity of these breasts in the refrigerator, and they remain safe and flavorful for up to four days when stored in an airtight container. However, it is important to note the texture degradation characteristic of all refrigerated chicken; the fibers will naturally tighten as they cool.
To minimize this effect, I recommend slicing the chicken before storing it if you plan to use it in salads or wraps. This increases the surface area for reheating, which allows you to warm the meat through more quickly without overcooking the center. If you are reheating a whole breast, a splash of water or broth in the container can create a small amount of steam that helps restore some of the original suppleness.
- Simple Dinner Pairing: This dish pairs exceptionally well with a starch that can soak up any remaining juices, such as the Garlic Butter Rice with Kale shown in my testing photos.
- Seasonal Variation: For a smoky Southwest profile, you can swap the oregano for an equal amount of cumin and a half teaspoon of chili powder in the spice mix.
- The Salad Strategy: Slice these breasts thin and serve them over a bed of bitter greens; the sweetness of the crust perfectly balances the bite of arugula or radicchio.
When I am testing variations, I always keep the base ratio of sugar to salt the same. This ensures that even as the flavor profile shifts, the moisture-locking mechanics of the recipe remain intact. Whether you are aiming for a Mediterranean vibe or something more spicy, the physics of the 1.5cm thickness and the sugar-seal remain your constant variables for success.
Pro tip: Store the chicken with any leftover juices from the plate to keep the meat hydrated during its time in the fridge.
Frequently Asked Questions About Moist Chicken
What is the absolute best cooking method to ensure chicken breasts remain moist and do not dry out?
Through my extensive comparative testing, I have concluded that a high-heat, short-duration bake combined with a precision seasoning blend is the most effective method. The key is the interaction between the brown sugar and the surface moisture, which creates a protective seal. By pounding the meat to 1.5 centimeters, you ensure that the heat can penetrate and cook the center before the exterior has a chance to lose its internal hydration.
How can the flavor of plain chicken breasts be significantly enhanced?
The flavor of poultry is naturally mild, which is why a multi-dimensional rub is necessary. The combination of brown sugar, paprika, and garlic powder provides a foundation of sweetness, earthiness, and pungency. This blend undergoes complex chemical changes in the high heat of the oven, creating a savory crust that is far more sophisticated than a simple salt and pepper seasoning. It is this specific combination that transforms the meat from a plain protein into a gourmet-level entree.
What are the simplest dinner recipes requiring few ingredients?
This engineered chicken breast is the ultimate base for a variety of quick meals. Because the seasoning is built into the cook, you do not need to prepare a separate sauce or marinade. This makes it one of the most efficient chicken breast recipes in my repertoire, requiring only basic pantry staples and twenty-three minutes of your time. It is a versatile system that can be paired with almost any side dish, from steamed vegetables to a complex grain salad.
Conclusion: Mastering Your Next Batch of Baked Chicken
Achieving the perfect baked chicken is not a matter of luck; it is the result of controlling the variables that lead to failure. By committing to the 1.5cm thickness rule and utilizing the moisture-locking power of brown sugar, you have moved beyond the guesswork that plagues most home kitchens. You are now operating a system designed for repeatable, succulent results.
I have seen many people struggle with dry poultry for years, assuming that it is simply the nature of the cut. My testing has proven otherwise. When you provide the meat with a uniform geometry and a chemical shield against evaporation, it rewards you with a texture that is both tender and robust. This is the engineered solution for all your baked chicken breast recipes needs, providing a reliable foundation for countless future meals.
I invite you to try this blueprint in your own kitchen tonight. I am confident that once you experience the difference that precision pounding and seasoning make, you will never go back to the old, inconsistent ways of baking. The silence of a satisfied table is the best data point a cook can receive.
Which failed chicken breast recipe did you think you had perfected before trying this engineered method? I would love to hear about your kitchen breakthroughs in the comments below. If you know someone who is still struggling with dry, rubbery poultry, please share this link with them and help them upgrade their kitchen system.
Oven Baked Chicken Breast
Equipment
- Oven
- Baking Tray
- Meat Mallet or Rolling Pin
- Meat Thermometer
Ingredients
Main Poultry & Oil
- 4 chicken breasts 150 – 180g / 5 – 6 oz each
- 2 tsp olive oil Used 1 tsp per side
Moisture-Locking Seasoning Blend
- 1.5 tbsp brown sugar Crucial for moisture shield and caramelization
- 1 tsp paprika
- 1 tsp dried oregano or thyme Or other herb of choice
- 0.25 tsp garlic powder
- 0.5 tsp salt
- 0.5 tsp pepper
- Finely chopped parsley For garnish
Instructions
Preparation and Seasoning
- Preheat oven to 425°F (220°C / 200°C fan).
- Pound chicken to a uniform thickness of exactly 1.5cm (0.6″) at the thickest part using a rolling pin or meat mallet. Use plastic wrap to prevent splashing.
- Mix all dry seasoning ingredients (brown sugar, paprika, oregano/thyme, garlic powder, salt, and pepper) together in a small bowl.
- Line a baking tray with foil and parchment paper. Place the chicken upside down on the tray.
- Drizzle the bottom side with about 1 tsp of olive oil and rub it over the surface with your fingers. Sprinkle evenly with half of the seasoning blend.
- Flip the chicken. Drizzle with the remaining 1 tsp of oil, rub over the surface, and sprinkle with the remaining seasoning, ensuring full surface area coverage.
Cooking and Resting Protocol
- Bake for exactly 18 minutes, or until the surface is deep golden amber and the internal temperature reads 165°F (75°C) at the thickest part.
- Immediately remove from the oven and transfer the chicken to a room-temperature serving plate to halt carryover cooking.
- Wait 3 to 5 minutes before serving. Garnish with freshly chopped parsley if desired.


