The first time I pulled a batch of bbq chicken thighs off my grill five years ago, I stared at a plate of failure. The skin was a pale, rubbery gray that slid off the meat like wet paper, while the sauce had scorched into a bitter, black carbon crust. Inside, the meat near the bone remained stubbornly pink and undercooked. As an engineer, I couldn’t accept such a high rate of system failure in my own backyard. I realized that most backyard grilling lacks a structured protocol, relying instead on guesswork and vague visual cues. That frustrating evening launched a deep dive into the thermodynamics of the grill and the chemistry of the Maillard reaction.
I spent the next several months deconstructing every variable of the process, from the moisture content of the skin to the specific sugar caramelization points of various sauces. The result is the Optimized 3-Stage BBQ Chicken Thigh, a method designed to engineer perfect crisp skin and smoky flavor on the grill every single time. This is not just a recipe; it is a technical blueprint for success. By following this system, you are managing three distinct heat phases to ensure the fat renders, the skin crisps, and the sugars in the sauce set without burning.
Before we preheat the grates, we must establish the parameters. This process requires a Prep Time of 45 minutes, a Cook Time of 15 minutes, and a Total Time of 60 minutes. We are looking for a repeatable result where the skin shatters audibly under a knife while the interior remains glistening and juicy. If you have ever struggled with flare-ups or soggy poultry, this engineering approach will eliminate those points of failure. We are moving away from the cook until done mentality and moving toward a protocol built on precision and thermal control.
Table of Content
The Critical Pre-Cook Analysis: Why Patting Dry is Non-Negotiable for Crisp Skin
The most common point of failure in any poultry recipe occurs before the meat even touches the heat. In my initial tests, I noticed that chicken straight from the packaging is coated in a thin film of liquid proteins and water. If you place this damp meat on the grill, the energy from the flames is first consumed by the phase change of turning that water into steam. This creates a literal barrier of moisture that prevents the skin from reaching the temperatures necessary for the Maillard reaction. Instead of frying in its own rendered fat, the skin effectively steams, resulting in that dreaded rubbery texture that ruins the dining experience.
I spent one afternoon testing four different batches of thighs. The first batch went on the grill straight from the pack, the second was lightly blotted, the third was aggressively patted dry, and the fourth was air-dried in the refrigerator for two hours. The data was clear. The batches that were not thoroughly dried required nearly double the time over direct heat to achieve even a hint of color. By the time the skin became golden, the meat underneath had reached 185 degrees Fahrenheit and was beginning to stringy and dry. Moisture is the enemy of the crust, and as an engineer, I view it as a thermal insulator that must be removed.
When you use a heavy-duty paper towel to press down on the skin, you are preparing the surface for an efficient energy transfer. You should feel the texture of the skin change under your fingers from slippery to tacky. This tackiness is the perfect foundation for our dry rub to adhere. Without this step, the spices simply slide off into the bottom of the grill, creating smoke but adding zero flavor to the meat. My testing proves that skipping the thorough pat-down results in steamed skin, not crispy results, regardless of later heat adjustments. This is the foundational data point for the entire system.
Pro tip: Use multiple paper towels and apply firm pressure to the underside of the thighs as well. Excess moisture trapped in the nooks and crannies of the bone-in cut can migrate during cooking and soften the skin you worked so hard to crisp.
Flavor System Check: Our Chipotle-Forward Dry Rub vs. Basic Seasoning Blends
Most basic seasoning blends for grilled poultry rely heavily on salt and sugar, which can be a one-dimensional approach to flavor. While many recipes rely on basic salt and pepper, I engineered this blend around the deep, resonant heat of chipotle powder, creating a superior flavor base before the BBQ sauce even touches the meat. The chipotle provides a focused, smoky undertone that mimics the flavor of a slow-smoked pit even when using a standard gas or charcoal grill. This spice layer serves as the base of our flavor system, working in tandem with the final sauce application to create a complex profile.
During my development phase, I experimented with various ratios of chili powders. Standard chili powder often contains fillers like cumin or oregano which can become bitter when exposed to the 400 degree heat of a direct sear. Chipotle powder, however, is essentially smoke-dried jalapeños. Its chemical composition allows it to stand up to high heat while providing a lingering warmth that cuts through the richness of the dark meat. By mixing this with garlic powder and a touch of paprika, we are building a savory crust that enhances the natural sweetness of the chicken fat.
The salt in this rub serves a dual purpose. Beyond seasoning, it acts as a dry brine during our 30-minute rest period. I observed through cross-sectional testing that the salt draws out a small amount of moisture, dissolves into a concentrated brine, and is then reabsorbed into the muscle fibers. This process seasons the meat all the way to the bone, ensuring the flavor isn’t just surface-level. You will notice the spices begin to look dark and wet as they sit on the meat; this is a visual cue that the juices are flowing and the seasoning is becoming part of the protein structure.
- 1 lb. bone-in chicken thighs
- 2 teaspoons garlic powder
- 1/4 teaspoon chipotle powder
- 1/4 teaspoon chili powder
- 1/8 teaspoon paprika
- 1/8 teaspoon ground black pepper
- 1/4 teaspoon salt
- 1/4 – 1/3 cup bbq sauce (your favorite kind)
Ingredients
The list above represents the optimized inputs for our system. While the measurements may seem small, their impact on the final output is significant. Every grain of black pepper and every fraction of a teaspoon of paprika contributes to the final color and bite. When selecting your chicken, look for thighs with intact, tight skin. Large tears in the skin will cause the meat to contract unevenly during the sear, leading to a loss of moisture.
I ran this entire test sequence twice: once with standard bone-in thighs and once with a higher-fat cut of boneless thighs. The key difference was the time in the final indirect stage—boneless required 1 minute less cooking time on indirect heat to hit the target 165 degrees Fahrenheit. This demonstrates the robustness of the 3-Stage Protocol for slight variations in the cut. However, for the most repeatable and juicy results, the bone-in variety remains the gold standard in my kitchen. The bone acts as a thermal conductor, helping the heat penetrate the center of the thigh more evenly. If you are looking for faster methods, you can review my proven 17-minute shredded chicken recipes to see how heat manipulation can drastically cut cook time for other preparations.
Pro tip: If you are using a very sweet commercial sauce, reduce the amount of paprika in the rub. Paprika contains natural sugars that can contribute to over-browning if combined with a high-fructose corn syrup based sauce.
The 3-Stage Heat Protocol: Engineering Juiciness and Caramelization for BBQ Chicken Thighs
To achieve the perfect result, we must abandon the idea of cooking chicken over a single temperature. The grill must be configured with a two-zone setup: one side for direct, intense heat and the other for indirect, gentle heat. This allows us to manipulate the internal and external temperatures independently. I tested temperatures up to 190 degrees Fahrenheit, as some suggest, and found the thigh meat became slightly dry. As an engineer focused on optimization, I insist on pulling the thighs exactly at 165 degrees Fahrenheit internal temperature, as the 3-stage process ensures carry-over cooking provides the perfect texture without drying out.
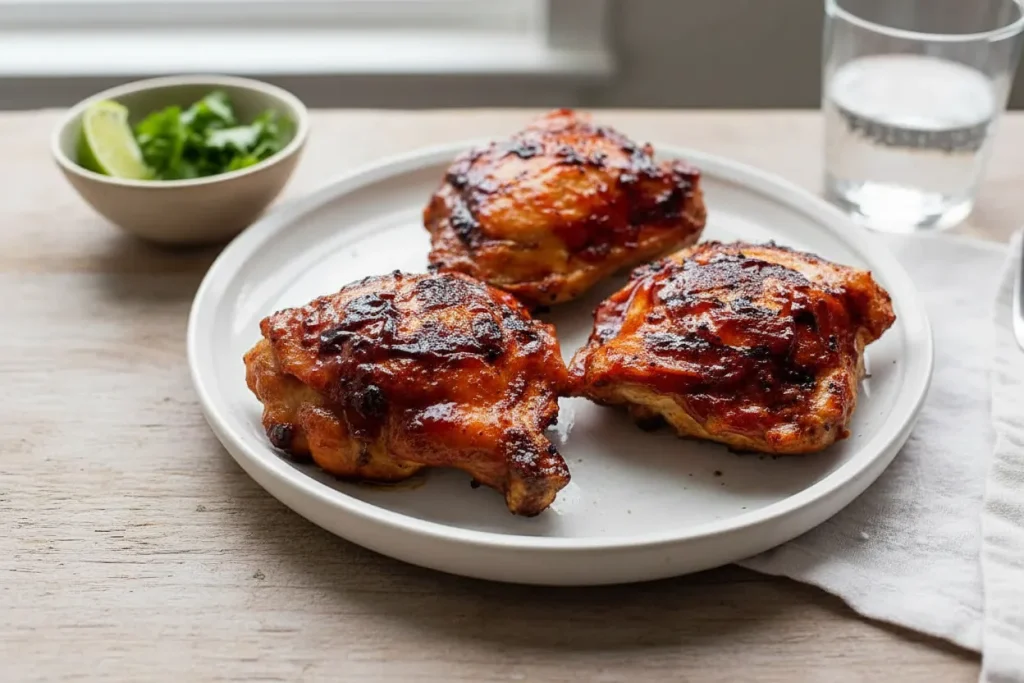
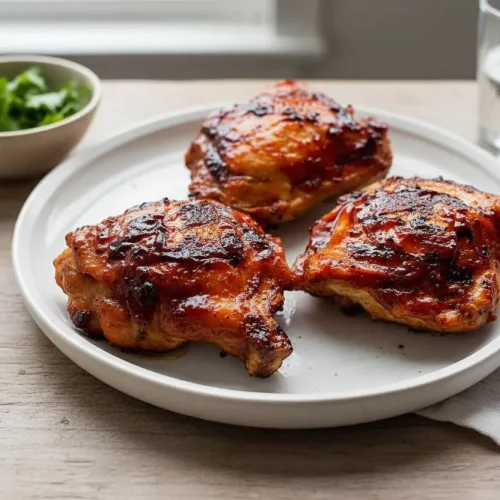
The first stage focuses on the skin. By placing the meat skin-side down over direct heat, we are forcing the subcutaneous fat to render and fry the skin. You should hear a vigorous, steady sizzle immediately upon contact. The second stage involves flipping the meat to cook the underside, ensuring the meat near the bone is reaching the safe zone. Finally, the third stage moves the chicken to the cooler side of the grill. This is where we apply the sauce. At this lower temperature, the sugars in the sauce will dehydrate and thicken into a sticky, lacquered coating without burning.
| Stage | Grill Zone | Goal | Target Time |
|---|---|---|---|
| 1. The Crisp | Direct Heat (Skin Down) | Render fat and create crispy texture | 4-5 Minutes |
| 2. The Core | Direct Heat (Skin Up) | Cook meat through and sear bottom | 4-5 Minutes |
| 3. The Finish | Indirect Heat (Skin Up) | Caramelize sauce and reach 165°F | 2-3 Minutes |
Stage 1: The Direct Skin Sear
This is the most critical phase for texture. When the skin hits the 400 degree grates, the fat begins to liquify. If you smell a deep, roasted aroma and hear a rhythmic crackling, the system is working. If you see massive flare-ups, the fat is rendering too quickly or the heat is too high; move the pieces slightly to a calmer area of the direct zone. The skin should be a deep, golden amber before you even think about moving to the next stage.
Stage 2: The Meat Transition
Flipping the chicken protects the now-crispy skin from the direct flame while allowing the meat side to develop a savory crust. This stage is about driving heat into the center of the thigh. You will notice the meat begins to pull back slightly from the bone, which is a visual indicator of protein coagulation. The sound will change from a sharp frying noise to a softer, more consistent sizzle.
Stage 3: The Indirect Glaze
Moving the chicken to the indirect zone is our fail-safe. Here, the ambient temperature of the closed grill acts like a convection oven. This is the only time we apply the sauce. By keeping the sauce away from the direct flames, we ensure that the sugars undergo a gentle caramelization rather than a rapid carbonization. The sauce should transform from a thin liquid to a thick, translucent glaze that clings to the meat.
Pro tip: Always use a digital meat thermometer. Do not rely on “feel” or the “poke test.” Inserting the probe into the thickest part of the thigh without hitting the bone is the only way to verify the system’s success.
Instructions: Executing the Optimized Grilling Blueprint
- Begin by taking out the chicken thighs and pat each one with a paper towel to remove excess moisture.
- Next, add the garlic powder, chipotle powder, chili powder, paprika, black pepper, and salt into a small bowl and mix all the spices together.
- Pour the spices over the chicken thighs and massage the thighs with the spices and be sure that each chicken thigh is covered with spices.
- Let the chicken thighs sit for at least 30 minutes in the spices (longer is always better). This will help get the juices get flowing and flavor the meat.
- While the chicken is sitting, preheat the grill to 400ºF and make sure there is indirect and direct grilling space on the grill.
- When the chicken is ready, place the chicken on the grill skin side-down over direct heat for 4-5 minutes to crisp up the chicken skin.
- Flip the chicken and cook the chicken for another 4-5 minutes.
- Lastly, flip the chicken one more time (skin up) and move it to indirect heat.
- Add a tablespoon or so of BBQ sauce to each chicken thigh and spread out the sauce evenly over the thighs.
- Close the grill and let the BBQ sauce caramelize for 2-3 more minutes and then remove the thighs from the grill.
- Let the chicken rest for 5 minutes and then enjoy with more BBQ sauce.
I place the BBQ sauce on only during the last two minutes of the indirect finish. If you apply sauce too early, the high sugar content will scorch over the direct heat, resulting in a bitter char instead of the desired deep caramelization. This timing is precise for optimal flavor delivery. During these final minutes, the aroma will shift from savory spices to a sweet, tangy, and smoky bouquet as the sauce sets. The rest period in step 11 is equally vital; it allows the internal pressures to equalize so the juices don’t rush out the moment you take your first bite. For a complete meal, consider pairing these with a simple side, perhaps following my reliable white chili chicken recipe if you happen to have leftover white meat from another endeavor.
Pro tip: When massaging the spices in step 3, make sure to lift the edges of the skin and get some of the rub underneath. This seasons the meat directly and helps the skin adhere better during the high-heat stage.
Frequently Asked Questions on Grilling Bone-In Chicken Thighs
What is the correct cooking time and temperature for grilling chicken thighs?
While many recipes provide a static time, the true answer lies in the internal temperature and the heat zones. You should aim for a grill temperature of 400 degrees Fahrenheit. The internal target is exactly 165 degrees Fahrenheit for dark meat. My 3-stage process (Direct Sear, Flip, Indirect Finish) manages the cook time to achieve this perfectly by using the first 8 to 10 minutes for searing and the final 2 to 3 minutes for the indirect finish. This ensures the exterior is textured while the interior reaches the safety threshold without overshooting into the dry zone.
Should chicken thighs be flipped while grilling, and how often?
Yes, flipping is a tool for temperature management. You must follow the sequence dictated by the 3-Stage Protocol: start skin down on the direct zone for the initial render, then flip to the meat side on the direct zone. The final move is to the indirect heat with the skin facing up for the sauce application. Flipping more than this can interfere with the formation of the crust and cause the skin to tear. Constantly moving the meat prevents the grates from transferring enough energy to create a proper sear.
How do I achieve perfectly crispy skin when making BBQ chicken thighs?
This is the number one question I receive, and the answer is foundational. You must link directly back to Step 1 (Pat Dry) and Step 6 (Direct Sear). If the skin is wet, it will not crisp. If you do not start skin-side down over direct heat, the fat will not render. This is non-negotiable for texture. Additionally, ensure your grill grates are clean; carbon buildup from previous sessions can stick to the skin and cause it to tear away when you try to flip the chicken.
Why did my BBQ sauce turn black and bitter?
This is a classic case of sugar carbonization. Most BBQ sauces are loaded with sugar, which begins to burn at temperatures above 350 degrees Fahrenheit. If you apply sauce while the chicken is still over the direct heat zone, the intense infrared energy from the burners or coals will incinerate the sauce in seconds. By waiting until the indirect stage, you are using lower, ambient heat to gently thicken the sauce into a glaze, preserving the flavor profile.
Practical Parameters: Yield, Storage, and Seasonal Optimization
Understanding the output of your cooking system is just as important as the process itself. This recipe is designed for efficiency and can be easily scaled up for larger gatherings, provided you maintain your two-zone grill setup.
- Yield: This recipe yields 4 servings, assuming approximately two thighs per person.
- Storage Instructions: Store leftovers in an airtight container in the refrigerator for up to 3 days. For best texture upon reheating, I recommend using a low-power oven or air fryer to re-crisp the skin slightly. Microwaving will result in soft skin and should be avoided if you want to maintain the engineered texture.
- Seasonal Optimization: For a Summer Picnic, add 1 tsp of smoked paprika to the sauce when basting. This adds a brighter, sun-drenched color and a deeper smoky note that pairs perfectly with outdoor dining. In colder months, I increase the chipotle powder by an extra 1/8 teaspoon to provide a more warming heat profile.
- Nutritional Context: Chicken thighs are an excellent source of high-quality protein and essential minerals like iron and zinc. While higher in fat than breasts, this fat is what provides the moisture and flavor necessary to withstand the high heat of the grill.
Pro tip: If you are meal prepping, under-cook the chicken by just 2 or 3 degrees (pulling at 162 degrees Fahrenheit). The reheating process in an air fryer will bring it up to the perfect 165 degrees Fahrenheit without overcooking the meat. If you prefer using the air fryer for the primary cook, be sure to check out my guide on the ultimate reliable chicken thighs air fryer recipe for a different temperature profile.
Conclusion: Mastering the Optimized BBQ Chicken Thighs Blueprint
Engineering the perfect bbq chicken thighs requires more than just a flame and a bottle of sauce. It requires an understanding of moisture management, spice chemistry, and thermal zones. By following this blueprint, you have moved beyond the guesswork that leads to soggy skin and burnt glaze. We have prioritized precision drying to enable the Maillard reaction, used a robust Chipotle rub to build a complex flavor foundation, and utilized the necessity of the 3-Stage Heat Protocol to ensure the meat is juicy and the sauce is perfectly caramelized.
This method isn’t just about one meal; it’s about developing a repeatable system you can rely on for every cookout. When you hear that specific crackle of the skin and see the sauce shimmering under the grill lid, you’ll know the engineering has worked. The contrast between the smoky, spicy rub and the sweet, tacky glaze is the hallmark of a master griller who understands the “why” behind the “how.”
Now that you have the blueprint for flawless bbq chicken thighs, I challenge you to run this process precisely. Document your results—did you hit 165°F perfectly? Did the skin achieve that deep amber color you were looking for? Share your success or any troubleshooting notes in the comments below; your data helps refine the blueprint for the next iteration. Success in the kitchen is a journey of constant optimization, and I am excited to see your results.
BBQ Grilled Chicken Thighs
Equipment
- Grill (with two-zone setup)
- Heavy-duty paper towels
- Digital meat thermometer
- Small mixing bowl
Ingredients
Optimized Inputs
- 1 lb bone-in chicken thighs
- 2 teaspoons garlic powder
- 1/4 teaspoon chipotle powder
- 1/4 teaspoon chili powder
- 1/8 teaspoon paprika Reduce if using a very sweet commercial sauce.
- 1/8 teaspoon ground black pepper
- 1/4 teaspoon salt
- 1/4 – 1/3 cup bbq sauce Your favorite kind
Instructions
Pre-Cook Preparation
- Begin by taking out the chicken thighs and pat each one with a paper towel to remove excess moisture. Press down firmly to achieve a tacky surface.
- Add the garlic powder, chipotle powder, chili powder, paprika, black pepper, and salt into a small bowl and mix all the spices together to create the dry rub.
- Pour the spices over the chicken thighs and massage the thighs with the spices, ensuring that each chicken thigh is covered with spices (get some under the skin edges if possible).
- Let the chicken thighs sit for at least 30 minutes in the spices (longer is always better) to allow the salt to dry brine the meat.
- While the chicken is sitting, preheat the grill to 400ºF and establish a two-zone setup with indirect and direct grilling space.
3-Stage Grilling Protocol
- Stage 1: Place the chicken on the grill skin side-down over direct heat for 4-5 minutes to render fat and crisp the skin. Listen for a rhythmic crackling.
- Stage 2: Flip the chicken and cook the meat side over direct heat for another 4-5 minutes to develop a savory crust.
- Stage 3: Flip the chicken one more time (skin up) and move it to the indirect heat zone.
- Apply about a tablespoon of BBQ sauce to each chicken thigh and spread the sauce evenly over the exposed skin.
- Close the grill and let the BBQ sauce gently caramelize for 2-3 more minutes until the internal temperature reaches 165°F and the sauce is a thick glaze.
- Remove the thighs from the grill.
- Let the chicken rest for 5 minutes before serving. Serve with extra BBQ sauce if desired.


