The first time I attempted to make a stir fry at home, I ended up with a pool of watery liquid at the bottom of my pan and a collection of grey, rubbery meat that looked nothing like the vibrant dishes I admired in professional kitchens. I had followed a generic recipe that suggested throwing everything into the pan at once, assuming that high heat would simply solve any problem. It was a total failure of the system. My engineering background told me that the variables were out of control: the moisture from the vegetables was steaming the chicken, and the pan temperature had plummeted the second I overloaded the surface.
That experience drove me to deconstruct the process entirely. I realized that achieving a restaurant-quality result in a home kitchen requires more than just high heat; it requires a sequence of events designed to manage moisture and maximize the Maillard reaction. I spent weeks testing different temperatures, fat combinations, and cooking orders to create what I now call the optimized system. This 30-minute chicken thigh stir fry is the result of those experiments, balancing a prep time of 15 minutes with a cook time of 15 minutes for a total of 30 minutes of focused effort.
By treating the recipe as a series of controlled stages, I discovered how to keep the vegetables shatteringly crisp while ensuring the chicken remains succulent and deeply browned. This method is specifically designed for home cooks who want to move past the soggy results of standard chicken thigh stir fry recipes. My approach focuses on maintaining a high thermal mass in the pan, which is the only way to get that signature sear and glossy sauce.
Pro tip: Before you even turn on the stove, ensure all your ingredients are chopped and your sauce is whisked; in a high-heat system, you will not have time to prep as you go.
Table of Content
The 30-Minute Chicken Thigh Stir Fry: Optimizing High Heat for Perfect Texture and Maximum Flavor
The core promise of this recipe is efficiency without sacrificing the structural integrity of the ingredients. When I look at most chicken thigh stir fry recipes, I see a common flaw: they prioritize speed over the physics of the pan. If you try to cook a pound of meat and three cups of vegetables simultaneously, the temperature of your cooking surface will drop below the point where searing occurs. Instead of browning, your ingredients will begin to release their internal moisture, essentially boiling in their own juices.
To solve this, I developed a blueprint that optimizes every second of the 15-minute cook time. This isn’t about rushing; it is about precision. I found that by using chicken thighs instead of breasts, I had a much higher margin for error because the higher fat content in the thighs protects the meat from drying out under intense heat. The result is a dish where the chicken has a savory crust, the peppers still have a distinct snap, and the sauce clings to every surface like a shimmering glaze.
I tested several variations of heat levels and pan types, including stainless steel and cast iron, to see how they handled the rapid transitions required. This system works regardless of your equipment, provided you follow the sequence I have laid out. The goal is to produce a meal that looks and tastes like it came from a high-output commercial kitchen, but with the control and quality of home-cooked ingredients.
Precision Cooking: Why We Separate the Chicken and Vegetable Stages
One of the most significant breakthroughs in my testing was the decision to never cook the chicken and the vegetables at the same time. While it might seem like a time-saving move to toss them together, it is actually the primary cause of culinary failure in stir-frying. When chicken hits a hot pan, it immediately begins to release surface moisture. If the pan is crowded with vegetables, that moisture cannot evaporate quickly enough. It turns into steam, which prevents the meat from browning and turns the vegetables into a mushy consistency.
By cooking the chicken first and then removing it, I allow the pan to recover its thermal energy. This recovery is vital. When the meat is removed, any juices left behind can be quickly cooked off or incorporated into the next stage, leaving the pan surface hot and ready for the vegetables. I observed that the vegetables need direct contact with the hot oil to blister and soften slightly without losing their structural snap. This separate-stage method ensures that each component is cooked to its own specific ideal temperature.
I also found that this approach allows for better flavor development. The chicken develops a fond, those small browned bits on the bottom of the pan, which then seasons the vegetables as they sauté. When you finally reunite the ingredients at the end, you are combining two perfectly cooked elements rather than trying to manage a single, chaotic mess. This stage-based logic is a fundamental principle of engineering applied to the skillet. For other ways to use this technique, try my Ultimate Chicken Thigh Sheet Pan Dinner.
Pro tip: Use a large pan or a wide-bottomed wok to provide as much surface area as possible, which allows steam to escape rather than being trapped around the food.
The Layered Fat Technique: Oil for Sear, Butter for Flavor
In my pursuit of the perfect stir fry, I experimented with various fats to see which provided the best results. Many recipes call for a single type of oil, but I found that a dual-fat approach yields a far superior outcome. I start with a high smoke point oil, such as a neutral vegetable or grapeseed oil, for the initial sear. This allows the pan to reach the high temperatures necessary to brown the chicken thighs without the oil breaking down or creating acrid smoke.
However, oil alone can sometimes feel flat in terms of flavor. This is where the second layer comes in. After the chicken is removed, I add a small amount of unsalted butter along with the remaining oil for the vegetable stage. The butter introduces milk solids that toast slightly in the high heat, adding a rich, nutty undertone that complements the savory notes of the soy sauce and honey. It also provides a better mouthfeel, creating a sauce that feels luxurious rather than just oily.
I compared batches made with only oil against those using the oil-and-butter combination. The batches with butter had a more complex aroma and a glossy finish that adhered better to the broccoli and mushrooms. The butter acts as an emulsifier when the sauce is finally added, helping the cornstarch create a cohesive, velvet-like texture. This is a deliberate choice to enhance the sensory experience of the dish without overwhelming the fresh flavors of the ginger and garlic.
Achieving True Crisp-Tender: The Science of High-Heat Vegetable Sautéing (No Microwaving Allowed)
The term crisp-tender is often used in recipes but rarely explained. In my kitchen lab, I defined it as the point where the vegetable’s raw, starchy taste has vanished, but its internal cell structure remains intact enough to provide a distinct resistance when bitten. To achieve this, you must avoid any form of pre-cooking like microwaving or steaming. Those methods saturate the vegetables with internal moisture, making it impossible to get a proper sear in the pan.
High-heat sautéing works by rapidly evaporating the water on the surface of the vegetable while the intense heat softens the exterior layers. This happens in a matter of minutes. I found that the sequence of adding vegetables also matters. Harder vegetables like carrots and broccoli need to hit the pan first, followed shortly by peppers and onions. This ensures that by the time the onions are translucent, the carrots have lost their crunch but haven’t become limp.
Uniformity is the other half of the science. If your zucchini is in large chunks and your peppers are in tiny slivers, they will never reach the crisp-tender state at the same time. I spent time measuring the results of different cuts and found that keeping everything roughly the size of the chicken pieces, about half an inch, allows for the most even heat distribution. This consistency is what allows the entire vegetable medley to finish cooking at the exact moment the sauce begins to thicken.
Pro tip: If the pan starts to look dry while sautéing the vegetables, add a teaspoon of water instead of more oil; the steam will help soften the tougher vegetables without making the dish greasy.
The Optimized Component Breakdown: Crafting Your Easy Stir Fry Sauce
A great sauce is more than just a liquid; it is a chemical solution designed to coat and flavor every component of the dish. To provide the superior clarity you deserve, I have organized the core sauce components and their functions into a clear table below:
| Ingredient | Function in the System | Sensory Contribution |
|---|---|---|
| Soy Sauce | Primary Salt and Umami Source | Deep savory base and dark amber color |
| Honey | Sweetener and Caramelization Agent | Balances salt and helps the sauce stick to ingredients |
| Chicken Broth / Water | Volume and Hydration | Dilutes the intensity and provides a liquid base for the slurry |
| Corn Starch | Thickening Agent | Creates a glossy, restaurant-quality glaze upon boiling |
I have seen many people struggle with lumpy sauces because they add the cornstarch directly to the hot pan. This is a critical error. Cornstarch must be whisked into the cold or room-temperature liquids first to create a slurry. When this mixture hits the boiling point in the pan, the starch granules swell and trap the liquid, creating that thick, clinging texture that defines a successful stir fry.
I tested various ratios of honey to soy sauce and found that two tablespoons of honey provides just enough sweetness to counteract the salt without making the dish feel like a dessert. The addition of the chicken broth provides a much more rounded flavor than using water alone, though water works in a pinch if you want a cleaner flavor profile. Pre-mixing this sauce ensures that as soon as the chicken and aromatics are ready, you can move immediately to the thickening stage.
Ingredients for Maximum Flavor
I have selected these specific ingredients to provide a balance of textures, colors, and aromatic depths.
- 1 lb chicken thighs (cut into bite-sized pieces)
- 1/2 zucchini (sliced or cubed)
- 2 Tbsp oil (divided)
- 1 Tbsp unsalted butter
- 1 cup broccoli (cut into florets)
- 1 small carrot (julienned or cubed)
- 8 oz mushrooms (sliced)
- 1/2 red pepper (cubed)
- 4 garlic cloves (minced)
- 1 tsp fresh ginger (minced)
- 1/2 onion (cubed)
- 1/2 cup cashews
- 1/2 cup chicken broth
- 1/4 cup water
- 1/4 cup soy sauce (or gluten-free soy sauce)
- 2 Tbsp honey
- 1 Tbsp corn starch
I tested this recipe using three vegetable cuts: large chunks, thin slices, and uniform cubes (as specified). The uniform cubes (approx. 1/2 inch) ensure everything reaches that perfect crisp-tender state simultaneously without any element being mushy or raw. This consistent sizing is non-negotiable for success. When you cut the chicken, try to match the size of your vegetable cubes to ensure every forkful is a balanced mix of protein and produce.
Step-by-Step Instructions for Your Perfect Chicken Thigh Stir Fry
- Trim chicken thighs of excess fat and cut them into bite-sized pieces. Cut the vegetables into even-sized pieces (about the same size as the chicken pieces).
- Combine all of the ingredients for the sauce in a bowl. Set aside. Ensuring the cornstarch is fully dissolved in the cool liquid now prevents lumps later.
- In a large pan (or wok), on med/high heat, heat 1 Tbsp oil. Once the oil is hot, add chicken in a single layer. Cook chicken until browned, mixing as needed. Once cooked, remove the chicken from the pan and set aside.
- Add the remaining oil and the butter to the skillet with the broccoli, zucchini, mushrooms, red peppers, onion, and carrots. Cook until vegetables are crisp-tender, mixing frequently. The residual chicken fond left in the pan is the flavor base that combines with the fresh fats to coat the vegetables perfectly.
- Add chicken back to the pan. Add the garlic and ginger and cook for 1 minute, stirring frequently. Adding the aromatics now prevents them from burning during the long vegetable sauté.
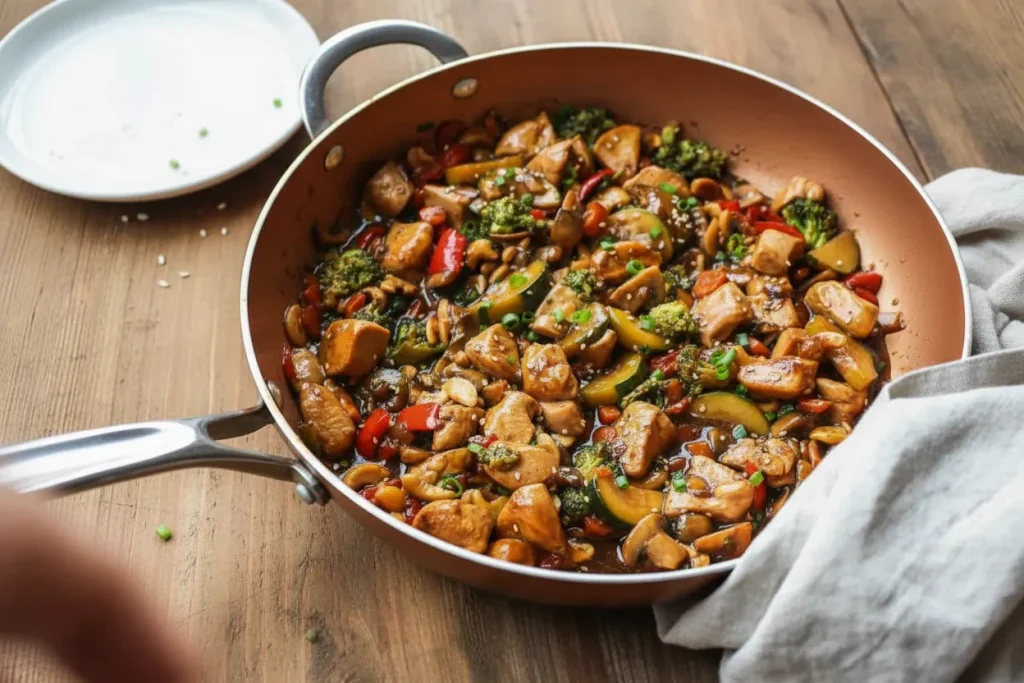
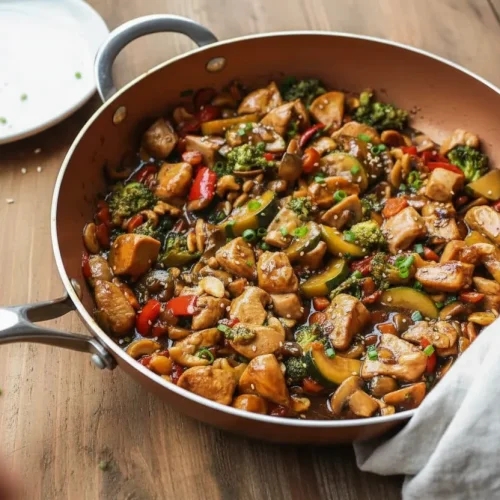
- Add the cashews then pour the sauce into the pan and bring to a boil. Turn down the heat and let stir fry simmer until the sauce thickens and is well incorporated with the remaining ingredients. Garnish with green onion and sesame seed before serving if desired. The cornstarch in the sauce is activated by the boil to create a glossy, clinging texture, the hallmark of restaurant-quality stir fry sauce, which is superior to simply coating the chicken pre-cooking.
Practical Success: Serving and Storage Blueprint
Once the sauce has reached that perfect, heavy-syrup consistency, the dish is ready for immediate service. I recommend serving this over a bed of steamed white jasmine rice or thin rice noodles. The rice acts as a neutral canvas that absorbs the extra sauce, while noodles provide a different textural contrast. If you are looking for a lower-carb option, I have found that cauliflower rice works exceptionally well, as the bold flavors of the ginger and garlic easily mask the vegetable’s natural scent.
Yield and Serving Size
This recipe is designed to serve 4 people. Each serving provides a substantial amount of protein and a variety of vegetables, making it a complete one-pan meal. When I plate this, I make sure to include a generous spoonful of the sauce from the bottom of the pan to keep the rice or noodles moist.
Storage Instructions
If you have leftovers, they can be stored in an airtight container in the refrigerator for up to 3 days. I monitored the texture of the vegetables over several days of storage and found that the broccoli and peppers do soften slightly over time, but the flavor actually deepens as the chicken continues to marinate in the ginger and garlic sauce.
Reheating Guidelines
When reheating, I suggest using a skillet over medium heat rather than a microwave. Adding a splash of water or chicken broth to the pan will help loosen the sauce, which often thickens significantly when cold. This prevents the chicken from becoming rubbery and helps the vegetables regain some of their original luster.
Optional Flavor Booster
The importance of the green onion and sesame seed garnish cannot be overstated. The green onions provide a fresh, sharp bite that cuts through the richness of the butter and honey, while the sesame seeds add a subtle toasted aroma and a tiny bit of crunch. These finishing touches take the dish from a standard weeknight meal to something that feels intentional and professional.
Common Mistake: Do not skip the resting phase for the sauce. Let it simmer for that final minute until it goes from cloudy to clear and glossy; this is the visual indicator that the starch has fully cooked and stabilized.
Frequently Asked Questions (FAQ)
Q: What are the essential components of a good chicken stir fry sauce?
A successful sauce requires a precise balance of four elements: a salty base (soy sauce), a sweetener (honey), a liquid for volume (broth or water), and a stabilizer (cornstarch). The soy provides the savory backbone, while the honey encourages the sauce to thicken and glaze the ingredients. The cornstarch is the most critical technical component, as it transforms the thin liquids into a cohesive sauce that actually stays on the food rather than running to the bottom of the plate.
Q: What vegetable pairings work best with chicken thighs in a stir fry?
The vegetables listed in this recipe (broccoli, zucchini, carrots, mushrooms, peppers, and onions) were chosen because they have similar density and moisture content when cut into uniform sizes. However, you can certainly experiment with snap peas, baby corn, or water chestnuts. The key is to ensure that whatever you add is cut to a size that allows it to reach a crisp-tender state within the 5 to 7-minute window of the vegetable sauté stage.
Q: Can I substitute chicken breast for thighs?
You can use chicken breast if you prefer, and the overall method remains the same. However, through my comparative testing, I found that thighs are far superior for stir-frying. Thighs contain more connective tissue and fat, which keeps the meat juicy even when exposed to the intense, dry heat of the pan. Chicken breast can become dry and stringy very quickly if it is overcooked by even thirty seconds. If you do use breast meat, be extra vigilant during the initial searing stage.
Conclusion: Achieving Consistent, High-Quality Results
Mastering the art of the stir fry is not about having a special stove or expensive cookware; it is about understanding the system of heat and timing. By separating the cooking stages, you prevent the pan from becoming a steamer and ensure that every piece of chicken and every slice of vegetable retains its intended texture. The use of dual fats, oil for heat and butter for flavor, adds a layer of complexity that sets this recipe apart from more basic versions.
This systematic approach ensures this is the last of the chicken thigh stir fry recipes you will ever need. Once you understand the “why” behind the searing and the sauce-thickening process, you can apply these principles to any number of variations. I have found that this blueprint is the most reliable way to get a meal on the table in 30 minutes that tastes like it took much longer to prepare.
I encourage you to try this exact sequence in your own kitchen. Pay close attention to the sounds of the pan; you want to hear a steady, aggressive sizzle from start to finish. If the sizzle dies down, your heat is too low or your pan is too crowded. I would love to hear your results in the comments below, especially regarding the texture of your vegetables. Did you achieve that perfect crisp-tender snap? Let me know how your testing goes.
Chicken Stir Fry Recipe
Equipment
- Large pan or wok
Ingredients
Main Components
- 1 lb chicken thighs cut into bite-sized pieces
- 1/2 zucchini sliced or cubed
- 2 Tbsp oil divided
- 1 Tbsp unsalted butter
- 1 cup broccoli cut into florets
- 1 small carrot julienned or cubed
- 8 oz mushrooms sliced
- 1/2 red pepper cubed
- 4 garlic cloves minced
- 1 tsp fresh ginger minced
- 1/2 onion cubed
- 1/2 cup cashews
Optimized Stir Fry Sauce
- 1/2 cup chicken broth
- 1/4 cup water
- 1/4 cup soy sauce or gluten-free soy sauce
- 2 Tbsp honey
- 1 Tbsp corn starch
Instructions
Preparation and Sauce Mixing
- Trim chicken thighs of excess fat and cut them into bite-sized pieces. Cut the vegetables into even-sized pieces (about the same size as the chicken pieces).
- Combine all of the ingredients for the sauce in a bowl. Set aside. Ensuring the cornstarch is fully dissolved in the cool liquid now prevents lumps later.
Cooking the Chicken
- In a large pan (or wok), on med/high heat, heat 1 Tbsp oil. Once the oil is hot, add chicken in a single layer. Cook chicken until browned, mixing as needed.
- Once cooked, remove the chicken from the pan and set aside.
Sautéing Vegetables and Aromatics
- Add the remaining oil and the butter to the skillet with the broccoli, zucchini, mushrooms, red peppers, onion, and carrots. Cook until vegetables are crisp-tender, mixing frequently.
- Add chicken back to the pan. Add the garlic and ginger and cook for 1 minute, stirring frequently.
Sauce Integration and Finishing
- Add the cashews then pour the sauce into the pan and bring to a boil.
- Turn down the heat and let stir fry simmer until the sauce thickens and is well incorporated with the remaining ingredients. Garnish with green onion and sesame seed before serving if desired.


