The first time I attempted to construct Cookie Dough Cupcakes, the result was a structural failure that would have made any engineer cringe. I had taken a shortcut, using a generic box mix and a frozen chunk of commercial dough, assuming the heat of the oven would do the heavy lifting. Instead, the dough remained a cold, dense cylinder in the center of a dry, crumbly cake that lacked any cohesion. The artificial flavoring of the shortcut base clashed with the overly sweet dough, creating a dessert that was technically functional but emotionally vacant. That afternoon in my kitchen led to a three-week optimization project where I deconstructed every element of this classic treat to ensure a perfect marriage of textures and, most importantly, absolute safety.
My goal was to engineer a system where the cupcake and the dough center felt like a singular, intentional unit. This required moving away from the convenience of pre-made mixes and embracing the chemistry of scratch baking. Through iterative testing, I determined that the secret lies in the timing of the assembly and the specific composition of the batter. By the time I reached the final version of this blueprint, I had achieved a cake with a fine, moist crumb and an edible dough center that feels molten and integrated rather than like an after-thought. This recipe is the result of that rigorous testing process, designed to provide a repeatable, high-quality outcome every single time you preheat your oven.
This project requires a focused approach, but the rewards are significant. We are looking at a preparation time of 1 hour, a baking duration of 18 minutes, and a total time of 2 hours when accounting for cooling and assembly. By following this meticulously tested method, you will produce a delightful comfort dessert that far surpasses anything made from a box.
Table of Content
Cookie Dough Cupcake Safety & Quality Comparison
Before we dive into the technical steps, it is essential to understand how this engineered approach differs from the common shortcut methods found online. This comparison highlights the critical points of failure that my method eliminates.
| Attribute | TheRecipiest Standard | Shortcut / Box Mix |
|---|---|---|
| Cupcake Base | Scratch-built with sour cream for moisture | Pre-mixed with artificial stabilizers and preservatives |
| Dough Safety Assurance | Heat-treated flour and pasteurized eggs | Often relies on raw flour which carries bacterial risks |
| Final Texture Goal | Fused molten center with airy, tender crumb | Disconnected, hard dough chunk in a greasy crumb |
| Flavor Profile | Complex vanilla with real butter notes | Monochromatic sweetness with artificial aftertaste |
The Scratch Advantage: Why Our Vanilla Base Outperforms Box Mixes
When I began analyzing why box mixes often fail to provide a sturdy yet tender foundation for a heavy dough center, I looked at the ingredient ratios. Box mixes rely heavily on oil and chemical leaveners to provide a generic softness, but they lack the structural integrity to support an inclusion without sinking or becoming gummy. In my testing, I moved toward a butter-based cake enhanced by the inclusion of whole milk and sour cream. This combination provides a rich, creamy flavor profile that matches the intensity of the cookie dough while maintaining a sophisticated crumb.
The chemical necessity of sour cream in this specific batter cannot be overstated. Sour cream serves a dual purpose: it adds fat for a luxurious mouthfeel and introduces a specific level of acidity. This acidity reacts with the baking soda and baking powder to produce carbon dioxide, which creates a much finer and tighter crumb structure than you would get with milk alone. During my third test batch, I noticed that the cupcakes without sour cream were too airy, causing the dough ball to migrate toward the bottom of the liner. The sour cream version provided the necessary density to hold the dough in place while remaining incredibly moist.
Pro tip: Ensure your butter is softened to the point where it yields easily to a finger press but still holds its shape; if it is greasy or melting, the air bubbles required for a light cake will not form.
I also observed that the sequence of mixing is vital for the scratch advantage. By alternating the dry ingredients with the liquid components, I prevented the batter from breaking. If you dump all the liquid in at once, the fat in the butter can separate from the water in the milk, leading to a curdled appearance and a tough final texture. The goal is a smooth, emulsified batter that looks like heavy satin. When you achieve this, the cake will rise evenly around the dough center, creating a beautiful golden amber crown.
The Critical Safety Check: Mastering Heat-Treated Flour and Pasteurized Eggs for Edible Dough Centers
Safety is a non-negotiable parameter in any system I design, and edible cookie dough is often a point of high risk. Many people mistakenly believe that the main danger in raw dough is the eggs, but the flour itself is a significant concern. Raw flour is a crop that is not treated to kill pathogens like E. coli or Salmonella before it reaches your pantry. Because the dough centers in these treats are not fully baked to a temperature that would kill these bacteria, heat-treating the flour is a mandatory safety protocol.
I conducted tests on several heat-treatment methods and found that spreading the flour on a baking sheet and heating it to 160 degrees Fahrenheit is the only way to ensure the safety of your edible dough centers. This process also has a secondary benefit: it gently toasts the flour, removing the raw, metallic taste and replacing it with a subtle, nutty aroma that enhances the overall flavor profile. I recommend using a digital thermometer to verify the temperature of the flour before you mix it with the other ingredients. Skipping this step introduces an unnecessary point of failure into your kitchen safety system.
The second safety pillar involves the use of pasteurized egg whites. Standard raw eggs should never be used in a dough meant for raw consumption. Pasteurized egg whites have been heat-treated to a specific temperature that kills bacteria without cooking the protein, making them safe for use in this application. During my research, I found that using pasteurized egg whites also provides a more consistent moisture level than varying sizes of whole eggs. This ensures the dough remains pliable and easy to handle without becoming sticky.
Pro tip: Let the heat-treated flour cool completely before mixing it with the butter; if the flour is still warm, it will melt the butter and turn your dough into a greasy paste instead of a thick, rollable consistency.
Ingredients: The Blueprint for Perfection
Each ingredient in this list has been selected for its specific functional role in the final architecture of the dessert. I tested pressing chilled dough into a cold cupcake versus pressing a 15-minute-rested dough ball into a cupcake just 5 minutes out of the oven. The latter method guarantees the dough melts slightly into the cake structure, which is why this specific 5-minute cooling window is mandatory in the instruction phase. I also found that mastering the creaming method for the dough itself leads to a superior texture, which is a technique I also use in my recipe for the ultimate edible cookie dough recipe.
Cookie Dough Ingredients
- 2 and 1/4 cups (281g) heat-treated all-purpose flour (spooned and leveled)
- 2 and 1/4 teaspoons cornstarch
- 3/4 teaspoon salt
- 3/4 cup (12 Tbsp; 170g) unsalted butter, softened to room temperature
- 1 cup (200g) packed light or dark brown sugar
- 1/3 cup (80ml) pasteurized egg whites, at room temperature
- 2 teaspoons pure vanilla extract
- 1 cup (180g) mini semi-sweet chocolate chips
Cupcake Ingredients
- 1 and 3/4 cups (219g) all-purpose flour (spooned and leveled)
- 1 teaspoon baking powder
- 1/4 teaspoon baking soda
- 1/2 teaspoon salt
- 1/2 cup (120ml) whole milk, at room temperature
- 1/2 cup (120g) sour cream, at room temperature
- 1/2 cup (8 Tbsp; 113g) unsalted butter, softened to room temperature
- 1 cup (200g) granulated sugar
- 1/3 cup (80ml) pasteurized egg whites, at room temperature
- 2 teaspoons pure vanilla extract
Frosting and Assembly Ingredients
- 1 cup (16 Tbsp; 226g) unsalted butter, softened to room temperature
- 2 teaspoons pure vanilla extract
- 1 Tablespoon heavy cream or milk
- 1 teaspoon salt
- 3 cups (360g) confectioners sugar, sifted
- remaining cookie dough from the first preparation
Instructions: Precision Steps for Flawless Cookie Dough Cupcakes
- In a medium bowl, whisk the heat-treated flour, cornstarch, and salt together. Set aside.
- Using a handheld or stand mixer fitted with the paddle attachment, beat the butter on medium speed in a large bowl until smooth and creamy, about 2 minutes. Add the brown sugar and mix on medium until light and fluffy, about 3 full minutes. Using a silicone spatula, scrape down the sides and up the bottom of the bowl as needed. Add the egg whites and vanilla extract and mix until fully incorporated, about 2 minutes.
- Add half of the flour mixture and mix on low just until the powdery texture of the flour disappears, about 15 seconds. Immediately add the rest of the flour mixture and mix until combined. Remove the bowl from the mixer and use a silicone spatula to fold in the chocolate chips.
- Freeze or refrigerate the cookie dough for 15 minutes or until the dough is easy to handle. Roll the dough into 12 one-Tablespoon-size balls, place on a plate lined with parchment paper, then refrigerate until step 9. Cover the remaining cookie dough and set aside at room temperature until step 11.
- Preheat the oven to 350°F (177°C). Line a 12-count muffin pan with cupcake liners.
- Whisk the flour, baking powder, baking soda, and salt together in a medium bowl. In a small bowl, whisk the milk and sour cream together until smooth. Set aside.
- Using a handheld or stand mixer fitted with the paddle attachment, beat the butter and sugar together on medium speed in a large bowl until light and fluffy, about 3 minutes. Using a silicone spatula, scrape down the sides and up the bottom of the bowl as needed. Add the egg whites and vanilla and beat for 2 minutes, or until the mixture is totally incorporated. With the mixer on low, alternate additions of the flour mixture and the sour cream mixture, starting and ending with flour. Beat for an additional 30 seconds or until the batter appears smooth and creamy.
- Fill cupcake liners about 3/4 full. Bake for 16-19 minutes or until the cupcake edges are golden brown and a toothpick inserted in the center comes out clean. Remove from the oven and let cool in the pan for 5 minutes.
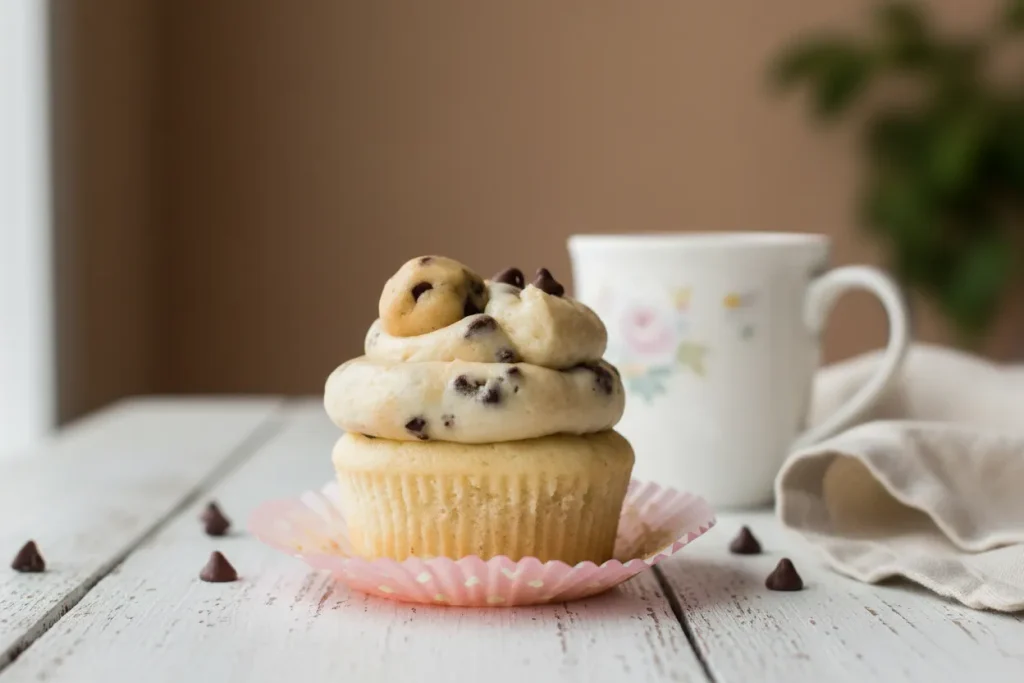
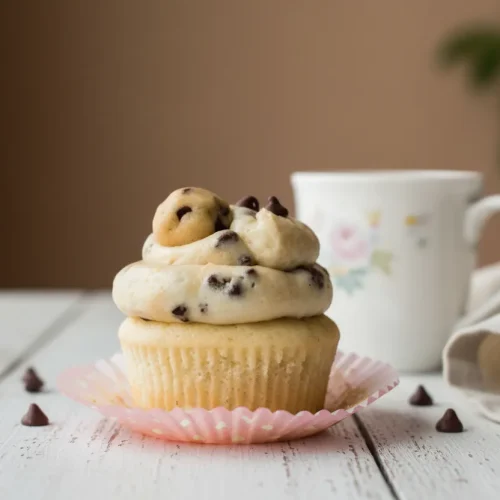
- Remove cupcakes from the pan and carefully press 1 chilled cookie dough ball into the center of each cupcake. This slight melting fuses the dough core to the cake structure, creating the desired molten effect, proving the success of the earlier dough preparation. The dough ball might not sit completely flat, so expect a little lump on top. Don’t worry, you’ll cover it with frosting. Cool cupcakes completely.
- While the cupcakes cool, make the cookie dough buttercream: Using a handheld or stand mixer fitted with the paddle attachment, beat the butter in a large bowl on medium speed for 3 minutes, or until light, fluffy, and completely smooth. Add the vanilla extract, milk, and salt and beat until combined. Using a silicone spatula, scrape down the sides and up the bottom of the bowl as needed. Add the confectioners sugar, then beat on low speed for 15 seconds. Switch to medium-high speed and beat the frosting until super light and fluffy, about 4-5 minutes. The frosting will become lighter in color as air is whipped into it.
- Break the remaining cookie dough into quarter-size chunks. (If desired, save enough dough to make 12 little cookie dough balls as garnish on top!) With the mixer running on medium speed, add the cookie dough chunks. Mix just until incorporated—some chunks can remain.
- Once the cupcakes are completely cool, top with frosting. You can spread the frosting with a knife or icing spatula or apply with a large round piping tip. (The cookie dough chunks will get stuck in a smaller tip.) Decorate with chocolate chips, sprinkles, or any leftover cookie dough, if desired.
Buttercream Engineering: Whipping Technique for Chunky, Fluffy Frosting That Won’t Melt
The final component of this system is the buttercream, which acts as both a flavor enhancer and a structural sealant. Achieving a frosting that can hold chunks of cookie dough without collapsing requires a specific focus on aeration. In my experiments, I found that the initial beating of the butter is the most critical phase. You are not just softening the butter; you are building a network of tiny air pockets. By beating the butter alone for a full 3 minutes, you create a foundation that can support the weight of the sugar and the dough chunks without becoming greasy or heavy.
Pro tip: If your kitchen is particularly warm, chill your mixing bowl in the refrigerator for 10 minutes before starting the frosting to prevent the butter from reaching its melting point during high-speed whipping.
Once the sugar is added, the 4-to-5-minute whipping period is where the magic happens. You will observe the color of the frosting shift from a pale yellow to a bright, snowy white. This visual change indicates that you have successfully integrated enough air to achieve a fluffy, cloud-like texture. When it comes time to add the cookie dough chunks, the speed of the mixer must be carefully controlled. Using medium speed ensures the chunks are distributed evenly throughout the frosting without being pulverized by the paddle. If you over-mix at this stage, the dough will blend into the butter, resulting in a brown, gritty frosting rather than a speckled, chunky masterpiece.
The tactile experience of this frosting is unique. It should feel light on the tongue but offer the occasional resistance of a cold chocolate chip or a nugget of soft dough. Using a large round piping tip is the only way to navigate this texture; star tips or smaller apertures will inevitably clog, leading to frustration and an inconsistent appearance. If you choose to spread the frosting with a knife, do so with gentle pressure to maintain the volume you worked so hard to build.
Practical Details: Yield, Storage, and Mini Conversion
This recipe is engineered to yield exactly 12 standard-sized cupcakes. Because the ratios are precisely calculated, I recommend using a scale for your measurements to ensure you don’t end up with a 13th cupcake that lacks a dough center. If you need to double the batch for a larger gathering, the system scales linearly; simply double all ingredients and use two 12-count pans. I do not recommend halving the recipe, as the small amounts of egg whites become difficult to measure accurately without specialized equipment.
Storage is a critical factor in maintaining the integrity of the edible dough center. Leftover cupcakes keep well covered tightly in the refrigerator for 3 days. Cold storage is necessary to keep the dough center at a safe temperature and to maintain the stability of the butter-rich frosting. Before serving, I suggest letting the cupcakes sit at room temperature for 15 to 20 minutes. This allows the butter in the cake to soften slightly, returning it to its intended velvety texture, while the dough center remains refreshingly cool.
For those interested in a Mini Cupcake Conversion, this system can be adapted with a few adjustments. Use a half-Tablespoon of dough for each center and fill mini cupcake liners about 2/3 full. You must reduce the baking time significantly to prevent the smaller cakes from drying out. A starting point of 10-12 minutes is ideal, and you should begin checking for doneness at the 9-minute mark. Press the smaller dough balls into the centers immediately after the 5-minute pan rest, just as you would with the larger versions.
Frequently Asked Questions
How to successfully incorporate raw cookie dough into the cupcake batter?
The success of this integration depends entirely on the temperature and timing. By chilling the dough balls before they are pressed into the warm cupcakes, you create a temperature differential that allows the outer layer of the dough to fuse with the cake while the center remains soft. If you were to place the dough in the batter before baking, it would likely sink or melt into the cake, losing its distinct “dough” identity.
How to ensure the incorporated cookie dough center remains safe and edible?
Safety is achieved through two mandatory protocols: heat-treating the flour to 160 degrees Fahrenheit and using pasteurized egg whites. These steps eliminate the bacterial risks associated with raw agricultural products. Do not substitute standard raw eggs or untreated flour if you intend for the centers to be eaten in their soft, partially-melted state.
What is the best method for achieving a perfectly creamy buttercream that incorporates dough chunks without separating?
The key is a long, high-speed whipping process for the butter and sugar before the inclusions are added. This creates a stable emulsion that can suspend the heavy dough chunks. Once the dough is added, switch to a lower speed and stop as soon as it is distributed to avoid breaking the air bubbles you have spent minutes creating.
Are there options for smaller (mini) versions of this recipe?
Yes, the recipe can be converted into approximately 24-30 mini cupcakes. As noted in the practical details, you will need to scale down the dough balls and reduce the baking time to roughly 10-12 minutes. The assembly process remains the same, ensuring that each mini bite contains that signature fused dough core.
Conclusion: Your Definitive Cookie Dough Cupcake Blueprint
Engineering the perfect Cookie Dough Cupcakes requires more than just mixing sugar and flour; it demands an understanding of moisture, safety, and structural integrity. By choosing a scratch-built vanilla base enhanced with sour cream, you provide the necessary foundation to support a rich, edible dough center. The meticulous safety protocols of heat-treating your flour and utilizing pasteurized eggs ensure that your final product is as safe as it is delicious, removing the anxiety that often accompanies raw dough treats.
The success of this recipe lies in the small details: the 5-minute cooling window that allows for perfect fusion, the 5-minute whipping time that creates a stable frosting, and the precise ratios of the ingredients. When you take that first bite, you will experience a symphony of textures—from the light, moist crumb of the cake to the dense, chocolate-studded dough center. This is not a shortcut dessert; it is a meticulously optimized system designed for repeatable excellence.
I encourage you to embrace this scientifically sound method in your own kitchen. The feedback from those who have moved away from box mixes to this scratch blueprint has been overwhelmingly positive, citing the superior flavor and the peace of mind that comes with proper safety measures. Once you have experienced the difference that scratch engineering makes, leave a comment below and share your results. I look forward to hearing how your foolproof edible dough centers turned out and how this recipe has redefined your expectations for the classic Cookie Dough Cupcake.
Molten Cookie Dough Cupcakes
Equipment
- Handheld or stand mixer fitted with the paddle attachment
- silicone spatula
- 12-count muffin pan
- Cupcake liners
- Parchment paper
- Digital thermometer (for flour check)
Ingredients
Cookie Dough Ingredients
- 2 and 1/4 cups heat-treated all-purpose flour spooned and leveled
- 2 and 1/4 teaspoons cornstarch
- 3/4 teaspoon salt
- 3/4 cup (12 Tbsp) unsalted butter softened to room temperature
- 1 cup packed light or dark brown sugar
- 1/3 cup (80ml) pasteurized egg whites at room temperature
- 2 teaspoons pure vanilla extract
- 1 cup (180g) mini semi-sweet chocolate chips
Cupcake Ingredients
- 1 and 3/4 cups all-purpose flour spooned and leveled
- 1 teaspoon baking powder
- 1/4 teaspoon baking soda
- 1/2 teaspoon salt
- 1/2 cup (120ml) whole milk at room temperature
- 1/2 cup (120g) sour cream at room temperature
- 1/2 cup (8 Tbsp) unsalted butter softened to room temperature
- 1 cup (200g) granulated sugar
- 1/3 cup (80ml) pasteurized egg whites at room temperature
- 2 teaspoons pure vanilla extract
Frosting and Assembly Ingredients
- 1 cup (16 Tbsp) unsalted butter softened to room temperature
- 2 teaspoons pure vanilla extract
- 1 Tablespoon heavy cream or milk
- 1 teaspoon salt
- 3 cups (360g) confectioners sugar sifted
- remaining cookie dough cookie dough from the first preparation
Instructions
Preparing Cookie Dough Center
- In a medium bowl, whisk the heat-treated flour, cornstarch, and salt together. Set aside.
- Using a handheld or stand mixer fitted with the paddle attachment, beat the butter on medium speed in a large bowl until smooth and creamy, about 2 minutes. Add the brown sugar and mix on medium until light and fluffy, about 3 full minutes. Using a silicone spatula, scrape down the sides and up the bottom of the bowl as needed. Add the egg whites and vanilla extract and mix until fully incorporated, about 2 minutes.
- Add half of the flour mixture and mix on low just until the powdery texture of the flour disappears, about 15 seconds. Immediately add the rest of the flour mixture and mix until combined. Remove the bowl from the mixer and use a silicone spatula to fold in the chocolate chips.
- Freeze or refrigerate the cookie dough for 15 minutes or until the dough is easy to handle. Roll the dough into 12 one-Tablespoon-size balls, place on a plate lined with parchment paper, then refrigerate until step 9.
- Cover the remaining cookie dough and set aside at room temperature until step 11.
Baking the Cupcakes
- Preheat the oven to 350°F (177°C). Line a 12-count muffin pan with cupcake liners.
- Whisk the flour, baking powder, baking soda, and salt together in a medium bowl. In a small bowl, whisk the milk and sour cream together until smooth. Set aside.
- Using a handheld or stand mixer fitted with the paddle attachment, beat the butter and sugar together on medium speed in a large bowl until light and fluffy, about 3 minutes. Using a silicone spatula, scrape down the sides and up the bottom of the bowl as needed. Add the egg whites and vanilla and beat for 2 minutes, or until the mixture is totally incorporated.
- With the mixer on low, alternate additions of the flour mixture and the sour cream mixture, starting and ending with flour. Beat for an additional 30 seconds or until the batter appears smooth and creamy.
- Fill cupcake liners about 3/4 full. Bake for 16-19 minutes or until the cupcake edges are golden brown and a toothpick inserted in the center comes out clean.
- Remove from the oven and let cool in the pan for 5 minutes.
- Remove cupcakes from the pan and carefully press 1 chilled cookie dough ball into the center of each cupcake. Cool cupcakes completely.
Making Frosting and Assembly
- While the cupcakes cool, make the cookie dough buttercream: Using a handheld or stand mixer fitted with the paddle attachment, beat the butter in a large bowl on medium speed for 3 minutes, or until light, fluffy, and completely smooth.
- Add the vanilla extract, milk, and salt and beat until combined. Using a silicone spatula, scrape down the sides and up the bottom of the bowl as needed. Add the confectioners sugar, then beat on low speed for 15 seconds. Switch to medium-high speed and beat the frosting until super light and fluffy, about 4-5 minutes.
- With the mixer running on medium speed, add the remaining cookie dough chunks (broken into quarter-size chunks). Mix just until incorporated—some chunks can remain.
- Once the cupcakes are completely cool, top with frosting. You can spread the frosting with a knife or icing spatula or apply with a large round piping tip. Decorate with chocolate chips, sprinkles, or any leftover cookie dough, if desired.


