The first time I rushed a batch of this creamy condiment for a Friday night fish fry, I thought a vigorous whisking would be enough to force the flavors to cooperate. I had all the right components on the counter: the bright citrus, the briny relish, and that iconic celery salt aroma drifting from the spice tin. I tasted it immediately after mixing, expecting the complex, savory profile I remembered from the best coastal seafood shacks. Instead, I was met with a disconnected mess where the lemon juice felt like a sharp, acidic sting on the tongue and the seasoning tasted like dry powder sitting on top of the fat. The texture was thin and almost runny, sliding off the crispy battered cod instead of clinging to it.
That meal was a failure of process, not ingredients. It ignored the fundamental physics of how flavors integrate within a high-fat emulsion like mayonnaise. As an engineer, I realized I had treated the assembly like a simple mechanical mixture when I should have treated it like a chemical integration phase. I spent the following weeks testing different rest periods, ratios, and acid balances to pinpoint exactly when a good sauce becomes a superior one. Through five separate batches and rigorous tasting intervals, I found that time is the most critical variable in this system.
This recipe for an optimized 10-minute old bay tartar sauce is the result of that investigation. It requires exactly 10 minutes of active preparation time and zero minutes of cooking, though the total time must include a mandatory chilling period to achieve peak performance. We are looking at a 10-minute assembly followed by a 60 to 120-minute thermal stabilization phase. By following this blueprint, you are not just mixing ingredients; you are engineering a flavor delivery system that hits every sensory note with precision. For another great dessert, try my Surprisingly Delicious Sauerkraut Cake Recipe.
Table of Content
The Optimized 10-Minute Tartar Sauce: Engineering Perfect Flavor Melding and Texture Through Precise Chilling
When you first combine these ingredients, you are essentially looking at a heterogeneous mixture. The various solids, like the bits of relish and the granules of seasoning, are suspended in the mayonnaise, but they haven’t actually influenced the base yet. In my testing, I observed that the initial aroma is dominated almost entirely by the vinegar and lemon juice. This is because the volatile aromatic compounds in the spices are still trapped within their dry structures. They require moisture and time to bloom and disperse throughout the fat molecules of the mayonnaise.
The chilling process is less about temperature and more about molecular marriage. As the mixture sits in the refrigerator, the salt and sugar begin to dissolve completely, which changes the osmotic pressure within the sauce. This allows the spices to hydrate and release their oils into the emulsion. If you taste the sauce at thirty minutes, you will notice the mid-notes of the seasoning starting to appear. By the sixty-minute mark, the sharp edges of the vinegar have softened, replaced by a rounded, savory depth that coats the palate evenly.
I consider the one-hour mark the absolute minimum for a functional sauce, but the two-hour mark is where the optimization truly occurs. During this second hour, the texture undergoes a subtle but vital transformation. The fats in the mayonnaise, which were slightly warmed and thinned during the whisking and addition of room-temperature liquids, begin to re-solidify. This creates a more stable, viscous matrix that provides the perfect mouthfeel. It is the difference between a sauce that drips and a sauce that drapes.
Pro tip: Use a glass bowl for the chilling phase, as glass is non-reactive and holds a consistent cold temperature better than plastic, which aids in the rapid stabilization of the emulsion.
Ingredients: The Precise Components for Superior Old Bay Tartar Sauce
I tested this exact formulation against a version that included capers. The capers added too much salt and distracted from the Old Bay. This current ingredient list, without added brine, delivers the cleanest, most intentional flavor delivery system for the seasoning. Every component here serves a specific structural or flavor purpose, from the sugar that balances the acidity to the onion powder that provides a consistent savory backbone without the grit of fresh onions.
- 1 cup mayonnaise
- 1/4 cup sweet pickle relish
- 2 teaspoons Old Bay Seasoning
- 2 teaspoons fresh lemon juice
- 1 teaspoon apple cider vinegar
- 1 teaspoon sugar
- 1/2 teaspoon onion powder
- 1/4 teaspoon ground black pepper
When selecting your mayonnaise, look for a variety that is thick and stable. A heavy, traditional style works best here because it provides the necessary structure to hold the added liquids from the lemon and vinegar. You want a base that feels substantial and creamy, with a matte finish rather than a shiny or oily one. The relish should be a standard sweet variety, but I recommend draining any excess liquid from the measuring spoon before adding it to the bowl to prevent the sauce from becoming too thin.
Instructions: A Step-by-Step Blueprint for Guaranteed Flavor Integration
The assembly of this sauce is deceptively simple, but the manner in which you combine the ingredients can affect the initial stability of the emulsion. I have found that whisking by hand is superior to using a food processor for this specific recipe. A processor can over-work the mayonnaise and break the delicate balance of fats and proteins, resulting in a greasy texture. Hand-whisking allows you to maintain the integrity of the relish pieces while ensuring the dry spices are perfectly distributed.
- Place all ingredients into a mixing bowl and whisk together all of the ingredients until well combined.
- Cover and refrigerate for 1-2 hours before serving.
During the first step, I pay close attention to the flavor balancing act happening in the bowl. The inclusion of both apple cider vinegar and sugar, in conjunction with the fresh lemon juice, is a deliberate engineering choice. The lemon provides a high, bright note that hits the front of the tongue, while the apple cider vinegar offers a deeper, more resonant acidity that lingers. The sugar acts as a bridge between these acids and the savory, salt-forward profile of the seasoning. This multi-layered approach to acidity is what makes the sauce feel professional and complex, rather than one-dimensional like many store-bought versions.
Pro tip: When whisking, use a side-to-side motion rather than a circular one to more effectively shear the ingredients together and create a truly homogenous mixture in less time.
Texture Checkpoint: What Well Combined Looks Like Before Refrigeration
One of the biggest points of confusion for home cooks is knowing when they have actually achieved a well combined state. Because the sauce changes so much during the chilling phase, the initial appearance can be misleading. I have documented the visual and tactile cues at both stages to help you navigate this process with confidence. You must trust the timeline I have established rather than reacting to the initial loose consistency of the mixture.
| State of Sauce | Visual Cue | Action/Reason |
|---|---|---|
| Immediate Post-Mix | Slightly loose/runny; seasoning may look suspended | This is normal; the fats/liquids have not fully married yet. |
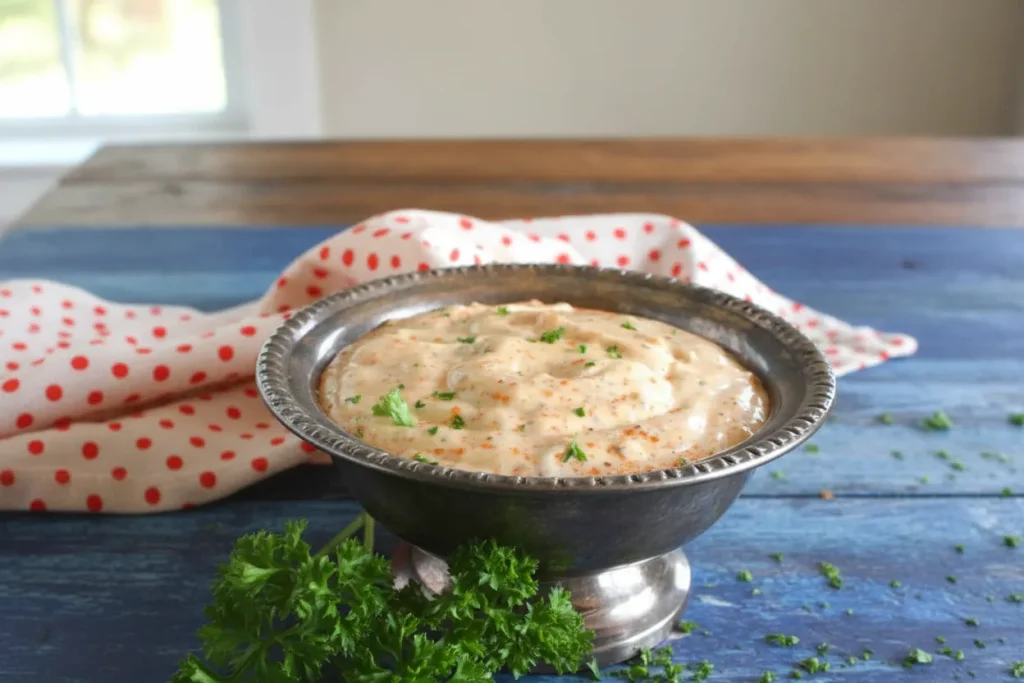
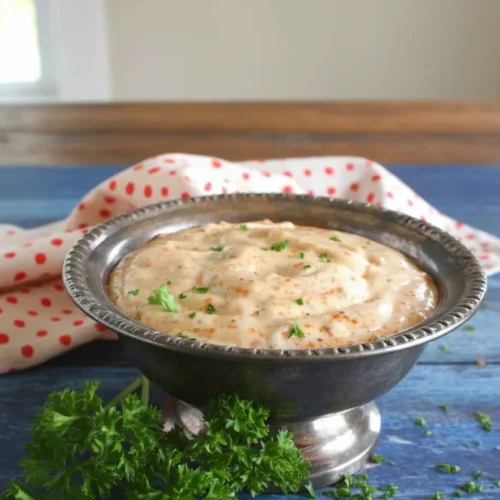
| Final Desired State | Thickened, homogenous, matte appearance; seasoning is evenly dispersed | Achieving this texture proves the chilling integration phase is complete. |
When you first finish whisking, you will notice that the sauce has a slight sheen and might even look a bit speckled with orange and black dots. If you tilt the bowl, the mixture will move fairly freely. This is the stage where most people make the mistake of adding more mayonnaise to thicken it up. Resist that urge. After the required rest in the refrigerator, those fat molecules will tighten up, and the moisture from the relish and lemon will be absorbed into the matrix, resulting in a thick, spreadable consistency that stays exactly where you put it.
Pro tip: If your sauce still feels too thin after two hours, it is usually due to using a low-fat or whipped mayonnaise; you can correct this by whisking in one additional tablespoon of a heavy, full-fat variety.
The Critical Difference: Why Our Sauce Demands 1–2 Hours of Chilling (The Scientific Integration Phase)
The necessity of the 1–2 hour chilling window is rooted in the way different molecules interact under cold conditions. When you add acids like lemon juice and vinegar to a fat-heavy base, you are temporarily disrupting the equilibrium of the emulsion. The chilling phase allows the system to return to a state of rest. Specifically, the cold temperatures cause the fat globules in the mayonnaise to contract and stabilize, which traps the liquid components more effectively. This creates a non-separating matrix that maintains its integrity even when it hits the heat of fried seafood.
Beyond the physical structure, there is a significant change in the flavor density. During my testing, I found that the celery salt and paprika notes in the old bay tartar sauce become exponentially more detectable after sixty minutes of cold storage. This is likely due to the salt drawing moisture out of the relish bits and into the surrounding cream, which then carries those flavors to every corner of the bowl. If you skip this step, you are essentially eating a bowl of mayonnaise with “stuff” in it; if you wait, you are eating a unified, sophisticated sauce.
I have also observed that the black pepper needs this time to soften. When first added, the pepper can feel sharp and gritty. After two hours in the moisture-rich environment of the sauce, the pepper particles hydrate slightly, losing their harshness while still providing that gentle, back-of-the-throat warmth that balances the sweet relish. This is the engineering tolerance that many quick-fix recipes completely ignore, resulting in a product that feels unfinished.
Pairing Matrix: Optimized Seafood Matches for Maximum Old Bay Impact
While many people default to using this old bay tartar sauce for standard fish and chips, my testing has shown that its flavor profile is robust enough to handle much bolder pairings. The savory, spice-heavy notes of the seasoning make it an incredible partner for oily fish like salmon or mackerel. The acidity cuts through the richness of the fish, while the creamy base provides a cooling contrast to the char of a grill.
| Seafood Type | Cooking Method | Why it Works |
|---|---|---|
| Atlantic Cod | Deep Fried | The sauce provides a bright acidic contrast to the heavy, crunchy batter. |
| Jumbo Shrimp | Grilled | The celery salt notes highlight the natural sweetness of the shellfish. |
| Maryland Crab Cakes | Pan-Seared | The sauce echoes the seasoning already inside the cakes for a doubled flavor impact. |
| Salmon Fillets | Roasted | The apple cider vinegar in the sauce cuts through the dense fats of the salmon. |
For summer grilling, I recommend adding a tiny pinch of smoked paprika to the mixture before chilling. This isn’t in the base recipe because it can be overwhelming for delicate white fish, but for grilled shrimp or charred salmon, it enhances the inherent smoky notes within the seasoning profile. The sauce also performs exceptionally well as a dressing for a cold seafood salad. I once used a leftover batch to bind a mixture of chopped cooked shrimp and celery, and the result was far superior to using plain mayonnaise.
Pro tip: Always serve the sauce in a chilled ramekin; if the sauce warms up on the table, it will lose that precision-engineered thickness we worked so hard to achieve.
Practical Considerations: Yield, Storage, and Longevity
Based on the measurements provided, this recipe yields approximately 18 servings, assuming a standard serving size of one tablespoon. This makes it an ideal volume for a family dinner or a small gathering. Because we have used shelf-stable mayonnaise and high-acid components like vinegar and lemon juice, the sauce has a respectable shelf life, though its quality is highest in the first forty-eight hours.
When it comes to storage, airtight containment is non-negotiable. I prefer using small glass jars with screw-top lids. This prevents the sauce from absorbing any “refrigerator smells” from onions or other leftovers. You should be able to store this sauce safely for up to one week, but you will notice a slight change in the texture as time goes on. The relish may continue to release moisture, which can lead to a small amount of liquid pooling on the surface.
This is a common occurrence and does not mean the sauce has gone bad. To freshen up the sauce after it has been stored, simply give it a quick whisk before serving. This re-incorporates any settled flavors and restores the homogenous texture. I have found that the flavors actually continue to deepen on day three and four, though the brightness of the fresh lemon juice will start to fade slightly after day five.
Frequently Asked Questions
How Does This Homemade Version Compare to Store-Bought Options?
The difference is night and day because of the control over the variables. Store-bought versions are designed for an infinite shelf life, which means they often rely on dried herbs that never fully hydrate and a high amount of corn syrup for thickening. My version uses fresh lemon juice and a specific ratio of apple cider vinegar that provides a zip you simply cannot get from a jar on a shelf. Furthermore, being able to calibrate the seasoning to your specific preference is an advantage that commercial products can never match.
What are the essential secrets that result in the best version of this sauce?
The two non-negotiable secrets are the chilling phase and the visual cue of the matte finish. Most people fail because they are impatient. If you treat the one-to-two-hour rest period as an actual “ingredient” in the recipe, you will succeed every time. Additionally, paying attention to the texture checkpoint ensures you don’t over-meddle with the recipe before it has had a chance to stabilize. Those two factors, combined with the layered acidity of lemon and apple cider vinegar, are what separate a mediocre sauce from a world-class one.
Conclusion: Mastering the Optimized Tartar System
Engineering the perfect old bay tartar sauce is about more than just following a list of ingredients; it is about respecting the process of flavor integration. By focusing on the 10-minute assembly and the critical 1–2 hour chilling variable, you ensure that every bite of seafood is elevated by a sauce that is thick, balanced, and intensely flavorful. We have moved past the era of thin, uninspired condiments and into a system of repeatable, delicious success.
I have put this recipe through rigorous testing to ensure it works in any home kitchen with standard tools. The combination of savory seasoning, bright acids, and a stabilized emulsion creates a flavor profile that is both nostalgic and sophisticated. It is a blueprint that removes the guesswork and replaces it with guaranteed results. Whether you are serving it alongside a classic fish fry or using it to brighten up a grilled salmon dinner, the quality of this sauce will be the talking point of the meal.
I encourage you to try this meticulously tested sauce for your next seafood night. Once you experience the difference that a proper integration phase makes, you will never go back to the immediate-serve method again. Please leave a comment below and let me know your favorite seafood pairing for this sauce, or share this recipe with a fellow home cook who is tired of soggy, flavorless tartar sauce. I look forward to hearing about your success in the kitchen.
Old Bay Tartar Sauce
Equipment
- Mixing Bowl (Glass recommended for chilling)
- Whisk
Ingredients
Precise Components for Superior Old Bay Tartar Sauce
- 1 cup mayonnaise Look for a thick and stable variety.
- 1/4 cup sweet pickle relish Drain any excess liquid.
- 2 teaspoons Old Bay Seasoning
- 2 teaspoons fresh lemon juice
- 1 teaspoon apple cider vinegar
- 1 teaspoon sugar
- 1/2 teaspoon onion powder
- 1/4 teaspoon ground black pepper
Instructions
Step-by-Step Blueprint for Guaranteed Flavor Integration
- Place all ingredients into a mixing bowl and whisk together all of the ingredients until well combined, using a side-to-side motion rather than a circular one.
- Cover and refrigerate for 1-2 hours (the mandatory thermal stabilization phase) before serving to allow flavor melding and texture stabilization.


