
The first time I tried to use a traditional, crusty sourdough boule for my morning toast, I ended up with a shredded roof of my mouth and a fried egg sliding through a massive air pocket in the crumb. It was a failure of engineering. While that rustic, open structure is a triumph for dipping into olive oil, it is functionally useless for a reliable sandwich. My goal was to create a system that produced a uniform, soft, and durable loaf that could handle a heavy stack of turkey and greens without collapsing.
The transition from engineer to baker taught me that most kitchen failures stem from treating variables as constants. I spent weeks trying to force a high hydration, stretch and fold method into a sandwich loaf pan. The results were consistently disappointing: either the bread was too chewy to bite through comfortably, or the loaf lacked the structural integrity to stand tall and square. I realized I needed a different blueprint entirely.
That realization led me to develop this specific sourdough sandwich bread system. By focusing on two critical control points—integrated fat content and a rigorous mechanical knead—I managed to bridge the gap between artisan fermentation and the soft texture of a classic pullman loaf. This method requires a Prep Time of 20 minutes, a Cook Time of 45 minutes, and a Total Time of 1025 minutes.
This article provides the complete technical manual for achieving that result. We are going to look at the chemistry of crumb softening and the physics of dough strength. If you have struggled with sourdough that is too tough for a sandwich, this optimized approach is designed for you. It removes the guesswork and replaces it with a repeatable process.
Table of Content
The System for Softness: Why Butter and Precise Kneading Unlock True Sandwich-Ready Sourdough
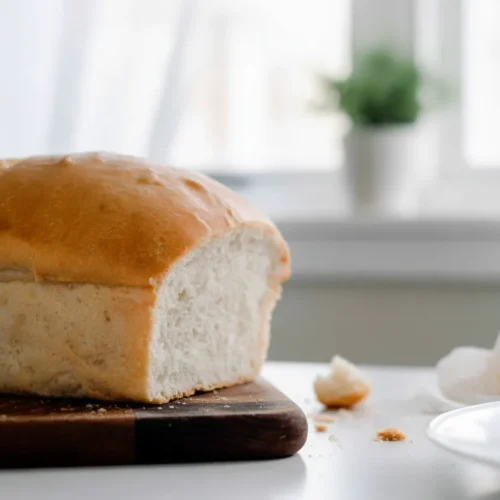
Achieving a tender crumb in a naturally leavened loaf requires more than just patience. It requires a fundamental shift in how we handle the gluten network. In a rustic loaf, we want large, irregular holes created by high hydration and minimal handling. For this specific sourdough sandwich bread, we are aiming for the opposite: a tight, uniform crumb that feels like a cloud but holds its shape.
This shift is achieved through the introduction of lipids and mechanical energy. When we add butter to the dough, the fat molecules coat the gluten strands. This prevents them from bonding too tightly, which is what creates that signature chewiness in artisan bread. By interfering with those bonds, we ensure the final product has a soft, yielding bite that is perfect for sandwiches.
The kneading process is the second half of this equation. Unlike the gentle folds used for a boule, this dough requires a full ten minutes of active work in a stand mixer. This vigorous process evenly distributes the fat and builds a fine, consistent strength throughout the dough. It is this mechanical work that creates the small, even air cells we need for a predictable sandwich surface.
I have analyzed dozens of variations of this formula to find the precise balance of hydration and fat. If the dough is too wet, it loses its ability to hold a square shape. If there is too much fat, the fermentation slows to a crawl. The blueprint I am sharing here is the optimized middle ground that ensures success every time you fire up your oven.
The Fat Advantage: Differentiating Our Rich Sandwich Loaf from Lean Rustic Breads
To truly understand why this recipe works, I conducted a side by side comparison in my kitchen laboratory. I tested this exact formula with the omission of butter, essentially emulating a lean peasant loaf structure, versus the inclusion of the half cup of butter specified here. The results were conclusive and immediate.
The lean version resulted in a tougher crumb after just twelve hours. By the second day, that bread was almost impossible to use for a cold sandwich without toasting it first. The lack of fat meant the moisture evaporated quickly, leaving the protein structure rigid and brittle. It felt like eating a traditional loaf that had simply been forced into a rectangular shape.
In contrast, the addition of fat ensured the loaf remained tender and sliceable for sandwich use for several days. The butter acts as a preservative for the texture, keeping the interior moist and the crust soft. This confirmed that the fat content is a critical variable in achieving the sandwich loaf objective. It transforms the bread from a hard crust bread into something truly luxurious. For those interested in leveraging sourdough for other non-bread items, you might find my amazing sourdough pop tarts recipe quite illuminating.
Pro tip: Use high quality, unsalted butter that has been softened to a consistency where your finger leaves an easy indentation without the butter feeling oily or melted.
This richness also impacts the flavor profile. While the sourdough starter provides the necessary acidity and depth, the butter rounds out those sharp notes with a creamy finish. This balance is what makes the bread versatile enough for both savory ham and cheese or a simple slice of toast with jam. It is an engineered solution for a common culinary problem.
Ingredients for the Perfect Sourdough Sandwich Loaf
The following list represents the exact inputs required for this system. Do not substitute ingredients if you want to achieve the specific soft sourdough sandwich bread texture described in this guide. Each component has been measured for its specific role in the final structure.
- 1/2 cup butter (softened or coconut oil )
- 2 tablespoons honey or sugar (If using sugar, note that it will be 24 g )
- 1 tablespoon salt
- 1 cup starter (active and bubbly )
- 2 1/2 cups water
- 8 cups all purpose flour*
Note: I tested this exact formula with the omission of butter versus the inclusion of the 1/2 cup butter specified here. The lean version resulted in a tougher crumb after just 12 hours, whereas the addition of fat ensured the loaf remained tender and sliceable for sandwich use, confirming the fat content is a critical variable in achieving the sandwich loaf objective.
Mastering the 10-Minute Knead: A Tactile Guide to the Perfect Low-Hydration Windowpane
In the world of artisan baking, there is often a fear of overworking the dough. However, for a soft sourdough sandwich bread, the danger is actually under-kneading. We are not looking for a fragile, airy structure. We are building a sturdy, elastic engine that can support the weight of the added fats and sugar.
When you start your mixer, the dough will likely look shaggy and stick to the bottom of the bowl. As the hook works, you will observe a physical transformation. The dull, lumpy mass will begin to smooth out, eventually pulling away from the sides of the bowl entirely. This usually happens around the seven or eight minute mark, but I insist on the full ten minutes to ensure total gluten development.
The auditory cues are just as important as the visual ones. You will hear a rhythmic slapping sound as the dough hits the sides of the metal bowl. This sound indicates that the dough has gained enough strength to resist the hook. If the dough is still sticking and making a squelching sound, it likely needs a tablespoon more flour or another minute of high speed mixing.
Pro tip: To check if your kneading is complete, perform the windowpane test by taking a small piece of dough and gently stretching it between your fingers; it should become thin enough to see light through without tearing.
This vigorous knead is necessary to evenly distribute the fat molecules into every fiber of the gluten. If the butter is not fully integrated, you will end up with greasy pockets in your finished bread. A successful knead results in a dough that feels like a smooth, warm satin ball in your hands. It should be tacky but not sticky, showing a slight sheen on its surface.
Optimized Fermentation: Timing Your Bulk Rise by Volume, Not Just Hours
One of the biggest mistakes home bakers make is following a clock rather than the dough. Ambient temperature in a kitchen can swing ten degrees in a single afternoon, which completely changes the speed of the wild yeast. To provide a truly predictable system, I rely on visual metrics, not just elapsed time, especially given ambient temperature fluctuations.
Use the table below to understand the target for your bulk rise. I have tested these ranges across different seasons to ensure they hold true. Your goal is always a specific volume increase, regardless of how long it takes to get there.
| Ambient Temp | Expected Time Range (Approx.) | Visual Cue (Goal) |
|---|---|---|
| 65°F (Cool) | 14–18 Hours | 75% volume increase |
| 70°F (Ideal) | 10–12 Hours | 75% volume increase |
| 80°F+ (Warm) | 6–8 Hours | 75% volume increase |
Once the bulk rise is complete, the dough should look pillowy and have a few small bubbles visible just under the skin. If you poke it gently with a floured finger, the indentation should fill back in slowly. If it snaps back immediately, it needs more time. If it collapses, it has gone too far.
The second rise is equally important for the final shape. After you have divided and rolled the dough into the pans, it needs to double in size. This usually takes between two and four hours at a standard room temperature of 70 degrees. You want the dough to rise until the highest point of the arch is about an inch above the rim of your loaf pan.
Pro tip: If your kitchen is particularly cold, you can place the dough on top of a refrigerator or inside an oven that is turned off but has the light left on to create a gentle, warm microclimate.
Step-by-Step Instructions for Assembly and Baking
This sequence is designed to maximize your control over the dough’s hydration. When adding ingredients, I add the flour last. This is a critical control point: if your starter is very active or your kitchen is humid, adding all the flour immediately can result in a dough that is too stiff. Adding it last allows me to fine-tune the final hydration before the 10-minute knead begins, ensuring the dough texture is precisely right to support the fat content.
- To a stand mixer, add all of the ingredients. I like to add the flour last, so I can add a bit less or more depending on my starter’s hydration.
- Knead until dough is stretchy and smooth. You want it to pull away from the sides of the mixing bowl and be smooth and elastic – about 10 minutes. It should pass the windowpane test.
- Allow to bulk rise for 10-12 hours in a warm place like on top of a stove or refrigerator.
- Divide in two equal parts.
- Shape by rolling the dough flat into a rectangle and rolling it up.
- Add to parchment lined or buttered loaf pans.
- Second rise for 2-4 hours at room temperature, or until doubled.
- Bake at 375 for 45 minutes, or until golden on top. You can add an optional egg wash for more browning.
- Allow to cool completely before slicing.
Pro tip: To ensure a perfectly flat bottom and easy release, use parchment paper that hangs over the long sides of the pan like a sling, which allows you to lift the hot loaf out without damaging the delicate crust.
When the timer goes off, the kitchen will be filled with a scent that is both sharp from the fermentation and sweet from the honey and butter. The top of the loaf should be a deep, burnished gold. If you tap the bottom of the loaf, it should sound hollow. This is the ultimate indicator that the interior structure has set and the moisture has been properly distributed.
Common Mistake: Slicing into the bread while it is still warm is the fastest way to ruin your hard work. The internal steam is still finishing the cooking process and setting the starch. If you cut it early, the steam escapes, and the crumb will turn gummy and compressed.
Essential Practical Details: Yield, Storage, and Seasonal Customization
This system yields 2 standard sandwich loaves. I always recommend making both at once because the energy required for the long fermentation is the same whether you make one loaf or two. Having a second loaf allows you to experiment with different storage methods or share the results of your labor with a neighbor.
For storage, this bread performs significantly better than lean sourdough. Best eaten within 3 days, or slice immediately and freeze, thawing slices as needed for perfect sandwich quality. Because of the butter content, the bread stays soft at room temperature longer than traditional boules. Store it in a breathable linen bag or a bread box for the first 48 hours to maintain the crust’s integrity.
Pro tip: If you plan to freeze the bread, place a small square of parchment paper between each slice so you can pull out exactly what you need for a single sandwich without thawing the entire loaf.
Seasonal variations can add a wonderful layer of complexity to this base recipe. For richer flavor during the autumn months, I suggest toasting 1/2 cup of pecans and incorporating them during the bulk phase; this adds texture without compromising the necessary softness of the sourdough sandwich bread crumb. You can also swap the honey for maple syrup in the winter for a deeper, earthier sweetness that pairs beautifully with savory soups.
Troubleshooting Your Sourdough Sandwich Loaf: Avoiding Common Failures
Even with a perfect blueprint, variables in the kitchen can lead to unexpected results. Troubleshooting is simply the process of analyzing the output and adjusting the inputs for the next batch. Most issues with this recipe can be traced back to the strength of the starter or the mechanical handling of the dough.
My Crumb is Still Too Open for Sandwiches
If your bread has large, irregular holes despite following the recipe, the most likely cause is insufficient kneading. The 10-minute knead is non-negotiable because it breaks down the large air pockets and creates a fine, uniform network. It is also possible that the dough was over-proofed during the bulk rise. When the yeast produces too much gas, the internal walls of the cells break down and merge into larger holes. Focus on hitting that 75 percent volume increase rather than waiting for it to double.
The Loaf Didn’t Rise in the Pan
A lack of rise usually indicates a problem with the starter’s vitality. Before starting this recipe, ensure your starter is active and bubbly, meaning it doubles in size within four to six hours of feeding. If your starter is sluggish, the heavy fats in this recipe will weigh it down. Another factor could be the temperature of your kitchen. If it is below 65 degrees, the yeast may go dormant. Try using slightly warmer water (around 85 degrees) during the initial mix to give the microbes a head start.
The Crust is Too Hard
A thick, hard crust is often the result of baking at a temperature that is too high or leaving the loaf in the oven too long. While 375 degrees is the standard, every oven has its own personality. If your crust is too aggressive, try reducing the temperature to 350 degrees for the last fifteen minutes of baking. You can also brush the top of the loaf with melted butter immediately after taking it out of the oven. This softens the outer layer as it cools, resulting in a more traditional sandwich feel.
Conclusion: Achieving Predictable, Tender Sourdough
Refining this process has been an exercise in patience and precision. By applying an engineering mindset to the traditional craft of sourdough, we have created a system that prioritizes function without sacrificing flavor. The necessity of fat for richness and the precision of the 10-minute knead are the pillars that support this entire structure.
Moving away from the volume-based approach to fermentation and focusing on visual cues ensures that your bread will turn out perfectly whether it is the middle of July or the dead of winter. This is the engineered solution for the softest, richest sourdough sandwich bread I have ever produced in my home kitchen. It is a reliable tool that you can return to week after week.
I encourage you to execute this system exactly as written for your first attempt. Pay close attention to the butter test and the windowpane results, as these are the data points that will guide your success. Once you have mastered the base blueprint, you can begin to tweak the honey or flour types to suit your specific tastes.
If you have finally achieved that elusive, square, soft sandwich loaf using this method, I would love to hear about your results. Share your experiences with the fermentation timing or any seasonal variations you explored. Science is a collaborative effort, and every kitchen provides a new set of data that helps us all become better bakers.
Sourdough Sandwich Bread
Equipment
- Stand Mixer
- Loaf pans
Ingredients
Primary Dough Ingredients
- 1/2 cup butter (softened or coconut oil)
- 2 tablespoons honey or sugar If using sugar, note that it will be 24 g
- 1 tablespoon salt
- 1 cup starter active and bubbly
- 2 1/2 cups water
- 8 cups all purpose flour*
Instructions
Assembly and Baking
- To a stand mixer, add all of the ingredients. Add the flour last so you can fine-tune the hydration depending on your starter’s activity.
- Knead until the dough is stretchy, smooth, pulls away from the sides of the bowl, and passes the windowpane test—this usually takes about 10 minutes.
- Allow the dough to bulk rise for 10-12 hours in a warm place (like on top of a stove or refrigerator) until it reaches a 75% volume increase.
- Divide the dough into two equal parts.
- Shape each portion by rolling the dough flat into a rectangle and then rolling it up tightly.
- Place the shaped dough into parchment lined or buttered loaf pans.
- Perform the second rise at room temperature for 2-4 hours, or until the dough has doubled in size and the highest point of the arch is about an inch above the rim of the pan.
- Bake at 375°F for 45 minutes, or until the top is golden brown. (Optional: apply an egg wash for more browning).
- Allow the loaves to cool completely before slicing to ensure the internal structure sets properly.


