The first time I pulled a batch of sourdough english muffins from the pan, I felt a familiar sense of frustration. On the outside, they looked like the artisanal versions I had admired in bakery windows, with a light dusting of cornmeal and a gentle gold hue. However, when I split one open, the center was a gummy, undercooked mess that lacked the iconic architecture of peaks and valleys I craved. The exterior had scorched before the heat could penetrate the dense dough, a failure that revealed a fundamental flaw in my process. I realized that relying on visual cues or a kitchen timer was a recipe for inconsistency in a home environment where pan temperatures vary wildly.
That initial failure pushed me to treat the process like an optimization problem. I spent weeks deconstructing the relationship between hydration, fermentation time, and thermal transfer. I moved away from the vague idea of cooking for a set number of minutes and toward a data-driven approach centered on a specific internal temperature. By treating the kitchen as a lab and the dough as a structural system, I developed a blueprint that guarantees success every single time. This guide is the result of that rigorous testing, designed to help you achieve perfect results without the guesswork.
The Engineer’s Guide to Sourdough English Muffins: Achieving Guaranteed Nooks, Crannies, and Perfectly Cooked Centers (No Oil Required) is not just a recipe, it is a system. For this specific build, the Prep Time is 20M, the Cook Time is 8M, and the Total Time is 1468M. While the timeline may seem extensive, most of that is passive fermentation where the biological systems of the starter do the heavy lifting for you. By the end of this article, you will understand exactly how to manage these variables to produce a muffin that is light, tangy, and structurally sound.
Table of Content
Sourdough English Muffins: The Flavor and Health Equation
The primary difference between a standard yeast-based muffin and these sourdough english muffins lies in the complexity of the flavor profile. Traditional muffins rely on commercial yeast for a rapid, aggressive rise, which often leaves the final product tasting primarily of flour and water. Sourdough utilizes a diverse ecosystem of wild yeast and lactic acid bacteria that work slowly to break down complex starches. During the long fermentation period, these microbes produce a range of organic acids that contribute to that signature tang. This depth of flavor is impossible to replicate with shortcuts or artificial flavorings.
From a physiological perspective, the long fermentation process significantly alters the nutritional landscape of the bread. As the dough rests, the wild yeast and bacteria begin to predigest the proteins and starches, including gluten. This enzymatic activity makes the final product much easier on the digestive system for many people who feel sluggish after eating standard white bread. The phytic acid found in grain, which can inhibit mineral absorption, is also broken down during this window, increasing the bio-availability of nutrients.
I observed during my testing that the texture of the crumb becomes more resilient as the fermentation progresses. A short-fermented muffin feels soft but lacks the structural integrity to hold up to heavy toppings like poached eggs or thick spreads. The slow-rise method creates a crumb that is both tender and remarkably strong, with a slight chew that provides a satisfying resistance when you bite into it. This balance of flavor and function is why I refuse to rush the fermentation cycle in my kitchen, for another great dessert, try my Amazing Sourdough Pop Tarts: The Flakiest Crust Ever!.
The No-Oil Advantage: How We Achieve Perfect Browning Without Added Fat
Many traditional recipes insist on greasing the skillet with butter or oil to prevent sticking and encourage browning. Through my testing, I found that this approach often leads to uneven heat spots and a greasy exterior that masks the natural flavor of the sourdough. By using a dry, non-stick surface, I can achieve a cleaner, more uniform browning that highlights the texture of the cornmeal. This method relies on controlled heat transfer rather than frying the exterior of the dough.
The cornmeal acts as a physical barrier and a heat-conducting medium, creating a thin layer of air between the dough and the pan. This allows the heat to radiate evenly across the flat surface of the muffin, resulting in a crisp, toasted skin rather than a scorched one. I noticed that when oil is introduced, it tends to soak into the cornmeal, making it heavy and damp rather than light and crunchy. Eliminating the fat ensures that the exterior remains shatteringly crisp while the interior stays moist.
| Cooking Feature | No-Oil Method (Our System) | Standard Oil/Butter Method |
|---|---|---|
| Exterior Texture | Uniformly crisp and toasted | Can become greasy or soft |
| Flavor Profile | Pure sourdough and cornmeal | Toasted fat can mask the tang |
| Browning Control | Highly predictable on low heat | Prone to rapid scorching |
| Cleanup | Minimal pan residue | Requires degreasing after each batch |
Pro tip: Ensure your skillet is truly non-stick and has a heavy base, as thin pans create hot spots that will burn the cornmeal before the center of the muffin reaches the target temperature.
The Critical Timeline: Why An Overnight Proof is Non-Negotiable for True Sourdough English Muffins
The 8-12 hour room temperature fermentation is the most important variable in this entire system. During this window, the dough undergoes a transformation where the carbon dioxide produced by the wild yeast is trapped by the developing gluten network. If you attempt to shorten this window, the internal structure will be too dense, and you will lose the craggy nooks that define a high-quality muffin. The long rest allows the gluten to relax just enough to expand without collapsing, creating those essential air pockets.
In my experiments, I compared a four-hour proof against an eight-hour proof. The four-hour version resulted in a tight, bread-like crumb that felt more like a dinner roll than an english muffin. The eight-hour version, kept between 65 and 70 degrees Fahrenheit, produced a honeycomb-like interior that was ideal for capturing melted butter. This structural integrity is vital because it prevents the muffins from flattening out into pancakes when you transfer them to the heat.
It is important to note that this recipe requires an active, bubbly sourdough starter to act as the primary leavening agent. While many people look for ways to use discard, the discard lacks the explosive power needed to lift this relatively heavy dough. You can certainly use your leftover discard to feed and create the active starter required for this process, but the starter itself must be at its peak. Look for a surface covered in tiny, active bubbles and a volume that has clearly doubled before you begin mixing.
Stop Guessing: The 200°F Internal Temperature Mandate for Flawless Results
The most significant breakthrough in my testing came when I stopped timing the muffins and started measuring their internal temperature. Even a slight variation in the thickness of the dough or the ambient temperature of your kitchen can change the required cooking time by several minutes. By using an instant-read thermometer to target exactly 200 degrees Fahrenheit, I eliminated the risk of serving a muffin with a raw, doughy core. This temperature marks the point where the starches have fully gelatinized and the structure is set.
I used a digital caliper to measure the dough thickness during my trials, finding that a precise $1/2$ inch thickness before the final rise is the sweet spot. If the dough is even $1/8$ inch too thick, the exterior will likely overcook before the center reaches thermal equilibrium. If it is too thin, you lose the vertical height necessary for a satisfying crumb. This precision ensures that the heat travels through the dough at a predictable rate, allowing the center to reach 200 degrees Fahrenheit just as the outside hits a deep golden color.
| Metric | Our Method (200°F Target) | Standard Method (Time-Based) |
|---|---|---|
| Risk of Undercooking | Near Zero | High |
| Heat Management Required | High Precision | Minimal |
| Final Result Reliability | Absolute Consistency | Highly Variable |
| Crumb Texture | Fully Set and Aerated | Often Gummy in the Center |
Pro tip: Insert the thermometer probe through the side of the muffin rather than the top to get an accurate reading of the very center without deflating the structure.
Mastering the Components: Ingredients for Optimal Structure
The hydration level of the dough is a critical factor in creating the proper texture. During my testing of various hydration levels, I found that using exactly 3 1/2 tablespoons of water, in addition to the milk and starter, ensures the dough achieves the correct tacky, shaggy texture. This specific moisture content is required for the final 8-12 hour fermentation to yield superior cragginess. If the dough is too dry, the holes will not form; if it is too wet, the muffins will lose their shape and stick to the parchment.
- 1 tablespoon sourdough starter
- 1/3 cup + 1 tablespoon all-purpose flour
- 3 1/2 tablespoons water
- 1/2 cup active sourdough starter
- 1 tablespoon honey (sugar or maple syrup)
- 1 cup milk
- 3 cups all-purpose flour
- 1 teaspoon fine sea salt
- 1/4 cup cornmeal (for sprinkling)
The choice of all-purpose flour provides enough protein for structure while keeping the crumb tender. The small amount of honey serves two purposes: it provides a quick food source for the yeast and assists in the enzymatic browning of the crust. The milk contributes fats and sugars that soften the crumb, making it feel rich rather than lean.
The Precise Assembly: Step-by-Step Instructions
- 12 hours before you plan to mix the dough, add the ingredients to make ½ cup (100 g) of active sourdough starter to a clean jar. Stir until combined, loosely cover the jar and let the starter rise at room temperature. (The ingredients will create a total of 115 g active starter but, because some of it will stick to the sides of the jar during the transfer, we are making a little more than needed.) The sourdough starter is ready to use when it has doubled in size and there are plenty of bubbles on the surface and sides of the jar.
- Add 100g of the active starter and the rest of the ingredients (except corn meal) to a large bowl and use your hands to mix until well combined. Cover and let rest 30-60 minutes. Turn the dough out onto a floured surface and knead the dough by hand for 5 minutes. (A stand mixer with a dough hook attachment can be used on the lowest speed.)
- Place the dough back into the bowl, cover and let ferment on the counter at room temperature 8-12 hours. (Room temperature is 65-70°F)
- Turn the dough out onto a floured surface, flour the top of the dough and press it out using your fingertips until it is 1/2″ in thickness.
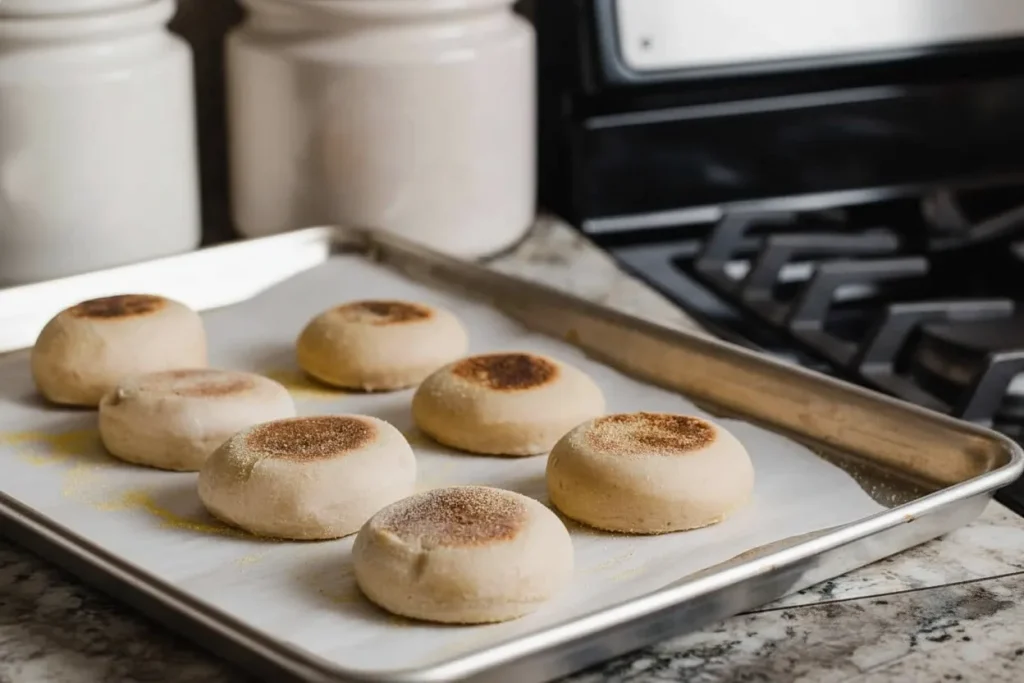
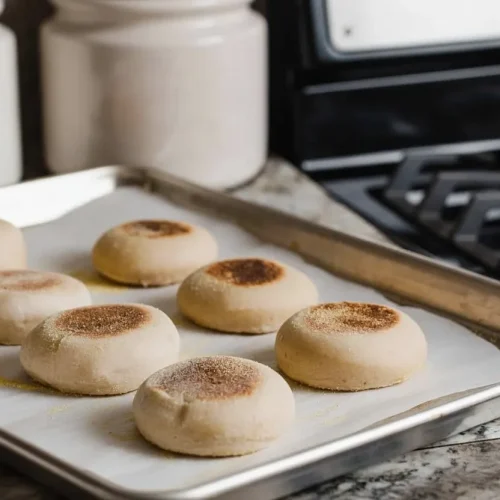
- Use a 3″ biscuit cutter to cut rounds and place them on a parchment lined baking sheet that’s been sprinkled with cornmeal. Sprinkle the tops with cornmeal, cover with a tea towel and allow to rise for 1 hour at room temperature.
- Preheat your non-stick skillet over LOW heat. Place 4 muffins into the skillet spaced 2″ apart, cover and cook the first side for 4 minutes. Turn the muffins over and cook for an additional 4 minutes. (When done, the center of a muffin should register about 200°F on an instant-read thermometer.)
Pro tip: In Step 6, keeping the heat on a low setting is critical because it allows the heat to migrate to the center of the muffin before the exterior sugars burn. If you see the cornmeal turning dark brown within the first two minutes, your heat is too high, and the center will almost certainly remain raw. Covering the pan during the first four minutes creates a small steam chamber that helps set the structure quickly.
Yield, Storage, and Troubleshooting Common Failures
This specific configuration yields 10 muffins when using a standard 3-inch cutter. Each muffin contains approximately 161 kcal, making them a relatively light option for a satisfying breakfast. Because these are made without preservatives, they will firm up faster than store-bought versions. I suggest storing them in an airtight container at room temperature for up to two days. If you need them to last longer, they respond exceptionally well to freezing.
For long-term storage, slice the muffins before freezing. This allows you to pull a single piece directly from the freezer and place it in the toaster, which effectively revitalizes the interior while crisping the edges. In my testing, muffins stored in the refrigerator became stale and tough due to starch retrogradation, so the freezer is always my preferred method for anything beyond a 48-hour window.
Troubleshooting
If you find that your centers are consistently raw, the most likely culprit is your heat management. You must resist the urge to increase the temperature to speed up the process. A low, steady heat allows the moisture inside the dough to turn to steam, which cooks the flour from the inside out. If your muffins lack the internal nooks, check your fermentation time and starter activity. A weak starter or a cold kitchen will result in a sluggish rise and a dense, tight crumb. Ensure your room temperature is truly between 65 and 70 degrees for the full 8-12 hour window.
Sourdough Starter Discard vs. Active Starter Requirements
Using discard instead of active starter is the most common reason for a failed rise in this recipe. While discard can be used in pancakes or crackers where chemical leaveners like baking soda provide the lift, these english muffins rely entirely on the biological activity of the yeast. If your starter is not at its peak when you mix the dough, the resulting muffins will be heavy and flat. Always plan ahead to ensure your starter is bubbly and active before you begin the mixing phase.
Preventing the Most Common Cooking Mistake (Raw Centers)
The raw center issue is almost always a result of impatience. Many cooks see the golden exterior and assume the muffin is finished. However, the density of the dough requires a sustained internal temperature of 200 degrees Fahrenheit to ensure the starches are fully cooked. Using a lid on your skillet during the first half of the cooking process is a vital technique I discovered to trap heat and ensure the middle reaches that target temperature efficiently.
Nutritional Snapshot and Serving Size
Each muffin in this 10-count yield provides 161 kcal. This nutritional profile is based on a single 3-inch muffin. By avoiding the use of oil or butter in the cooking process, we keep the fat content low while focusing on the high-quality carbohydrates provided by the long-fermented flour. This makes them a versatile base for both savory and sweet toppings without adding unnecessary calories during the cooking stage itself.
Conclusion: Your Blueprint for Perfect Sourdough English Muffins
Success in the kitchen is often a matter of controlling variables, and these sourdough english muffins are the perfect example of that principle in action. By moving away from guesswork and adopting a systematic approach to temperature and fermentation, you can produce a bakery-quality product in your own home. The combination of a 200 degree Fahrenheit internal target and a patient overnight proof ensures that every muffin you make will have the perfect texture and flavor.
The engineering mindset taught me that failure is just a data point on the way to a solution. Those early, gummy muffins were necessary for me to understand the critical importance of thermal transfer and hydration. I hope this blueprint provides you with the confidence to tackle the process without fear of inconsistent results. There is a deep satisfaction in cracking open a perfectly toasted muffin and seeing that intricate internal structure you created from scratch.
I encourage you to put this system to the test in your own kitchen. Once you pull your first batch from the skillet, I would love to hear about your experience. Did you hit the 200 degree Fahrenheit target on the first try, or did you have to adjust your burner settings? Share your results and your internal temperature readings in the comments below, so we can continue to refine this process together as a community of precision-focused home cooks.
Sourdough English Muffins Recipe
Equipment
- Non-stick skillet (heavy base recommended)
- Instant-read thermometer
- 3-inch biscuit cutter
- Digital caliper (optional, for dough thickness)
- Parchment lined baking sheet
Ingredients
For Active Sourdough Starter
- 1 tablespoon sourdough starter (to feed) To make ½ cup (100g) active starter
- 1 tablespoon all-purpose flour
- 1 tablespoon water
For Dough Mixing
- 100 g active sourdough starter From the fed starter above
- 1 tablespoon all-purpose flour In addition to the 3 cups below
- 1 tablespoon honey (sugar or maple syrup)
- 1 cup milk
- 3 cups all-purpose flour
- 3 1/2 tablespoons water In addition to starter water above
- 1 teaspoon fine sea salt
For Cooking & Topping
- 1/4 cup cornmeal For sprinkling
Instructions
Activate Starter (12 Hours Prior)
- 12 hours before you plan to mix the dough, add the ingredients to make ½ cup (100 g) of active sourdough starter to a clean jar. Stir until combined, loosely cover the jar and let the starter rise at room temperature.
- The sourdough starter is ready to use when it has doubled in size and there are plenty of bubbles on the surface and sides of the jar.
Mixing and First Rest
- Add 100g of the active starter and the rest of the main dough ingredients (except cornmeal) to a large bowl and use your hands to mix until well combined.
- Cover and let rest 30-60 minutes.
- Turn the dough out onto a floured surface and knead the dough by hand for 5 minutes (A stand mixer with a dough hook attachment can be used on the lowest speed).
Long Fermentation
- Place the dough back into the bowl, cover and let ferment on the counter at room temperature for 8-12 hours (Room temperature should be 65-70°F).
Shaping and Final Proof
- Turn the dough out onto a floured surface, flour the top of the dough and press it out using your fingertips until it is exactly 1/2″ in thickness.
- Use a 3″ biscuit cutter to cut rounds and place them on a parchment lined baking sheet that’s been sprinkled with cornmeal.
- Sprinkle the tops with cornmeal, cover with a tea towel and allow to rise for 1 hour at room temperature.
Cooking the Muffins
- Preheat your non-stick skillet over LOW heat. Place 4 muffins into the skillet spaced 2″ apart, cover, and cook the first side for 4 minutes.
- Turn the muffins over and cook for an additional 4 minutes.
- When done, the center of a muffin should register about 200°F on an instant-read thermometer.


