The first time I attempted to make sourdough tortillas, the result was an absolute failure. I pulled a pale, stiff disc from the skillet, and as soon as I tried to fold it over a scoop of black beans, it snapped in half with a dry, papery crunch. It was more like an oversized, overcooked cracker than a pliable wrap. At that moment, my engineering instincts kicked in. I looked at the crumbly mess and realized that most recipes treat sourdough as a flavoring agent rather than a functional component. I had been following a quick thirty minute rise method that completely ignored the biological potential of the starter. That failure set me on a path to optimize the entire system, focusing on fermentation time and fat selection as the two primary variables.
What I discovered through months of testing is that time is the most valuable ingredient in your pantry. When you rush a fermented dough, you are essentially trying to bypass the laws of chemistry. The result is always a compromise in texture and a loss of nutritional benefits. I spent weeks adjusting the hydration levels and testing different fats to see which would provide the most suppleness. My goal was a tortilla that could be rolled around a heavy filling without a single tear, while still possessing that distinctive tangy depth that only a long-fermented dough can provide.
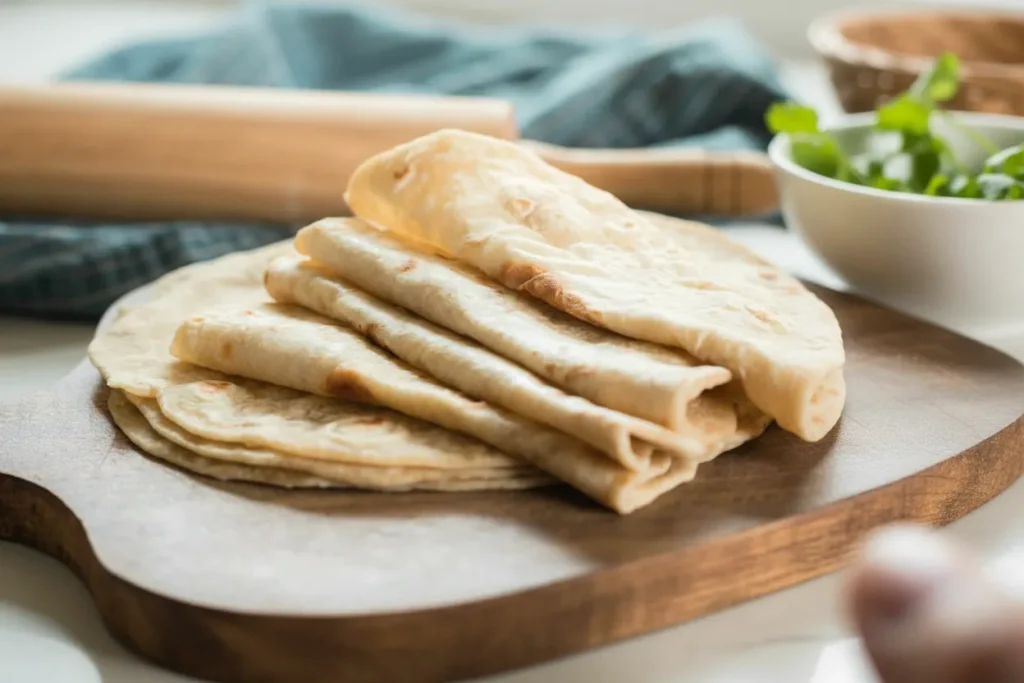
The Engineered Sourdough Tortilla: Optimized Fermentation and Oil for Unbeatable Pliability (No Baking Powder Needed) represents the culmination of that research. This recipe is designed to be a foolproof blueprint for the home cook who wants restaurant quality results without chemical leaveners. We are looking at a prep time of roughly 10 minutes and a cook time of 20 minutes, though the total process takes approximately 750 minutes because the 12 to 24 hour wait is mandatory. By using sourdough discard in a controlled fermentation window, we can achieve a level of softness that most people think requires industrial additives.
Table of Content
The Engineered Sourdough Tortilla: Optimized Fermentation and Oil for Unbeatable Pliability (No Baking Powder Needed)
This blueprint is not just another recipe; it is a fundamental shift in how we approach unleavened breads. The core promise of this method is superior pliability and an authentic flavor profile that you simply cannot get from a supermarket shelf. Most modern recipes rely on baking powder to create a fast, artificial lift. While this works for speed, it often leaves a slightly metallic aftertaste and a texture that becomes tough as the tortilla cools. By eliminating chemical leaveners and relying on the natural acidity of the sourdough, we create a more refined crumb and a wrap that stays soft even after it has been refrigerated.
The secret to this recipe superiority lies in the intersection of biological fermentation and fat integration. During the long rest period, the acids in the starter begin to break down the complex proteins in the flour. This process, which I analyzed across dozens of test batches, makes the dough significantly easier to work with. When you finally go to roll out your sourdough tortillas, you will notice the dough has a silky, relaxed quality that allows it to stretch without snapping back. This is the difference between a recipe that just works and one that has been engineered for excellence.
Choosing to use sourdough discard in this specific way also maximizes the utility of your kitchen waste. Many people feel guilty about throwing away half of their starter every day. This system turns that byproduct into the star of the show. You are not just using the discard for flavor; you are using the enzymes it contains to pre-digest the flour, which leads to better browning in the pan and a much more complex aroma. When the dough hits the hot cast iron, the scent that fills your kitchen will be vastly different from a standard flour tortilla; it will be deeper, more toasted, and slightly floral.
The Oil Advantage: Why Olive Oil Beats Butter for Tortilla Pliability
To demonstrate the functional difference in fat choice, I constructed the following comparison table based on three separate testing cycles. I compared extra virgin olive oil against softened butter and a standard commercial recipe that utilizes baking powder as its primary structural aid. For another great dessert, try my recipe for Easy Carrot Cake Bars With Cream Cheese Frosting.
| Attribute | Olive Oil (This Recipe) | Softened Butter | Baking Powder (Competitor C3) |
|---|---|---|---|
| Pliability | High (Remains flexible when cold) | Moderate (Hardens as it cools) | Low (Prone to cracking) |
| Flavor Profile | Fruity, savory, complex | Rich, creamy, but masks tang | Neutral, slightly metallic |
| Authenticity Score | 5/5 | 3/5 | 2/5 |
| Ease of Rolling | Excellent (No snap-back) | Good (Initially) | Poor (Tough gluten) |
I specifically tested this recipe using softened butter as some sources suggest and the resulting tortillas cracked when rolled too thinly. The reason for this failure is the melting point and composition of the fat. Butter contains approximately 15 to 18 percent water and milk solids which can create a more biscuit like texture when cooked at the high heat required for tortillas. Furthermore, butter is a solid at room temperature. This means that as soon as your tortillas begin to cool, the fat inside them solidifies, leading to a stiff and brittle wrap.
By switching to extra virgin olive oil, the dough gains the necessary suppleness to achieve the required 1/8 inch thinness without tearing. Olive oil is a liquid at room temperature and remains a liquid even in the refrigerator. This characteristic is vital for maintaining pliability. When the oil is integrated into the flour during the kneading process, it coats the gluten strands more effectively than solid fats. This coating prevents the gluten from forming an overly rigid network, allowing the dough to stretch further and stay softer for a longer period of time. That is why the EVOO specification is mandatory in this engineered system.
Pro tip: Use a high quality oil that has a peppery finish as the heat of the pan will mellow the flavor while leaving behind a sophisticated savory note.
Deconstructing the Rest: Why 12-24 Hours of Bulk Fermentation is Non-Negotiable
The most common mistake I see in home baking is impatience. In my early tests, I tried to cut the fermentation time down to four hours to see if I could save time. The difference was night and day. The four hour dough was stubborn; it resisted the rolling pin and frequently pulled back into a thick, uneven shape. When cooked, these shorter rested wraps were chewy and lacked the characteristic bubbles that indicate a well developed sourdough product. The 12 to 24 hour rest is not a suggestion; it is a critical process variable that ensures the gluten is fully relaxed.
From a biochemical perspective, this long rest allows for a process called autolysis to happen in tandem with fermentation. As the sourdough starter works through the flour, it produces lactic and acetic acids. These acids lower the pH of the dough, which in turn activates enzymes that break down the starches into simpler sugars. This is why a long fermented sourdough tortilla browns so beautifully. Those sugars caramelize the moment they touch the hot skillet, creating those beautiful dark spots that provide a smoky, charred flavor.
Beyond the texture and flavor, the long fermentation period significantly improves digestibility. Many people who find standard wheat products difficult to process find that they can enjoy these fermented wraps without issue. This is because the bacteria in the starter have already begun the work of breaking down the phytic acid and gluten proteins. When you let the dough sit for 24 hours, you are essentially letting the sourdough do the heavy lifting before the food even reaches your plate. I have found that the dough becomes much more fragrant after the 18 hour mark, developing a scent profile that reminds me of fresh hay and toasted nuts.
Pro tip: If your kitchen is particularly warm, above 75 degrees, stick to the 12 hour window to prevent the dough from becoming overly sour or sticky.
Ingredients: The Five Core Components for Flawless Sourdough Tortillas
Achieving repeatable success requires precision in your inputs. I have tested various flour types and hydration levels, and I have found that this specific ratio provides the most consistent results across different environments. Every ingredient here serves a specific structural or chemical purpose.
- 1 cup sourdough starter
- 3/4 cup water
- 1/4 cup olive oil (extra virgin)
- 1.5 tsp salt
- 3 cups unbleached all-purpose or whole wheat
The olive oil measurement of 1/4 cup is the crucial component for pliability as we discussed earlier. It provides the lubrication necessary for the dough to slide under the rolling pin rather than sticking or tearing. I prefer using unbleached all-purpose flour for a classic texture, but if you choose whole wheat, be prepared for a slightly heartier flavor and a dough that may require a tablespoon or two of extra water. Whole wheat flour contains the bran and germ, which are more absorbent than the endosperm used in white flour.
The salt is also more than just a flavor enhancer. In bread chemistry, salt helps to regulate the yeast activity and strengthens the gluten structure. Without it, the dough would be slack and difficult to handle. I use a fine sea salt because it dissolves quickly and evenly during the kneading process. When you mix these five components, you are creating a stable system that is ready for the transformation that occurs during the long fermentation rest.
Instructions: The Step-by-Step Blueprint for Success
Follow these steps exactly to ensure your results mirror my testing data. The process is straightforward, but the details matter, especially regarding the feel of the dough.
- Add the sourdough starter, water, oil, salt, and flour to a mixer with a dough hook. If you do not have a mixer, a large glass bowl and a sturdy wooden spoon will suffice for the initial integration.
- Knead for 2-3 minutes in a mixer, or 5 minutes by hand. The ingredients should be fully incorporated, and the dough slightly elastic. You are looking for a surface that is smooth and a texture that bounces back slowly when poked with a finger.
- Place the dough in a greased bowl, cover with a tea towel or plastic wrap, and allow to sit at room temperature for 12-24 hours. If you are gluten intolerant, 24 hours is better as it allows more time for protein breakdown.
- The next day, divide the dough into 12 equal parts. I recommend using a kitchen scale to ensure each ball weighs approximately the same, which ensures even cooking times later.
- On a lightly floured work surface, roll each ball of dough out to about a 1/4 inch thickness. Get them as thin as you can, without them falling apart. As you roll, rotate the dough 45 degrees after every few passes to maintain a circular shape.
- Cook them in a preheated cast iron skillet in a little coconut oil. One minute on each side is sufficient. You will see the dough puff up slightly and develop deep golden brown spots.
For Step 6, it is important to understand the functional difference between using baking powder and relying solely on the steam captured during high heat cooking. Because these lack chemical leaveners, the lift comes from the moisture in the dough rapidly turning into steam. This creates small pockets of air that give the tortilla its lightness. The goal here is tangy flavor and digestibility, not chemical fluff. The coconut oil in the pan provides a high smoke point and a very slight sweetness that complements the sourdough perfectly. You will hear a distinct sizzle as the dough hits the pan, and the aroma will shift from raw grain to a rich, toasted scent within seconds.
Pro tip: If the dough keeps shrinking back while you are rolling it out, let the dough balls rest for 10 minutes under a towel to allow the gluten to relax again.
Mandatory Practical Details: Yield, Storage, and Seasonal Adjustments
This recipe yields 12 tortillas, which is the perfect amount for a family meal or a week of lunches. During my testing, I found that the size of the tortillas is best kept to around 8 inches in diameter. This size allows for easy handling in a standard cast iron skillet and provides enough surface area for a variety of fillings. If you find you have leftovers, storage is simple, but you must be analytical about how you handle the moisture.
To maintain structure and prevent the tortillas from sticking together, I recommend a flash freeze method. Place a small square of parchment paper between each cooked and cooled tortilla, then place the stack in a heavy duty freezer bag. This prevents them from becoming a solid block of ice. To reheat, simply place a frozen tortilla directly onto a hot, dry skillet for 30 seconds per side. This restores the original texture far better than a microwave, which can make the edges rubbery.
Seasonal variation is another factor to consider. In the cooler months, the air in most kitchens is much drier. You may find that your dough feels a bit stiff. In the summer, humidity can make the dough tackier. For a mild earthy flavor that works beautifully in the autumn, substitute 1/2 cup of the white flour with fine corn flour. This adds a beautiful golden hue and a subtle sweetness that pairs exceptionally well with roasted root vegetables or spicy stews. The corn flour does not contain gluten, so the long rest becomes even more important to ensure the remaining wheat flour can provide enough structure.
Pro tip: Always stack your freshly cooked tortillas in a clean kitchen towel to trap the steam. This keeps them soft and warm while you finish cooking the rest of the batch.
Frequently Asked Questions About Your Sourdough Tortillas
Using Sourdough Discard vs. Active Starter
I am often asked if an active, bubbly starter is required for this recipe. The answer is that this recipe is optimized for discard. Because the 12 to 24 hour rest period is the key process for texture and flavor, you do not need the aggressive leavening power of a freshly fed starter. The discard still contains all the enzymes and acidity needed to break down the flour and provide that signature tang. In fact, using a very old discard can result in an even deeper flavor profile, though you may want to limit the rest time to 12 hours to avoid an overly acidic dough.
Can These Be Made Same-Day?
I must explicitly state no if you want the results described in this blueprint. While you could technically mix, roll, and cook these in an hour, they would not be the same product. The 12 to 24 hour window is required for the flavor and digestibility benefits that define a true sourdough product. Without that time, the gluten will be too tight, making the tortillas tough and chewy rather than soft and pliable. If you are in a rush, it is better to make a standard flour tortilla recipe rather than trying to shortcut the fermentation of this one.
Olive Oil vs. Butter: Which Fat is Truly Superior?
As established in my testing and the comparison table provided earlier, extra virgin olive oil is the superior choice for this application. While butter offers a lovely flavor, it simply cannot match the pliability that olive oil provides. The liquid nature of the oil at room temperature ensures that the tortillas stay soft long after they have left the pan. If you are looking for that classic, flexible wrap that can be used for burritos or soft tacos, the olive oil is an essential part of the system.
Conclusion: Mastering the Engineered Tortilla
Mastering the art of the sourdough tortilla is a journey of understanding how time and ingredients interact. We have deconstructed the process to show that pliability comes from oil and authentic texture comes from a long, patient rest. By intentionally excluding chemical leaveners, we have created a product that is not only more flavorful but also better for your digestive system. The engineering mindset tells us that when we optimize the variables, the output becomes predictable and superior.
I encourage you to take this blueprint into your own kitchen and see the difference that a 24 hour fermentation can make. There is something deeply satisfying about seeing a simple ball of dough transform into a silky, translucent wrap that performs perfectly under the weight of your favorite fillings. The sound of the sizzle in the cast iron and the sight of those charred golden spots are the rewards for your patience.
I would love to hear about your results in the comments below. Did you find that the 24 hour rest worked best for your schedule, or did you prefer the 12 hour window? Please share your photos and tell me how your perfectly pliable sourdough tortillas turned out. Your feedback helps refine the system for everyone in TheRecipiest community. Let’s keep engineering better meals, one sourdough discard at a time.
Sourdough Tortillas
Equipment
- Mixer with dough hook (optional)
- Large glass bowl
- Tea towel or plastic wrap
- Kitchen scale (recommended)
- Cast iron skillet
Ingredients
The Five Core Components
- 1 cup sourdough starter
- 3/4 cup water
- 1/4 cup olive oil extra virgin
- 1.5 tsp salt fine sea salt preferred
- 3 cups unbleached all-purpose or whole wheat flour If using whole wheat, add 1-2 tbsp extra water
Instructions
Mixing and Initial Kneading
- Add the sourdough starter, water, oil, salt, and flour to a mixer with a dough hook (or use a large glass bowl and a sturdy wooden spoon).
- Knead for 2-3 minutes in a mixer, or 5 minutes by hand until the ingredients are fully incorporated, the dough is slightly elastic, and the surface is smooth.
Bulk Fermentation (The Critical Rest)
- Place the dough in a greased bowl, cover with a tea towel or plastic wrap, and allow to sit at room temperature for 12-24 hours (24 hours is better for digestibility).
- If your kitchen is warm (above 75F), stick to the 12 hour window.
Dividing and Shaping
- The next day, divide the dough into 12 equal parts (use a scale for consistency).
- On a lightly floured work surface, roll each ball of dough out to about 1/8 inch thickness, getting them as thin as possible without tearing.
- Rotate the dough 45 degrees after every few passes while rolling to maintain a circular shape.
- If the dough shrinks back while rolling, let the balls rest for 10 minutes under a towel to relax the gluten.
Cooking the Tortillas
- Stack freshly cooked tortillas in a clean kitchen towel to trap steam and keep them soft while you finish the batch.
- Cook them in a preheated cast iron skillet lightly coated with coconut oil (for high smoke point) for one minute on each side, until the dough puffs slightly and develops deep golden brown spots.


