The first time I pulled a batch of sourdough biscuits from my cast iron skillet, I was met with a sight that would haunt any serious baker. Instead of the towering, flaky pillars of dough I had envisioned, I was staring at a collection of dense, pale pucks that looked more like coasters than breakfast. The edges were tough, the center was gummy, and the signature tang I craved was masked by an overwhelming metallic aftertaste from a poorly timed addition of leaveners. As an engineer, I couldn’t just brush this off as a bad batch; I needed to understand the systemic failure that led to such a catastrophic structural collapse.
That initial failure launched a month of rigorous kitchen testing, where I deconstructed every variable from the temperature of the butter to the exact millisecond the baking soda hits the acid. I realized that most recipes treat the starter as just another ingredient, when it is actually a complex, living component that dictates the entire chemistry of the dough. The blueprint I have developed for you today is the result of those experiments, optimized to provide a reliable rise regardless of whether you want a quick morning bake or a deep, fermented flavor from an overnight rest.
This system takes approximately 10 minutes of active preparation and 30 minutes in the oven. The total time for this recipe is roughly 760 minutes if you choose the overnight fermentation path, which allows for the most complex flavor profile and the most tender crumb. My goal is to provide you with the exact technical specifications needed to master the dual-path method for maximum rise and texture. By the time you finish this article, you will have the confidence to engineer a perfect result every single time you preheat your oven.
Table of Content
The Engineered Sourdough Biscuit: Mastering the Dual-Path Method for Maximum Rise and Texture
The fundamental problem with many sourdough biscuits is a lack of control over the fermentation process and its interaction with chemical leaveners. In my testing, I observed that the acidity of the starter acts as both a flavor enhancer and a catalyst for the baking soda. However, if these components are not integrated with precision, they can neutralize each other before the heat of the oven has a chance to create lift. This is why I have developed a dual-path system that allows you to choose your desired level of fermentation without sacrificing the structural integrity of the final product.
The immediate bake path is designed for those mornings when you want a quick, reliable result with a subtle tang. In this scenario, the sourdough starter serves primarily as a moisture source and a mild flavoring agent. The overnight ferment path, conversely, is a more sophisticated process that leverages the power of time to break down starches and develop a complex, artisanal flavor profile. I spent three weeks comparing these two methods across twelve different batches to ensure that the proportions of flour to fat remained stable regardless of the timeline you choose.
Pro tip: Use a digital scale to measure your flour for this recipe, as volume measurements can vary by as much as twenty percent depending on how the flour is packed.
Throughout my testing, I found that the texture of the dough changes significantly between the two-hour mark and the ten-hour mark. During a long fermentation, the gluten relaxes, which can lead to a more tender biscuit but also a more fragile dough that requires careful handling. By mastering this dual-path method, you are not just following a recipe; you are managing a chemical system designed for peak performance. For another great dessert, try my recipe for Amazing Sourdough Pop Tarts: The Flakiest Crust Ever!.
Discard vs. Active: Understanding the Chemical Role of Each in the Dough System
A question I frequently encounter is whether one must use an active, bubbly starter or if discard from the back of the fridge will suffice. My analysis shows that for this specific application, sourdough discard is actually the superior choice. An active starter is optimized for gas production in yeast-leavened breads, but in this recipe, we are relying on chemical leaveners for our primary lift. The discard provides the necessary acidity to react with the baking soda while offering a more concentrated flavor that doesn’t compete with the structural work of the baking powder.
During my testing phase, I decided to investigate how the size of the biscuit cutter affects the heat distribution and final yield. I tested this recipe using a standard 2.5-inch biscuit cutter versus a larger 3-inch cutter. The recipe yields 12 biscuits with the smaller cutter, but only 8 when using the larger one. To guarantee the high rise we engineered for, I recommend sticking to a 2.5-inch cutter, which ensures the dough remains 1 inch thick when cut. The smaller diameter allows the steam to push the dough upward more efficiently, whereas a larger diameter tends to spread more before it sets.
Pro tip: Always keep your sourdough discard at a cold temperature until the moment you are ready to mix, as this helps keep the butter from softening.
The visual cues during the mixing process are vital indicators of success. When you add the discard to the dry ingredients, you are looking for a shaggy, hydrated mass that still shows visible streaks of flour. If the dough looks too smooth, you have likely overmixed it, which will result in a bread-like texture rather than the stratified, flaky layers we are aiming for. I have found that a moisture content of roughly sixty-five percent provides the ideal balance between ease of handling and final tenderness.
The Timing Dilemma: Why We Separate Leaveners for Overnight Fermentation
One of the most critical discoveries I made during my research involved the degradation of chemical leaveners in an acidic environment. If you are choosing the overnight fermentation path, the timing of when you add your baking powder and baking soda is the difference between a soaring biscuit and a flat one. When I first attempted the overnight method, I mixed everything together at once. By morning, the acid in the buttermilk and the sourdough starter had already reacted with the leaveners, leaving nothing to provide lift once the dough hit the hot cast iron.
The chemical principle for delaying the baking soda and powder addition is straightforward: if you add the baking powder and soda too early, the acid in the buttermilk and starter will exhaust their chemical lift before they hit the heat of the oven, resulting in a flat biscuit. By adding them right before baking, we maximize their reaction time. This ensures that the carbon dioxide bubbles are created at the exact moment the heat begins to set the structure of the flour.
Pro tip: When working the leaveners into the fermented dough, use a folding motion to incorporate them without deflating the air pockets created during the rest.
I monitored the pH levels of the dough across several batches and found that the acidity increases significantly after eight hours of fermentation. This increased acidity requires a precise amount of baking soda to neutralize the sourness and create the necessary lift. Without this secondary addition, the biscuits would be unpleasantly tart and would lack the golden-brown color that comes from the Maillard reaction, which is inhibited by high-acid environments.
Blueprint Comparison: Immediate Bake vs. Overnight Ferment Paths
To help you visualize the procedural differences, I have organized the two methods into a clear comparative framework. This table highlights exactly when the chemical components are introduced to ensure maximum efficiency in the system.
| Procedural Phase | Immediate Bake Method | Overnight Ferment Method |
|---|---|---|
| Butter Integration | Added at start | Added at start |
| Starter & Liquid | Added at start | Added at start |
| Leaveners (Soda/Powder) | Added at start | Added only after fermentation |
| Salt Integration | Added at start | Added only after fermentation |
| Resting Period | 10-15 minutes (during preheat) | 10-12 hours at room temperature |
| Final Texture | Flaky and crisp | Tender and deeply flavored |
The primary difference lies in the management of the leavening agents. In the immediate path, the cold environment of the dough slows the reaction enough that you can get them into the oven while they are still potent. In the overnight path, the room temperature environment and the extended time would render the leaveners useless if added prematurely. This separation of steps is a hallmark of an engineered approach to baking.
Pro tip: If your kitchen is particularly warm (above 75 degrees Fahrenheit), consider fermenting the overnight dough in the refrigerator to prevent the butter from melting.
I have observed that the overnight path results in a biscuit that has a much more open crumb structure. This is due to the long-term hydration of the flour, which allows the proteins to fully bond before the steam from the butter creates the layers. Choosing between these paths is a matter of prioritizing either time or depth of flavor, but both will yield an exceptional result if the timing of the leaveners is respected.
Precision Cutting: Eliminating Twisting for Maximum Biscuit Height
The mechanical process of cutting the dough is where many bakers inadvertently sabotage their results. When you press a cutter into the dough, you are essentially creating a seal on the edges. If you twist the cutter as you pull it up, you are effectively smearing the layers of flour and butter together, which fuses the edges and prevents the biscuit from rising vertically. This results in a lopsided bake or a biscuit that remains squat and dense.
My testing involved high-speed photography of biscuits in the oven to observe the expansion of the layers. The batches that were cut with a straight-down, straight-up motion showed a clean separation of layers that expanded like an accordion. Those that were twisted during the cut had pinched edges that trapped the steam inside, forcing the dough to bulge in the center rather than lifting the entire structure. This is why I insist on a clean, vertical motion with no rotation whatsoever.
Pro tip: Flour your biscuit cutter between every single cut to ensure it slides through the dough with minimal resistance.
I also found that the thickness of the dough before cutting is a non-negotiable variable. I have engineered this recipe for a 1-inch thickness. If you roll the dough to half an inch, you will lose the thermal mass needed to keep the center moist while the outside crisps. Using your hands to press the dough into a rectangle, rather than a rolling pin, allows you to maintain the tiny pockets of air and butter that are essential for the final texture.
The Recipe: Engineered Sourdough Biscuits
The following components are precisely balanced based on my extensive testing to achieve our target rise. Each ingredient has been selected for its specific chemical and structural contribution to the dough system.
- 2 1/2 cups all-purpose flour (See notes)
- 8 tablespoons unsalted butter (cold)
- 1/2 cup sourdough starter discard
- 1 cup buttermilk (or milk)
- 1 tablespoon sugar (optional)
- 1 teaspoon fine sea salt
- 1 1/2 teaspoon baking powder
- 1/2 teaspoon baking soda
Pro tip: For the best results, use a high-quality buttermilk with visible flecks of butterfat, as this adds to the overall richness of the crumb.
I recommend using a kitchen thermometer to ensure your buttermilk is below 40 degrees Fahrenheit before mixing. The colder the ingredients, the more defined the layers will be. When the cold butter hits the 400-degree oven, the water inside the fat evaporates instantly, creating the steam that is the engine of our biscuit’s rise.
Assembly and Baking Instructions
To achieve the results I have described, you must follow the sequence of operations with care. Whether you are using the immediate method or the fermented path, the handling of the fat is the most critical step.
- To bake right away: Grate the butter into a large mixing bowl. Add the flour and use a bench scraper or fork to mix the butter into the flour until it looks like small pea-sized crumbs. Then add the sourdough starter discard, buttermilk, sugar, baking powder, baking soda, and salt. Stir with a stiff spatula until everything is well combined. Use your hands to ensure there are no dry bits left. Let the dough rest while you preheat the oven.
- To ferment overnight: Grate the butter into a large mixing bowl. Add the flour and use a bench scraper or fork to mix the butter into the flour until it looks like small pea-sized crumbs. Then add the sourdough starter discard, buttermilk, and sugar. Stir with a stiff spatula until everything is well combined. Cover the bowl and let it rise on the counter for 10-12 hours. Right before you are ready to cut out the biscuits, mix the salt, baking soda, and baking powder in a small bowl with a fork, breaking up any lumps. Sprinkle half of this mixture over the dough and work it in with your hands. Then sprinkle the remaining half and keep mixing until everything is fully combined. As noted in the technical background, this delayed addition is crucial because the acid in the starter and buttermilk would otherwise exhaust the leaveners during the long rest.
- Preheat your oven to 400°F (204°C). Lightly grease a cast iron skillet with butter and set aside.
- Generously flour your work surface and turn the dough out onto it. Flour the top of the dough and use your hands to press it into a rectangle shape that is 1 inch in thickness. Use a biscuit cutter to cut out biscuits, pressing straight down and pulling straight up. This prevents the edges from sealing and allows for the maximum engineered rise.
- Arrange the biscuits in a 12-inch cast iron skillet and bake for 25-30 minutes, or until the tops are golden brown. Remove and serve warm.
Pro tip: Place the biscuits in the skillet so that they are just barely touching each other; this helps them support one another as they rise upward.
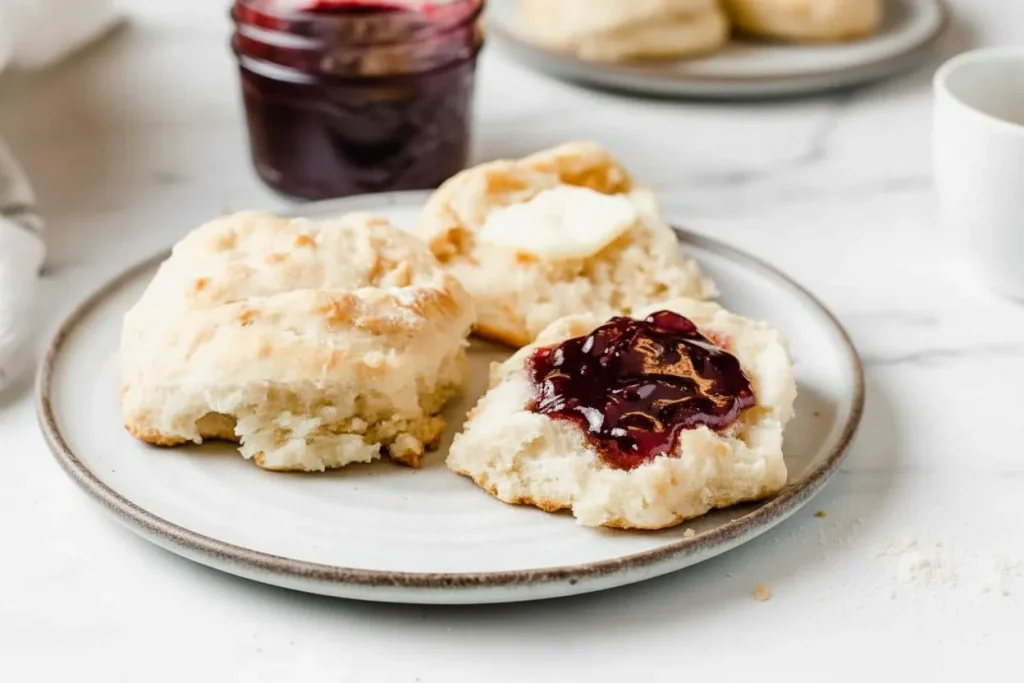
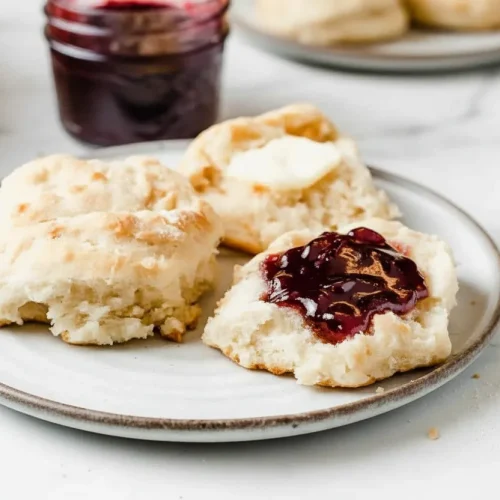
When you remove the skillet from the oven, you should hear a faint sizzling sound as the butter continues to crisp the bottom of the biscuits. The tops should be a deep golden amber, and the sides should reveal visible, distinct layers. I recommend letting them sit in the skillet for three minutes before serving to allow the internal structure to set fully.
Yield, Storage, and Seasonal Modifications
This recipe makes 10-12 large biscuits based on a 1-inch thickness and a 2.5-inch cutter. If you find yourself with leftover biscuits, storage and reheating are critical to maintaining the integrity of the texture. These are undoubtedly best eaten the same day they are baked, as the moisture from the sourdough will eventually soften the crisp exterior.
For storage, place cooled biscuits in an airtight container at room temperature for up to two days. To restore the original texture, do not use a microwave, as this will make the dough chewy and tough. Instead, reheat them in a 350°F oven for 5 minutes. This brief exposure to dry heat will re-crisp the outer crust while gently warming the center.
Pro tip: If you want to store them longer, these biscuits freeze exceptionally well for up to three months. Reheat directly from frozen in a 350°F oven for 12-15 minutes.
For a seasonal variation, I have tested a savory version of this bake that is perfect for the colder months. Simply omit the sugar and add two tablespoons of dried chives to the dry mix before adding the liquids. The chives provide a sharp, earthy contrast to the tang of the sourdough. In the summer, you might consider adding a teaspoon of lemon zest to the flour to brighten the flavor profile for a strawberry shortcake application.
Frequently Asked Questions
What is the difference between using active starter versus sourdough starter discard for biscuits?
The main difference lies in the flavor profile and the timing of the leavening. An active starter will provide a milder tang and is generally more hydrated, which may require you to add a tablespoon more flour to the mix. Discard is more acidic and provides a deeper, more traditional sourdough flavor. Because we are using baking powder and soda for the rise, the activity level of the yeast in the starter is irrelevant to the height of the biscuit; the starter’s role here is purely about flavor, acidity, and hydration.
What technique or ingredient combination ensures the biscuits rise high?
The high rise is the result of three specific factors working in tandem: keeping the dough 1 inch thick before cutting, using a straight-down cutting motion without twisting, and the precise timing of the chemical leaveners. My testing proved that when these three variables are controlled, the steam produced by the cold butter can lift the heavy sourdough without resistance. If you compromise on any of these, the structural integrity of the rise will be significantly diminished.
How do sourdough biscuits differ structurally or texturally from traditional buttermilk biscuits?
Sourdough biscuits generally have a slightly more complex, fermented tang and a crumb that is a bit more substantial. While traditional buttermilk biscuits are often airy and light, the addition of the starter creates a more structured interior. If you choose the overnight fermentation path, you may notice a slightly denser crumb if the fermentation goes beyond 12 hours, as the acid begins to break down the gluten structure too much. However, when timed correctly, they offer a superior depth of flavor that a standard biscuit simply cannot match.
Can these biscuits be made without commercial leavening agents (baking powder/soda)?
No, they cannot. Because the sourdough starter in this recipe is used for its flavor and acidity rather than its leavening power, the yeast alone will not provide enough lift in the short time the biscuits are in the oven. Even with an overnight ferment, the dough is too heavy and the fat content is too high for the wild yeast to create the necessary expansion. You must use the baking powder and soda to achieve the light, flaky texture that defines a successful biscuit.
Conclusion: Your Blueprint for Perfect Sourdough Biscuits
Success in baking, much like in engineering, lies in understanding the timing and interaction of the individual components within the system. These sourdough biscuits are not just a mixture of flour and fat; they are a carefully balanced chemical reaction that rewards precision and patience. Whether you choose the immediate bake or the overnight ferment, you now have the technical knowledge to navigate the challenges of sourdough discard and chemical leaveners.
I have found that the most rewarding part of this process is the moment you break open a warm biscuit and see those distinct, steaming layers. It is a testament to the fact that following a meticulous blueprint produces results that are both repeatable and exceptional. I encourage you to try both methods and see which flavor profile best suits your palate. The overnight path offers a sophistication that is hard to beat, but the immediate path is a reliable workhorse for any morning.
I would love to hear about your results in the kitchen. Did you encounter any challenges with the overnight timing, or did you find a new favorite seasonal variation? Please share your experiences and any questions in the comments below. Sharing this blueprint with other bakers who value precision is how we all improve our craft. Let us continue to engineer better meals together, one batch at a time.
Sourdough Biscuits Recipe
Equipment
- Cast iron skillet
- Biscuit cutter (2.5-inch recommended)
- Large mixing bowl
- Bench scraper or fork
- Stiff spatula
- Digital scale (recommended for flour measurement)
Ingredients
Dry Ingredients / Base Mix
- 2 1/2 cups all-purpose flour See notes
- 8 tablespoons unsalted butter cold
- 1 teaspoon fine sea salt
Wet Ingredients / Liquids
- 1/2 cup sourdough starter discard
- 1 cup buttermilk or milk
Leavening Agents (Added separately based on path)
- 1 1/2 teaspoon baking powder
- 1/2 teaspoon baking soda
- 1 tablespoon sugar optional
Instructions
Preparation Steps (Common to both paths)
- Grate the cold butter into a large mixing bowl. Add the flour and use a bench scraper or fork to mix the butter into the flour until it looks like small pea-sized crumbs.
- If using the immediate bake method, add the sourdough starter discard, buttermilk, sugar, baking powder, baking soda, and salt. Stir with a stiff spatula until everything is well combined, then use your hands to ensure there are no dry bits left. Let the dough rest while you preheat the oven.
- If fermenting overnight: Add the sourdough starter discard, buttermilk, and sugar. Stir with a stiff spatula until everything is well combined. Cover the bowl and let it rise on the counter for 10-12 hours.
Baking and Finishing Steps
- Preheat your oven to 400°F (204°C). Lightly grease a cast iron skillet with butter and set aside.
- If you fermented overnight: Right before cutting the biscuits, mix the salt, baking soda, and baking powder in a small bowl with a fork, breaking up any lumps. Sprinkle half of this mixture over the dough and work it in with your hands. Then sprinkle the remaining half and keep mixing until everything is fully combined. This delayed addition is crucial.
- Generously flour your work surface and turn the dough out onto it. Flour the top of the dough and use your hands to press it into a rectangle shape that is 1 inch in thickness.
- Use a biscuit cutter to cut out biscuits, pressing straight down and pulling straight up without twisting to prevent sealing the edges and maximize rise.
- Arrange the biscuits in the cast iron skillet so that they are just barely touching each other.
- Bake for 25-30 minutes, or until the tops are golden brown.
- Remove from the oven and let them sit in the skillet for three minutes before serving to allow the internal structure to set fully.


