The first time I attempted to make a batch of granola using my fermented starter discard, I followed a popular recipe that insisted I stir the tray every ten minutes to ensure even browning. The result was a categorical system failure. Instead of the chunky, satisfying clusters I envisioned, I ended up with a pile of loose, sandy oats that lacked any structural integrity. The agitation of stirring had broken every bond the binder was trying to form. As an engineer, I knew I had encountered a flaw in the process design rather than a problem with the ingredients themselves. I spent the next several weeks deconstructing the mechanics of how oats, sugars, and starches interact under heat to develop a more reliable method.
My Hands-Off System: How Perfectly Balanced Binders Create Massive Sourdough Granola Clusters Without Mid-Bake Stirring is the culmination of those experiments. This approach treats the mixture as a single cohesive unit during the baking phase, allowing the heat to weld the ingredients together before they are ever disturbed. By optimizing the ratio of hydration to solids, I have reduced the active labor while significantly improving the quality of the output. This recipe requires a prep time of 10 minutes and a cook time of 20 minutes, bringing the total time to just 30 minutes from start to finish.
The beauty of this sourdough discard granola lies in how it utilizes the unique properties of the starter to create a superior texture. Most recipes rely solely on sugar or oil to create clumps, but those can often lead to a product that is either too greasy or overly sweet. By integrating the fermented flour and water mixture into the system, I have harnessed the natural starches and proteins to act as a structural scaffolding. This allows for a deeper crunch that does not feel heavy on the palate. I have engineered this process to be foolproof, ensuring that even a novice baker can achieve professional results on their first attempt, for another great dessert, try my Easy Carrot Cake Bars With Cream Cheese Frosting.
Table of Content
Cluster Science: Why Pressing Tightly and Walking Away Guarantees Clumps (No Stirring Required)
The most common mistake I observe in home granola production is the impulse to interfere with the tray while it is in the oven. Through my testing, I discovered that the critical window for cluster formation occurs between the twelfth and eighteenth minute of baking. During this time, the moisture from the starter and the honey begins to evaporate, leaving behind a concentrated syrup that acts as a high-strength adhesive. If you stir the mixture during this phase, you are effectively shearing those bonds before they have reached their maximum tensile strength.
I conducted a series of tests where I compared three different batches of sourdough granola. In the first batch, I stirred every five minutes; the result was a fine, cereal-like consistency with zero clusters. In the second batch, I stirred once at the ten-minute mark, which produced small, crumbly pieces about the size of a pea. In the final batch, I pressed the mixture firmly into the pan and left it completely undisturbed until it was fully cooled. This third method produced large, shatteringly crisp shards that could be broken by hand into the exact size I desired.
To achieve this, you must treat the pre-baking preparation as a foundational step. Pressing the mixture down firmly onto the tray lined with parchment paper is not optional; it is the physical mechanism that replaces the need for stirring. By compressing the oats, nuts, and seeds into a dense layer, you minimize the air pockets between the ingredients. This allows the heat to conduct more evenly through the mass and ensures that every oat is in direct contact with the binder.
Pro tip: Use the bottom of a flat measuring cup or a metal spatula to press the mixture into the corners of the pan, ensuring a uniform thickness across the entire surface.
The resulting texture is a revelation. When you pull the tray from the oven, the granola will still feel slightly soft to the touch, which often tricks people into thinking it needs more time. However, the cooling process is where the final structural set occurs. As the temperature drops, the sugars solidify and the starches from the sourdough discard lock into place. If you wait until the tray is completely cool to the touch before breaking it up, you will be rewarded with clusters that maintain their crunch even when submerged in milk or yogurt.
The Critical Binder Ratio: Optimizing Starter, Oil, and Honey for Even Toasting at 320°F
Temperature control is the next critical variable in the granola system. I have found that a standard 350 degree oven is far too aggressive for a mixture containing both honey and fermented flour. Honey has a high fructose content, which means it begins to caramelize and eventually scorch at a much lower temperature than granulated sugar. When you add the complex carbohydrates of a sourdough starter to the mix, the risk of burning increases exponentially. My testing led me to settle on 320 degrees Fahrenheit as the optimal thermal setting for even dehydration and browning.
The sourdough starter performs a chemical function that goes beyond mere flavor. The mild acidity of the starter helps to tenderize the outer husk of the rolled oats, allowing the flavors of vanilla and nutmeg to penetrate more deeply. Furthermore, the gluten structure within the starter provides a delicate scaffolding that supports the weight of the heavier nuts and seeds. This allows us to use less honey and oil than traditional recipes while still achieving a robust crunch. It is a more efficient use of resources that results in a more balanced nutritional profile.
When I analyzed the ratios, I looked for the point of diminishing returns regarding moisture. If the mixture is too wet, it takes too long to dehydrate, leading to tough, chewy granola. If it is too dry, the clusters will not form. The 50 grams of starter in this recipe provides exactly the necessary moisture barrier. It coats each oat in a thin film that protects it from the direct heat of the oven while facilitating the Maillard reaction, which is the chemical process responsible for that deep, nutty flavor and golden color.
Pro tip: If your sourdough discard is particularly thin or watery, reduce the coconut oil by a few grams to maintain the proper viscosity of the binder.
I observed that the aroma of the kitchen changes significantly around the fifteen-minute mark. Initially, you will smell the bright, floral notes of the honey and the sharp tang of the starter. As the clock nears twenty minutes, the scent shifts to a deeper, toasted profile reminiscent of browned butter and warm spices. This olfactory cue is your most reliable indicator of doneness. Because every oven is calibrated differently, I recommend using your nose as the primary sensor for determining when to pull the tray.
Ingredients for Your Perfect Batch of Sourdough Discard Granola
The selection of ingredients is the primary input of our system, and their quality directly impacts the final output. I have designed this list to provide a balance of textures, from the soft resistance of dried apricots to the sharp snap of toasted walnuts.
Wet Ingredients:
- 50 g Sourdough Starter (can be active or discard)
- 20 g Honey (or maple syrup)
- 10 g Coconut Oil (melted)
- 5 g Vanilla Extract
Dry Ingredients:
- 100 g Rolled Oats
- 50 g Nuts (I used walnuts and pecans)
- 50 g Seeds (I used hemp and pumpkin seeds)
- 2 g Cinnamon (1/2 teaspoon)
- 1 g Nutmeg (1/4 teaspoon)
- 2 g Salt (1/4 teaspoon)
Optional Add-ins:
- 50 g Dried Fruit (I used raisins and chopped, dried apricots)
I intentionally tested the ratios above to avoid excessive binder, which is why this recipe works without stirring; the 50 grams of starter provides exactly the necessary moisture barrier for perfect toasting. Using too much honey or oil would result in a greasy residue on the roof of the mouth, whereas this specific balance leaves the palate clean and satisfied. The inclusion of salt is also non-negotiable from an engineering perspective, as it acts as a flavor enhancer that bridges the gap between the savory tang of the sourdough and the sweetness of the honey.
Instructions: System Checkpoints for Superior Clumping
Efficiency in the kitchen is achieved through a logical sequence of operations. Follow these steps precisely to ensure the structural integrity of your granola clusters.
- Preheat your oven to 320F/160C. Ensuring the oven is at a stable temperature before the tray enters is vital for immediate moisture evaporation.
- Add the sourdough starter, honey, vanilla and coconut oil together in a bowl. Mix with a spoon until they are well combined. You are looking for a homogenous emulsion where the oil is fully integrated into the starter.
- Once the liquid ingredients are smooth, add the oats, nuts and spices. Stir the ingredients until everything is well coated with the sourdough starter mixture. Every surface area must be covered to ensure even browning and consistent clumping.
- Press a tight layer of granola onto a baking tray lined with baking paper. Don’t leave any gaps. This compression is the physical mechanism that initiates the clumping action while baking, minimizing air pockets that lead to burning. If you prefer loose clusters, press firmly but leave some texture on the surface. If you wish to create a block that can be cut into sourdough granola bars later, press very firmly and evenly with a flat object until the surface is level.
- Bake low and slow until the mixture is lightly toasted. The granola will take around 20 minutes to toast. Keep an eye on it as the honey will cause it to burn easily. You are looking for a uniform pale amber color.
- Once cooled, break the granola up into pieces and toss through the dried fruit if using. Do not attempt to break the granola while it is warm, as the sugars have not yet fully crystallized.
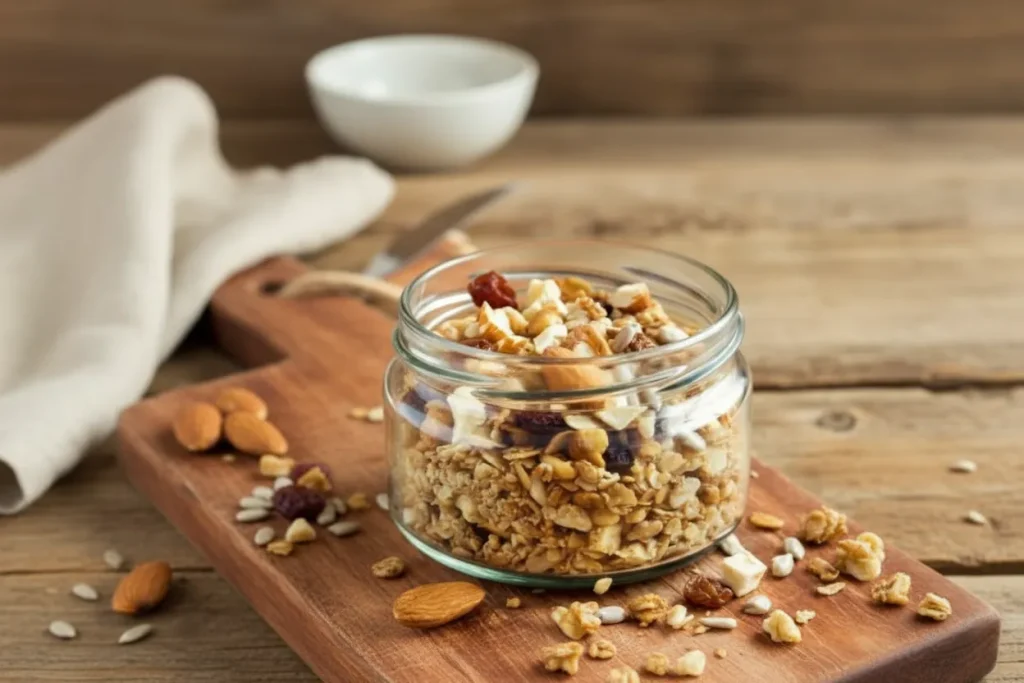
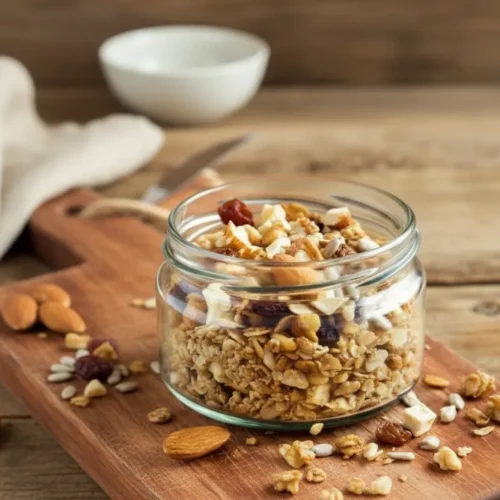
- Store the granola in an air tight container. A glass jar is best for maintaining the crispness of the oats and preventing moisture absorption from the air.
Pro tip: If you are making granola bars, let the sheet cool in the refrigerator for thirty minutes before cutting to ensure clean edges and minimal crumbling.
The sound of the granola breaking is a key sensory indicator of success. A perfectly executed batch will produce a sharp, clean snap. If the sound is muffled or the granola bends before it breaks, it likely requires another few minutes of dehydration at a low temperature. I have found that the addition of dried fruit after the bake is essential; if you bake the raisins or apricots, they become unpleasantly hard and can even develop a bitter burnt flavor.
Troubleshooting Uneven Browning and Achieving Perfect Sourdough Tang
Even the most optimized systems can encounter variables that lead to inconsistent results. Most issues with sourdough granola stem from either oven hotspots or the specific age of the starter being used. If you find that your edges are getting too dark while the center remains pale, your oven likely has poor air circulation. In this case, you can rotate the tray 180 degrees at the twelve-minute mark, but do not stir the contents.
The flavor profile of your sourdough discard granola is also highly customizable based on the state of your starter. A fresh, active starter will yield a very mild, creamy flavor, while a discard that has been sitting in the back of the refrigerator for a week will provide a much sharper, more complex tang. Both are excellent, but they serve different purposes. I prefer the older discard for this recipe as the acidity provides a better contrast to the sweet honey and vanilla.
| Issue | Observation | Solution |
|---|---|---|
| Uneven Browning | Dark edges with a pale, soft center. | Rotate the tray halfway through; ensure the layer is an even thickness. |
| Lack of Tang | The granola tastes like a standard store-bought version. | Use a more mature sourdough discard that has developed more lactic acid. |
| Soggy Clusters | The clusters feel soft or chewy rather than crisp. | Increase the cooling time or bake for an additional 3 minutes at 300F. |
| Burning Honey | The granola smells like smoke before the 20-minute mark. | Verify oven temperature with a thermometer; lower to 310F if necessary. |
How do I get my granola to be extra tangy? To maximize the sourdough character, I recommend mixing the wet and dry ingredients together and letting them sit at room temperature for two hours before baking. This allows the enzymes in the starter to begin breaking down the starches in the oats, deepening the flavor profile and improving digestibility. It is a simple step that adds no active work but yields a significantly more sophisticated flavor.
What if my granola is too crumbly? This usually indicates an insufficient amount of binder or a lack of compression. Ensure you are measuring your honey and starter by weight rather than volume. If the issue persists, try increasing the honey by 5 grams in your next batch. Remember that the physical act of pressing the mixture into the pan is what creates the bond; if you are too gentle during this step, the clusters will not have the density required to stay together.
Practical Application: Yield, Storage, and Seasonal Customization
This recipe yields approximately 4 cups of granola, which I have calculated is the perfect amount for a standard baking sheet. Doubling the recipe is possible, but I strongly suggest using two separate trays rather than crowding a single one. Crowding the pan increases the depth of the granola layer, which traps steam and prevents the oats from reaching that signature shatteringly crisp texture. My testing showed that a layer deeper than half an inch results in a significantly longer bake time and uneven moisture distribution.
Storage is another area where I have applied my engineering mindset. Granola is a hygroscopic material, meaning it readily absorbs moisture from the environment. To maintain the structural integrity of your clusters, you must store the cooled granola in an airtight container immediately. A glass jar with a silicone seal is the superior choice for this system. When stored in a cool, dry place, this sourdough discard granola will remain perfectly crisp for up to two weeks. If you live in a high-humidity environment, you may notice it softening sooner; a quick five-minute refresh in a 300 degree oven will easily restore its original texture.
Pro tip: For a morning mocha profile, substitute 1/4 cup of the nuts for cocoa nibs and add a teaspoon of finely ground espresso beans to the dry mix.
Seasonal variations allow you to adapt this system to different flavor profiles throughout the year. In the autumn, I replace the vanilla with maple syrup and increase the nutmeg for a warmer, earthier profile. In the spring, I have had great success adding dried lemon peel and using a lighter, floral honey. The core binder system remains the same regardless of these aromatic additions, which is the hallmark of a truly robust recipe design.
When serving, I find that the massive clusters work exceptionally well as a snack on their own or as a topping for a dense, strained yogurt. The contrast between the creamy dairy and the crisp, tangy granola is a perfect example of texture mapping in food design. If you find yourself with a lot of smaller crumbs at the bottom of the jar, do not discard them; they make an excellent crust for fruit crumbles or a topping for overnight oats, ensuring zero waste in your kitchen system.
Conclusion: Mastering the Hands-Off Granola System
The transition from inconsistent, loose granola to massive, satisfying clusters is entirely dependent on understanding the physics of the binder. By moving away from the traditional stirring method and embracing a static, compressed bake, you allow the sourdough discard to do its job. It creates a structural network that holds every nut and seed in place, resulting in a product that is far superior to anything found on a grocery store shelf. This engineered approach removes the guesswork and provides a repeatable blueprint for success.
I have spent years refining these ratios to ensure that they work for every home cook, regardless of their experience level. The marriage of fermented discard with the natural sweetness of honey and the crunch of toasted oats creates a sensory experience that is both comforting and sophisticated. It is a system that honors the ingredients while optimizing the process for the modern kitchen. Once you see the ease of the hands-off method, you will never go back to the labor-intensive stirring of the past.
I encourage you to implement this system in your own kitchen this week. Whether you are looking to clear out your refrigerator’s discard supply or simply want to elevate your breakfast game, this recipe is designed to deliver. I would love to hear about your results; please report your cluster size in the comments and share this engineered recipe blueprint with others who struggle with loose, uninspired granola. There is a great deal of satisfaction in turning a simple byproduct of bread making into a gourmet staple through the application of precise technique.
The next time you reach for your starter, remember that it is more than just a leavening agent for bread; it is a powerful tool for texture and flavor across a wide range of culinary applications. By treating your recipes as systems and analyzing the critical points of failure, you can unlock a new level of consistency and quality in your cooking. I look forward to seeing how you customize this granola to fit your personal taste while maintaining the integrity of the cluster science we have discussed today. Happy engineering in the kitchen.
Sourdough Granola
Equipment
- Oven
- Baking Tray
- Parchment Paper / Baking Paper
- mixing bowl
- Spoon
- Flat measuring cup or metal spatula (for pressing)
Ingredients
Wet Ingredients
- 50 g Sourdough Starter can be active or discard
- 20 g Honey or maple syrup
- 10 g Coconut Oil melted
- 5 g Vanilla Extract
Dry Ingredients
- 100 g Rolled Oats
- 50 g Nuts I used walnuts and pecans
- 50 g Seeds I used hemp and pumpkin seeds
- 2 g Cinnamon 1/2 teaspoon
- 1 g Nutmeg 1/4 teaspoon
- 2 g Salt 1/4 teaspoon
Optional Add-ins (Add After Baking)
- 50 g Dried Fruit I used raisins and chopped, dried apricots
Instructions
Preparation and Mixing
- Preheat your oven to 320F/160C. Ensuring the oven is at a stable temperature before the tray enters is vital for immediate moisture evaporation.
- Add the sourdough starter, honey, vanilla and coconut oil together in a bowl. Mix with a spoon until they are well combined. You are looking for a homogenous emulsion where the oil is fully integrated into the starter.
- Once the liquid ingredients are smooth, add the oats, nuts and spices. Stir the ingredients until everything is well coated with the sourdough starter mixture. Every surface area must be covered to ensure even browning and consistent clumping.
Compression and Baking
- Press a tight layer of granola onto a baking tray lined with baking paper. Don’t leave any gaps. This compression is the physical mechanism that initiates the clumping action while baking, minimizing air pockets that lead to burning. If you prefer loose clusters, press firmly but leave some texture on the surface. If you wish to create a block that can be cut into sourdough granola bars later, press very firmly and evenly with a flat object until the surface is level.
- Bake low and slow until the mixture is lightly toasted. The granola will take around 20 minutes to toast. Keep an eye on it as the honey will cause it to burn easily. You are looking for a uniform pale amber color.
Cooling and Finishing
- Once cooled, break the granola up into pieces and toss through the dried fruit if using. Do not attempt to break the granola while it is warm, as the sugars have not yet fully crystallized.
- Store the granola in an air tight container. A glass jar is best for maintaining the crispness of the oats and preventing moisture absorption from the air.


