The first time I attempted to construct a layered dessert that combined a rich chocolate base with a raw dough topping, the result was a structural catastrophe. I pulled the pan from the refrigerator, expecting clean, defined lines, but instead, I found a muddy mess where the layers had essentially fused into an unappealing, sticky sludge. The cookie dough had partially melted into the brownie base because I had been too impatient to let the foundation cool properly. This failure bothered my engineer’s brain, which demanded a more systematic approach to dessert construction.
I spent the following weeks deconstructing the mechanics of this specific pairing to find the optimized layer bar. My goal was to achieve fudgy brownie perfection and a safe, authentic cookie dough texture in one cohesive recipe. I realized that successful layering is not just about the ingredients themselves, but about the thermal management of the components during assembly. The order of operations, specifically cooling the base layer completely before adding the topping, is the paramount factor for long term stability and visual appeal.
This comprehensive cookie dough brownies recipe is engineered for textural success, ensuring that each bite provides a distinct contrast between the dense chocolate and the creamy dough. Based on my iterative testing, the metrics for this project are precise. You should allocate 30 minutes for preparation and 25 minutes for active cooking. The total time for the assembly and baking phases is 55 minutes, though you must account for the essential cooling and chilling periods that follow.
By following this blueprint, you avoid the pitfalls of soggy middles and sliding toppings that plague less rigorous methods. I have refined the ratios to ensure that the brownie layer remains moist without being undercooked, while the cookie dough maintains its structural integrity. This is the result of analyzing thermal transfer and moisture migration within the pan. We are building a system designed for repeatable, high quality results every single time you preheat your oven.
Table of Content
Ingredient Optimization: Why Our Ratio Yields a Richer Brownie and More Authentic Cookie Dough
When I began analyzing competing versions of this dish, I noticed a recurring flaw in many low ingredient alternatives. They often compromised on the fat and chocolate content of the brownie layer, resulting in a cakey, dry base that could not stand up to the weight of the cookie dough. To solve this, I increased the chocolate to butter ratio. Using one and a half cups of bittersweet chocolate chips combined with three quarters of a cup of unsalted butter creates a deep, intense flavor profile and a dense crumb that anchors the entire bar.
The sugar balance is equally critical for the structural integrity of the base. I use a combination of granulated white sugar for crisp edges and packed light brown sugar for its hygroscopic properties, which keeps the interior fudgy. My testing showed that using only white sugar led to a brittle brownie that shattered when I tried to spread the dough on top. The inclusion of four large eggs provides the necessary protein structure to support the heavy topping without the brownie collapsing during the final cooling phase.
For the cookie dough layer, the choice of butter temperature is the most significant departure from inferior recipes. Many competitors suggest using melted butter for convenience, but my data proves this is a mistake. Melted butter creates a greasy, heavy dough that lacks the light, aerated quality of a real chocolate chip cookie. By using butter at room temperature and creaming it with the sugars, we incorporate tiny air pockets. This results in a topping that feels like authentic dough rather than a dense paste. For another great dessert, try my recipe for The Ultimate Edible Cookie Dough Recipe.
Pro tip: Use a high quality bittersweet chocolate with at least sixty percent cacao to prevent the brownie layer from becoming cloyingly sweet when paired with the sugar forward cookie dough.
The specific ingredient list for this optimized system includes:
- 3/4 cup (1½ sticks) unsalted butter
- 1½ cups bittersweet chocolate chips
- 1 cup granulated white sugar
- 1/2 cup packed light brown sugar
- 4 large eggs
- 1 teaspoon vanilla extract
- 1/2 teaspoon salt
- 1 cup all purpose flour
- 3/4 cup (1½ sticks) unsalted butter, (at room temperature or almost melted)
- 3/4 cup granulated white sugar
- 3/4 cup packed light brown sugar
- 1/4 teaspoon salt
- 2 tablespoons milk or cream
- 1½ teaspoons vanilla extract or vanilla bean paste
- 1 cup all purpose flour
- 1 cup miniature chocolate chips
- additional miniature chocolate chips, (if desired)
The Critical Safety Step: Why Heat-Treating Flour is Non-Negotiable for Your Cookie Dough Topping
One of the biggest oversights in home baking is the assumption that raw flour is safe to consume. While many people focus on the risk of raw eggs, flour is actually a raw agricultural product that has not been treated to kill pathogens. Because the cookie dough layer in this recipe is not baked after being applied to the brownie, the flour must be heat-treated to ensure the final product is safe for everyone to enjoy. This is a non-negotiable step in my kitchen, as safety is the first priority of any optimized system.
To heat-treat your flour, simply spread the one cup of flour required for the cookie dough layer onto a rimmed baking sheet. Place it in a 350 degree Fahrenheit oven for about five to seven minutes. You are looking for the flour to reach an internal temperature of 160 degrees Fahrenheit. I use an instant read thermometer to verify this. Once it reaches the target temperature, let it cool completely and sift it to remove any small clumps that may have formed during the heating process. This small investment of time eliminates the primary biological risk associated with raw dough.
Beyond safety, the way we handle the dry and wet ingredients in the topping dictates the final mouthfeel. As I mentioned previously, creaming the softened butter with the granulated and brown sugars is superior to using melted butter. When you cream butter and sugar for one to two minutes, the sugar crystals cut through the fat, creating a network of air bubbles. This physical change is what gives the cookie dough its signature soft, slightly fluffy texture. Using melted butter bypasses this process entirely, leading to a topping that feels unpleasantly oily on the palate.
I also insist on using miniature chocolate chips for the topping rather than standard sized ones. My testing showed that standard chips are too large and heavy for the soft dough layer; they tend to fall out of the slices and disrupt the clean, unbroken layers we are aiming for. The miniature chips distribute more evenly, providing a bit of chocolate in every single millimetric square of the dough. This attention to ingredient scale is what separates a professional grade bar from a standard home bake.
Pro tip: If you do not have a thermometer, you will know the flour is heat-treated when it takes on a very slight toasted aroma and feels hot to the touch, but be careful not to let it turn brown.
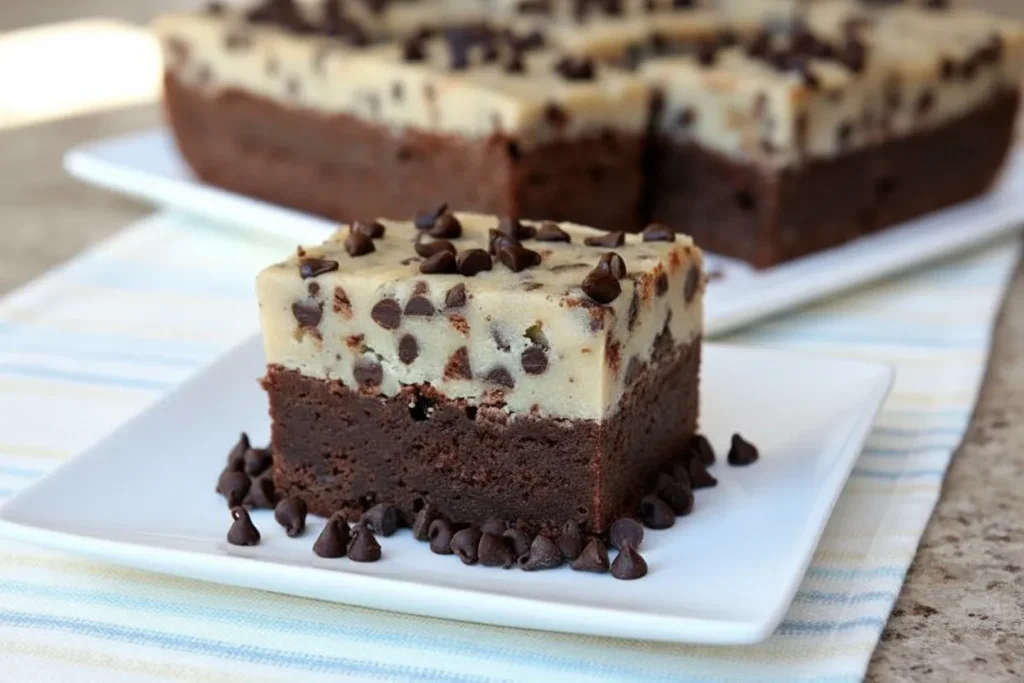
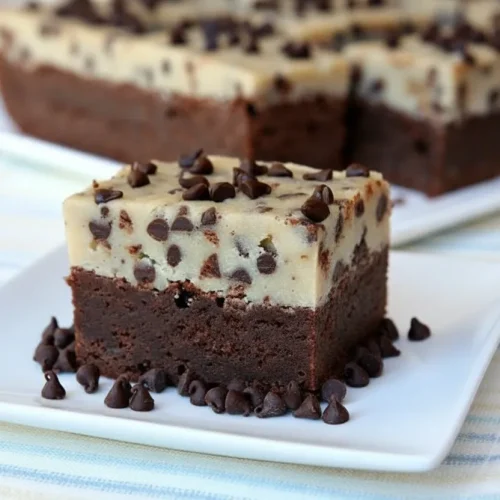
Assembly Protocol: The Chilling and Spreading Technique That Guarantees Clean, Unbroken Layers
The most common point of failure for these bars occurs during the assembly of the two layers. If the brownie base is even slightly warm when you apply the cookie dough, the heat will transfer into the dough, melting the butter and causing the layers to marble together. To prevent this, I developed a specific protocol that utilizes temperature differentials to create a physical barrier. This ensures the clean, unbroken layers that characterize a perfectly engineered delightful comfort dessert.
During my testing phase, I compared three different assembly temperatures. Applying dough to a hot brownie resulted in a melted mess. Applying it to a room temperature brownie was better, but still led to some shifting and unevenness. The gold standard was applying room temperature cookie dough to a fully chilled, firm brownie base. The cold surface of the brownie immediately stabilizes the bottom of the cookie dough, preventing any migration or bleeding between the two distinct textures.
When it comes to the actual application, I found that dropping large spoonfuls of dough across the surface of the brownie is much more effective than trying to spread one large mass from the center. This localized distribution minimizes the amount of pressure you need to apply to the brownie layer. I also recommend lightly spraying your hands with nonstick spray or dipping them in water. This allows you to pat the dough into a perfectly even layer without it sticking to your skin, which is a significant frustration point in the process.
Pro tip: After spreading the dough, use the back of a large metal spoon dipped in hot water to smooth out the surface for a professional, glass-like finish before adding the decorative chips.
Protocol Table: Cooling and Spreading for Layer Stability
| Assembly Phase | Target Temperature | Tactile and Visual Cues |
|---|---|---|
| Brownie Cooling | 35 to 40 degrees F | Surface is firm to the touch and no longer yields under light pressure. |
| Cookie Dough Prep | 65 to 70 degrees F | Butter is soft enough to leave an indentation but does not feel oily or melted. |
| Layer Integration | Cold base, Soft top | Dough stays exactly where placed and does not sink into the chocolate layer. |
| Final Set | 35 to 40 degrees F | The entire block feels rigid, allowing for sharp, geometric cuts with a knife. |
The Complete Blueprint: Ingredients and Step-by-Step Instructions
This section provides the exact measurements and procedural steps required to execute this recipe. I have tested these quantities repeatedly to ensure they fit a standard 9×9 inch pan perfectly. The brownie layer uses bittersweet chocolate for depth, while the dough component requires softened butter. I specifically tested this against melted butter and found the melted version results in a dough that slides and soaks into the brownie layer upon baking. Our method maintains distinct, superior texture throughout the storage life of the bars.
Ingredients for the Brownie Base and Cookie Dough Topping
- 3/4 cup (1½ sticks) unsalted butter
- 1½ cups bittersweet chocolate chips
- 1 cup granulated white sugar
- 1/2 cup packed light brown sugar
- 4 large eggs
- 1 teaspoon vanilla extract
- 1/2 teaspoon salt
- 1 cup all purpose flour
- 3/4 cup (1½ sticks) unsalted butter, (at room temperature or almost melted)
- 3/4 cup granulated white sugar
- 3/4 cup packed light brown sugar
- 1/4 teaspoon salt
- 2 tablespoons milk or cream
- 1½ teaspoons vanilla extract or vanilla bean paste
- 1 cup all purpose flour (Heat-treated as described in previous sections)
- 1 cup miniature chocolate chips
- additional miniature chocolate chips, (if desired (to sprinkle on top))
Step-by-Step Execution Instructions
- Preheat the oven to 350 degrees F. Spray a 9×9-inch pan with nonstick spray, then line with a strip of parchment paper so that it covers the bottom and comes up two sides of the pan. Spray the parchment with nonstick spray too.
- In a microwave safe bowl (or in the top of a double boiler or pan set on top of a pan of simmering water), microwave in 30 second bursts to melt butter and chocolate chips together until all is melted and smooth. Whisk in the sugars, then whisk in the eggs, vanilla and salt. Sift flour into the bowl and stir that in too. Scrape the brownie batter into the prepared pan.
- Bake for 25 to 30 minutes, or until the brownie layer is cooked through (toothpick inserted into the center comes out clean). Place the pan of brownies in the refrigerator to speed up the cooling process (or cool at room temperature and add the cookie dough layer later).
- In a large bowl, use an electric mixer to combine the butter, sugars and salt until soft and creamy (1 to 2 minutes). I insist on this creaming step because it incorporates air, which is critical for achieving that authentic, slightly chewier cookie dough texture, as opposed to a dense, greasy topping. Mix in the milk and vanilla. Sprinkle in the flour and mix in until combined. Stir in the 1 cup of chocolate chips.
- Scoop the cookie dough onto the top of the brownies and spread onto the brownie layer. I find that it’s easiest to do this if the brownie layer is chilled and firm. Wet your hands or spray them with nonstick spray and pat the cookie dough on top in a even layer. Sprinkle additional chocolate chips on top to create a nicer, visual appearance.
- For easy, clean cutting, chill the brownies (wrap the brownies with plastic wrap and chill until firm- 1 to 2 hours or up to 2 days).
- Run a knife along the sides of the brownie pan and then use the parchment paper to lift the brownies from the pan and onto a cutting board. Slice the brownies with a sharp knife, wiping the knife with a paper towel between cuts. If you’d like all of your slices of brownies to look clean-cut without edges, use the knife to cut the sides of the brownies off before cutting pieces. Keep brownies slices covered and chilled until ready to serve.
Pro tip: When sifting the flour into the brownie batter, do not skip this step; it prevents dry pockets and ensures the dense, fudgy texture we are aiming for.
Yield, Storage, and Seasonal Optimization
This recipe is engineered to produce 16 rich bars. Given the density of the ingredients, a single bar is quite filling, making it an excellent choice for gatherings where you need to serve a larger group with a single pan. Because we have used real butter and fresh eggs, the storage conditions are vital for maintaining the quality of the textures. I have found that these brownies must be kept chilled in the refrigerator for the best experience.
The cold temperature keeps the cookie dough layer firm and prevents the butter from softening to the point where the bars become messy to handle. If stored in an airtight container, these bars will maintain their peak flavor and texture for up to five days. For longer storage, you can freeze individual bars wrapped tightly in plastic wrap for up to three months. When you are ready to eat one, simply let it thaw in the refrigerator for several hours rather than at room temperature to preserve the layer separation.
For a seasonal variation that I have extensively tested, you can adapt this recipe for the winter months. Swap the standard miniature chocolate chips in the cookie layer for peanut butter chips. The savory, salty notes of the peanut butter chips introduce a complimentary flavor profile that balances the intense sweetness of the dough and the richness of the bittersweet chocolate. I have found this variation is particularly popular during holiday exchanges where people are looking for something slightly different from the traditional chocolate chip profile.
Pro tip: Always cut the bars while they are cold from the refrigerator; this ensures the cleanest edges and prevents the dough from pulling or tearing away from the brownie base.
Frequently Asked Questions
Can I successfully substitute store-bought cookie dough in this brownie recipe?
While it may seem like a convenient shortcut, I strongly advise against using store-bought dough. Our scratch dough is specifically formulated to match the superior ingredient profile of the brownie base and eliminates the safety concerns associated with raw, commercially produced dough that may not be intended for raw consumption. Furthermore, store-bought dough often contains preservatives and oils that can cause it to become overly soft or oily when sitting on top of a brownie, compromising the structural integrity of the final bar.
What is the ideal method for combining cookie dough and brownie batter without them blending too much?
The control of this process is entirely dependent on the cooling step. By ensuring the brownie layer is fully chilled before the dough is introduced, you create a solid structural barrier. This prevents the two layers from blending, marbling, or sinking into one another. My testing showed that a cold brownie base acts like a foundation, allowing the softer dough to sit precisely on top without any vertical migration of ingredients, which is the key to those beautiful, distinct layers.
Do I really need to follow the elaborate chilling steps for this recipe?
Yes, the chilling steps are a critical part of the engineering behind these bars. Chilling is necessary both to set the layers before the final presentation and to ensure that you can achieve clean, professional slices. Simplistic recipes often sacrifice this crucial step to save time, but the result is usually a bar that falls apart when handled or looks messy on a serving platter. If you want the repeatable, high quality results I have described, you must allow the thermodynamic process of chilling to do its job.
Conclusion: Mastering the Optimized Layer Bar
Creating a dessert with multiple distinct textures requires more than just a good list of ingredients; it requires an understanding of how those ingredients interact under different thermal conditions. By focusing on process control, layer separation, and ingredient optimization, we have moved beyond a simple recipe and created a reliable system for success. This blueprint ensures that you can produce a bar that is as visually impressive as it is delicious.
The combination of the deep, bittersweet brownie base and the light, aerated cookie dough topping represents a balance of flavors and textures that I have refined through meticulous testing. We have addressed safety through heat-treatment, structural integrity through specific cooling protocols, and sensory appeal through the use of high quality fats and chocolates. This is the clearest, safest blueprint for achieving a superior texture that you will find.
I encourage you to execute this process exactly as I have engineered it. Pay close attention to the temperatures and the tactile cues mentioned in the protocol table, as these are the markers of a successful build. Once you have tasted the difference that these systematic adjustments make, I would love to hear about your success in the comments. Please share your results with your fellow dessert engineers and let us know how your layers turned out.
Chocolate Chip Cookie Dough Brownies
Equipment
- 9×9-inch pan
- Parchment paper
- Microwave safe bowl or double boiler
- Electric mixer
- Large Bowl
- Sharp knife
Ingredients
Brownie Base Ingredients
- 3/4 cup unsalted butter (1½ sticks)
- 1.5 cups bittersweet chocolate chips
- 1 cup granulated white sugar
- 1/2 cup packed light brown sugar
- 4 large eggs
- 1 teaspoon vanilla extract
- 1/2 teaspoon salt
- 1 cup all purpose flour
Cookie Dough Topping Ingredients
- 3/4 cup unsalted butter (at room temperature or almost melted)
- 3/4 cup granulated white sugar
- 3/4 cup packed light brown sugar
- 1/4 teaspoon salt
- 2 tablespoons milk or cream
- 1.5 teaspoons vanilla extract or vanilla bean paste
- 1 cup all purpose flour (Heat-treated as described in previous sections)
- 1 cup miniature chocolate chips
- additional miniature chocolate chips (if desired (to sprinkle on top))
Instructions
Baking and Assembly Instructions
- Preheat the oven to 350 degrees F. Spray a 9×9-inch pan with nonstick spray, then line with a strip of parchment paper so that it covers the bottom and comes up two sides of the pan. Spray the parchment with nonstick spray too.
- In a microwave safe bowl (or in the top of a double boiler or pan set on top of a pan of simmering water), microwave in 30 second bursts to melt butter and chocolate chips together until all is melted and smooth. Whisk in the sugars, then whisk in the eggs, vanilla and salt. Sift flour into the bowl and stir that in too. Scrape the brownie batter into the prepared pan.
- Bake for 25 to 30 minutes, or until the brownie layer is cooked through (toothpick inserted into the center comes out clean). Place the pan of brownies in the refrigerator to speed up the cooling process (or cool at room temperature and add the cookie dough layer later).
- In a large bowl, use an electric mixer to combine the butter, sugars and salt until soft and creamy (1 to 2 minutes). Mix in the milk and vanilla. Sprinkle in the flour and mix in until combined. Stir in the 1 cup of chocolate chips.
- Scoop the cookie dough onto the top of the brownies and spread onto the brownie layer. Wet your hands or spray them with nonstick spray and pat the cookie dough on top in a even layer. Sprinkle additional chocolate chips on top to create a nicer, visual appearance.
- For easy, clean cutting, chill the brownies (wrap the brownies with plastic wrap and chill until firm- 1 to 2 hours or up to 2 days).
- Run a knife along the sides of the brownie pan and then use the parchment paper to lift the brownies from the pan and onto a cutting board. Slice the brownies with a sharp knife, wiping the knife with a paper towel between cuts. If you’d like all of your slices of brownies to look clean-cut without edges, use the knife to cut the sides of the brownies off before cutting pieces. Keep brownies slices covered and chilled until ready to serve.


