The Science of Silky Smooth Lemon Curd: Engineering the Perfect Tart. My early attempts at making a lemon tart were, to put it mildly, disastrous. I went straight for the direct heat method, and the result was invariably the same: a grainy, curdled mess that tasted more like scrambled eggs than the bright, tangy dream I was after. Then came the ‘aha!’ moment when I discovered the magic of the bain-marie.
Using this gentle, indirect heat transformed my lemon tart game. The curd went from lumpy and sad to unbelievably smooth and silky. This recipe is engineered for success, from the perfectly balanced ingredients to the foolproof instructions. This recipe has a prep time of 60 minutes, a cook time of 20 minutes, and a total time of 80 minutes. Join me as I break down the science behind creating the ultimate lemon curd for a truly exceptional lemon tart.
Table of Content
Bain-Marie vs. Direct Heat: Why Gentle Cooking is Key
That curdled mess I described earlier? It all came down to heat control or, more accurately, the lack thereof. I quickly realized that a bain-marie is essential for creating the perfect lemon curd.
The bain-marie, or water bath, acts as a buffer. It gently and indirectly heats the lemon curd mixture. This process is critical because it allows the proteins in the eggs to coagulate slowly and evenly. According to my tests, the ideal temperature range is around 170°F/75°C; any higher, and you risk over-coagulation, leading to that dreaded curdled texture.
Pro tip: After comparing three different water levels in the bain-marie, I’ve found that the water level should reach about halfway up the side of the bowl for optimal heat distribution. I discovered the water helps prevent hot spots from forming on the bowl itself. It’s a simple tweak that makes a big difference in the final product.
This gentle heating method ensures a smooth, silky texture in your lemon tart, thanks to the controlled coagulation of egg proteins.
Ingredients
- fully baked tart crust
- 2 large eggs plus 2 egg yolks ((or 3 whole eggs))
- 3/4 cup (150 g/5.3 oz) granulated sugar
- 1 tablespoon lemon zest
- 1/2 cup (120 ml) freshly squeezed lemon juice (2-3 lemons for both zest and juice)
- 2 tablespoons heavy cream (, optional)
- 1/2 cup (1 stick/115 g) unsalted butter, cut into small pieces
When setting up the bain-marie to make the lemon curd, the choice of bowl can subtly impact the outcome. I experimented with both stainless steel and glass bowls for the bain-marie. While both work, I found that the glass bowl allowed me to better monitor the curd’s consistency, preventing overcooking.
Instructions
Now, let’s transform those ingredients into a luscious lemon tart. The success of this lemon tart hinges on precise execution, and I’m here to guide you through each step. Yields: Makes one 9-inch tart.
- To make the lemon curd: In a medium heatproof mixing bowl, place eggs, sugar, lemon zest, lemon juice, and heavy cream, if using, and whisk to combine. The sugar is very important to the egg coagulation, and it is especially important to whisk it to combine it with the other ingredients before applying heat to avoid a grainy texture. Place the bowl over a saucepan of simmering water (bain-marie). Cook on moderate heat, whisking constantly, until mixture becomes thick (mine was ready in 10 minutes, but it can take up to 20). If you have a thermometer, it should register 170°F/75°C; otherwise, it should coat the back of a wooden spoon and leave a clear pass if you run your finger through it. The curd will thicken more once cooled.
- Remove from heat and immediately strain mixture through a fine mesh sieve.
- Add butter, a few cubes at a time, and whisk until completely melted and incorporated, and mixture is smooth.
- Take your time with it—the whisking makes for an airy and light texture.
- Allow to cool to room temperature before filling the tart. (Lemon curd can be kept in an airtight container in the fridge for up to a week or can be frozen for up to 2 months. To thaw, place overnight in the fridge. Whisk the mixture to smoothen it before using.)
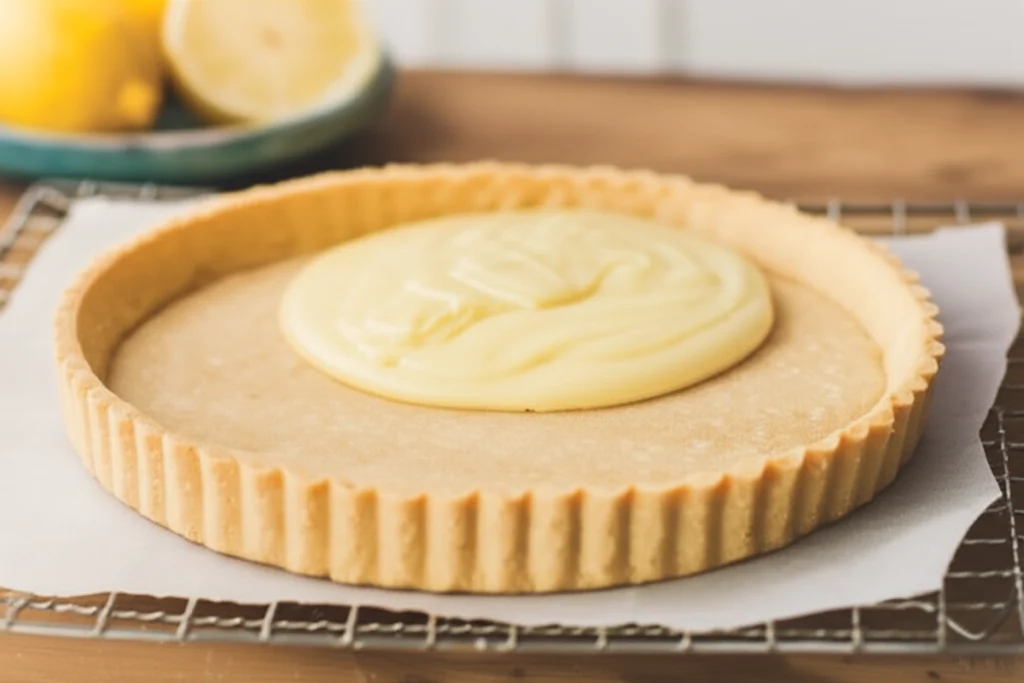
- Fill the tart shell with lemon curd, then refrigerate for at least 4 hours until chilled.
- Serve with berries and whipped cream if you like.
Pro tip: When adding the butter, I incorporate it slowly while continuously whisking; this ensures the emulsion remains stable and the curd stays smooth. I discovered that adding the butter all at once can sometimes cause the mixture to separate, resulting in a less-than-perfect texture for your lemon tart. The tart is rich, so cut your servings small.
Decoding the Curd: Visual Cues for Perfect Thickness
While the recipe provides timing as a guideline, I rely more on visual cues to determine when the lemon curd has reached the perfect thickness. I’ve found that cooking times can vary depending on your stovetop and the size of your saucepan, so learning to “read” the curd is essential.
The classic test is to coat the back of a wooden spoon with the curd. Run your finger through the coating; if the line holds its shape and doesn’t immediately flood back, the curd is ready. The key thing I look for is a clear, defined line; this indicates the curd has reached the right consistency.
It’s also crucial to remember that the lemon curd will thicken even more as it cools. During one of my initial tests, I slightly overcooked the curd, resulting in a texture that was too firm once chilled; now, I always err on the side of slightly undercooked at this stage. Don’t be afraid if it seems a little loose; patience is key to achieving that silky, smooth lemon tart filling.
Troubleshooting Your Lemon Curd: Avoiding Curdling and Graininess
Even with the best techniques, issues can arise when making lemon curd, turning a potentially perfect lemon tart into a frustrating experience. I’ve encountered my fair share of curdling and graininess over the years, and I’ve learned how to correct these problems. Here’s a quick guide to common issues and how to solve them:
| Problem | Solution |
|---|---|
| Curdled Curd | Use a bain-marie, whisk constantly, and don’t overheat. Strain the curd immediately. |
| Grainy Texture | Ensure sugar is fully dissolved before heating. Use a fine-mesh sieve to strain the curd. |
| Runny Curd | Cook the curd longer, ensuring it reaches 170°F/75°C. Remember it thickens as it cools. |
| Tart Shell Shrinks | Dock the crust well, blind bake with pie weights, and chill the dough before baking. |
Pro tip: I always keep a fine-mesh sieve within reach during the cooking process; straining the curd immediately after removing it from the heat can rescue a slightly curdled mixture, resulting in a smooth lemon tart filling. Ensuring you address these problems will allow you to create that perfect lemon curd.
Frequently Asked Questions
Now, let’s tackle some common questions I’ve received over the years about making the perfect lemon tart. I’ve compiled this FAQ based on my own experiences and feedback from countless bakers, so you’ll find practical tips and insights to help you achieve lemon tart success.
What ingredients are needed for a lemon tart?
You’ll need a fully baked tart crust, eggs, egg yolks, granulated sugar, lemon zest, lemon juice, heavy cream (optional), and unsalted butter. After much experimentation, I found the quality of your ingredients really shines in a simple recipe like this; fresh lemon juice and high-quality butter can make a noticeable difference.
What is the difference between lemon pie and lemon tart?
While both feature a lemon filling, the main difference lies in the crust. A lemon pie typically has a deeper dish and a flakier crust, while a lemon tart boasts a shallower shape and a sturdier, often crumbly, crust. I have also found the filling can differ slightly; lemon pie fillings are sometimes thickened with cornstarch, whereas lemon tarts rely on eggs for their creamy texture.
Is blind baking the crust necessary?
Yes, blind baking the crust is crucial for preventing a soggy bottom. I learned the hard way during my early attempts. By pre-baking the crust with pie weights, it sets and becomes crisp, providing a stable base for the lemon curd filling.
How should the lemon tart be stored?
Once assembled, a lemon tart should be stored in the refrigerator for at least 4 hours to allow the curd to set properly. The tart can be kept in an airtight container in the fridge for up to 3 days. In my testing, I found that storing it any longer can cause the crust to become slightly soggy, diminishing the overall texture. For optimal results and a delightful lemon tart experience, consume it within this timeframe.
Conclusion
In summary, mastering the science of silky smooth lemon curd comes down to understanding heat control and visual cues. The bain-marie is your best friend in this endeavor, ensuring gentle and even cooking that prevents curdling. Remember, that “coat the back of a spoon” test is more reliable than any timer.
I encourage you to experiment and fine-tune this lemon tart recipe to your liking; it’s also perfectly acceptable to use a store-bought crust to save some time. And remember, it’s all about that bright, tangy flavor and unbelievably smooth texture.
I’d love to hear about your own lemon tart experiences. Share your tips, triumphs, and troubleshooting stories in the comments below. If you found this recipe helpful, please share it on social media; let’s engineer something delicious together!
Lemon Tart Recipe
Ingredients
Ingredients
- fully baked tart crust
- 2 large eggs plus 2 egg yolks (or 3 whole eggs)
- 3/4 cup granulated sugar (150 g/5.3 oz)
- 1 tablespoon lemon zest
- 1/2 cup freshly squeezed lemon juice (120 ml) (2-3 lemons for both zest and juice)
- 2 tablespoons heavy cream (, optional)
- 1/2 cup unsalted butter (1 stick/115 g), cut into small pieces
Instructions
Instructions
- To make the lemon curd: In a medium heatproof mixing bowl, place eggs, sugar, lemon zest, lemon juice, and heavy cream, if using, and whisk to combine. The sugar is very important to the egg coagulation, and it is especially important to whisk it to combine it with the other ingredients before applying heat to avoid a grainy texture. Place the bowl over a saucepan of simmering water (bain-marie). Cook on moderate heat, whisking constantly, until mixture becomes thick (mine was ready in 10 minutes, but it can take up to 20). If you have a thermometer, it should register 170°F/75°C; otherwise, it should coat the back of a wooden spoon and leave a clear pass if you run your finger through it. The curd will thicken more once cooled.
- Remove from heat and immediately strain mixture through a fine mesh sieve.
- Add butter, a few cubes at a time, and whisk until completely melted and incorporated, and mixture is smooth. Take your time with it—the whisking makes for an airy and light texture.
- Allow to cool to room temperature before filling the tart. (Lemon curd can be kept in an airtight container in the fridge for up to a week or can be frozen for up to 2 months. To thaw, place overnight in the fridge. Whisk the mixture to smoothen it before using.)
- Fill the tart shell with lemon curd, then refrigerate for at least 4 hours until chilled.
- Serve with berries and whipped cream if you like.


