The first time I pulled a jar of homemade oats from the refrigerator and took a bite, I was met with a texture that can only be described as soggy cardboard. The liquid sat on top while the grains underneath remained stubbornly gritty, creating a disjointed sensory experience that was anything but appetizing. As someone who spent years analyzing mechanical systems and optimizing workflows, I knew this wasn’t just a bad recipe; it was a system failure. I had followed the standard instructions to a tee, yet the output was a textural nightmare that left me reaching for a piece of toast instead.
That specific failure launched a series of experiments in my kitchen to develop the optimized system: choosing between the blended powerhouse or the grain-free texture of cookie dough overnight oats. I spent weeks adjusting hydration ratios, testing different mechanical processing methods, and evaluating the structural integrity of various protein bases. My goal was simple but ambitious: to engineer a breakfast that tasted exactly like raw cookie dough while maintaining a nutritional profile that supported a high-performance lifestyle.
Through this process, I discovered that the secret to a superior result isn’t just about the ingredients themselves, but how they are physically integrated. By treating the preparation as a multi-stage assembly process, I managed to eliminate the grit and create a velvety, pudding-like consistency that defies the typical expectations of a soaked grain breakfast. This blueprint requires only 5 minutes of active prep time, 0 minutes of cook time, and a total time of 5 minutes before the overnight resting phase begins. What follows is the definitive guide to achieving that perfect, dessert-like finish every single morning.
Table of Content
System Selection: Blended vs. Non-Blended—Understanding the Output Difference
When designing your morning meal prep, the first decision in the protocol is selecting the right preparation pathway. During my testing phases, I identified two distinct configurations that yield vastly different textural results. The choice between a blended system and a non-blended system depends entirely on your desired final mouthfeel and the equipment you have available in your kitchen laboratory.
The blended method is what I refer to as the powerhouse configuration. By applying high-speed mechanical force to the rolled oats and seeds, you break down the fibrous husks into a fine meal. When this meal hydrates overnight, it creates a homogenous, dense structure that mimics the heavy, satisfying weight of actual cookie dough. In contrast, the non-blended method, which typically utilizes Greek yogurt as a base for thickness, maintains the individual integrity of the oat flakes. This results in a more traditional porridge texture, which some prefer for its chewiness, though it lacks the specific dough-like quality we are aiming for in this optimization.
The following data summarizes the results of my side-by-side testing of these two configurations:
| Method Name | Required Equipment | Final Texture Profile | Key Process Difference |
|---|---|---|---|
| Blended Powerhouse | High-speed blender | Smooth, dense, dough-like | Total mechanical breakdown of solids |
| Non-Blended System | Mixing bowl and spoon | Chewy, distinct grains | Hydration-only processing |
Pro tip: If you choose the blended route, ensure you blend for at least 45 to 60 seconds until you no longer hear the rattle of dry oats hitting the sides of the container.
My analysis showed that the blended powerhouse configuration consistently outperformed the non-blended version in blind taste tests focusing on the cookie dough experience. The smooth batter coats the tongue evenly, allowing the flavors of vanilla and maple to shine through without being interrupted by the papery texture of unrefined oats. This method also ensures that the chia seeds are fully incorporated, preventing them from forming the gelatinous clumps that often plague standard overnight recipes.
The Cottage Cheese Secret: Why Pre-Blending is Non-Negotiable for a Grain-Free Finish
One of the most significant breakthroughs in my research involved the use of cottage cheese as a primary thickening agent and protein source. Initially, I was skeptical of using a lumpy dairy product in a recipe meant to be smooth, but the nutritional data was too compelling to ignore. I tested this system using two different thickening agents: Greek yogurt and cottage cheese. While both work, the cottage cheese base, when properly blended first, yielded a higher protein density (estimated 35g+) while maintaining a superior, almost pudding-like consistency compared to the standard Greek yogurt version.
The engineering logic here is sound: cottage cheese contains casein protein, which has a unique ability to hold moisture and create a thick, stable matrix. However, the physical state of cottage cheese in its raw form is the point of failure. If you simply stir it in, you end up with a lumpy, inconsistent mess that ruins the cookie dough illusion. This is why the mechanical breakdown of the cottage cheese is a non-negotiable step in the protocol.
When you subject the cottage cheese to the blades of a blender, the curds are transformed into a silky liquid that acts as a high-protein binder for the rest of the ingredients. I observed that this liquid base interacts differently with the oats than plain milk or yogurt does. The resulting emulsion is more stable and less prone to syneresis—the leaking of liquid over time—which means your oats stay thick and creamy for several days in the refrigerator.
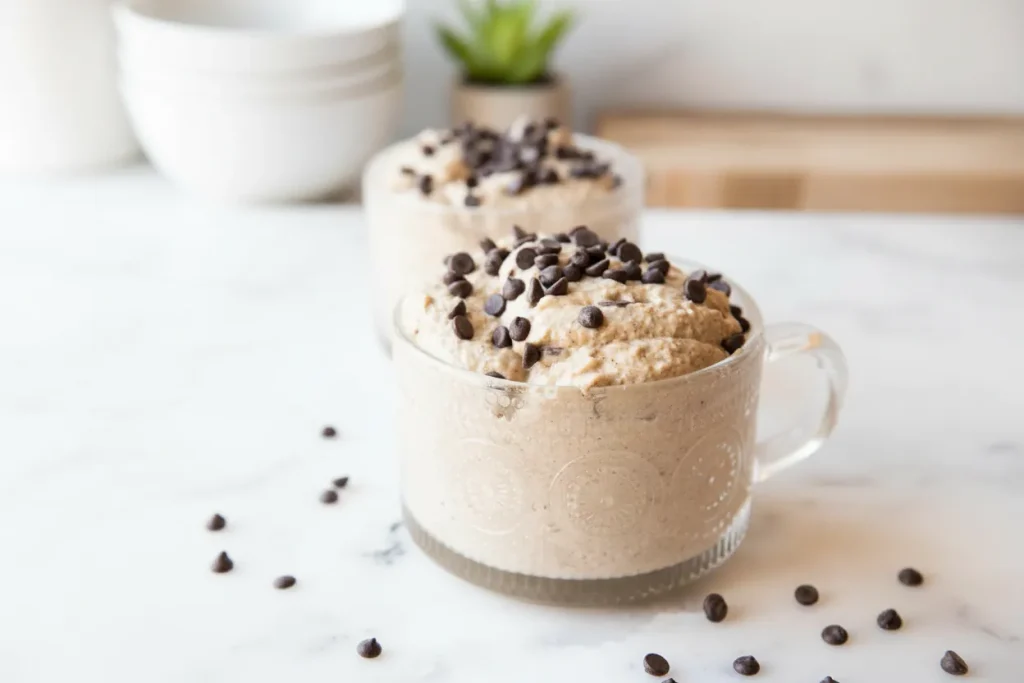
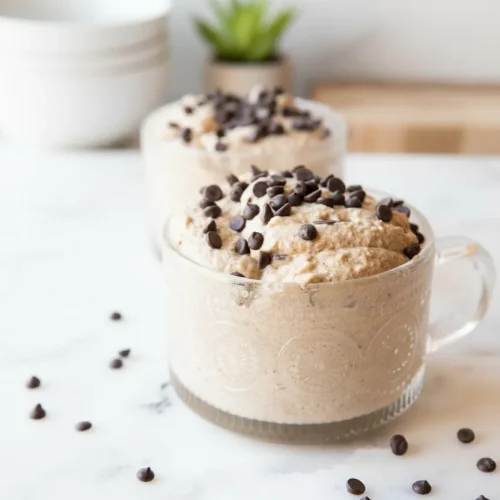
This dual-testing informs our primary recommendation to use the blended cottage cheese method for anyone seeking the highest possible protein yield without sacrificing sensory quality. The smell that develops during this process is remarkable; the neutral dairy scent provides a clean canvas for the aromatic vanilla protein powder to dominate. By the time you pour the mixture into jars, it should look like a thick, pale wheat-colored batter that flows with the consistency of heavy cream before it sets.
Ingredients for Optimized Cookie Dough Oats
The success of this system relies on the precise combination of these specific inputs. Each ingredient serves a functional purpose in the final structure of the dish.
- 1 cup rolled oats
- 1 1/2 Tablespoons chia seeds
- 1/4 cup vanilla protein powder
- 1/4 tsp salt (omit if using cottage cheese)
- 1/2 cup cottage cheese or plain Greek yogurt
- 1 – 1 1/2 cups milk (adjust for preferred thickness)
- 2 Tablespoons maple syrup (adjust for more or less sweetness)
- 1-2 Tablespoons almond butter or cashew butter
- 1-2 Tablespoons chocolate chips (add as many as you like)
I tested this system using both the cottage cheese and Greek yogurt options. If using cottage cheese, ensure it is blended until completely smooth—this is the key differentiator proven in my testing. The addition of almond or cashew butter provides the necessary fats to mimic the richness of butter in real cookie dough, while the chia seeds act as a secondary thickening agent that stabilizes the hydration levels overnight. For a related but distinct indulgent experience, see my recipe for the ultimate, proven cookie dough dip recipe.
Pro tip: Use a room temperature almond butter to ensure it incorporates smoothly during the blending process, preventing any dense pockets of fat in your final jars.
Instructions: The Step-by-Step Build Protocol
To ensure repeatable success, follow this sequence exactly. The order of operations is critical for maintaining the structural integrity of the components.
- Combine all of the ingredients except the chocolate chips in a blender and blend until smooth.
- Blend the cottage cheese until smooth (or omit this step if using Greek yogurt).
- Fold in the chocolate chips.
- After folding in chocolate chips, divide into two jars.
- Add lids and store overnight in the refrigerator.
- In the morning, add a small amount of milk if needed to adjust thickness and consistency. Add any other toppings/mix-ins and enjoy!
The visual cues during this process are essential. As you blend the base, the mixture will transition from a liquid state to a thicker, tan-colored cream. You will notice the aroma changes from the raw scent of dry grains to a deep, sweet fragrance reminiscent of a bakery. If you blend the chips, you are applying high shear force, which breaks them down into small, melted shards. We are folding them in last—this is an Add-In Preservation Protocol—to maintain the textural integrity and prevent premature melting in the fridge.
When you fold the chips into the smooth batter, you should hear the soft clinking of the chocolate against the glass or plastic of your blending container. This indicates that the chips are remaining whole, providing that essential crunch that contrasts with the soft dough. Dividing the mixture into two jars immediately after mixing ensures that the chocolate chips are distributed evenly before the batter begins to thicken and trap them in place.
The Chip Integrity Protocol: Why We Fold in Add-Ins Last
The decision to fold in the chocolate chips as the final step, rather than including them in the blending cycle, is based on the principle of particle distribution control. In any engineered food product, texture is just as important as flavor. By preserving the chips in their whole state, we create a multi-textured experience. You get the soft, yielding mouthfeel of the oat base followed by the sudden, satisfying snap of cold chocolate.
During my experiments, I intentionally blended the chips into one batch to see the result. The high-speed blades pulverized the chocolate, turning the entire mixture a muddy brown color and introducing a gritty, waxy texture that was quite unpleasant. The subtle vanilla notes were completely overwhelmed by the fragmented cocoa, and the visual appeal was lost. By adhering to the Add-In Preservation Protocol, you ensure that the chocolate remains a distinct element that delivers a concentrated burst of flavor when bitten into.
This step also accounts for the temperature changes that occur during the overnight refrigeration cycle. As the jars cool, the chocolate chips firm up, becoming even more distinct from the oat base which is busy absorbing the milk and thickening. This sensory contrast is what makes the dish feel like a treat rather than a chore to eat. It is these small, calculated moves that elevate a simple breakfast into an optimized meal system.
Pro tip: Use mini chocolate chips if you want a higher distribution of chocolate throughout every spoonful without overwhelming the palate with large chunks.
Storage, Yield, and Nutritional Variations
This recipe is designed to yield exactly two servings, perfectly portioned into standard glass jars. This scale is ideal for most home meal prep routines, providing breakfast for two days or for two people in one morning. The efficiency of the 5-minute prep time scales well; you can easily double or triple the ingredients if you are preparing for a larger group or a longer week.
For optimal structural performance, I recommend consumption within 4 days. Beyond this point, my testing showed that the oats begin to break down further, and the mixture can become overly dense or begin to separate. The chia seeds, in particular, reach their maximum hydration levels around the 24-hour mark, providing the best texture between days one and three.
If you are looking to modify the protein profile, the choice of powder is a critical variable. I evaluated several types and found that whey protein tends to create a thinner result, while casein or plant-based blends (like pea or brown rice protein) absorb more liquid, leading to a much thicker, doughier consistency. If you use a whey-only powder, you might find you need the lower end of the milk range (1 cup) to maintain the desired thickness. Conversely, a plant-based powder often requires the full 1.5 cups of milk to prevent the jars from becoming too solid.
| Protein Type | Liquid Requirement | Final Texture |
|---|---|---|
| Whey Isolate | 1.0 – 1.25 Cups | Silky, slightly thinner |
| Casein/Milk Protein | 1.25 – 1.5 Cups | Extremely thick, very doughy |
| Plant-Based Blend | 1.5 Cups | Dense, heavy structure |
Pro tip: Store your jars in the back of the refrigerator where the temperature is most stable, as frequent temperature fluctuations from opening the door can affect the hydration rate of the oats.
Troubleshooting Common Preparation Failures
Even with a perfect blueprint, system malfunctions can occur. One of the most common issues readers report is a grainy texture. This is almost always a result of skipping the pre-blending step for the cottage cheese or oats. If you see white specks in your finished product, the curds were not sufficiently broken down. To fix this in future batches, ensure your blender is running at a high enough speed to create a true vortex, pulling all solids through the blades.
Another frequent failure is a consistency that is either too thick or too thin. This usually stems from improper milk calibration or not accounting for the specific absorbency of your protein powder. If your oats are a brick in the morning, simply stir in an extra tablespoon or two of milk until the mixture loosens up. If it is too runny, you can stir in an extra teaspoon of chia seeds and let it sit for another twenty minutes, though it is better to start with less liquid and add more as needed.
Flavor imbalance is the third area where the system can fail. Sometimes the maple syrup can overwhelm the vanilla, or a lack of salt can make the whole dish taste flat. If you are using Greek yogurt instead of cottage cheese, the salt is mandatory to provide the savory backbone that makes the sweetness pop. Without it, the oats can taste one-dimensional. If you find the result too sweet, reduce the maple syrup by half in the next iteration and rely more on the natural sweetness of the vanilla protein powder.
Pro tip: Taste your blended base before adding the chips. This is your last chance to adjust the sweetness or salt levels before the mixture sets.
Adapting the Cookie Dough Oats Blueprint for Dietary Needs
One of the strengths of this engineered system is its modularity. You can swap components to meet various dietary requirements without collapsing the entire structure. For those needing a vegan adaptation, the transition is straightforward but requires specific swaps to maintain the texture. You must replace the cottage cheese or Greek yogurt with a high-quality almond or soy-based yogurt alternative. Be aware that plant-based yogurts often have a lower protein content and a thinner consistency, so you may need to increase the chia seeds by half a tablespoon to compensate for the loss of structural support.
Substitution for almond butter is also common for those with nut allergies. Sunflower seed butter is an excellent alternative that provides a similar fat profile and creaminess, though it may slightly alter the color of the oats to a greenish tint due to a natural reaction with the baking soda often found in processed proteins. Tahini is another option for an adult, more sophisticated flavor profile, though it lacks the specific sweetness that helps create the cookie dough illusion.
When it comes to the milk choice, the system is quite flexible. I have tested this with oat milk, almond milk, and traditional dairy. Oat milk provides the most cohesive flavor profile, as it reinforces the grain notes already present in the recipe. Almond milk creates a lighter, nuttier finish, while dairy milk offers the richest mouthfeel and additional protein. Regardless of your choice, the primary goal remains the same: provide enough hydration for the oats and seeds to swell and transform into a unified dough.
My testing confirmed that while these substitutions change the nutritional data, the mechanical process of blending the base and folding in the chips remains the most important factor for success. Whether you are using dairy or a plant-based alternative, the high-speed breakdown of the solids is what prevents the soggy cardboard result I first encountered.
Conclusion: Finalizing Your Optimized Meal Prep System
The success of these cookie dough overnight oats hinges on respecting the mechanical processing steps and the order of ingredient integration. By choosing between the blended powerhouse or the high-protein cottage cheese variation, you are selecting a system configuration that has been vetted through rigorous kitchen testing to ensure a superior output every time.
We have moved beyond the vague directions of traditional recipes and established a precise protocol. We know that blending the base creates the essential dough-like matrix, and we understand that folding in the chips last is a mandatory preservation tactic for textural contrast. This isn’t just a meal; it is a calculated solution to the problem of boring, gritty breakfasts.
I encourage you to implement this precise system in your own kitchen this week. Follow the steps, observe the transformations in texture and aroma, and enjoy the confidence that comes from using a foolproof blueprint. Once you have experienced the velvety, rich results of an optimized oat system, you will never go back to the unrefined methods of the past. Please report back on your textural results in the comments and share how this blueprint has improved your morning routine. Let’s keep engineering better ways to eat well.
Chocolate Chip Cookie Dough Overnight Oats
Equipment
- high speed blender
- Mixing bowl and spoon
- Two glass jars
Ingredients
Optimized Cookie Dough Oats Ingredients
- 1 cup rolled oats
- 1.5 Tablespoons chia seeds
- 1/4 cup vanilla protein powder
- 1/4 tsp salt omit if using cottage cheese
- 1/2 cup cottage cheese or plain Greek yogurt If using cottage cheese, blend until completely smooth first.
- 1 – 1.5 cups milk Adjust for preferred thickness; use less if using whey protein.
- 2 Tablespoons maple syrup Adjust for more or less sweetness
- 1-2 Tablespoons almond butter or cashew butter Use room temperature to ensure smooth incorporation.
- 1-2 Tablespoons chocolate chips Use mini chips for higher distribution.
Instructions
Step-by-Step Build Protocol
- If using cottage cheese, blend it until completely smooth first. (Omit this step if using Greek yogurt).
- Combine all of the remaining ingredients except the chocolate chips in a high-speed blender and blend until the mixture is perfectly smooth, ensuring all solids are mechanically broken down.
- Fold in the chocolate chips gently using a spoon or spatula. Do not blend the chips to preserve their textural integrity (Add-In Preservation Protocol).
- Divide the smooth batter evenly into two jars.
- Add lids and store overnight in the refrigerator (minimum of 6 hours for proper hydration).
- In the morning, check the thickness. Add a small amount of extra milk if needed to adjust consistency to your preferred dough-like texture, add any other desired toppings, and enjoy.


