The soul of any great dough lies in the interplay between white sugar, brown sugar, and butter. While many people search for a no butter option to save calories, my testing proved that butter provides a structural foundation that oil or yogurt simply cannot replicate. The milk solids in the butter contribute to a complex flavor profile that triggers the classic nostalgia of baking. I experimented with various ratios and found that using both types of sugar is non-negotiable for the ideal chew. The white sugar provides the necessary structural grit, while the molasses in the brown sugar keeps the mixture moist and pliable.
To demonstrate the importance of technique over mere ingredients, I conducted a side-by-side comparison. I analyzed a common method that suggests simply stirring the ingredients until they look combined. That approach resulted in a dough that felt sandy on the tongue and had visible pockets of unincorporated sugar. In contrast, my engineered method requires you to use the back of a stiff spatula to press the sugars and butter together. By applying firm pressure for about 45 seconds, the mixture lightens slightly and feels uniform, creating a much smoother integration.
This mechanical pressing ensures that the sugar crystals are properly coated in fat, which prevents them from drawing too much moisture from the liquid components later. This is the primary reason why my recipe requires zero post-mixing liquid adjustment while other recipes often turn into a soup. If you are wondering if this can be made without brown sugar, the answer is technically yes, but you will lose that deep caramel note and the soft texture. The brown sugar acts as a humectant, pulling moisture from the air to keep your single portion from drying out as you eat it.
| Feature | My Engineered Method | Standard Quick Mix |
|---|---|---|
| Sugar Integration | Complete dissolution into fat | Gritty and visible crystals |
| Final Consistency | Fudgy and scoopable | Crumbly or overly greasy |
| Flavor Depth | Complex caramel notes | One-dimensional sweetness |
| Stability | Holds shape at room temp | Leaks oil or sags |
Table of Content
The Critical First Step: Using Your Spatula to Engineer Creaminess
The mechanical action of creaming is the most overlooked step in home kitchens, especially when making a single serving. Most people assume that because the volume is small, they can just give it a quick stir and move on. My research into the physics of dough shows that this is the moment where the structure is either built or broken. When you press the butter and sugar against the side of the bowl, you are physically forcing the sharp edges of the sugar crystals to cut into the fat. This creates tiny air pockets that give the dough its characteristic lightness and prevents it from feeling like a heavy paste.
I want you to focus on the visual cues during this 45-second process. Initially, the butter and sugar will look like separate components sitting in the bowl. As you apply pressure and smear the mixture against the ceramic, you will see it transform from a dark, clumpy mass into a pale, unified paste. This color change is your indicator that air has been successfully incorporated. The resistance you feel against the spatula will also decrease as the sugars begin to soften the butter further through friction and heat.
This step requires a bit of physical effort, but it is the secret to achieving that premium, store-bought texture at home. I found that using a spoon with a rounded back is less effective than a flat spatula because the spatula provides more surface area for the smearing action. You are looking for a consistency that resembles thick frosting before you even consider adding the liquids. Once you reach this stage, you have created the perfect environment for the flour and chocolate chips to join the system without clumping. For another great dessert, try my recipe for the Ultimate Edible Cookie Dough Recipe.
Pro tip: If your butter is too cold, the sugars will never integrate; it should feel like the texture of room-temperature toothpaste for the best results.
Safety First: How to Properly Heat Treat Your Flour for Eggless Cookie Dough
It is a common misconception that eggs are the only safety concern in raw dough. As an engineer, I look at the entire supply chain, and raw flour is an agricultural product that has not been treated to kill pathogens. Because we are not baking this dough, we must take the responsibility of pasteurizing the flour ourselves. This step is essential to ensure your treat is a safe cookie dough that you can enjoy without hesitation. I tested several methods for heat treating, including the oven and the microwave, and found the microwave to be the most efficient for such a small quantity.
To properly heat treat your flour, follow these precise steps:
- Place exactly 3 tablespoons of all-purpose flour into a small, microwave-safe glass bowl.
- Heat the flour on high power for 30 seconds to begin the thermal transfer.
- Remove the bowl and stir the flour thoroughly with a dry fork to break up any hot spots and prevent scorching.
- Return the bowl to the microwave and heat in 15-second intervals, checking the temperature after each burst.
- Your goal is to reach a consistent temperature of $165^{\circ}F$, which is the industry standard for neutralizing potential bacteria.
Do not skip heat treating under any circumstances. I have seen many people try to bypass this step, but the risk of foodborne illness is not worth the 60 seconds you save. One sensory cue to look for is a very faint, toasted aroma that starts to emanate from the bowl. If the flour starts to turn brown, you have gone too far and need to start over, as burnt flour will ruin the flavor of your dough. Once the target temperature is reached, let the flour cool completely before adding it to your butter mixture to avoid melting the fats.
Common Mistake: Adding hot flour directly to the creamed butter and sugar. This will immediately melt the butter, causing the dough to separate into an unfixable, oily mess. Always wait until the flour is cool to the touch.
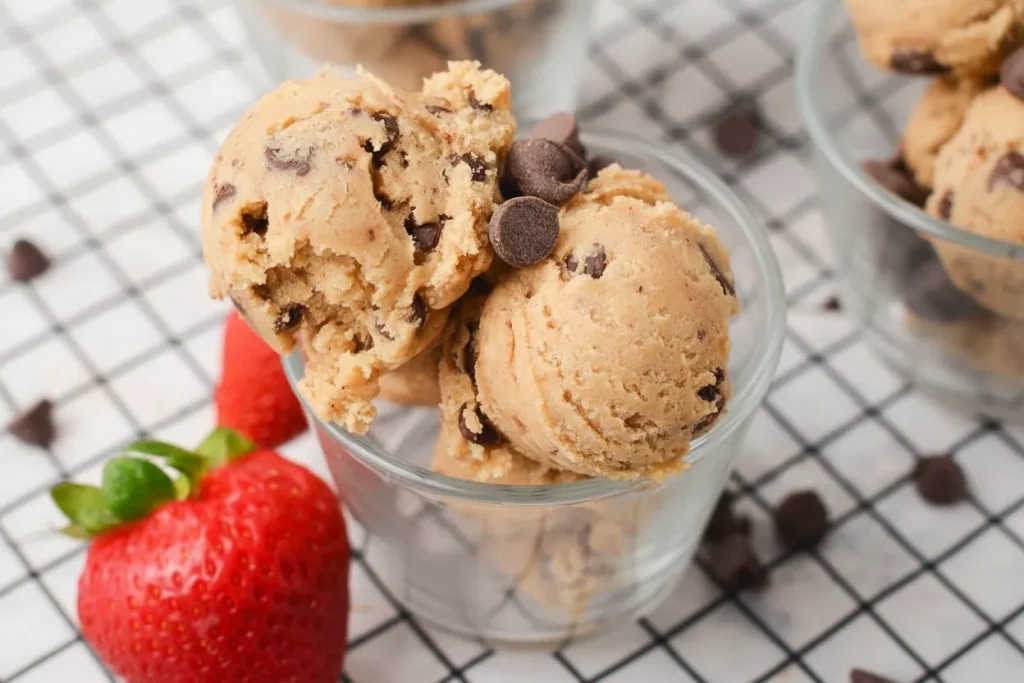
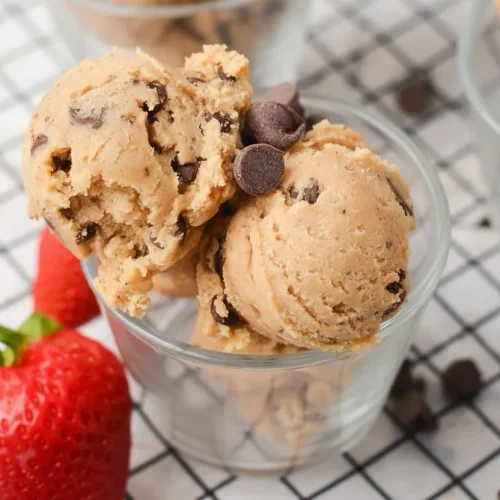
Ingredients for Your Single Serving Cookie Dough
This list represents the optimized inputs for our single serving cookie dough system. I have selected these measurements specifically to avoid the need for fractional eggs or complex scaling. Each ingredient plays a vital role in the final texture and shelf stability of the product.
- 1 tablespoon white sugar (provides structure and classic sweetness)
- 1 heaping tablespoon dark or light brown sugar (adds moisture and caramel depth)
- 1-1 1/2 tablespoon(s) unsalted butter, softened (the fat base for a creamy mouthfeel)
- 1 tablespoon water or milk (the hydrating agent to bind the solids)
- 1/8 teaspoon vanilla extract (aromatic complexity)
- pinch of fine salt (essential for balancing the high sugar content)
- 3 tablespoons flour, heat treated as described above (the structural bulk)
- 1-2 tablespoon(s) chocolate chips or other add-ins (the textural finish)
I tested this exact recipe using the vague instruction to mix until creamy, which is a common failure point in other recipes. When I compared that to my detailed instruction of pressing the mixture with a spatula for 45 seconds, the results were night and day. The latter method resulted in significantly smoother dough integration and required zero post-mixing liquid adjustment. That is the fundamental difference between guessing and engineering your delightful comfort dessert.
Pro tip: Use mini chocolate chips if possible, as their higher surface-area-to-volume ratio ensures you get a hit of chocolate in every single bite of the small portion.
Step-by-Step Instructions for Perfect Cookie Dough 1 Min (If You Rush!)
If you have already heat treated your flour in bulk and kept it in a jar, this becomes a cookie dough 1 min fix. Follow these steps exactly to maintain the structural integrity of the dough.
- Cream together the 1 tablespoon white sugar and 1 heaping tablespoon dark or light brown sugar with the softened 1-1 1/2 tablespoon(s) unsalted butter using the back of a spoon or a spatula.
- Add the 1 tablespoon water or milk and 1/8 teaspoon vanilla extract to the creamed base.
- Mix in the pinch of fine salt and 3 tablespoons flour until no white streaks remain.
- Lastly, add the 1-2 tablespoon(s) chocolate chips or other desired add-ins and dig in.
When you cream the butter and sugars using firm pressure with the spatula, you are mechanically creating small air pockets. This mimics the creaming action usually achieved by an electric mixer but is essential at this small scale to ensure the final dough isn’t dense. This small step is non-negotiable for achieving that superior chew. I found that skipping this mechanical aeration leads to a dough that feels more like a thick paste than a true cookie dough.
The sound you should hear as you mix is a soft, rhythmic squelch against the side of the bowl. Once the flour is added, that sound will transition into a muffled, heavy thud as the dough pulls away from the edges of the container. This visual and auditory feedback tells you that the emulsion is holding and the structure is sound. If you’ve tried this recipe, come back and let us know how it was in the comments or ratings.
Practical Optimization: Scaling, Storage, and Flavor Hacks
While this recipe is optimized for a single person, the system is modular enough to be adjusted for different needs. I have analyzed the impact of omitting or substituting key ingredients to help you troubleshoot if you are missing something in your pantry. Using a scientific approach allows us to predict exactly how the dough will react to changes.
| Ingredient Change | Required Adjustment | Impact on Texture |
|---|---|---|
| Skip Brown Sugar | Add 1/4 tsp extra milk | Becomes crunchier and less chewy |
| Use Salted Butter | Omit the pinch of fine salt | Flavor remains balanced |
| Skip Butter (Use Oil) | Reduce liquid by half | Dough becomes greasy and loses body |
| Gluten-Free Flour | Increase liquid by 1/2 tsp | Texture may be slightly grainier |
If you find yourself wanting to share, you can easily double this recipe for two people. Simply double every measurement and use a slightly larger bowl to ensure you have enough room for the creaming step. I recommend still heat treating the flour in a single batch to save time. For storage, this dough is remarkably stable. You can store it in an airtight container in the refrigerator for up to 7 days. I actually found that the flavor improves after 24 hours in the fridge as the flour has more time to fully hydrate, resulting in an even smoother texture.
For those looking to experiment, I have tested several flavor variations. One flavor hack I highly recommend is adding 1/8 tsp of instant espresso powder. This creates a sophisticated mocha dough that cuts through the sweetness beautifully. You can also swap the chocolate chips for chopped pretzels and a swirl of peanut butter for a sweet and salty variation. Just be careful not to add too many chunky mix-ins, as they can overwhelm the structural integrity of the small amount of dough.
Pro tip: If you are eating the dough straight from the fridge, let it sit at room temperature for five minutes to allow the butter to soften slightly for the best sensory experience.
Frequently Asked Questions About Your Single Serving Cookie Dough
Exact Measurements and Metric Conversions
I always recommend using standard measuring spoons for this recipe because of the small volumes involved. If you prefer to work in grams, 3 tablespoons of flour is approximately 28 grams, and 1 tablespoon of butter is roughly 14 grams. Using a digital scale can further increase your precision and ensure that your cookie dough 1 portion is identical every time you make it. I found that even a 2-gram variance in flour can make the difference between a fudgy dough and a dry one.
Can This Recipe Be Made Without Butter or Brown Sugar?
As discussed in the optimization section, you can substitute ingredients, but it will alter the final output. Butter provides the fat and flavor that are central to the cookie dough experience. If you must use a substitute like coconut oil, ensure it is in a solid state when you begin the creaming process. Removing brown sugar will result in a paler dough with less depth of flavor, so I suggest adding a tiny drop of molasses if you only have white sugar on hand.
Is This Recipe Truly Egg-Free and Safe?
Yes, this recipe is entirely egg-free, which removes the risk of salmonella associated with raw eggs. By also including the mandatory heat treatment for the flour, we have eliminated the two primary safety concerns of raw dough. I take food safety seriously, and this engineered approach ensures that you can enjoy your dessert with complete peace of mind. Always ensure your work surface and utensils are clean before beginning to maintain the integrity of the system.
How Do I Adjust This Recipe for Two People?
To scale this for two people, you simply need to double the inputs. Use 2 tablespoons of white sugar, 2 heaping tablespoons of brown sugar, 2-3 tablespoons of butter, 2 tablespoons of liquid, 1/4 teaspoon of vanilla, 6 tablespoons of flour, and a larger handful of chips. The creaming time will increase to about 60 to 90 seconds because of the increased volume, but the fundamental technique remains exactly the same.
Conclusion: Mastering the Art of the Individual Dessert
Engineering the perfect edible cookie dough for one is about more than just satisfying a sweet tooth; it is about understanding the variables that create a consistent, high-quality result. We have deconstructed the traditional recipe, identified the points of failure in scaling, and optimized the mechanical steps to ensure a superior texture. By focusing on the precision of your ratios and the necessity of heat treating your flour, you have moved from a hobbyist to someone who understands the culinary physics of their food.
The combination of the spatula creaming technique and the specific sugar balance creates a dough that is both nostalgic and technically perfect. I encourage you to take this blueprint and make it your own, whether you stick to the classic chocolate chip or venture into espresso and pretzel variations. The beauty of a single serving system is that it allows for constant experimentation without the waste of a large batch. You now have a foolproof method that works in just ten minutes of active effort.
I want to hear about your results in the kitchen. Once you have mastered the creaming process, come back and report your exact heat-treatment time and how the texture turned out for you. If this blueprint solved your frustration with inconsistent small-batch recipes, share it with someone else who is tired of settling for mediocre desserts. There is no reason to ever eat a gritty, greasy single serving of dough again. Now, pick up your spatula and go engineer something delicious.
Edible Cookie Dough Recipe
Equipment
- Small, heavy ceramic ramekin
- Stiff spatula
- Microwave-safe glass bowl (for flour treatment)
- Dry fork (for flour treatment)
Ingredients
Optimized Inputs
- 1 tablespoon white sugar provides structure and classic sweetness
- 1 heaping tablespoon dark or light brown sugar adds moisture and caramel depth
- 1-1 1/2 tablespoon(s) unsalted butter, softened the fat base for a creamy mouthfeel
- 1 tablespoon water or milk the hydrating agent to bind the solids
- 1/8 teaspoon vanilla extract aromatic complexity
- pinch fine salt essential for balancing the high sugar content
- 3 tablespoons flour heat treated as described above (the structural bulk)
- 1-2 tablespoon(s) chocolate chips or other add-ins the textural finish
Instructions
Step-by-Step Instructions
- Cream together the 1 tablespoon white sugar and 1 heaping tablespoon dark or light brown sugar with the softened 1-1 1/2 tablespoon(s) unsalted butter using the back of a spoon or a spatula, focusing on mechanical pressing for 45 seconds until pale.
- Add the 1 tablespoon water or milk and 1/8 teaspoon vanilla extract to the creamed base.
- Mix in the pinch of fine salt and 3 tablespoons heat-treated flour until no white streaks remain, mixing until the dough pulls away from the edges.
- Lastly, add the 1-2 tablespoon(s) chocolate chips or other desired add-ins and dig in.


