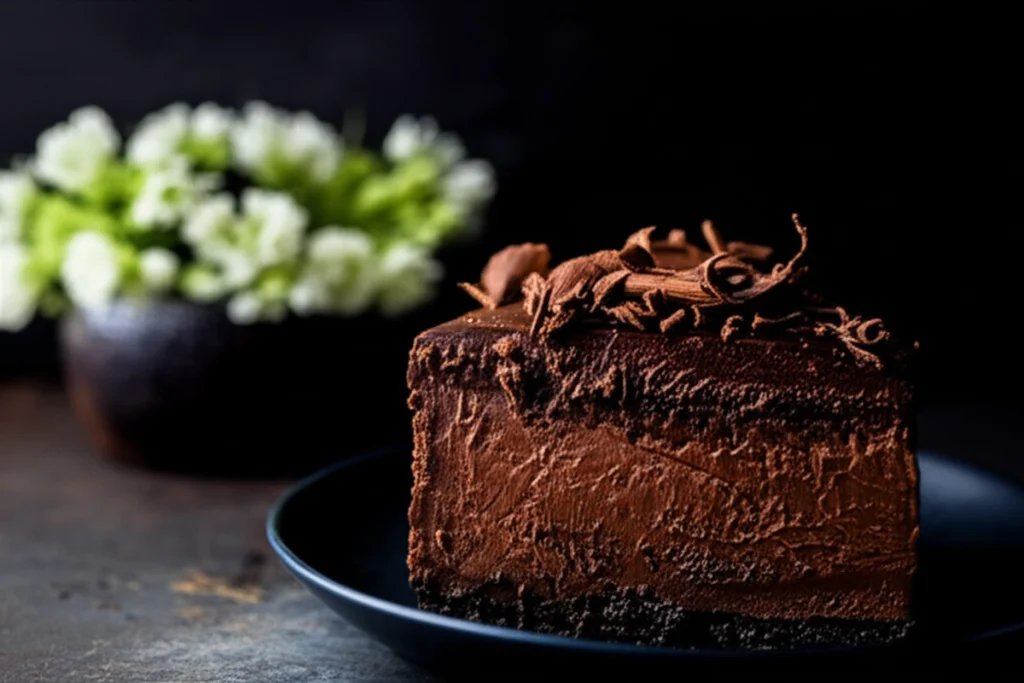
My early attempts at making chocolate cheesecake were… humbling. I remember the frustration of pulling a beautifully browned cake from the oven, only to watch it develop a Grand Canyon-sized crack as it cooled. The texture was often uneven, ranging from gummy to dry, nothing like the silky smooth chocolate cheesecake I craved.
Then came my “aha!” moment: the water bath. I discovered the delicate dance between oven temperature, moisture, and the crucial “jiggle” test that signals cheesecake perfection. This recipe, “The Science of Silky Smooth: The Definitive Guide to Chocolate Cheesecake Perfection,” is the culmination of that journey.
This recipe makes one 9-inch chocolate cheesecake, takes about 30 minutes to prep, requires 70 minutes of cooking time, and has a total time investment of 460 minutes. This isn’t just another recipe; it’s a meticulously tested blueprint for repeatable success.
Table of Contents
The Water Bath Advantage: Why It’s Essential for Even Baking & a Crack-Free Top
That “aha!” moment I mentioned? It centered entirely around the necessity of a water bath. I initially dismissed it as an unnecessary step, but I quickly learned that it’s the single most important factor in achieving a uniformly textured, crack-free chocolate cheesecake.
The science is simple: a water bath provides gentle, even heat. By surrounding the springform pan with hot water, I create a humid environment that prevents the edges of the cheesecake from cooking faster than the center. This even heat distribution is what prevents the rapid expansion and contraction that leads to unsightly cracks. As Baker Bettie explains, a water bath helps delicate items to bake more gently and helps provide a moist environment.
Pro tip: Ensure your foil wrapping is tight! I once had water seep into a cheesecake because of a poorly sealed pan; it created a soggy crust and diluted the flavor. Double-layered heavy-duty foil is now my standard practice.
Without the water bath, the outer edges of the cheesecake would set and dry out before the center is fully cooked. This differential in doneness creates stress within the cake, leading to cracking as it cools. The water bath acts as a buffer, keeping the temperature consistent and preventing that stress. Learning to embrace the water bath was the key to unlocking truly perfect chocolate cheesecake.
Ingredients
The quality of your ingredients will directly impact the final flavor and texture of your chocolate cheesecake. Therefore, I recommend using the best you can find. Here’s what you’ll need:
- 1 and 1/2 cups (180g/6.3 ounces) Chocolate Wafer Crumbs
- 1/4 cup (57g/2 ounces) vegetable shortening, melted
- 2 cups (340g/12 ounces) bittersweet chocolate, coarsely chopped
- 1 and 1/2 pounds (680g/24 ounces) full-fat cream cheese, at room temperature
- 1 cup (198g/7 ounces) granulated sugar
- 1/4 cup (53g/1 and 7/8 ounces) light brown sugar, packed
- 3 Tablespoons unsweetened natural cocoa powder
- 4 large eggs plus 2 egg yolks, at room temperature
- 3/4 cup (170g/6 ounces) heavy cream, at room temperature
- 1 teaspoon vanilla extract
- 1 and 1/3 cups (226g/8 ounces) semi-sweet chocolate, finely chopped
- 1 and 1/4 cups (12 ounces) heavy cream
- 1/4 cup (57g/2 ounces) vegetable shortening, at room temperature, cut into cubes
I tested this recipe with both Dutch-processed and natural cocoa powder. While Dutch-processed cocoa offers a deeper color, the natural cocoa powder’s slight acidity interacts better with the cream cheese, resulting in a more balanced flavor. That’s why the recipe calls for natural cocoa powder in my chocolate cheesecake.
Instructions
- Preheat oven to 325°F (163°C). Grease the bottom and sides of a 9-inch springform pan. Wrap the outside of the pan in layers of heavy duty aluminum foil. You’ll be placing this pan in a water bath, so be sure the pan has been wrapped from every angle.
- In a medium mixing bowl, combine the chocolate wafer crumbs and melted vegetable shortening. Pat the mixture firmly into the bottom of the prepared pan. Bake the crust for 10 minutes. Set the pan on a wire rack and cool the crust completely. Leave the oven on.
- Fill a medium pot one-third full with water and bring it to a low simmer over medium heat.
- Place a heatproof bowl that will fit on top of the pan snugly, but will not touch the simmering water, on top of the pan. Reduce the heat to low and add the chopped chocolate into the bowl over the pot. Heat until the chocolate is completely melted, stirring occasionally with a silicon spatula. Remove the pot from the heat, leaving the bowl of chocolate over the hot water. Set aside until needed.
- In the bowl of a food processor (or high-powered blender), pulse the cream cheese until completely smooth, scraping down the sides of the bowl as needed, about 2 minutes. Add in both sugars and cocoa powder and beat smooth. Add in the eggs, egg yolks, and heavy cream and mix until just combined, about 20 seconds. Fold in the chocolate. Finally add in the vanilla and pulse for another 20 seconds.
- Remove the bowl from the food processor and, using a rubber spatula, stir the filling several times to ensure it’s evenly blended.
- Scrape the filling over the partially baked crust in the prepared pan.
- Place the springform pan in a roasting pan or large baking pan. Place the roasting pan in the preheated oven and pour enough hot water into the pan to come 1-inch up the sides of the springform pan.
- Bake the cheesecake in the water bath for 1 hour and 10 minutes, or until the center of the cake is set but still slightly jiggly. The cake will set completely as it cools. The slight jiggle is your key to success! That slight jiggle indicates the perfect balance of doneness and moisture in your chocolate cheesecake. What you’re seeing is the proteins setting, but the cheesecake is still moist; overbaking leads to a dry, cracked cheesecake.
- Remove the cake from the water bath and place the pan on a wire rack. Carefully loosen the foil, then immediately run the tip of a knife around the sides of the pan, to prevent the top from cracking. Cool completely (in the pan), then transfer cheesecake to the refrigerator to chill for at least 6 hours before removing from the pan and slicing.
- Add chopped chocolate to a medium bowl; set aside.
- In a small saucepan over medium-heat, bring the cream to a low simmer. Pour half of the cream on top of the chocolate pieces and set aside for 1 minute. With a whisk, begin to incorporate the melted chocolate into the cream. Slowly add the remaining cream and continue carefully whisking until smooth and glossy.
- Add in the vegetable shortening and use a spatula to stir until the vegetable shortening is completely melted. The mixture will be dark and glossy. Set aside, at room temperature, until needed.
- Pour ganache over cooled cheesecake. Set aside until ganache is set, about 1 hour.
- To serve, slice the cheesecake with a thin-bladed sharp knife, wiping the knife clean between each cut.
- Store, loosely covered, in the refrigerator, for up to 5 days.
Decoding the “Jiggle”: How to Visually Identify the Perfect Cheesecake Doneness
The “jiggle” test is the most reliable indicator of chocolate cheesecake doneness. It’s a skill I’ve honed over many cheesecakes, and it’s far more accurate than relying solely on baking time. The goal is to catch the cheesecake when it’s just set, but still has a slight wiggle in the very center.
Here’s a breakdown of what to look for at different stages:
| Appearance | Texture | Result |
|---|---|---|
| Completely liquid; no visible setting. | Entire surface flows like liquid when shaken. | Undercooked; the cheesecake will collapse and have a soupy texture when cooled. |
| Significant jiggle; only the edges appear set. | The outer 2-3 inches are firm; the center is very loose and fluid. | Mostly undercooked; the center will be gummy, though the edges may be edible. |
| Slight jiggle; the center moves as a single unit. | The entire cheesecake is mostly set; a slight jiggle remains in the center. | Perfectly cooked; the cheesecake will be creamy, smooth, and set evenly when cooled. This is the target! |
| No jiggle; the entire surface appears firm and still. May show browning or slight cracking around edges. | The cheesecake is firm to the touch across the entire surface. | Overcooked; the cheesecake will be dry, dense, and prone to cracking. The texture will be less creamy and more like a firm custard. |
The science behind the jiggle involves the coagulation of proteins. As the cheesecake bakes, the proteins in the eggs and cream cheese begin to denature and link together, creating a network that gives the cheesecake its structure. A slight jiggle indicates that this network is mostly formed, but still retains enough moisture to create that signature creamy texture.
Pro tip: Avoid opening the oven frequently to check the jiggle. Each time you open the door, you release heat and interrupt the cooking process, potentially leading to uneven baking.
If you pull the cheesecake when it’s still too liquid, the protein network hasn’t fully formed, and it will collapse upon cooling. If you bake it until there’s no jiggle, the protein network becomes too rigid, squeezing out moisture and resulting in a dry, cracked chocolate cheesecake. Mastering the jiggle test is key to unlocking the perfect texture.
The Chef’s Secret: Why Running a Knife Around the Edge Prevents Cracks
After mastering the water bath and the jiggle test, there’s one final technique that acts as an insurance policy against cracks: running a thin knife around the edge of the cheesecake immediately after baking. I initially thought this was just an old wives’ tale, until I understood the science behind it.
As the chocolate cheesecake cools, it contracts. The edges of the cake are bonded to the springform pan, creating resistance. This resistance pulls on the surface of the cheesecake, often resulting in a large, unsightly crack right across the top.
By running a thin knife around the edge, you’re essentially freeing the cheesecake from the pan. This allows it to contract evenly without any external stress. The cheesecake can shrink at its own pace, without the pull of the pan causing the surface to fracture. Through testing, I’ve found the timing of this step is critical; do it while the cake is still warm to maximize its effectiveness.
Frequently Asked Questions
How do I make a chocolate cheesecake without a water bath?
While I strongly recommend using a water bath for the most consistent and crack-free results, I understand it can be cumbersome. If you skip the water bath, reduce the oven temperature by 25°F (14°C). Monitor the chocolate cheesecake closely, and expect a slightly denser texture and a higher risk of surface cracks. I’ve tried this method, and while the flavor is still delicious, the texture and appearance are not quite as perfect.
Can I use cocoa powder in my chocolate cheesecake and how does it affect the recipe?
Yes, cocoa powder is a key component of this recipe! I specifically use natural unsweetened cocoa powder. The slight acidity interacts with the cream cheese, creating a more complex and balanced flavor profile in the chocolate cheesecake. I avoid Dutch-processed cocoa powder, which, while providing a darker color, lacks the acidity necessary for that flavor balance.
What can I do to ensure the perfect cheesecake texture, avoiding cracks or a gummy consistency?
The key to perfect chocolate cheesecake texture lies in a multi-pronged approach. The water bath ensures even baking. Also, the “jiggle” test is vital for determining doneness. Further, running a knife around the edge post-baking prevents cracking. Avoid overmixing the batter, as this incorporates too much air and can lead to a gummy texture. I’ve learned that patience is paramount; a slow and steady bake, followed by a gradual cooling period, is the best way to achieve a silky-smooth consistency in your chocolate cheesecake.
How long can I store leftover chocolate cheesecake and what’s the best way to keep it fresh?
Leftover chocolate cheesecake can be stored, loosely covered, in the refrigerator for up to 5 days. I recommend using a cake container or covering it with plastic wrap, making sure it doesn’t directly touch the surface. Direct contact with plastic wrap can sometimes make the top slightly sticky. For longer storage, I’ve successfully frozen slices of chocolate cheesecake; wrap them individually in plastic wrap and then place them in a freezer-safe bag. Thaw overnight in the refrigerator before serving.
What are common mistakes to avoid when making chocolate cheesecake?
One common mistake is overbaking, which leads to a dry, cracked chocolate cheesecake. Another is using cold cream cheese, which results in a lumpy batter. Also, failing to properly seal the springform pan when using a water bath can result in a soggy crust. Through many trials, I’ve learned that taking the time to ensure each step is done correctly drastically improves the final outcome.
How to Slice a Cheesecake Cleanly
After perfecting your chocolate cheesecake, the final touch is slicing it beautifully. A clean slice enhances the presentation and eating experience. I’ve experimented with countless methods, and these are the techniques I’ve found to be the most effective for consistently perfect slices.
The key is a warm, thin-bladed knife. Before each slice, run the knife under hot water for a few seconds, then dry it thoroughly. The heat helps the knife glide through the dense cheesecake without dragging or tearing.
Pro tip: Keep a glass of hot water nearby to re-warm the knife between each cut, particularly if the cheesecake is very cold.
It’s equally important to wipe the knife clean between each slice. This prevents crumbs and ganache from transferring to the next slice, ensuring a clean separation. For optimal results, use a long, sharp knife and slice with a gentle sawing motion rather than pressing straight down. These simple steps will result in neat, professional-looking slices every time you serve your chocolate cheesecake.
Storage Instructions for Your Chocolate Cheesecake
Proper storage is essential to maintain the freshness and flavor of your chocolate cheesecake. I’ve found the best practice is to store the chocolate cheesecake, loosely covered, in the refrigerator. This will keep it tasting its best for up to 5 days.
Loosely covering the cheesecake prevents it from drying out while still allowing some air circulation. I advise against tightly wrapping the cheesecake; doing so can trap moisture and make the surface sticky. Storing your chocolate cheesecake this way maintains its creamy texture and rich chocolate flavor for several days.
Conclusion
So there you have it: “The Science of Silky Smooth: The Definitive Guide to Chocolate Cheesecake Perfection.” Remember, the key to a truly exceptional chocolate cheesecake lies in understanding and embracing a few critical techniques. Don’t underestimate the power of the water bath for even baking, and always trust the “jiggle” test to gauge doneness.
That knife-around-the-edge trick? It might seem simple, but it’s your final safeguard against unsightly cracks. I urge you to try this recipe and experience the satisfaction of creating a truly perfect chocolate cheesecake.
Now I want to hear from you! What are your favorite chocolate cheesecake tips and tricks? Share your experiences and any variations you’ve tried in the comments below. I am always excited to learn from fellow bakers!
Ultimate Chocolate Cheesecake
Equipment
- 9-inch springform pan
- medium mixing bowl
- wire rack
- medium pot
- heatproof bowl
- food processor
- rubber spatula
- roasting pan or large baking pan
- small saucepan
Ingredients
For the Crust:
- 1.5 cups Chocolate Wafer Crumbs (180g/6.3 ounces)
- 1/4 cup vegetable shortening (57g/2 ounces), melted
For the Ultimate Chocolate Cheesecake:
- 2 cups bittersweet chocolate (340g/12 ounces), coarsely chopped
- 1.5 pounds full-fat cream cheese (680g/24 ounces), at room temperature
- 1 cup granulated sugar (198g/7 ounces)
- 1/4 cup light brown sugar (53g/1 and 7/8 ounces), packed
- 3 Tablespoons unsweetened natural cocoa powder
- 4 large eggs plus 2 egg yolks, at room temperature
- 3/4 cup heavy cream (170g/6 ounces), at room temperature
- 1 teaspoon vanilla extract
For the Chocolate Ganache:
- 1.33 cups semi-sweet chocolate (226g/8 ounces), finely chopped
- 1.25 cups heavy cream (12 ounces)
- 1/4 cup vegetable shortening (57g/2 ounces), at room temperature, cut into cubes
Instructions
For the Crust:
- Preheat oven to 325°F (163°C). Grease the bottom and sides of a 9-inch springform pan. Wrap the outside of the pan in layers of heavy duty aluminum foil. You’ll be placing this pan in a water bath, so be sure the pan has been wrapped from every angle.
- In a medium mixing bowl, combine the chocolate wafer crumbs and melted vegetable shortening. Pat the mixture firmly into the bottom of the prepared pan. Bake the crust for 10 minutes. Set the pan on a wire rack and cool the crust completely. Leave the oven on.
For the Ultimate Chocolate Cheesecake:
- Fill a medium pot one-third full with water and bring it to a low simmer over medium heat.
- Place a heatproof bowl that will fit on top of the pan snugly, but will not touch the simmering water, on top of the pan. Reduce the heat to low and add the chopped chocolate into the bowl over the pot. Heat until the chocolate is completely melted, stirring occasionally with a silicon spatula. Remove the pot from the heat, leaving the bowl of chocolate over the hot water. Set aside until needed.
- In the bowl of a food processor (or high-powered blender), pulse the cream cheese until completely smooth, scraping down the sides of the bowl as needed, about 2 minutes. Add in both sugars and cocoa powder and beat smooth. Add in the eggs, egg yolks, and heavy cream and mix until just combined, about 20 seconds. Fold in the chocolate. Finally add in the vanilla and pulse for another 20 seconds.
- Remove the bowl from the food processor and, using a rubber spatula, stir the filling several times to ensure it’s evenly blended.
- Scrape the filling over the partially baked crust in the prepared pan.
- Place the springform pan in a roasting pan or large baking pan. Place the roasting pan in the preheated oven and pour enough hot water into the pan to come 1-inch up the sides of the springform pan.
- Bake the cheesecake in the water bath for 1 hour and 10 minutes, or until the center of the cake is set but still slightly jiggly. The cake will set completely as it cools.
- Remove the cake from the water bath and place the pan on a wire rack. Carefully loosen the foil, then immediately run the tip of a knife around the sides of the pan, to prevent the top from cracking. Cool completely (in the pan), then transfer cheesecake to the refrigerator to chill for at least 6 hours before removing from the pan and slicing.
For the Chocolate Ganache:
- Add chopped chocolate to a medium bowl; set aside.
- In a small saucepan over medium-heat, bring the cream to a low simmer. Pour half of the cream on top of the chocolate pieces and set aside for 1 minute. With a whisk, begin to incorporate the melted chocolate into the cream. Slowly add the remaining cream and continue carefully whisking until smooth and glossy.
- Add in the vegetable shortening and use a spatula to stir until the vegetable shortening is completely melted. The mixture will be dark and glossy. Set aside, at room temperature, until needed.
- Pour ganache over cooled cheesecake. Set aside until ganache is set, about 1 hour.
- To serve, slice the cheesecake with a thin-bladed sharp knife, wiping the knife clean between each cut.
- Store, loosely covered, in the refrigerator, for up to 5 days.


