The first time I pulled a container of homemade vanilla ice cream from my freezer, I expected a velvety, rich experience comparable to a high-end scoop shop. Instead, my spoon met a crystalline, icy block that shattered rather than scooped. The flavor was there, but the texture was a systemic failure. That specific disappointment sparked a three-month obsession with the physics of frozen dairy and the chemistry of inclusions. I spent weeks deconstructing why some recipes resulted in a smooth mouthfeel while others felt like eating flavored snow.
My engineering background pushed me to look past the surface-level instructions of quick-fix recipes. I realized that most home recipes omit the most critical component of professional-grade frozen desserts: the emulsified custard base. While no-churn methods are popular for their speed, they lack the structural integrity to support heavy inclusions like chunks of dough. To create the ultimate version of cookie dough ice cream, I had to move away from simple stir-and-freeze methods and return to the classic, yolk-thickened system that defines premium ice cream.
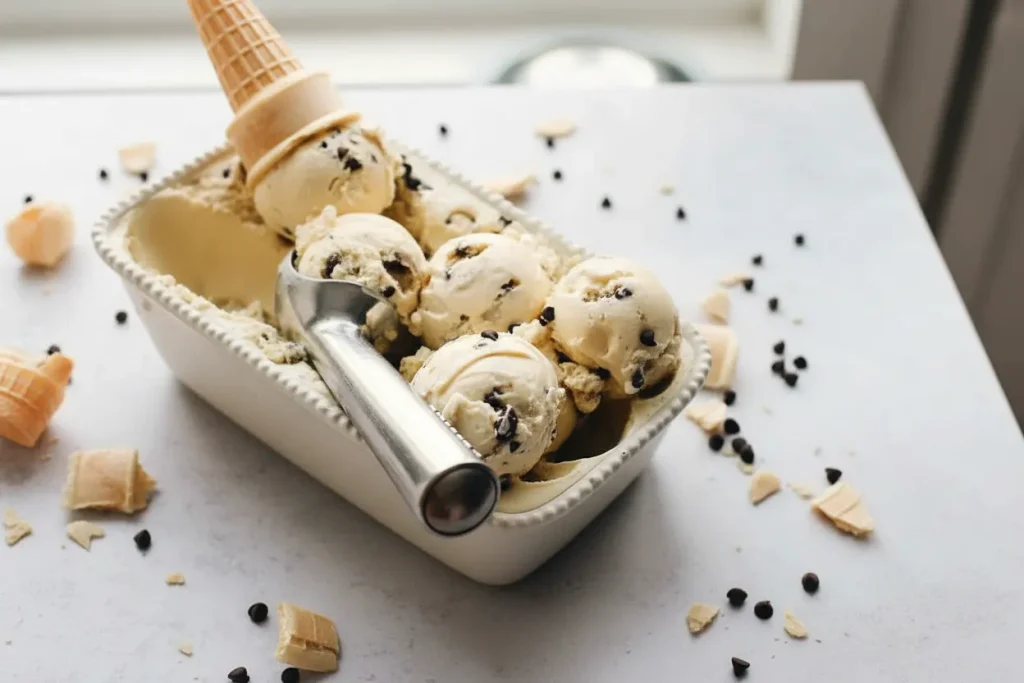
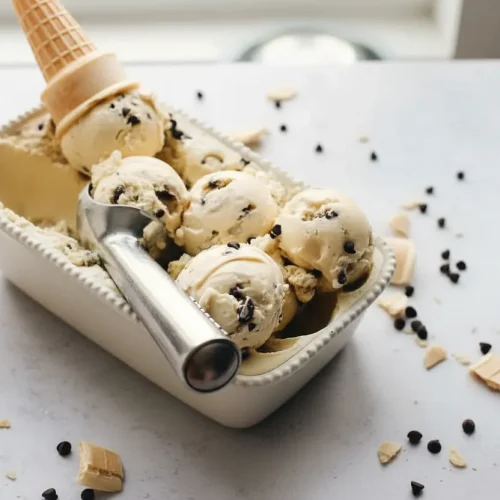
This article serves as the definitive blueprint for what I call The Engineer’s Guide to Perfectly Creamy Cookie Dough Ice Cream: Mastering the Classic Custard Base for Restaurant Texture at Home. We are optimizing for density, smoothness, and the perfect distribution of salty-sweet dough pieces. Before we begin, let’s look at the timeline for this operation. Prep Time: 25 minutes. Cook Time: 15 minutes. Total Time: Approximately 6 hours 40 minutes, which includes the essential chilling and freezing phases. This is a process that rewards patience and precision over shortcuts.
Table of Content
The Critical Safety Step: Why Heat-Treating Flour is Non-Negotiable for Edible Dough
When I first started designing the dough component for this recipe, I focused purely on the ratio of fats to sugars. However, a deeper dive into food safety science revealed a significant point of failure in most home-made versions. Many people believe the primary risk in raw dough comes from eggs, but raw flour is an agricultural product that is not treated to kill pathogens like E. coli or Salmonella. Since the dough in this ice cream is never baked, the flour remains raw unless we intervene.
To create truly edible cookie dough, you must heat-treat the flour to a temperature of 160 degrees Fahrenheit. This process neutralizes potential bacteria without compromising the structural role the flour plays in the dough. To do this, I spread the flour on a rimmed baking sheet and toast it in a 350-degree oven for about five to seven minutes. You will notice a slight change in the aroma; it becomes subtly nutty and warm, which actually improves the flavor profile of the final dessert.
I tested several methods, including microwave heating, but the oven provides the most even heat distribution. Use an instant-read thermometer to verify the temperature of the flour in multiple spots. If you skip this, you are introducing a biological risk into your kitchen system. Once the flour is treated and cooled, it becomes a safe, shelf-stable inclusion that maintains its chewy texture even when submerged in a frozen dairy environment.
Pro tip: Sift the flour after heat-treating it, as the moisture loss during toasting can sometimes cause small, dense clumps that would disrupt the smooth texture of your dough chunks.
Creaminess Decoded: How the Egg Yolk Custard Base Outperforms No-Churn Methods
The primary challenge in any frozen dessert is managing ice crystal growth. In a no-churn system, you rely on whipped cream to provide aeration, but these systems often lack the stabilizers needed to keep the texture smooth over several days in the freezer. By using a classic custard base, we are utilizing the natural lecithin in egg yolks to create a powerful emulsion. This emulsion binds the water and fat molecules together, preventing the water from forming large, jagged ice crystals.
My testing involved side-by-side comparisons of three common base styles. The results were clear: the cooked custard base provided a level of density and a slow melt-rate that the others simply could not match. The yolks contribute a rich, yellowish hue and a savory undertone that balances the high sugar content of the cookie dough. Below is the data from my comparison trials regarding texture and stability.
| Base Method | Primary Stabilizer | Texture Profile | Freeze Stability |
|---|---|---|---|
| Our Custard Base | Egg Yolks (Lecithin) | Dense, Velvety, Rich | High (Resists iciness for 2+ weeks) |
| No-Churn Style | Whipped Cream | Airy, Light, Foamy | Low (Becomes icy within 48 hours) |
| Simple Milk/Sugar Mix | None | Thin, Icy, Hard | Minimal (Best eaten immediately) |
The density of the custard base also serves a functional purpose. In a lighter, airier base, heavy inclusions like chocolate chip dough will eventually sink to the bottom of the container during the final hardening phase. The higher viscosity of an egg-based custard keeps the pieces suspended, ensuring you get a balanced ratio of dough to ice cream in every single scoop. For another great dessert, try my recipe for the ultimate chocolate cheesecake recipe.
Phase 1: Making the Safe Dough
The dough must be engineered to stay soft at sub-zero temperatures. If the dough has too much moisture, it will freeze into hard, tooth-chipping pebbles. By removing the eggs and using a specific ratio of fats and milk, we ensure the chunks remain pliable and chewy even when pulled directly from the freezer.
Ingredients for the Dough:
- 1/2 cup butter (softened)
- 1/2 cup granulated sugar
- 1/4 cup light brown sugar (packed)
- 4 Tablespoons milk
- 1 teaspoon pure vanilla extract
- 1 1/2 cups all-purpose flour
- 1/2 teaspoon baking soda
- 1/4 teaspoon baking powder
- 1/4 teaspoon fine sea salt
- 1/2 cup mini chocolate chips
Instructions for the Dough:
- In a small bowl, mix together the flour, baking soda, baking powder and sea salt. Set aside.
- In a medium bowl, cream together butter, granulated sugar and brown sugar with a hand-held mixer (or standing mixer) until well combined (about 60 seconds). Be sure to start on low speed and increase it as the ingredients begin to stick together.
- Add 4 Tablespoons milk and vanilla extract and beat on medium speed until combined.
- Add dry ingredients and mix, starting on low speed and increasing to medium-high, until all ingredients are combined.
- Add mini chocolate chips and stir until evenly distributed.
- Line a baking sheet with wax paper, set aside.
- Spread the cookie dough evenly on the prepared baking sheet, then place it in the freezer to harden.
- One hardened, cut into chunks with a sharp knife. Then keep frozen until ready to add to the ice cream.
I tested the dough freezing method using both rolling into logs and spreading thinly. Spreading the dough thin, then freezing, ensures that when you chop it, you get sharp, distinct chunks that don’t bleed into the vanilla base; a common failure point in rushed recipes. When the dough is spread to about a half-inch thickness, it freezes rapidly and consistently, which is vital for maintaining the structural integrity of the individual pieces.
Pro tip: Use mini chocolate chips specifically for this phase; larger chips become uncomfortably hard when frozen and can overwhelm the delicate texture of the custard.
Phase 2: Engineering the Custard Base
Creating the custard is the most technical part of this system. It requires careful temperature management to avoid scrambling the eggs. The goal is to reach the point where the proteins have bonded enough to thicken the liquid but haven’t reached the temperature where they coagulate into solids. This is why we use a technique called tempering, which gradually introduces the hot liquid to the cold yolks.
Ingredients for the Custard Base:
- 2 cups half and half
- 1 cup heavy cream
- 3/4 cup granulated sugar
- 1/4 cup brown sugar
- 1/4 teaspoon fine sea salt
- 4 egg yolks
- 1 teaspoon pure vanilla extract
Instructions for the Custard Base:
- In a medium saucepan, warm half and half, granulated sugar, brown sugar and salt over medium heat.
- Beat egg yolks in a small mixing bowl, add 1/2 cup of the warm half and half mixture to the egg yolks and whisk to combine. Once combined, pour the mixture into to the half and half on the stovetop.
- Cook over medium-low heat stirring constantly until the mixture thickens slightly and just barely coats the back of a spatula.
- Put the heavy cream into a bowl, then place a fine mesh strainer on top of the bowl.
- Strain the custard into the heavy cream. Discard the residue on the strainer.
- Add vanilla extract and stir to combine.
- Transfer to an airtight container and cool completely in the fridge (preferably overnight).
When cooking the custard base, I look for the moment the mixture leaves a clean streak across the back of a wooden spatula; this is the precise moment the egg proteins have thickened the mixture sufficiently without scrambling. Do not trust a timer alone here. Variations in stove power and pan thickness make timing unreliable. The visual cue of the streak is your most accurate sensor. Straining the mixture immediately into the cold heavy cream serves two purposes: it removes any tiny bits of cooked egg and it initiates the cooling process to stop the cooking immediately.
Pro tip: Chilling the base overnight is non-negotiable because it allows the fat globules to undergo a process called partial coalescence, which results in a much smoother churn and better air incorporation.
Phase 3: Churning and Assembly
The churning process is where the liquid base transforms into a semi-solid state. As the paddle turns, it introduces air (known as overrun) while the cold walls of the machine freeze the mixture. If you add your inclusions too early, the paddle will crush them, leading to a muddy-colored ice cream. The timing of the assembly is critical for maintaining the visual and textural contrast between the white vanilla base and the dark dough chunks.
Instructions for Churning and Assembly:
- Once the vanilla ice cream is completely chilled, turn an ice cream maker on and pour mixture into it while it’s turning. Churn until thick and frozen.
- Transfer to a freezer-friendly container.
- Add the cookie dough pieces to the churned ice cream and stir until evenly combined.
- Transfer to the freezer to freeze until hardened (3-4 hours).
- Remove from the freezer 3-5 minutes before serving to soften. Then scoop and enjoy.
You will know the churning is complete when the mixture reaches the consistency of soft-serve. It should hold its shape on a spoon but still be pliable enough to fold in the dough. At this stage, you are working against the clock to prevent the ice cream from melting. Work quickly in a cool part of your kitchen. Once the dough is folded in, the final hardening phase in the freezer allows the structure to set completely.
Pro tip: Pre-chill your storage container in the freezer for at least an hour before assembly to prevent the edges of your fresh ice cream from melting the moment they touch the plastic or glass.
Optimization: Achieving Perfect Dough Chunks Without Oversizing or Sticking
One of the most common complaints with homemade cookie dough ice cream is that the dough pieces either disappear into the base or are so large they dominate the scoop. My research into inclusion distribution suggests that irregular, medium-sized chunks provide the best eating experience. When you chop the frozen sheet of dough, aim for pieces that are roughly the size of a chickpea.
The reason we freeze the dough before chopping is to prevent the fats from smearing. If the dough is room temperature, the knife will drag through it, creating a sticky mess that will eventually bleed into the ice cream. Frozen dough shatters slightly under the knife, creating those desirable irregular edges that catch the ice cream and provide a better surface area for flavor release. These sharp, distinct chunks are what separate a professional product from a basic home experiment.
I also discovered that the temperature of the dough at the moment of addition is vital. If the dough is too cold, it can cause the surrounding ice cream to freeze instantly and unevenly. If it is too warm, it melts the base. The sweet spot is taking the dough out of the freezer exactly when the ice cream maker begins its final five minutes of churning. This allows the very edges of the dough to soften slightly, helping them bond to the ice cream base without losing their core integrity.
Essential Practical Details: Yield, Storage, and Appliance Notes
To ensure your success, I have documented the practical outputs of this system. Understanding the yield and storage requirements helps you plan your preparation, especially if you are making this for a gathering or event.
- Yield: This recipe yields approximately 1.5 quarts of ice cream, which translates to about 15 standard servings.
- Storage: Transfer the finished product to a container with as little headspace as possible to prevent freezer burn. Freeze for 3-4 hours until hardened; the ice cream is best consumed within 2 weeks for peak texture. After two weeks, the moisture in the dough may begin to migrate into the ice cream, slightly altering the chewiness.
- Appliance Note (Ninja Creami): If you are using a Ninja Creami, the workflow changes slightly. Churn the fully chilled base first on the Lite Ice Cream setting if your machine struggles, then add the dough pieces before re-spinning on the standard Ice Cream setting. This protects the motor and ensures the dough pieces are distributed without being pulverized into a powder.
When serving, remember that a custard-based ice cream is much denser than store-bought varieties that are often pumped full of air. Removing the container from the freezer about three to five minutes before you plan to scoop is essential. This allows the fats to soften just enough to allow a spoon to glide through, revealing the beautiful marbleization of the dough and the glistening, creamy base.
Frequently Asked Questions
Can I skip heat-treating the flour if I don’t use eggs?
No, you cannot safely skip this step. The risk in raw flour is independent of the risk in raw eggs. Flour is a raw agricultural product that hasn’t been treated for bacteria. While the chances of illness might seem low, an engineered approach to cooking always prioritizes safety and risk elimination. Taking five minutes to toast the flour in the oven is a small price to pay for total peace of mind and a slightly improved nutty flavor profile in your cookie dough ice cream.
What is the best way to substitute the egg yolks in the custard base?
You cannot substitute the egg yolks while maintaining the same level of texture superiority. The yolks provide both fat and lecithin, which are the primary emulsifiers. If you skip them, you are essentially making a Philadelphia-style ice cream, which is much thinner and prone to iciness. If you must avoid yolks for dietary reasons, I recommend using a high-quality commercial ice cream mix or a specialized vegan stabilizer, but understand that the mouthfeel will significantly deviate from this blueprint.
Can I use pre-made cookie dough?
I do not recommend using pre-made, store-bought dough for this specific application. Commercial dough is formulated to spread and rise in a hot oven, meaning it often has a higher moisture content and different leavening balances than what we need here. Furthermore, most commercial doughs contain raw flour and are not safe for cold consumption. My recipe is specifically balanced for freezing and has the correct fat-to-moisture ratio to ensure the chunks remain chewy rather than becoming icy or rock-hard.
Conclusion: Your Blueprint for Next-Level Homemade Ice Cream
Mastering the custard base is the non-negotiable secret to achieving the texture you expect from a premium dessert. Through this process, we have addressed every potential point of failure: from the safety of the flour to the science of emulsification and the mechanics of inclusion distribution. By following this engineering-led approach, you have moved beyond simply following a recipe; you have implemented a system for repeatable, delicious success.
The richness of the egg yolks combined with the salty, chewy chunks of chocolate chip dough creates a flavor profile that is both nostalgic and sophisticated. This is not just cookie dough ice cream; it is a meticulously optimized frozen dessert designed for those who appreciate the details. The density and smoothness of the final product will prove that the extra steps of tempering and overnight chilling are worth every minute of effort.
Now that you have the technical blueprint, I want to see your results! Share your first churn below and tell me how this custard technique transformed your homemade cookie dough ice cream texture. If this guide saved your dessert night, please share it with another baking engineer! I am confident that once you taste the difference a proper custard base makes, you will never go back to the simplified methods again. Happy churning.
Chocolate Chip Cookie Dough Ice Cream Recipe
Equipment
- Hand-held or standing mixer
- Rimmed baking sheet
- Instant-read thermometer
- Medium saucepan
- fine mesh strainer
- Ice cream maker
- Freezer-friendly container
Ingredients
Phase 1: Making the Safe Dough
- 1/2 cup butter softened
- 1/2 cup granulated sugar
- 1/4 cup light brown sugar packed
- 4 Tablespoons milk
- 1 teaspoon pure vanilla extract
- 1 1/2 cups all-purpose flour (Note: This flour must be heat-treated to 160°F prior to mixing)
- 1/2 teaspoon baking soda
- 1/4 teaspoon baking powder
- 1/4 teaspoon fine sea salt
- 1/2 cup mini chocolate chips
Phase 2: Engineering the Custard Base
- 2 cups half and half
- 1 cup heavy cream
- 3/4 cup granulated sugar
- 1/4 cup brown sugar
- 1/4 teaspoon fine sea salt
- 4 egg yolks
- 1 teaspoon pure vanilla extract
Instructions
Phase 1: Making the Safe Dough
- In a small bowl, mix together the heat-treated flour, baking soda, baking powder, and sea salt. Set aside.
- In a medium bowl, cream together butter, granulated sugar, and brown sugar with a hand-held mixer (or standing mixer) until well combined (about 60 seconds). Be sure to start on low speed and increase it as the ingredients begin to stick together.
- Add milk and vanilla extract and beat on medium speed until combined.
- Add dry ingredients and mix, starting on low speed and increasing to medium-high, until all ingredients are combined.
- Add mini chocolate chips and stir until evenly distributed.
- Line a baking sheet with wax paper, set aside.
- Spread the cookie dough evenly on the prepared baking sheet to about a half-inch thickness, then place it in the freezer to harden.
- Once hardened, cut into chunks (aiming for chickpea size) with a sharp knife. Then keep frozen until ready to add to the ice cream.
Phase 2: Engineering the Custard Base
- In a medium saucepan, warm half and half, granulated sugar, brown sugar, and salt over medium heat.
- Beat egg yolks in a small mixing bowl, add 1/2 cup of the warm half and half mixture to the egg yolks and whisk to combine (tempering).
- Pour the tempered yolk mixture into the saucepan on the stovetop. Cook over medium-low heat stirring constantly until the mixture thickens slightly and just barely coats the back of a spatula (leaving a clean streak).
- Put the heavy cream into a bowl, then place a fine mesh strainer on top of the bowl.
- Strain the custard immediately into the heavy cream in the bowl. Discard the residue on the strainer.
- Add vanilla extract and stir to combine.
- Transfer to an airtight container and cool completely in the fridge (preferably overnight).
Phase 3: Churning and Assembly
- Once the vanilla ice cream base is completely chilled, turn an ice cream maker on and pour mixture into it while it’s turning.
- Churn until thick and frozen to a soft-serve consistency.
- Transfer the churned ice cream to a pre-chilled freezer-friendly container.
- Take the frozen cookie dough pieces out of the freezer just as the ice cream maker begins its final five minutes of churning. Add the cookie dough pieces to the churned ice cream and gently stir until evenly combined.
- Transfer the mixture to the freezer to freeze until hardened (3-4 hours minimum).
- Remove from the freezer 3-5 minutes before serving to soften slightly. Then scoop and enjoy.


