The first time I served a chilled dessert dip at a family gathering, I thought I had mastered the system. I had combined the fats, sugars, and flour into a bowl, whipped them until they looked acceptable, and set them out with a platter of crisp apples. Within twenty minutes, the dip began to weep, separating into an oily mess that looked nothing like the monster cookie dough dip I had envisioned. Worse yet, a guest politely asked if the flour had been heat-treated for safety. I realized then that I had skipped the most critical engineering protocols in the kitchen: structural stability and food safety. That single failure led me down a path of rigorous testing to develop a blueprint that eliminates every point of failure.
Prep Time: 10 minutes Cook Time: 45 minutes (for heat-treating flour) Total Time: 55 minutes
This recipe is not just a list of components thrown together; it is an optimized system designed for repeatable success. We are looking for a specific textural output that balances the density of a cookie with the spreadable nature of a high-quality dip. Most versions of this dish rely on luck to achieve the right consistency, but by controlling the variables of temperature, aeration, and hydration, I have created a version that remains stable and safe for hours. My background as an engineer taught me that if you do not understand why a process works, you cannot guarantee its success. This article deconstructs the monster cookie dough dip into its core mechanical parts so you can achieve a flawless result in your own kitchen.
Every gram of flour and every minute of whipping serves a specific function in this architecture. We will address the safety concerns of raw flour first, then move into the physics of aeration, and finally discuss the hydration levels of different oat varieties. By the end of this guide, you will have more than just a recipe; you will have a comprehensive understanding of the chemistry that makes this dip work.
Table of Content
The Safety Protocol: Engineering Flour for Raw Consumption
When most people think of food safety, they focus on eggs or meat, but raw flour is a significant biological risk factor. Flour is a raw agricultural product that hasn’t been treated to kill germs like E. coli or Salmonella. In a standard cookie recipe, the high heat of the oven acts as the kill step. Since this monster cookie dough dip is served chilled and unbaked, we must implement our own thermal process to ensure the final product is safe for consumption. Skipping this step is a fundamental failure in kitchen safety management.
The process of heat-treating flour is straightforward but requires precise temperature control. You cannot simply guess when it is ready; you must confirm that the internal temperature has reached a specific threshold to mitigate risk. I recommend using an oven for the most even heat distribution, though a microwave can work if you are diligent about stirring to avoid hot spots.
- Preheat your oven to 350°F (175°C) and spread the all-purpose flour in a thin, even layer on a rimmed baking sheet.
- Bake the flour for 5 to 8 minutes, checking the temperature with an instant-read thermometer every 2 minutes.
- The goal is to reach a minimum internal temperature of 165°F (74°C) across the entire surface.
- Once the flour hits the target temperature, remove it from the oven and let it cool completely before sifting it into your wet ingredients.
Pro tip: Sift your flour after heat-treating it because the moisture in the flour can cause small, hard clumps to form during the heating process that will ruin the smoothness of your dip.
If you choose the microwave method, heat the flour in 30-second intervals in a microwave-safe bowl. Stir the flour thoroughly after each burst to redistribute the heat. It usually takes about 2 to 3 minutes total to reach the 165°F (74°C) safety mark. Regardless of the method, do not ignore the sensory cues. The flour will lose its raw, grassy scent and take on a very faint, toasted aroma. It should remain a pale wheat color; if it starts to turn brown, you have gone too far and changed the flavor profile of the dip.
Process Control: Achieving the Perfect Density with Variable Oats
The texture of a monster cookie dough dip is defined by its heartiness, which comes primarily from the inclusion of oats. During my testing phase, I compared the performance of quick-cooking oats against old-fashioned rolled oats across five separate batches. The results were clear: the surface area and thickness of the oat significantly impact the final viscosity of the dip. Quick oats are thinner and more processed, meaning they absorb moisture from the cream cheese and butter base much faster than their whole-grain counterparts.
When I used quick oats, the dip became significantly denser within an hour of refrigeration. The smaller fragments of grain acted like a sponge, pulling water from the emulsion and creating a texture that was almost too stiff to scoop with a fragile pretzel. Conversely, old-fashioned oats maintained their structural integrity. They provided a satisfying chew that mimicked a real cookie while allowing the surrounding cream to remain supple.
The volume of oats is the primary lever you can pull to adjust the thickness of your dip. I start with a baseline measurement but always evaluate the consistency before the final chill. If you prefer a dip that holds its shape like a scoop of ice cream, you will lean toward the higher end of the measurement range. If you want something that can be easily spread onto a thin apple slice, you will stay on the lower end.
Pro tip: If you decide to use quick oats because that is what you have on hand, reduce the total amount by 1/4 cup to account for their higher absorption rate.
Remember that the hydration process continues in the refrigerator. Oats contain starches that will continue to swell as they sit in the fat and sugar mixture. A dip that looks perfectly spreadable at room temperature will often firm up by twenty percent once it reaches a stabilized cold temperature. I always aim for a dip that feels slightly softer than my desired final outcome during the mixing phase, knowing that thermodynamics and starch hydration will finish the job for me.
The Texture Spectrum: Whipping the Base for Lift and Air
The most common execution error I see in dessert dips is under-whipping the fat base. Many home cooks simply stir the ingredients together until they are combined, resulting in a heavy, greasy mouthfeel. To engineer a dip that feels light yet substantial, we must focus on the science of aeration. The cream cheese and butter act as a matrix for holding air. When you whip these fats, you are physically forcing tiny pockets of gas into the mixture, which creates lift and volume.
I have found through repeated trials that a minimum of 3 full minutes of high-speed whipping is required for the initial fat base before any sugars are introduced. During this time, the color of the mixture will shift from a yellow-ivory to a pale, nearly white shade. This visual change indicates that enough air has been incorporated to change the light refraction of the fats. If you skip this, your monster cookie dough dip will feel like eating a block of flavored butter rather than a cloud-like dessert.
Once the fats are aerated, adding the sugars provides another opportunity for structural development. The crystalline structure of the powdered sugar and the moisture in the brown sugar interact with the fats to create a stable emulsion. The brown sugar, in particular, contributes molasses which adds a depth of flavor and a slight tackiness that helps the oats and chocolate chips stay suspended rather than sinking to the bottom of the bowl. This successful aeration is a key step in any robust recipe.
Pro tip: Ensure your cream cheese and butter are at a true room temperature, around 68°F (20°C), before you start the mixer. If the fats are too cold, they will not trap air; if they are too warm, the air bubbles will collapse as quickly as they form.
You will know you have achieved the proper texture when the mixture clings to the whisk or paddle with soft peaks. It should look voluminous and glossy. This stage is critical because once you add the heavy inclusions like oats and M&Ms, you can no longer use the high-speed mixer without crushing those components. The air you incorporate now is the only air the final dip will have.
Ingredients: The Precision Components for Your Monster Cookie Dough Dip
To build this system, you need the following specified components. Each ingredient has been selected for its specific contribution to the final flavor and structural profile. I tested this recipe with both quick oats and old-fashioned oats at the base level of 1.5 cups. The quick oats produced a slightly smoother, denser dip, requiring 1/4 cup less liquid and fat balance later on, whereas the old-fashioned oats maintained a superior monster cookie chewiness. Our final recipe calls for old-fashioned oats for this reason.
- 1 (8 ounce) package cream cheese, softened
- ½ cup butter (slightly softened)
- 1 cup creamy peanut butter
- 2 cups powdered sugar
- 3 Tablespoons brown sugar
- 1/4 cup all-purpose flour (must be heat-treated)
- 1 teaspoon vanilla
- 2 ½ cups rolled oats (old-fashioned preferred for texture)
- 2/3 cup plain M&Ms (adjust to preference)
- 1 cup semi-sweet chocolate chips
The peanut butter should be a standard creamy variety rather than a natural style that requires stirring. The stabilized fats in standard creamy peanut butter ensure that the dip does not separate over time. For the butter, using a high-fat variety with lower water content will result in a richer mouthfeel. The semi-sweet chocolate chips provide a necessary bitterness to balance the high sugar content of the base.
Instructions: The Step-by-Step Build Sequence
Follow these steps in the exact order listed to maintain the structural integrity of the emulsion. Each step builds upon the previous one to ensure a stable final product.
- With a hand mixer or stand mixer, beat the cream cheese, butter, and peanut butter until smooth. Ensure you spend at least 3 minutes on this step to achieve the necessary aeration and volume.
- Add in the powdered sugar, brown sugar, flour, and vanilla. Mix on low speed initially to avoid a sugar cloud, then increase to medium until the mixture is fully incorporated and fluffy.
- Using the paddle attachment on your stand mixer or just a wooden spoon, mix in the oats. You may want to use more or less here. I really like the oats in it and a thicker dip so I added a lot. Remember that the dip will also firm up a bit in the fridge as the oats hydrate.
- Add the M&Ms and chocolate chips. Fold these in by hand to ensure they are evenly distributed without breaking the candy shells.
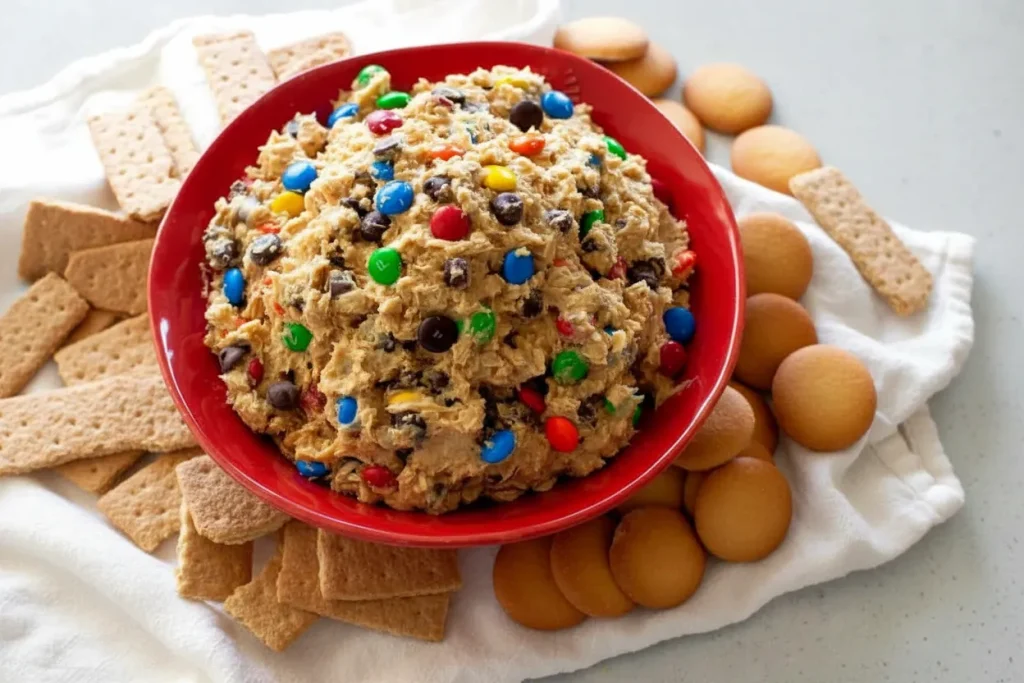
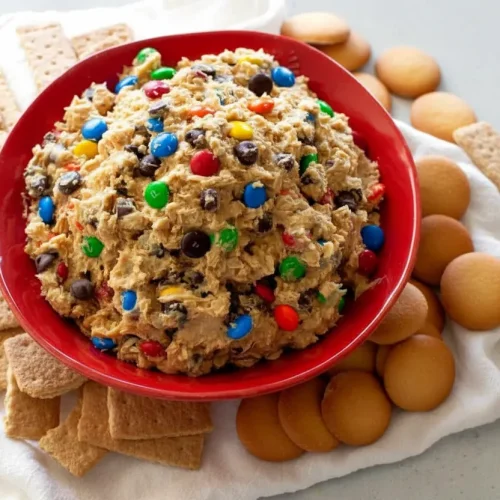
- Store in the refrigerator until serving. Serve with pretzels, graham crackers, or apple slices. You can dip or spread this depending on how thick you made your dip. Try not to eat it all like I did!
Pro tip: If you find the mixture is too thick after adding 2 cups of oats, stop there. The absorption rates of different grain brands can vary, and it is easier to add more oats later than it is to thin out a dip that has become too dry.
When you reach the stage of adding the oats, pay close attention to the tactile resistance of the dough. It should feel heavy but still pliable. If you use the full 2.5 cups of oats, you are creating a very sturdy dip that is best served with a knife for spreading. If you want something that can be scooped with a standard potato chip or thin cracker, stay closer to the 1.5-cup or 2-cup mark.
Accommodating Variables: Substitutions and Omissions for Allergies
While this recipe is optimized for the standard monster cookie profile, I have tested several workarounds for those with dietary restrictions or ingredient shortages. It is important to understand that changing a major component like peanut butter will alter the viscosity and flavor of the dip. However, by using the correct stabilizers, you can maintain the engineered standard.
Cream cheese is the non-negotiable structural component in this dip. It contains emulsifiers and stabilizers that allow the fat and sugar to hold together in a chilled state. Without it, the dip would lack the necessary tang to balance the sugar and would likely melt at room temperature. If you must replace it, a thickened Greek yogurt can work, but you will need to increase the oats significantly to compensate for the higher moisture content.
| Ingredient to Omit/Replace | Recommended Replacement/Stabilizer | Resulting Texture Change |
|---|---|---|
| Peanut Butter | Sunflower seed butter or almond butter | Slightly thinner consistency; may require 2 tbsp extra powdered sugar. |
| Old-Fashioned Oats | Certified gluten-free quick oats | Denser, more uniform texture with less chew. |
| Semi-Sweet Chips | Dark chocolate chunks or cacao nibs | Increased bitterness; chunks provide more tactile resistance. |
| M&Ms | Chopped chocolate-covered sunflower seeds | Nut-free crunch; smaller inclusions lead to a smoother spread. |
Pro tip: When using sunflower seed butter, the dip may take on a slight greenish tint after 24 hours due to a reaction with the baking soda often found in commercial seeds. This is harmless but can be visually startling.
If you are removing the peanut butter entirely, you are losing a significant amount of fat and protein that provides structure. In these cases, I recommend increasing the butter by 2 tablespoons and adding an extra 1/4 cup of heat-treated flour to provide the necessary body that the peanut butter usually offers. This ensures the dip doesn’t become a puddle as it sits on the serving table. For other great desserts, try my recipe for the ultimate chocolate cheesecake recipe: no cracks!.
Yield, Storage, and The Protein Dip Variation
This recipe yields approximately 16 servings, assuming a serving size of about 3 tablespoons. Because this dip is high in fats and sugars, it is quite calorie-dense and very satisfying in small portions. When it comes to storage, this dip is incredibly resilient if handled correctly. Because we have heat-treated the flour and used stabilized fats, it can last in the refrigerator for up to 7 days in an airtight container.
For long-term storage, this monster cookie dough dip can be frozen for up to 3 months. To do this, I recommend wrapping the dip tightly in plastic wrap, ensuring there is no air contact with the surface, and then placing it in a heavy-duty freezer bag. To serve after freezing, thaw it in the refrigerator for 24 hours. Do not thaw it on the counter, as the rapid temperature change can cause the emulsion to break, resulting in a grainy texture.
If you are looking to increase the nutritional density of this treat, you can create a protein-focused variation. I have successfully substituted 1/2 cup of the powdered sugar with a high-quality vanilla or unflavored whey protein powder. Because protein powder is much more absorbent than powdered sugar, this substitution will make the dip significantly drier. To maintain the moisture balance, you must add 1 to 2 teaspoons of milk or heavy cream for every 1/4 cup of protein powder used.
Pro tip: When making the protein variation, add the milk one teaspoon at a time while the mixer is running. You want to reach a consistency that looks like wet sand before you add the oats.
This protein version is excellent for those who want a post-workout treat that still feels like a decadent dessert. The addition of the protein powder actually helps stabilize the dip even further, making it less likely to soften at room temperature. However, the flavor of the protein powder will be present, so ensure you use a brand that you genuinely enjoy the taste of.
Frequently Asked Questions
What is the origin or context of this specific monster cookie dough dip?
The concept of the monster cookie is a classic American tradition, typically involving a “kitchen sink” approach where oats, peanut butter, and various candies are combined. The dip version of this cookie became popular as a party appetizer because it offers the nostalgic flavor of raw cookie dough without the traditional risks associated with raw eggs. My version takes this casual party food and applies engineering principles to ensure that it is not only delicious but also safe and structurally sound for hours of serving.
Can the dip be safely refrigerated, and for how long?
Yes, the dip must be refrigerated due to the cream cheese and butter content. When kept in an airtight container at a standard refrigerator temperature of 40°F (4°C) or below, it will remain fresh for up to one week. If you notice any separation or off-smells, discard it, but generally, the high sugar content acts as a preservative for the dairy. As I mentioned in the storage section, for any duration beyond a week, the freezer is your best option to maintain the quality of the fats and the crunch of the inclusions.
What are the core ingredients that define monster cookie dough flavor?
The signature profile of a monster cookie comes from the specific interplay of three elements: the salty-sweet depth of peanut butter, the earthy chew of toasted oats, and the chocolatey crunch of M&Ms. Without any one of these three, the dip loses its identity. While you can add other items like pretzels or nuts, the foundation must always be that specific trio to be considered a true monster cookie dough dip. The addition of vanilla and brown sugar rounds out the profile, providing that distinct “dough” flavor that separates it from a simple peanut butter spread.
Conclusion: Your Blueprint for Dip Perfection
Building the perfect monster cookie dough dip is an exercise in process control. By treating the flour to eliminate biological risks, whipping the fats to create a stable air-filled matrix, and carefully managing the hydration of the oats, you have moved beyond simply following a recipe. You have executed a blueprint designed for success. The result is a dip that is creamy, chewy, and holds its structural integrity from the first scoop to the last.
I have found that the most successful home cooks are those who pay attention to the small details, the temperature of the butter, the duration of the whipping, and the specific variety of grain used. These variables might seem minor, but they are the difference between a messy failure and an engineered masterpiece. This dip is a testament to the idea that even the simplest party foods benefit from a bit of scientific rigor and meticulous testing.
Did you measure your whipping time accurately? Did your texture meet the engineered standard? Report your results and your oat preference in the comments below. If you implemented this blueprint successfully, share this precise methodology with a friend who needs a foolproof dessert. Cooking is a skill that improves with every iteration, and I am confident that this system will become a staple in your entertaining repertoire. Thank you for trusting the process and joining me in the kitchen to engineer something truly delicious.
Monster Cookie Dough Dip
Equipment
- Oven
- Rimmed baking sheet
- Instant-read thermometer
- Sifter
- Hand mixer or stand mixer
- Wooden spoon or paddle attachment
Ingredients
The Safety Protocol: Heat-Treated Flour
- 1/4 cup all-purpose flour Must be heat-treated to 165°F (74°C) before using
The Precision Components
- 1 package (8 ounce) cream cheese Softened, non-negotiable structural component
- 1/2 cup butter Slightly softened
- 1 cup creamy peanut butter Standard variety, not natural style
- 2 cups powdered sugar
- 3 Tablespoons brown sugar
- 1 teaspoon vanilla
- 2.5 cups rolled oats Old-fashioned preferred for texture
- 2/3 cup plain M&Ms Adjust to preference
- 1 cup semi-sweet chocolate chips
Instructions
The Build Sequence
- Heat-treat the flour: Preheat oven to 350°F (175°C), spread flour thinly on a baking sheet, and bake for 5-8 minutes until the internal temperature reaches 165°F (74°C). Let cool completely, then sift.
- Using a hand mixer or stand mixer, beat the cream cheese, butter, and peanut butter until smooth. Spend at least 3 minutes on this step to achieve the necessary aeration and volume.
- Add in the sifted heat-treated flour, powdered sugar, brown sugar, and vanilla. Mix on low speed initially to avoid a sugar cloud, then increase to medium until the mixture is fully incorporated and fluffy.
- Using the paddle attachment or a wooden spoon, mix in the old-fashioned oats. Be mindful that the dip will firm up slightly in the fridge as the oats hydrate.
- Add the M&Ms and chocolate chips. Fold these in by hand to ensure they are evenly distributed without crushing the candy shells.
- Store in the refrigerator until serving. Serve with pretzels, graham crackers, or apple slices.


