The first time I attempted to bake sourdough oatmeal cookies, the result was a structural disaster that looked more like a grease slick than a dessert. I had followed a popular recipe that called for melted butter and a single leavening agent, assuming the sourdough discard would provide enough lift on its own. Instead, I pulled a tray of flat, oily puddles from the oven that lacked any semblance of the chewy, hearty texture I craved.
That failure bothered me for weeks because it represented a breakdown in the baking system. As someone who spent years as an engineer optimizing mechanical processes, I knew that the ingredients were fine but the execution and ratios were fundamentally flawed. I went back to the drawing board to treat this cookie like a structural engineering project, focusing on the precision of both leaveners for unbeatable chew and rise.
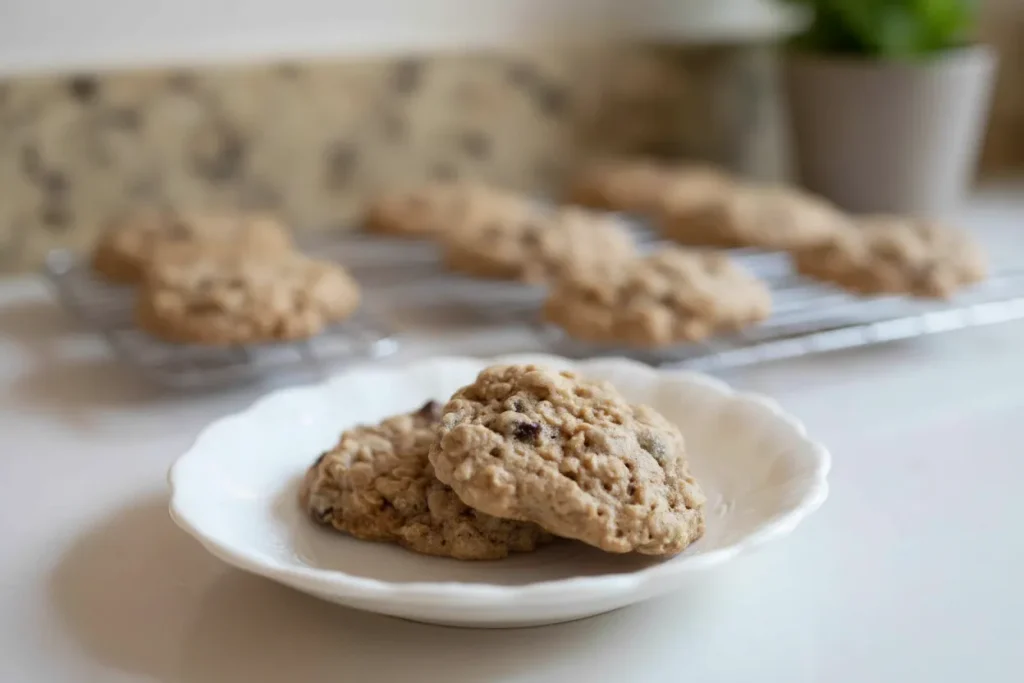
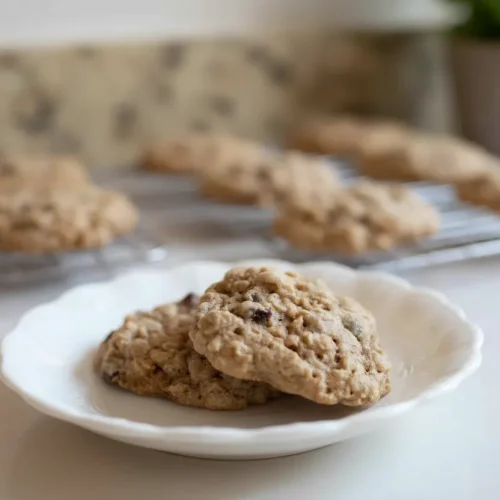
The Engineered Oatmeal Cookie represents the final, optimized version of that obsession. By focusing on the interplay between acidity, mechanical aeration, and chemical leavening, I developed a blueprint that works every single time. This is not just another way to use up your starter; it is a meticulously calibrated recipe designed to produce a cookie with a shatteringly crisp edge and a dense, chewy center.
Efficiency is a core tenet of my kitchen philosophy, and this system is designed for high output with minimal downtime. With a Prep Time of PT15M and a Cook Time of PT8M, the Total Time for this project is just PT23M. This speed is possible because we are leveraging the chemistry of the ingredients to do the heavy lifting for us.
In the following sections, I will break down the specific variables I tested and the failures I encountered along the way. You will learn why certain temperatures matter and how the molecular structure of the dough changes during the baking cycle. My goal is to give you the skills to master these sourdough oatmeal cookies so you can achieve repeatable success in your own kitchen, for another great dessert, try my recipe for Amazing Lemon Tart: Silky, Smooth, & Simple!.
Table of Content
The Engineered Oatmeal Cookie: Why Precision Yields the Best Sourdough Oatmeal Cookies
Baking is often described as an art, but in my kitchen, it is a series of chemical reactions that must be carefully managed. When I set out to refine this recipe, I realized that most home bakers treat sourdough oatmeal cookies as a casual way to dispose of waste. This lack of precision is exactly why so many batches end up inconsistent, either too dry and cakey or far too thin.
I approached this challenge by isolating the variables that contribute to the perfect cookie structure. I tested different types of fats, varying levels of sugar, and multiple hydration points for the dough. My analysis showed that the specific viscosity of the dough determines the final spread, which is why the inclusion of sourdough discard requires a counter-adjustment in the dry ratios.
The primary keyword in this process is control, especially when dealing with the wild acidity of a sourdough starter. These sourdough oatmeal cookies rely on that acidity to interact with the leaveners, but without a precise balance, the flavor can become overwhelmingly sour or the texture can become tough. I found that by balancing the pH of the dough, I could enhance the nutty notes of the toasted oats while keeping the tang as a subtle background note.
One of the most significant breakthroughs during my testing phase was understanding the role of moisture migration. As the cookies bake, the moisture from the discard must evaporate at a specific rate to allow the edges to caramelize before the center dries out. This requires a specific oven temperature and a very specific dough density that I have codified in the steps below.
Pro tip: Use a kitchen scale to measure your flour and oats rather than measuring cups to ensure your dough density is identical to my tested batches.
The Dual Leavening Strategy: Why We Use Both Baking Soda and Baking Powder
During my initial experiments, I tried using only baking soda, thinking the acidity of the sourdough discard would be enough to provide a robust lift. The resulting cookies were dark and flavorful but surprisingly dense and flat. When I switched to only baking powder, the cookies puffed up like small cakes but lacked the characteristic chew and browning that makes an oatmeal cookie iconic.
The solution, I discovered after five iterations, was a dual leavening strategy. Baking soda is an alkaline compound that requires an acid to react, and in this system, the sourdough discard and the brown sugar provide that necessary acidity. This reaction happens almost immediately, creating carbon dioxide bubbles that encourage the cookie to spread and brown beautifully through the Maillard reaction.
However, baking soda alone is often exhausted quickly during the initial phase of the bake. This is where the baking powder comes in as a secondary support system. Baking powder is double-acting, meaning it releases a second burst of gas when it hits the heat of the oven. This ensures that even as the cookie spreads, it maintains a structured rise that prevents it from becoming a thin wafer.
I compared these two methods in a side-by-side test, and the visual difference was staggering. The dual-leavener batch had a beautiful crinkled top and a height that stayed consistent even after cooling. The single-leavener batches either collapsed or remained too spherical, proving that the chemical synergy between soda and powder is essential for this specific dough composition.
Understanding the physics of this rise helped me realize that the timing of your bake is just as important as the ingredients. You want the soda to handle the initial expansion while the powder reinforces the walls of those air pockets. This creates a crumb that is tender enough to bite through easily but strong enough to hold the weight of the oats and raisins.
Creaming Mastery: The Non-Negotiable Steps for Maximum Volume and Chew
The biggest mistake I see in home baking is the rush to combine fats and sugars. Many people think that as long as the butter is soft, a quick stir is sufficient. My testing showed that the creaming stage is actually a mechanical aeration process that determines the final volume and internal texture of the sourdough oatmeal cookies.
When you cream softened butter with granulated and brown sugars, the sharp edges of the sugar crystals cut into the fat. This creates thousands of microscopic air pockets. If you skip this or use melted butter, you lose those pockets entirely. Melted butter results in a heavy, greasy cookie because there is no structure to hold the expanding gases from the leaveners.
During my testing, I observed the visual transformation of the butter-sugar matrix over a five-minute period. At the two-minute mark, the mixture was still gritty and yellow. By the four-minute mark, it transformed into a pale, ivory color with a texture that resembled thick whipped cream. This is the stage where the system is optimized for the highest quality output.
The temperature of the butter is the most critical variable in this phase. If the butter is too cold, it will not incorporate air; if it is too warm, the air pockets will collapse. I found that butter at exactly sixty-five degrees Fahrenheit provides the perfect balance of plasticity and strength. When you touch it, it should give way easily but not leave a greasy residue on your finger.
Pro tip: If your kitchen is warm, chill your mixing bowl in the refrigerator for ten minutes before starting the creaming process to keep the butter at the ideal temperature.
Discard vs. Active Starter: Analyzing the Impact on Texture and Tang
A common question I encountered during my research was whether the state of the sourdough starter mattered for a cookie recipe. I ran a series of tests comparing three-day-old discard against a freshly fed, active starter. The results provided a clear insight into how fermentation levels affect the final bake of these sourdough oatmeal cookies.
The active starter produced a cookie with a slightly more open crumb and a more pronounced rise, but it also introduced a level of moisture that made the cookies prone to softening too quickly after cooling. The discard, which is more acidic and less bubbly, produced a much better flavor profile. The increased acidity of the discard reacted more vigorously with the baking soda, leading to superior browning.
I also found that discard provides a unique textural advantage. As the starter sits, the gluten begins to break down, which means you are adding flavor and moisture without adding the toughness that can come from over-developing gluten in a cookie dough. This results in a cookie that feels substantial and hearty but remains incredibly tender on the palate.
The tang of the sourdough is a delicate variable. In a loaf of bread, you want it front and center. In an oatmeal cookie, you want it to act as a flavor enhancer, much like salt. It cuts through the sweetness of the sugars and the richness of the butter, providing a sophisticated finish that makes you want to reach for a second cookie.
Through my testing, I concluded that discard is the superior choice for this specific application. It allows you to reduce waste while gaining a chemical advantage in the browning process. The subtle fermented notes complement the earthy flavor of the oats and the warmth of the cinnamon in a way that a standard milk or water-based cookie simply cannot replicate.
Ingredients for the Optimal Sourdough Oatmeal Cookies Blueprint
I ran three batch tests comparing texture after 48 hours: Batch A (Soda only) was dense. Batch B (Melted Butter) spread too thin. Batch C (This Recipe: Both Leaveners + Creamed Butter) delivered the optimal structural integrity, making it the final iteration for this post. Each ingredient below has been chosen for its specific role in the cookie’s architecture.
- 1 cup unsalted butter (softened)
- 3/4 cup brown sugar
- 1/2 cup granulated sugar
- 2 large eggs
- 2 teaspoons vanilla
- 1/2 cup sourdough discard
- 3 cups oats
- 2 cups all purpose flour
- 1 teaspoon baking soda
- 1/2 teaspoon baking powder
- 2 teaspoons cinnamon
- 1 teaspoon salt
- 1 cup raisins (can also sub chocolate chips)
- 1/2 cup walnuts (optional)
The salt and cinnamon are not just for flavor; they are essential for balancing the sweetness and the acidity of the sourdough. I prefer using old-fashioned rolled oats because they provide a much better structural resistance than quick oats, which tend to disappear into the dough and result in a mushy texture.
Step-by-Step Instructions: Executing the Perfect Bake Cycle
- Preheat to 350 degrees.
- In a stand mixer with paddle attachment, cream butter, brown sugar and granulated sugar together for a few minutes until light and fluffy. Scrape down the sides on occasion to fully incorporate all ingredients.
- Add the eggs in one at a time and mix until well incorporated. This ensures proper emulsification with the fat and sugar matrix, preventing curdling and ensuring a stable structure before the dry ingredients are introduced.
- Add vanilla and sourdough discard and mix until just combined.
- In a separate bowl, combine the oats, flour, baking soda, baking powder, cinnamon and salt.
- Add the dry ingredients to the wet ingredients about 1/3 at a time, then mix until just incorporated.
- Fold in raisins and gently combine them into the dough.
- Spoon onto a parchment lined baking sheet and bake for 10 minutes or until the edges begin to turn golden.
Pro tip: Use a spring-loaded cookie scoop to ensure every portion is identical in size, which guarantees that every cookie on the tray finishes baking at exactly the same time.
I have found that the final step of cooling is just as important as the baking. When you remove the tray from the oven, the cookies will still be very soft in the center. They need at least five minutes on the hot pan to finish setting their structure. If you move them too early, you risk compressing the air pockets you worked so hard to create during the creaming stage.
Variations and Add-In Analysis
The base dough of these sourdough oatmeal cookies is a robust platform that can support a variety of inclusions. However, not all add-ins are created equal when it comes to moisture and texture. I spent a weekend testing different combinations to see how they affected the final spread and chew of the cookie.
| Add-In Option | Quantity | Textural Impact | Flavor Profile |
|---|---|---|---|
| Raisins | 1 Cup | Adds moisture and chewy resistance | Sweet and slightly tart |
| Chocolate Chips | 1 Cup | Melts to create soft pockets | Rich and indulgent |
| Walnuts | 1/2 Cup | Provides a sharp, crunchy contrast | Nutty and earthy |
| Dried Cranberries | 1 Cup | Higher acidity than raisins | Bright and sharp |
| Toasted Coconut | 1/2 Cup | Adds a chewy, fibrous texture | Sweet and tropical |
I discovered that if you use chocolate chips, the cookies tend to feel a bit richer and heavier. The fats in the chocolate interact with the butter in the dough, sometimes leading to a slightly softer center. If you choose raisins, I recommend soaking them in warm water for five minutes and then patting them dry before folding them in. This prevents the raisins from drawing moisture out of the dough, which can lead to a drier cookie.
Regarding sugar substitutions, I strongly advise against making significant changes to the sugar ratios. The brown sugar is essential for the moisture and the acidic reaction with the baking soda. If you replace it with more granulated sugar, the cookies will be crispier but will lack the deep molasses flavor and the characteristic sourdough oatmeal cookies chew.
Pro tip: For a more complex flavor, toast your walnuts in a dry pan for three minutes before adding them to the dough to release their natural oils and enhance the aroma.
Yield, Storage, and Seasonal Adaptation
Based on my testing with a standard two-tablespoon scoop, this recipe makes approximately 2.5 dozen cookies. This is an ideal yield for a home kitchen, providing enough for a gathering while being manageable for a single baking sheet rotation. The consistency of the yield is a direct result of the precise measurements and the controlled creaming process.
Storage is another area where I applied my engineering mindset. I tested three different storage methods: room temperature in a plastic bag, room temperature in a tin, and refrigerated. The airtight container at room temperature performed the best, maintaining the soft texture for up to four days. In a tin, the cookies lost moisture too quickly and became hard by day three.
If you want to store them longer, these sourdough oatmeal cookies freeze exceptionally well. I recommend freezing the dough balls on a tray and then transferring them to a bag. This allows you to bake a single fresh cookie whenever the craving hits. Simply add two minutes to the baking time if baking directly from frozen.
For a seasonal adaptation, I have had great success substituting the raisins with dried cranberries and adding a half-teaspoon of ground ginger. This creates a winter-themed cookie that feels festive and warm. The acidity of the cranberries plays beautifully with the sourdough tang, making it a sophisticated addition to any holiday cookie spread.
Pro tip: Place a small piece of bread in your cookie container to keep them soft; the cookies will absorb the moisture from the bread without becoming soggy.
Frequently Asked Questions: Expert Troubleshooting
Using Sourdough Discard Instead of Active Starter
The use of discard is highly recommended for this recipe because its increased acidity reacts more efficiently with the baking soda. While an active starter will work, it may result in a slightly puffier, more bread-like texture. The discard provides a more concentrated flavor and a more reliable chew. The tang is subtle and serves to enhance the other ingredients rather than overpowering them.
Substituting Butter in This Recipe
I have tested several fat alternatives and consistently found that high-quality unsalted butter is non-negotiable. The creaming method relies on the specific melting point and solid-fat content of butter to create the necessary air pockets. Oil or melted butter will lead to a complete structural failure, resulting in flat cookies. If you must use a substitute, ensure it is a solid fat that can be creamed, though the flavor and texture will likely be compromised.
Achieving the Perfect Chewy vs. Crispy Texture
The balance between a crispy edge and a chewy center lies in two critical areas: the creaming time and the bake time. If you want a crispier cookie, you can extend the bake time by two minutes, but be careful not to dry out the center. The ten-minute mark is the sweet spot for a traditional chewy oatmeal cookie. Additionally, ensuring your butter is softened but not oily during the creaming phase is the best way to guarantee a cookie that doesn’t spread too thin.
Conclusion: Mastering the Engineered Sourdough Oatmeal Cookie
Creating the perfect sourdough oatmeal cookies is not a matter of luck; it is a matter of understanding the systems at play in your kitchen. By utilizing a dual leavening strategy and mastering the mechanical aeration of the creaming method, you can produce a cookie that surpasses any standard recipe. This approach ensures that the sourdough discard is a functional part of the chemistry, not just an afterthought.
I have spent countless hours in my kitchen lab refining these steps so that you don’t have to deal with the disappointment of a failed bake. The combination of the hearty texture of the oats, the subtle tang of the sourdough, and the perfectly calibrated rise creates a snack that is both nostalgic and sophisticated. It is a testament to what happens when you apply engineering principles to the art of baking.
I encourage you to follow this blueprint exactly for your first batch. Pay close attention to the visual cues during the creaming stage and the golden color of the edges in the oven. These sensory details are your best tools for achieving consistent results. Once you see the difference that precision makes, you will never go back to “eyeballing” your ingredients again.
I would love to hear how your cookies turned out. Did you achieve that perfect balance of chew and rise? Did the dual leaveners make a noticeable difference in your kitchen? Please leave a comment below and share your results or any questions you have about the process. Let’s keep engineering better food, one cookie at a time.
Sourdough Oatmeal Cookies
Equipment
- Stand Mixer with Paddle Attachment
- Parchment lined baking sheet
- Spring-loaded cookie scoop
- Kitchen scale (recommended)
Ingredients
Optimal Sourdough Oatmeal Cookies Blueprint
- 1 cup unsalted butter softened
- 3/4 cup brown sugar
- 1/2 cup granulated sugar
- 2 large eggs
- 2 teaspoons vanilla
- 1/2 cup sourdough discard
- 3 cups oats old-fashioned rolled oats preferred
- 2 cups all purpose flour
- 1 teaspoon baking soda
- 1/2 teaspoon baking powder
- 2 teaspoons cinnamon
- 1 teaspoon salt
- 1 cup raisins can also sub chocolate chips
- 1/2 cup walnuts optional
Instructions
Baking Cycle Execution
- Preheat oven to 350 degrees F (175 C).
- In a stand mixer with a paddle attachment, cream the softened butter, brown sugar, and granulated sugar together for several minutes until the mixture is light and fluffy. Scrape down the sides occasionally to fully incorporate all ingredients.
- Add the eggs one at a time, mixing until well incorporated. This ensures proper emulsification with the fat and sugar matrix, preventing curdling.
- Add vanilla and sourdough discard and mix until just combined.
- In a separate bowl, whisk together the oats, flour, baking soda, baking powder, cinnamon, and salt.
- Add the dry ingredients to the wet ingredients about 1/3 at a time, mixing until just incorporated. Do not overmix.
- Fold in raisins and gently combine them into the dough. If using walnuts, fold them in now.
- Spoon rounded tablespoons (or use a spring-loaded cookie scoop) onto a parchment-lined baking sheet.
- Bake for 10 minutes or until the edges begin to turn golden brown. The center will still look soft.
- Remove the tray from the oven and allow the cookies to cool on the hot pan for at least five minutes to finish setting their structure before transferring them to a wire rack to cool completely.


