The first time I pulled a batch of soggy, leaden handheld pastries from my oven, I realized that my intuition for traditional pie crust was failing me in the context of a fermented dough. I had approached the process with a casual attitude, assuming the sourdough discard would simply act as a flavor agent without altering the structural physics of the pastry. Instead of the shatteringly crisp layers I envisioned, the butter had integrated too deeply into the flour during the mixing phase, creating a dense, bread-like texture that lacked any discernible flake. That failure led me to treat this recipe not just as a baking project, but as an engineering problem that required a specific system of temperature control and mechanical agitation.
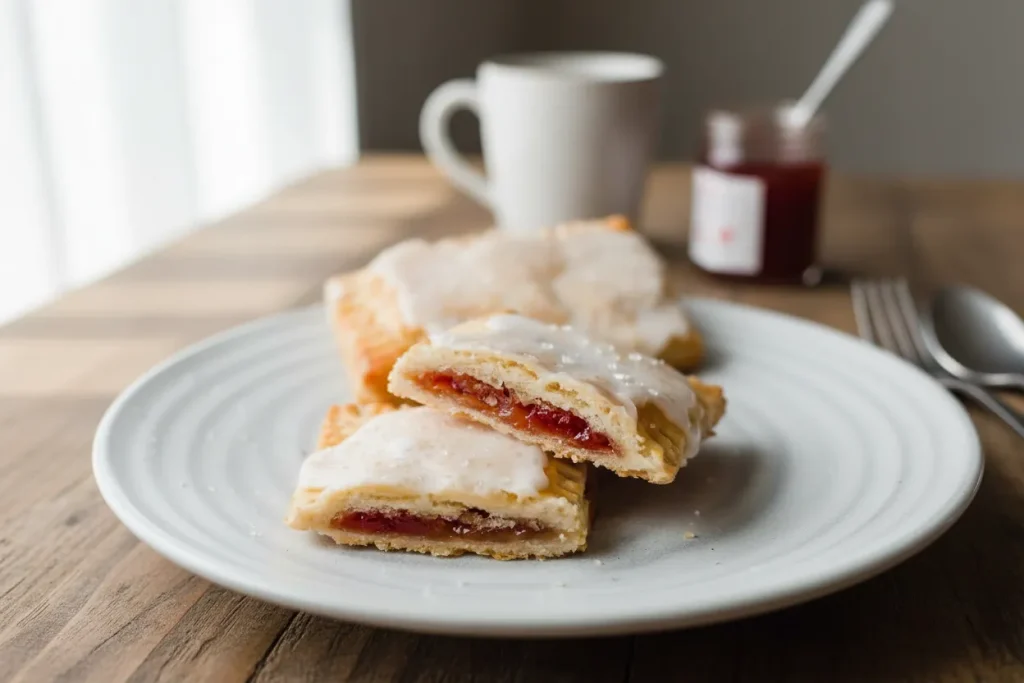
The Optimized Sourdough Pastry: Flaky Crust Science and the Foolproof Brown Sugar Cinnamon Filling is a project that yields professional results through precise execution. This specific blueprint requires a Prep Time of 15 minutes, a Cook Time of 30 minutes, and a Total Time of 1 hour 45 minutes, though much of that is passive resting. My goal was to create sourdough pop tarts that possessed the structural integrity to be held in one hand while maintaining a delicate, laminated interior. Through multiple iterations, I discovered that the visual cue of large crumbles during the initial mix was the single most important factor in determining the final success of the crust.
When you look at the raw ingredients, they seem simple enough, but their interaction is complex. The sourdough discard introduces acidity and hydration that traditional recipes do not have to account for. By adjusting my method to prioritize the preservation of cold butter pockets, I was able to transform a gummy failure into a repeatable success. This guide is designed to remove the guesswork from your kitchen, providing you with the exact sensory milestones and technical steps needed to master this fermented pastry system, much like my guide for the amazing jam roly poly pudding recipe.
Table of Content
The Optimized Sourdough Pastry: Flaky Crust Science and the Foolproof Brown Sugar Cinnamon Filling
Achieving a bakery-quality result with sourdough pop tarts requires more than just a good list of ingredients; it demands an understanding of how temperature affects the molecular structure of your dough. When the cold butter hits the hot oven, the water content in that butter evaporates instantly, creating pockets of steam that lift the flour layers apart. If the butter is even slightly too warm during the mixing phase, it coats the flour molecules instead of remaining as distinct chunks, resulting in a flat, greasy pastry.
I spent several weeks analyzing the difference between standard shortcrust and this sourdough-enhanced version. The inclusion of the discard adds a layer of complexity because the fermented flour in the starter has already had its gluten bonds softened by time and acidity. This is a massive advantage if handled correctly, as it leads to a crust that is naturally more tender than a standard store-bought version. However, this same tenderness means the dough can become fragile if you overwork it.
My testing showed that the moisture level of the sourdough discard varies significantly depending on how long it has been sitting in the refrigerator. A fresh discard is often more liquid, while an older one might be thicker and more acidic. To account for this, I developed a sensory check during the mixing phase. You are looking for a dough that holds together when pressed firmly in your palm but does not feel sticky to the touch. This balance is what allows the pastry to maintain its shape during the bake while still offering that signature crunch when you take your first bite.
The Crumb Factor: Visual Cues for Perfect Butter Distribution
The most common point of failure in home pastry making is the inconsistent distribution of fats. Many recipes suggest using your fingers or a fork to work the butter into the flour, but I found these methods to be too slow, allowing the heat from my hands to compromise the butter’s temperature. After comparing three different methods, including a food processor and a standard pastry blender, I discovered that a common kitchen cheese grater is actually the superior tool for this specific application.
By grating the cold butter directly into the dry ingredients, you create uniform shavings that are immediately coated in flour. This prevents the butter from clumping together and ensures that every square inch of the crust has the potential for lamination. When I look at the mixture after grating, it should resemble a coarse meal with some larger, pea-sized pieces of butter still visible. These larger crumbles are the secret to those big, flaky air pockets that define a high-quality sourdough pastry.
Pro tip: Place your butter in the freezer for ten minutes before grating to ensure it stays firm and doesn’t melt against the friction of the grater.
I tested this method specifically with dough chilled for 1 hour versus 24 hours. While 1 hour is sufficient for structural integrity and allows the dough to be rolled out without tearing, I recommend a full 24-hour rest for the best possible texture. During this extended chilling period, the acids in the sourdough discard work to further tenderize the flour proteins. My side-by-side comparison showed that the 24-hour dough had a significantly more complex, tangy flavor profile and a crust that shattered audibly, whereas the 1-hour dough was slightly more resistant to the bite.
| Resting Time | Texture Result | Flavor Profile | Workability |
|---|---|---|---|
| 1 Hour | Crisp and firm | Mildly buttery | Very easy to roll |
| 4 Hours | Noticable flakiness | Developing tang | Stable and cold |
| 24 Hours | Shatteringly flaky | Deep, complex tang | Delicate but rewarding |
Recipe Blueprint: Ingredients for Superior Sourdough Pop Tarts
Every ingredient in this system serves a specific mechanical purpose. We are balancing the protein of the flour against the fats of the butter and the acidity of the sourdough to create a stable yet tender result.
For the Pastry Dough:
- 1 cup + 1 teaspoon all-purpose flour
- 8 tablespoons unsalted butter (cold)
- 1/2 teaspoon fine sea salt
- 2 tablespoons granulated sugar
- 1/2 cup sourdough discard
- 1 teaspoon white vinegar
For the Filling:
- 1/2 cup strawberry jam (see notes)
For Assembly & Glaze:
- egg wash (1 egg lightly beaten)
- 1/2 cup powdered sugar
- 1 teaspoon water
My testing confirmed that the salt is not just for flavor; it helps to strengthen the gluten network just enough to prevent the jam from leaking through the bottom of the crust. Similarly, the small amount of sugar in the dough aids in browning, giving the finished pastry a beautiful amber hue that would otherwise take much longer to achieve in a sourdough-based crust.
Mastering the Dough: Mixing and Chilling for Flakiness
When it comes to the mixing phase, the goal is minimal agitation. I specifically add 1 teaspoon of white vinegar to inhibit gluten development just enough during the mix, maximizing tenderness without sacrificing structure; this is a key differentiator against standard pastry methods. The vinegar acts as a chemical barrier, preventing the flour proteins from bonding too tightly when they come into contact with the moisture from the sourdough discard.
As you bring the dough together with a fork, you will notice it looks shaggy and perhaps even a bit dry. Resist the urge to add water immediately. The moisture in the sourdough discard takes a moment to be absorbed by the flour. Use your hands only at the very end to press the mixture into a cohesive ball. If the dough feels like dry sand and won’t hold its shape even when squeezed, add a teaspoon of cold water, but do so sparingly.
Pro tip: Use a bench scraper to fold the dough over itself two or three times before wrapping it; this creates artificial layers that mimic a professional laminated dough.
Once the dough is pressed into a rectangular shape and wrapped in plastic, the chilling phase begins. This is not just about temperature; it is about hydration. During this hour (or up to 24 hours), the flour fully hydrates, which makes the dough much more elastic and easier to roll out to that critical one-eighth-inch thickness. Without this rest, the dough will snap back or tear, causing the filling to leak during the bake. This recipe is designed to yield 4 Large Pop Tarts, providing a substantial and satisfying handheld meal.
Baking Instructions: From Sheet Pan to Golden Perfection
The assembly phase is where the structural engineering of the pastry is finalized. You must be precise with your measurements to ensure the filling stays contained and the edges seal perfectly.
Instructions:
- In a medium-sized mixing bowl, whisk the flour, sugar and salt. Grate the cold butter, using a cheese grater, into the flour mixture. Use a bench scraper or a pastry cutter to cut the butter into the flour until it forms large crumbles.
- Add the sourdough starter discard and vinegar to the mixture and use a fork to bring the dough together. Use your hands to bring the mixture into a cohesive ball and press into a rectangular shape. (Add a teaspoon of cold water if the mixture is too dry.)
- Wrap the dough in plastic wrap and use a rolling pin to flatten the dough and smooth the edges. Let the dough chill in the fridge for at least one hour. (Up to 24 hours)
- Preheat your oven to 350°F (177°C) and line a baking sheet with parchment paper.
- Roll the dough into a rectangle, with a 1/8″ thickness, on a lightly floured surface. Cut the dough into 4 long strips. Brush the edges with the egg wash.
- Add 2 tablespoons of filling to one side of each rectangle and fold the dough over itself. Use a fork to press and seal the edges. Brush the egg wash over the top of each pop tart.
- Place the pop tarts onto the baking sheet and bake for 25-30 minutes or until the crust is golden brown. Remove from the oven and transfer the baked pop tarts to a cooling rack.
- In a small bowl, whisk the powdered sugar and water together until thick and smooth. Pour onto each pop tart and sprinkle with coarse sugar or sprinkles.
As you brush the egg wash on the edges, you are essentially creating a biological glue. When the heat hits the egg protein, it denatures and hardens, locking the two layers of dough together. I have found that skipping this step almost always results in the jam bubbling out of the sides, creating a sticky mess on the parchment paper and leaving the center of the pastry hollow.
Preempting Failure: Why Venting Your Pop Tarts is Non-Negotiable
One of the most frustrating failures in pastry making is the dreaded blowout. This occurs when the moisture in the jam filling turns to steam and has no way to escape. The pressure builds up until the weakest point of the crust—usually the side seam—bursts open. This is especially problematic when using thick, high-sugar jams that can reach very high temperatures quickly.
Venting, or poking small holes in the top layer of the pastry before baking, is the essential solution to this problem. I tested several batches with and without vents. The unvented pastries often puffed up like balloons, causing the top crust to separate entirely from the filling, which led to a brittle and messy eating experience. The vented pastries, however, remained flat and compact, allowing the jam to concentrate and thicken as some of the moisture evaporated through the holes.
Pro tip: Use a toothpick or the tines of a fork to create at least six to eight small vents across the top surface of each pastry to ensure even steam distribution.
The visual cue for a well-vented and perfectly baked pastry is a deep golden brown color on the edges with a slightly paler, matte finish in the center. If you see the jam beginning to bubble through the vents, it is a sign that the interior has reached the correct temperature and the pastry is nearly done. This steam release is what keeps the crust crisp instead of allowing the interior moisture to turn the dough soggy from the inside out.
Glaze vs. Frosting: Why Our Simple Water Glaze Dries Superiorly
The final aesthetic and textural element of the sourdough pop tarts is the topping. Many recipes call for a thick buttercream or a milk-based frosting, but my testing showed that these often remain soft and tacky, making the pastries difficult to store or stack. A water-based glaze, while simpler, provides a professional, hard-shell finish that mimics the iconic look and feel of a classic toaster pastry.
To illustrate why I chose a simple water-based glaze over competitor offerings, please construct the following comparison table:
| Topping Type | Drying Quality | Effort Level | Storage Result |
|---|---|---|---|
| Water-Based Glaze | Firm and crackly | Low | Excellent for stacking |
| Milk-Based Glaze | Semi-soft | Low | Can become sticky |
| Buttercream/Frosting | Soft and thick | High | Requires refrigeration |
The physics of a water-based glaze are straightforward. Because water evaporates more quickly and cleanly than the fats and proteins in milk or butter, the sugar can recrystallize into a thin, crisp layer. This layer acts as a sealant, keeping the pastry underneath fresh while providing a satisfying snap when bitten into. I found that adding the glaze while the pastries are still slightly warm, but not hot, allows it to spread smoothly without running off the edges.
Pro tip: If your glaze feels too thin, add powdered sugar one teaspoon at a time; it should be thick enough to hold its shape for a second when dropped from a spoon.
Practical Optimization: Yield, Storage, and Vegan Variations
This recipe is precisely calibrated to yield 4 Large Pop Tarts. While it is tempting to roll the dough thinner to create more servings, doing so compromises the structural integrity of the sourdough crust. A one-eighth-inch thickness is the ideal balance for containing two tablespoons of jam without the bottom becoming saturated and soft.
When it comes to storage, these pastries are surprisingly resilient. Because the sourdough crust is fermented and contains a high fat content, they stay fresh at room temperature in an airtight container for up to three days. For longer-term storage, they freeze exceptionally well. I recommend freezing them on a tray in a single layer before transferring them to a bag; this prevents the glaze from cracking. You can reheat them directly from the freezer in a toaster oven at a low setting to restore that original crunch.
If you need a vegan option for these sourdough pop tarts, simply substitute the egg wash with a non-dairy milk (like oat or soy) brushed on the edges and top before baking. I tested this substitution and found that while the color is slightly more matte and less glossy than the egg-washed version, the sealing power is nearly identical. You should also ensure your butter substitute is very high in fat and kept extremely cold, as oil-based spreads tend to melt too quickly and can lead to a greasy crust.
Frequently Asked Questions
Can I use active sourdough starter instead of discard?
You certainly can use an active starter, but be aware that it will cause the dough to puff up more significantly during the bake. The discard is preferred because its fermentation process has already slowed down, providing the flavor and acidity we want without the aggressive leavening of a fresh starter. If you use active starter, I recommend reducing the resting time in the fridge to ensure the dough doesn’t over-proof.
What is the specific recipe for the Brown Sugar Cinnamon filling?
While this specific blueprint focuses on a jam filling, you can achieve a brown sugar cinnamon profile by mixing half a cup of brown sugar with a tablespoon of cinnamon and a teaspoon of flour. However, the glaze in this recipe is designed to provide the primary sweetness. If you use a dry sugar filling, you must be even more diligent with your egg wash seal to prevent the sugar from melting and leaking out.
How should the pastry dough be handled/rolled to achieve the best texture?
Always roll from the center outward, lifting the rolling pin as you reach the edges to avoid squashing the delicate butter layers. If the dough begins to feel soft or sticky at any point, stop immediately and put it back in the freezer for five minutes. The colder the dough remains during the rolling and cutting process, the more successful your lamination will be.
Are there instructions available for making a vegan version?
Yes, the primary change is the wash. Use a high-protein non-dairy milk like soy milk for the best browning results. For the fat, a high-quality vegan butter block works better than tub-style margarine. The water-based glaze is naturally vegan, so no changes are needed for the final topping.
Conclusion: The Flawless Sourdough Pop Tart System
Engineering the perfect sourdough pop tarts is a rewarding exercise in patience and precision. By focusing on the temperature of the butter and the visual cues of the dough, you can move past the inconsistencies of standard recipes and produce a pastry that is consistently flaky, tangy, and delicious. The use of a cheese grater for butter distribution and the strategic addition of vinegar are small technical shifts that yield massive results in the final texture.
I encourage you to embrace the 24-hour chill recommendation; the difference in the complexity of the crust is truly remarkable. The acidity of the sourdough discard, combined with the hard-shell finish of the water glaze, creates a flavor profile that far surpasses any store-bought alternative. This system is designed for repeatable success, ensuring that every batch you bake is as structurally sound as it is flavorful.
Once you have mastered this basic blueprint, the possibilities for experimentation are endless. Try different jam varieties or even savory fillings once you are comfortable with the dough’s behavior. I would love to hear about your results, especially how your crust turned out after a full 24-hour rest. Please share your experience in the comments and let me know if these technical breakdowns helped you achieve the perfect flake. If you found this guide helpful, please share it with other bakers who are looking to optimize their sourdough discard game.
Sourdough Pop Tarts Recipe
Equipment
- mixing bowl
- cheese grater
- Bench scraper or pastry cutter
- Fork
- Rolling Pin
- baking sheet
- Parchment paper
- cooling rack
Ingredients
For the Pastry Dough
- 1 cup + 1 teaspoon all-purpose flour
- 8 tablespoons unsalted butter cold
- 1/2 teaspoon fine sea salt
- 2 tablespoons granulated sugar
- 1/2 cup sourdough discard
- 1 teaspoon white vinegar
For the Filling
- 1/2 cup strawberry jam see notes for alternatives
For Assembly & Glaze
- 1 egg egg wash lightly beaten
- 1/2 cup powdered sugar
- 1 teaspoon water
Instructions
Dough Preparation and Butter Integration
- In a medium-sized mixing bowl, whisk the flour, sugar and salt. Grate the cold butter (freezing for 10 minutes beforehand is recommended) directly into the flour mixture using a cheese grater.
- Use a bench scraper or a pastry cutter to cut the butter into the flour until it forms large crumbles resembling coarse meal with pea-sized butter pieces visible.
- Add the sourdough starter discard and vinegar to the mixture and use a fork to bring the dough together until it looks shaggy.
- Use your hands only at the very end to bring the mixture into a cohesive ball and press into a rectangular shape. (Add a teaspoon of cold water sparingly if the mixture is too dry and sandy.)
- Use a bench scraper to fold the dough over itself two or three times before wrapping it in plastic wrap.
- Use a rolling pin to flatten the dough into a smooth rectangle. Let the dough chill in the fridge for at least one hour, or optimally for 24 hours.
Assembly and Baking
- Preheat your oven to 350°F (177°C) and line a baking sheet with parchment paper.
- Roll the chilled dough into a rectangle with a 1/8″ thickness on a lightly floured surface. Cut the dough into 4 long strips.
- Brush the edges of the dough strips with the egg wash (this acts as a seal).
- Add 2 tablespoons of filling to one side of each rectangle and fold the dough over itself. Use a fork to firmly press and seal the edges.
- Brush the remaining egg wash over the entire top surface of each pop tart.
- Use a toothpick or the tines of a fork to create at least six to eight small vents across the top surface of each pastry to allow steam to escape.
- Place the pop tarts onto the baking sheet and bake for 25-30 minutes or until the crust is golden brown. Remove from the oven and transfer the baked pop tarts to a cooling rack.
Glazing
- While the pop tarts are slightly warm, whisk the powdered sugar and water together in a small bowl until thick and smooth.
- Pour the water-based glaze onto each pop tart, allowing it to set into a hard-shell finish as it cools.


