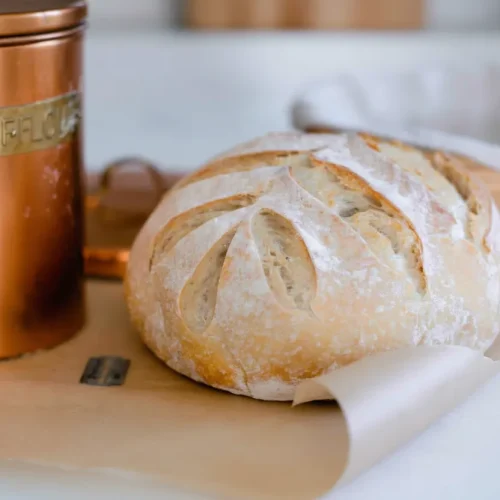
Beginners Sourdough Bread
This sourdough bread recipe is the result of rigorous optimization, stripping away unnecessary complexity to focus on three critical control points that dictate success for repeatable, professional results.
Equipment
- Large mixing bowl
- Plastic wrap or lid
- Banneton or bowl with floured tea towel
- Dutch oven
- Lame or razor blade
- Parchment paper
Ingredients
Definitive Sourdough Bread Ingredients
- 475 grams all-purpose flour (3 1/2 cups)
- 100 grams starter (active and bubbly (1/2 cup))
- 325 grams water (1 1/3 cups)
- 10 grams salt (2 teaspoons)
Instructions
Executing the System
- Feed a sourdough starter 4-12 hours before starting the dough, ensuring it is active and bubbly. You will know it is ready when it has doubled in size and looks like a thick, aerated mousse.
- Combine warm water, active starter, salt, and flour with a wooden spoon or even just your hands in a large mixing bowl. The water should feel like a warm bath, roughly ninety degrees, to jumpstart the yeast activity.
- Cover with plastic wrap or a lid and allow to rest for 30 minutes for the water to hydrate the flour. This rest is essential for gluten development and makes the next steps significantly easier.
- Grab the edge of the dough and pull up stretching it out as you pull upwards. This may be difficult and you may need to kind of bounce the dough to get it to stretch. Place dough that is in your hands back into the center. Turn the bowl about a quarter turn and complete another stretch and fold. Repeat two more times. This is considered one round. This controlled stretching manipulates gluten alignment, preparing the dough for the rapid gas expansion in the oven.
- Thirty minutes later, complete another round of stretch and folds. Cover and allow the dough to rest another 30 minutes. You will notice the dough becoming smoother and less sticky with each round.
- Complete one last stretch and fold round. By now, the dough should hold its shape in a ball and resist being pulled too far.
- Cover with a lid, damp towel, or plastic wrap. Let the dough bulk ferment in a warm place until it has doubled in size. This could be anywhere from 6-12 hours (or longer) depending on the temperature of your kitchen, maturity of your starter, etc. Be careful not to let it over ferment, which results in a sour, soupy mess.
- Place the dough on a clean work surface that has been lightly dusted with flour. Fold the dough onto itself and roll up. Then shape into a ball by gently spinning it toward you. This initial shaping organizes the fibers before the final tensioning.
- Optional - Let the dough sit out for 15-20 minutes uncovered. This prevents the dough from sticking to the tea towel during the overnight rise. It allows a very thin, dry skin to form on the surface.
- Turn over and shape. I do this by folding the two sides over to meet in the middle, pinch together and then repeat on the other two sides. This creates surface tension which helps give it more oven spring (a good rise).
- Transfer to a floured banneton or bowl with a floured tea towel (typically floured with rice flour, this is not necessary and all-purpose will work just fine) seam side up.
- Cover with plastic or place in a plastic bag and tie the ends. Let the dough rest for 12-15 hours in the refrigerator. You can also let the bread rise at room temperature for 3-4 hours. I like using the longer rise time in the refrigerator because it is easier to score and feel like the oven spring is better.
- Preheat a dutch oven to 500 degrees for 1 hour. This intense heat is necessary to turn the moisture in the dough into steam immediately.
- Remove dough from the fridge right before baking. Place dough on a piece of parchment paper. The cold dough will be easy to handle and hold its shape.
- Dust with flour, if desired, and score with lame or razor blade. I like to do one large score (called an expansion score) and then a cute design for the other score. The expansion score should be about half an inch deep.
- Carefully, transfer the piece of parchment paper with the dough into the hot dutch oven. Careful not to burn your fingers on the scorching cast iron.
- Place the lid back on and place the dutch oven into the hot oven. Bake for 20 minutes. The lid traps the steam, keeping the crust soft so the bread can expand fully.
- Remove the lid with oven mitts, turn the oven temperature down to 475, and bake an additional 15-25 minutes or until golden brown. You will hear a steady crackling sound as the crust cools and hardens.
Notes
The success of this bread comes down to mastering the three control points: the hydration rest, the structured stretch and folds, and the final tension shaping. When judging bulk fermentation readiness, rely on visual cues—the dough must double in volume and feel light and jiggly. If baking in winter, expect bulk fermentation to take significantly longer due to cooler kitchen temperatures. For storage, keep the finished loaf at room temperature for up to two days in a paper bag to preserve the crust texture.
Nutrition
Calories: 152kcalCarbohydrates: 32gProtein: 4gFat: 0.4gSodium: 325mgFiber: 1g
Tried this recipe?Let us know how it was!