Easy Homemade French Bread
This engineering-focused French Bread Recipe eliminates guesswork by focusing on controlled humidity and achieving a guaranteed 205-degree internal temperature for a light crumb and a shatteringly crisp crust.
Equipment
- Electric stand mixer with dough hook
- Digital thermometer
- Bread lame, razor blade, or VERY sharp knife
- Baking sheets
- Parchment paper
- Instant read thermometer (for final check)
Ingredients
Precision Components for Authentic Structure
- 2 1/4 cups warm water 110-115 degrees F
- 2 tablespoons granulated sugar
- 1 tablespoon instant or active dry yeast
- 2 1/4 teaspoons salt see note
- 2 tablespoons olive oil, canola oil, vegetable oil or avocado oil
- 5 1/2 - 6 cups all-purpose flour or bread flour see note
Instructions
A Step-by-Step Blueprint for Perfect French Bread
- In the bowl of an electric stand mixer fitted with the dough hook, combine the water, sugar, and yeast. If using active dry yeast, let the mixture bubble and foam before proceeding (this can take 3-5 minutes). If using instant yeast, proceed with the recipe (no need to let the yeast activate).
- Add the salt, oil, and 3 cups of flour and mix. Add in 2 1/2 to 3 more cups of flour gradually. The dough should clear the sides of the bowl and form a soft ball that doesn't leave a lot of dough residue on your fingers.
- Knead for 2-3 minutes until the dough is smooth. If the dough starts to cling to the sides of the bowl (or the center column if using a Bosch or other mixer with a center), add 1/4 cup of flour at a time until a sturdy but soft ball of dough forms.
- Rising Method 1: Leave the dough in the mixer, cover with a lid or towel, and let the dough rest for 10 minutes. Stir it down by turning on the mixer for 10 seconds or so. Repeat the rest and stir down cycle five more times.
- Rising Method 2: Instead of letting the dough rest for 10 minute spurts and then stirring it down, transfer the dough to a lightly greased bowl and cover with a towel or greased plastic wrap. Let the dough rise until doubled, about an hour or so, depending on the warmth of your kitchen.
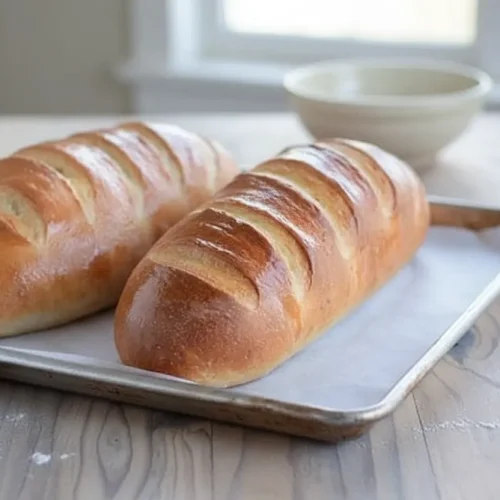
- Turn the dough onto a lightly greased surface and divide in half. Pat each section into a thick rectangle, 9X13-inches or thereabouts (doesn't have to be exact). Roll the dough up starting from the long edge, pressing out any air bubbles or seams with the heel of your hand, and pinch the edge to seal. Arrange seam side down on a large baking sheet lined with parchment paper (I use separate baking sheets for each loaf).
- With a bread lame, razor blade or VERY sharp knife, cut several gashes at an angle on the top of each loaf (you can wait to score the bread until after it rises, but it can easily deflate if the razor/knife isn't sharp enough).
- Cover the loaves with greased plastic wrap or a kitchen towel, and let rise until noticeably puffy and nearly doubled in size, about an hour.
- Preheat the oven to 375 degrees F and make sure an oven rack is in the center position. If you find your bread isn't browning as much as you like, preheat the oven to 400 or 425 degrees and/or move the oven rack up one position (watch carefully so the bread, especially the bottom, doesn't burn).
- Optional: for an extra golden, crisp crust, place the loaves in the preheated oven and immediately toss 3-4 ice cubes on the bottom of the oven. Close the oven door quickly but gently.
- Bake the loaves for 25-30 minutes until golden and baked through.
- If desired, brush melted butter over the hot loaves (this softens the crust a bit, so if you want a crispier crust, don't butter the top).
Notes
For active dry yeast, water temperature must be between 110-115 degrees F. If using active dry yeast, look for a thick, creamy foam to appear during activation. If the dough passes the windowpane test (a small piece can be stretched thin enough to see light through it without tearing), it is ready for kneading completion. If the indentation from the finger poke test fills back slowly, the dough is perfectly proofed. Do not slice the bread until it has cooled substantially to maintain the internal structure. To refresh a day old loaf, mist the crust lightly with water and place it in a 350 degree oven for five minutes to restore the crunch. Store cooled bread in a paper bag, not plastic.
Nutrition
Calories: 233kcalCarbohydrates: 47gProtein: 6gFat: 2g
Tried this recipe?Let us know how it was!