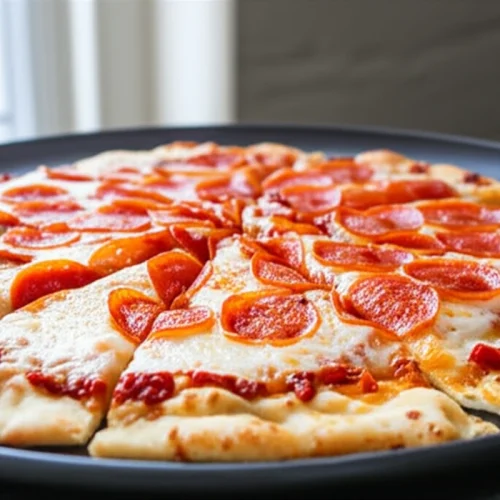
I’ve been on a quest for years: the perfect thin and crispy pizza. It sounds so simple, yet so many recipes fall short, leaving you with a crust that’s either too soft, too chewy, or just plain disappointing. I know the frustration of spending time and effort only to end up with inconsistent results.
That’s why I created this “Engineer’s Guide” to foolproof thin and crispy pizza. This Easy Thin Crust Pizza recipe only takes about 15 minutes to prep and 15 minutes to cook, so in about 30 minutes, you will be enjoying your pizza! I’ve broken down every step, analyzed the variables, and optimized the process for repeatable success. With this recipe, you will be enjoying your pizza in no time!
Next, I’ll dive into the science behind why this recipe works so well.
Table of Content
The Science of Crispy: How Gluten, Heat, and Fat Interact for the Perfect Thin and Crispy Pizza Crust
Now that I’ve introduced the recipe, let’s delve into the “why” behind its success, namely the science of gluten, heat, and fat. These elements work together in harmony to create the perfect thin and crispy pizza crust. Understanding their roles is key to mastering the recipe.
Gluten development is crucial. It’s what gives the dough its structure and elasticity. Think of gluten as a network of tiny, interwoven strands. Over-mixing the dough leads to a tough, chewy crust because the gluten becomes too strong. This is why I specify a mixing time of just 3 minutes in a stand mixer or 5 minutes of kneading by hand. This precise timing develops enough gluten for a cohesive dough, but not so much that it becomes tough.
Heat distribution is equally important. High heat is essential for achieving that desirable crispiness. I preheat my oven to 450 degrees because that intense heat rapidly evaporates moisture from the dough’s surface, creating a crisp, golden-brown crust.
Finally, the fat content plays a surprising role. Fat inhibits gluten formation, resulting in a more tender, delicate crumb. Most other thin crust pizza recipes do not utilize fat; however, the addition of olive oil to the dough and brushing the crust with garlic vegetable shortening is a must in this recipe. This leads to an extra crispy pizza.
By carefully balancing these three elements, this recipe delivers a consistently thin and crispy pizza crust that stands up to any toppings. In the next section, I’ll reveal my secret weapon for achieving unparalleled flavor and crispiness: garlic vegetable shortening.
Garlic Vegetable Shortening Crust: The Secret Weapon for a Thin and Crispy Pizza
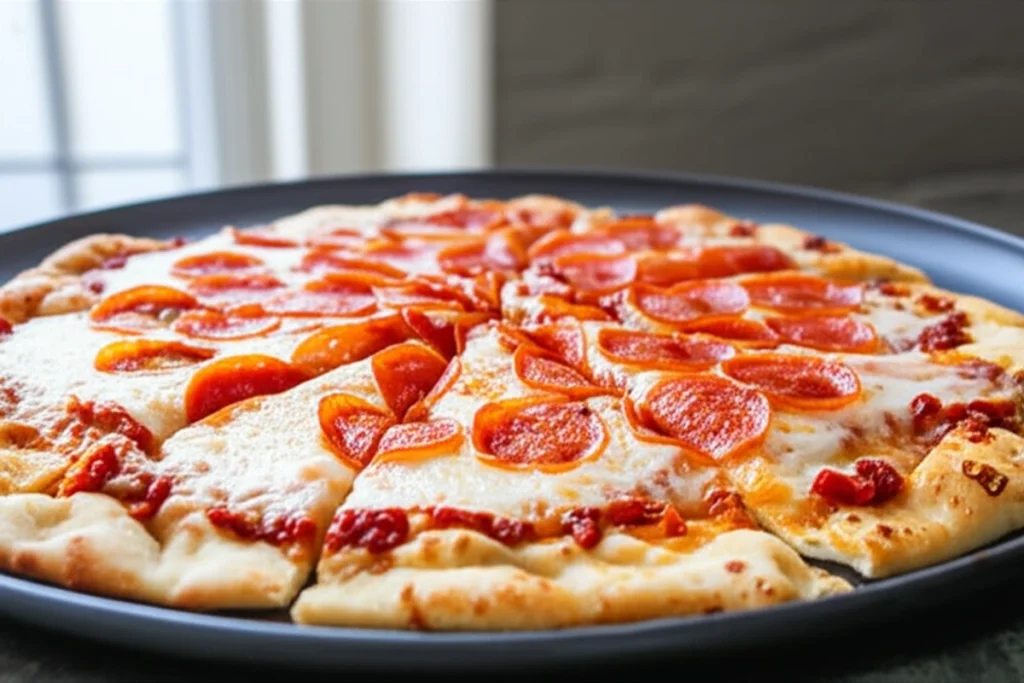
You might be wondering how this recipe stands apart from the rest. Okay, I know this sounds a little odd, but trust me: using melted vegetable shortening infused with garlic powder creates an unbelievably flavorful and crispy crust. The fat content helps to inhibit gluten formation, leading to a more delicate crumb, and the garlic infuses the crust with an aromatic flavor that complements any topping. As soon as you take it out of the oven, the smell of the garlic will immediately draw you in! The crust will also be incredibly golden and crispy.
I’ve found that the vegetable shortening delivers a level of crispness that olive oil alone simply can’t match. The crust is shatteringly crisp, yet still has a pleasant tenderness. The garlic powder adds a savory depth that enhances the overall flavor profile of the pizza. It complements both classic toppings like mozzarella and more adventurous combinations.
I didn’t always use this technique. I spent months trying different oils, even clarified butter, searching for that perfect crust. But once I tried the garlic vegetable shortening, there was no going back. The flavor and texture were simply superior.
This step is a game-changer. It elevates the pizza from ordinary to extraordinary. In the next section, I’ll explain how to achieve the perfect dough consistency for your thin and crispy masterpiece.
Achieving the Right Dough Development for Your Thin and Crispy Pizza
Now that you know about my garlic vegetable shortening crust, let’s talk dough. Getting the right dough consistency is crucial for a truly thin and crispy pizza. It’s a Goldilocks situation: not too much gluten, not too little, but just right.
I’ve seen so many recipes just say “mix until combined,” but that’s not good enough when chasing true crispiness. As an engineer, I needed to understand the gluten structure and how different mixing times affected the final texture. I spent weeks experimenting with different kneading times, documenting the changes in the dough’s elasticity and final crispiness. Here’s what I learned.
The key is to develop the gluten enough to create a cohesive dough, but not so much that it becomes tough. If you’re using a stand mixer, I recommend mixing with the dough hook for exactly 3 minutes on medium speed. This precise timing ensures the dough has completely pulled away from the sides of the bowl and is smooth, but not overworked.
If you’re kneading by hand, aim for about 5 minutes on a lightly floured surface. You’ll know the dough is ready when it feels smooth and elastic, and springs back slightly when you poke it. I look for a smooth and slightly tacky surface, not sticky or shaggy.
Under-kneading will result in a dough that’s difficult to roll out thinly and may tear easily. Over-kneading, on the other hand, will make the crust tough and chewy. Trust me, I’ve made both mistakes countless times! My experience has taught me that it’s better to err on the side of slightly under-kneading, as you can always let the dough rest a bit longer to relax the gluten.
Next up, I’ll provide a complete list of ingredients you’ll need to create your own thin and crispy pizza masterpiece.
Ingredients for the Best Thin and Crispy Pizza
Now that you have a grasp on the science and technique behind a truly stellar thin and crispy pizza, let’s talk ingredients. I always recommend gathering everything before you start. Here is what you’ll need:
- 2 1/4 Teaspoons Active Dry Yeast
- 1/2 Teaspoon Granulated Sugar
- 1 Cup Warm Water
- 1 Teaspoon Salt
- 1 Tablespoon Olive Oil
- 2 1/2 Cups All Purpose Flour
- 1 Cup Pizza Sauce
- 1 1/2 Cups Shredded Mozarella Cheese
- Toppings As Desired
- 2 Tablespoons vegetable shortening
- 2 Teaspoons Garlic Powder
- 1 Pinch Salt
These ingredients, when combined with the right techniques, will create a pizza that rivals anything you’d get from a restaurant. I find that using high-quality ingredients makes a noticeable difference in the final product. For example, a good quality mozzarella cheese will melt beautifully and provide a richer flavor. While it can be high in calories, fat, and sodium, pizza can also be a good source of essential nutrients like protein, B vitamins, calcium and iron.
Next, I’ll walk you through the step-by-step instructions for assembling and baking your thin and crispy pizza.
Instructions for the Best Thin and Crispy Pizza
Now that you’ve gathered your ingredients, it’s time to bring it all together. I’ve refined these instructions through countless batches of pizza, so follow them closely for the best possible results. Remember, the key to engineering a perfect outcome is to adhere to a proven process.
- Preheat oven to 450 degrees. Lightly grease a pizza baking sheet and set aside.
- In a large bowl or bowl of stand mixer, mix together the yeast, sugar, and warm water and allow to sit for 10 minutes until foamy.
- Stir the olive oil and salt into the yeast mixture. Then, using the dough hook on your stand mixer, or a sturdy spoon if using a bowl, mix in the flour 1/2 cup at a time until the dough has started to pull away from the sides of the bowl.
- If using a stand mixer, mix the dough with the dough hook for 3 minutes on medium speed until the dough has completely pulled away from the sides and is smooth.
- If you are not using a stand mixer, place the dough onto a lightly floured surface and knead for 5 minutes until smooth.
- Shape the dough into one ball, and slice in half evenly. At this point you can roll out both balls of dough for two 10 -12-inch pizzas. Or, store the remaining dough in the refrigerator for up to 5 days, or the freezer for up to one month.
- Roll the dough out to 1/4 inch thickness on a lightly floured surface and transfer to prepared pan. Bake in preheated oven for 5 minutes.
- While the pizza is in the oven, melt the two tablespoons of vegetable shortening and stir in the garlic powder and salt.
- Remove the pizza from the oven and top with your favorite sauce, cheese, and toppings as desired, leaving 1/2 inch of the crust without toppings. Brush the 1/2 inch edge of crust with garlic vegetable shortening.
- Place the pizza back in the oven and continue baking pizza 10-15 minutes until crust is golden and crispy, and cheese is melted.
One tip I always share: don’t overload your pizza with toppings. A thinner layer of toppings allows the crust to crisp up more effectively. In the next section, I’ll cover some common issues and solutions to help you troubleshoot your pizza-making process.
Troubleshooting Your Thin and Crispy Pizza: Common Issues and Solutions
Even with the most meticulously tested recipe, things can sometimes go awry in the kitchen. I’ve definitely had my share of pizza mishaps! So, let’s tackle some common issues and how to fix them, based on my own experiences.
What if your dough isn’t thin enough? Many home cooks get frustrated when their dough keeps shrinking back after rolling. From my experience and testing, this means the gluten is too strong! Allow the dough to rest for 10 minutes to allow the gluten to relax before re-rolling. If you continue to struggle after that, let the dough rest longer. I’ve found that patience is key here.
Another common problem is dough that’s too sticky. This usually happens when there’s too much moisture. Try adding a tablespoon of flour at a time until the dough becomes more manageable. Make sure you lightly flour your work surface. I find that a bench scraper is invaluable for handling sticky dough.
And what if your crust isn’t crispy enough? There are a few potential culprits. Make sure your oven is preheated to the correct temperature (450 degrees). I cannot stress enough how important this is! Also, avoid overloading the pizza with toppings, as this can prevent the crust from crisping properly. Baking the crust for 5 minutes before adding toppings helps a lot.
Sometimes, the issue is the baking sheet itself. I’ve found that a pizza stone or perforated pizza pan can significantly improve crispiness by allowing better air circulation. I would recommend purchasing either if you do not have one already.
Next up, I’ll be answering some frequently asked questions about thin and crispy pizza.
Frequently Asked Questions
Now that I’ve covered the key aspects of this recipe, let’s address some frequently asked questions. I’ve compiled these based on my own experiences and the questions I get asked most often about making thin and crispy pizza.
What are the key techniques to achieving a thin and crispy crust?
I’ve found that there are a few key techniques for getting a thin and crispy crust. First, don’t over-knead the dough; this develops too much gluten, which creates a chewy crust. Second, roll the dough out very thinly; about 1/4 inch is ideal. Third, bake the crust for a few minutes before adding toppings, this helps it to set and crisp up. Finally, make sure your oven is hot enough; I recommend 450 degrees for best results.
What are the best toppings to use on a thin and crispy pizza?
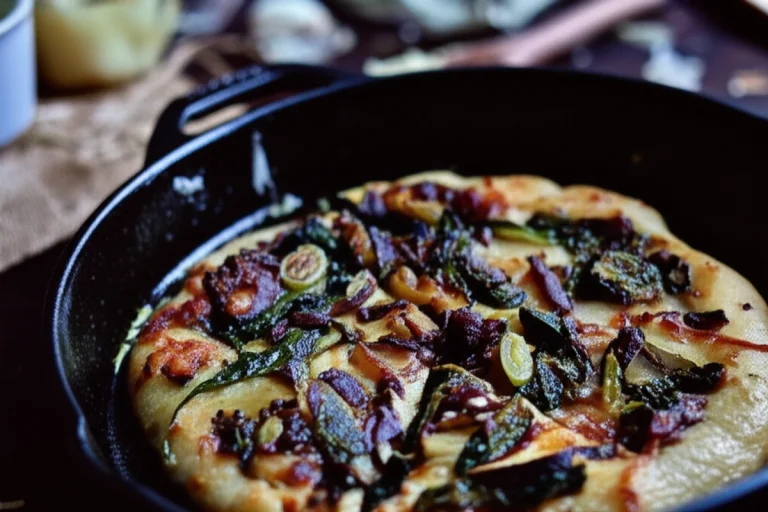
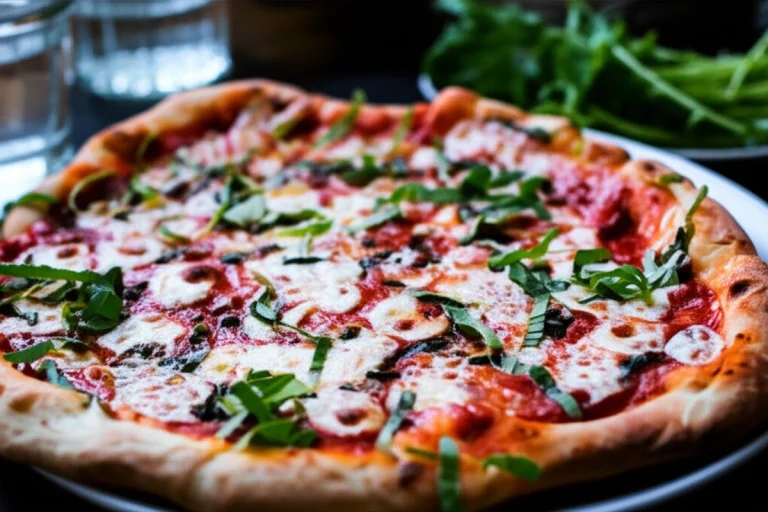
In my experience, lighter toppings work best on a thin and crispy pizza. Heavy toppings can weigh the crust down and prevent it from crisping up properly. I like to use a thin layer of sauce, a moderate amount of cheese, and a few select toppings. Some of my favorites include sliced tomatoes, mushrooms, olives, and a sprinkle of fresh basil.
What temperature and time is optimal for baking a thin and crispy pizza?
Through my testing, I’ve found that baking at 450 degrees for 10-15 minutes is optimal for a thin and crispy pizza. The high heat helps to evaporate moisture quickly, creating a crispy crust. I’ve found that it is crucial to monitor the pizza closely to prevent burning. The exact baking time will vary depending on your oven and the thickness of your crust.
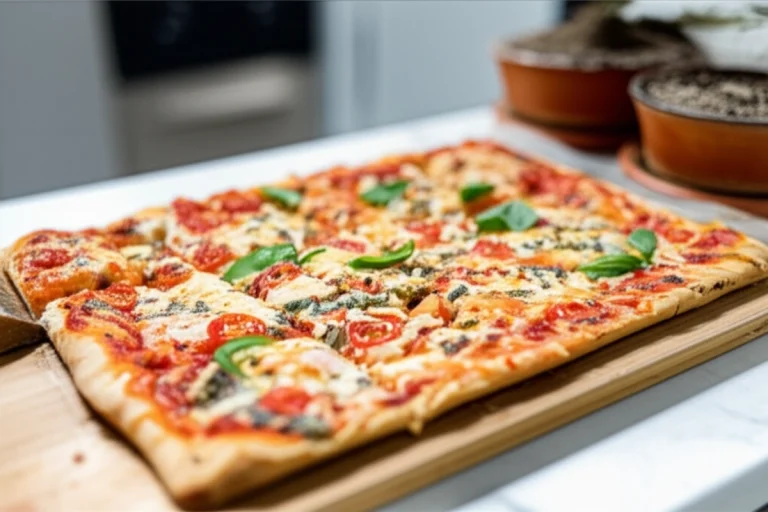
What is the difference between various thin crust pizza styles (e.g., Italian, Chicago)?
I’ve explored many different styles of thin crust pizza, and each has its unique characteristics. Italian-style thin crust pizza is typically very thin and crispy, with a simple sauce and minimal toppings. Chicago-style thin crust pizza is also thin and crispy, but it often features a generous amount of toppings and is cut into squares instead of slices. What I love about this recipe is that it’s a template that can be customized to any of these styles, depending on your preference! Tomatoes contain vitamins A and C, calcium, and the antioxidant lycopene, a combination of nutrients that transforms tomatoes into what you might call healthy.However, if you prefer a deeper dish, you might enjoy baking an amazing Chicago style pizza at home. In the next section, I’ll summarize the key benefits of this recipe and leave you with a final call to action.
Conclusion
This recipe is your foolproof guide to achieving the perfect thin and crispy pizza every time. I’ve engineered every step to eliminate guesswork and ensure consistent results, and with the unique addition of garlic vegetable shortening, you’re guaranteed a flavor and texture that’s simply unmatched. I’m confident that you’ll be amazed at how easy it is to create restaurant-quality pizza in your own kitchen.
Now it’s your turn! Try this recipe and share your crispy pizza creations in the comments below. What are your favorite toppings for a thin and crispy pizza? Don’t forget to rate and share this recipe if you found it helpful!
Easy Thin Crust Pizza
Equipment
- Pizza Baking Sheet
- Large Bowl
- Stand Mixer
- Dough Hook
- Spoon
- Pizza Pan
Ingredients
Pizza Dough
- 2 1/4 tsp Active Dry Yeast
- 1/2 tsp Granulated Sugar
- 1 cup Warm Water
- 1 tsp Salt
- 1 tbsp Olive Oil
- 2 1/2 cups All Purpose Flour
Toppings
- 1 cup Pizza Sauce
- 1 1/2 cups Shredded Mozzarella Cheese
- Toppings As Desired
Garlic Vegetable Shortening Crust
- 2 tbsp vegetable shortening
- 2 tsp Garlic Powder
- 1 pinch Salt
Instructions
Instructions
- Preheat oven to 450 degrees. Lightly grease a pizza baking sheet and set aside.
- In a large bowl or bowl of stand mixer, mix together the yeast, sugar, and warm water and allow to sit for 10 minutes until foamy.
- Stir the olive oil and salt into the yeast mixture. Then, using the dough hook on your stand mixer, or a sturdy spoon if using a bowl, mix in the flour 1/2 cup at a time until the dough has started to pull away from the sides of the bowl.
- If using a stand mixer, mix the dough with the dough hook for 3 minutes on medium speed until the dough has completely pulled away from the sides and is smooth.
- If you are not using a stand mixer, place the dough onto a lightly floured surface and knead for 5 minutes until smooth.
- Shape the dough into one ball, and slice in half evenly. At this point you can roll out both balls of dough for two 10 -12-inch pizzas. Or, store the remaining dough in the refrigerator for up to 5 days, or the freezer for up to one month.
- Roll the dough out to 1/4 inch thickness on a lightly floured surface and transfer to prepared pan. Bake in preheated oven for 5 minutes.
- While the pizza is in the oven, melt the two tablespoons of vegetable shortening and stir in the garlic powder and salt.
- Remove the pizza from the oven and top with your favorite sauce, cheese, and toppings as desired, leaving 1/2 inch of the crust without toppings. Brush the 1/2 inch edge of crust with garlic vegetable shortening.
- Place the pizza back in the oven and continue baking pizza 10-15 minutes until crust is golden and crispy, and cheese is melted.