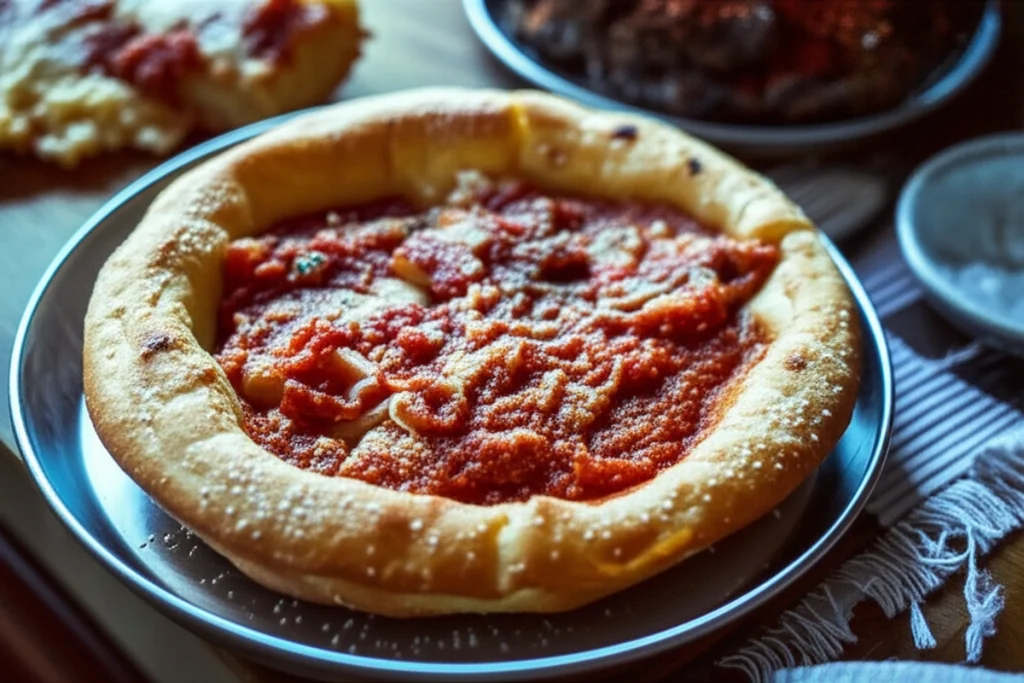
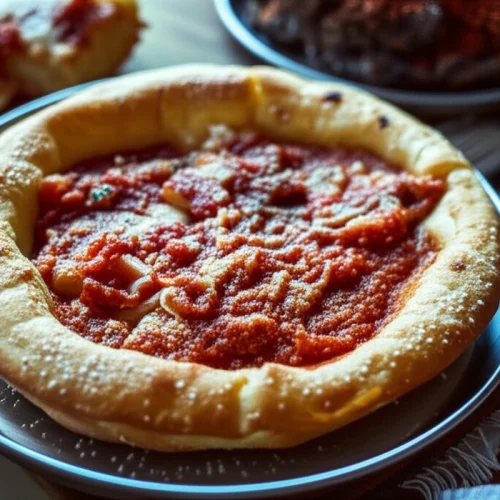
My first encounter with authentic Chicago deep dish pizza is etched in my memory. It was at a small, bustling pizzeria on Wells Street, the air thick with the aroma of oregano and melting cheese. The first bite was a revelation: a crispy, buttery edge giving way to a towering landscape of tangy tomato sauce and molten mozzarella. From that moment, I was determined to master this iconic dish.
That’s why I’m excited to share this meticulously crafted recipe, designed to bring the taste of Chicago deep dish pizza right to your kitchen. I’ll walk you through the science behind achieving the perfect crust and creating a rich, flavorful sauce. As a special twist, I’ve incorporated crispy smoked beef bacon that really elevates this recipe.
Prep Time: 4 hours Cook Time: 30 minutes Total Time: 4 hours 30 minutes
Table of Content
Smoked Beef Bacon: Elevating Chicago Deep Dish Pizza with a Modern Twist
Chicago deep dish is already a masterpiece, but I’ve found that the addition of smoked beef bacon takes it to a whole new level. Its smoky, savory flavor profile adds a layer of complexity that complements the sweetness of the tomato sauce and the richness of the cheese.
I spent weeks experimenting with different toppings, searching for something that would cut through the richness of the pizza without overpowering it. I found that smoked beef bacon crisps up beautifully in the oven, its smoky notes mingling with the other flavors in a way that’s both surprising and satisfying.
Traditional Chicago deep dish often includes pepperoni, which offers a spicy kick. But I wanted something different, something that would add depth and a touch of sophistication. The smoky flavor of the beef bacon, rather than a spicy one, balances the sweetness of the tomatoes, creating a far more nuanced and complex taste. It’s this contrast that makes the pizza truly special, each bite a harmonious blend of smoky, savory, and sweet.
The Science of Deep Dish: Achieving the Perfect Chicago Style Pizza Crust and Sauce at Home
Now that I’ve shared my little twist with the smoked beef bacon, I want to dive into what truly makes a Chicago deep dish pizza exceptional: the crust and the sauce. Getting these two elements right is a matter of understanding the underlying science, and I’ve spent countless hours perfecting them.
The crust’s unique texture, that delightful balance of crispness and chewiness, comes down to the interplay of cornmeal and butter. I tested various cornmeal grinds, and I found that a medium grind provided the best balance of flavor and structural integrity. The coarser grind provides a subtle, nutty flavor and a bit of crunch, while the butter contributes to the crust’s richness and tenderness. The butter essentially shortens the gluten strands, creating a more delicate crumb. The ratio is key; too much butter, and the crust will be greasy; too little, and it’ll be tough.
Yeast activation is another critical step. I always ensure that the water is slightly warm, around 90°F (32°C). This is the ideal temperature for the yeast to thrive, kickstarting the fermentation process that gives the crust its airy texture and complex flavor. Water that is too hot will kill the yeast. I’ve found that using water that’s just right leads to a predictable and consistent rise, which is essential for that signature deep-dish crust.
Then, there’s the sauce. I always start by grating the onion, which helps it melt seamlessly into the sauce. As the onion cooks in butter, it undergoes the Maillard reaction, a chemical process that creates hundreds of flavorful compounds, resulting in a deep, caramelized sweetness. I then balance the tomato acidity by adding a touch of granulated sugar. This small addition smooths out the sauce, creating a harmonious blend of sweet, savory, and tangy flavors. Also, pizza can be a good source of essential nutrients like including protein, B vitamins, calcium and iron. If you are looking for other pizza variations, check out our many other pizza options!
Understanding these scientific principles has been a game-changer for me. It’s not just about following a recipe; it’s about knowing why each step matters. With this knowledge, I can consistently recreate that perfect Chicago deep dish pizza every time, and I’m confident you can too.
Ingredients
Now that I’ve walked you through the science of creating the perfect crust and sauce, I want to get into the specifics of what you’ll need. Here’s a detailed list of ingredients I use to make my Chicago deep dish pizza:
- 3 and 1/4 cups (406g) all-purpose flour (spooned & leveled)
- 1/2 cup (60g) yellow cornmeal
- 1 and 1/4 teaspoons salt
- 1 Tablespoon (12g) granulated sugar
- 2 and 1/4 teaspoons (7g) Platinum Yeast from Red Star instant yeast (1 standard packet)*
- 1 and 1/4 cups (300ml) slightly warm water
- 1/2 cup (8 Tbsp; 113g) unsalted butter, divided (1/4 cup melted, 1/4 cup softened to room temperature)
- olive oil for coating
- 2 Tablespoons (28g) unsalted butter
- 1 small onion, grated (about 1/3 cup)*
- 3/4 teaspoon salt
- 1 teaspoon dried oregano
- 1/2 teaspoon crushed red pepper flakes (optional, but recommended)
- 3 garlic cloves, minced
- one 28-ounce can (794g) crushed tomatoes*
- 1/4 teaspoon granulated sugar
- 4 cups (about 16 oz) shredded mozzarella cheese*
- 1/2 cup (45g) grated parmesan cheese
- optional: 1/2 cup sliced pepperoni
- optional: 4 slices smoked beef bacon, cooked and crumbled
Using high-quality mozzarella cheese is crucial for the authentic cheese pull and flavor profile of Chicago-style pizza. I recommend a whole milk, low-moisture mozzarella for best results. I’ve found that the low-moisture variety melts beautifully without making the pizza soggy. I learned that the hard way after one particularly messy pizza night!
Next, I’ll guide you through the steps for making this incredible pizza.
Instructions
Now comes the fun part: putting it all together. Please use my step-by-step photos as a guide. I’ve learned that reading through the entire recipe before you start helps ensure the best results, and it puts your mind at ease. You will need two deep dish 9×2-inch round cake pans if you are making both pizzas at the same time. You can also use 9-inch springform pans. I find the depth of these pans is crucial for that authentic deep-dish experience.
- Combine the flour, cornmeal, salt, sugar, and yeast in the bowl of your stand mixer fitted with a dough hook attachment. If you do not have a stand mixer, use your hand mixer and a very very large bowl. If you do not have any mixer, you will do this all by hand. Again, use a very large bowl. Give those ingredients a quick toss with your mixer on low or with a large wooden spoon. Add the warm water and 1/4 cup of melted butter. The warm water should be around 90°F (32°C). Make sure it is not very, very hot or it will kill the yeast. Likewise, make sure the butter isn’t boiling hot. If you melt it in the microwave, let it sit for 5 minutes before adding. On low speed, beat (or stir) the dough ingredients until everything begins to be moistened. Continuing on low speed (or remove from the bowl and knead by hand if you do not own a mixer), beat the dough until it is soft and supple and gently pulls away from the sides of the bowl and falls off of the dough hook- about 4-5 minutes. If the dough is too hard (it will be textured from the cornmeal), but if it feels too tough, beat in 1 teaspoon of warm water. Alternatively, if it feels too soft, beat in 1 Tablespoon of flour. This initial mixing ensures that all the dry ingredients are evenly distributed before adding the wet ingredients. The warm water activates the yeast, while the melted butter adds richness to the dough. I’ve found that patience is key here; mixing on low speed prevents the flour from splattering everywhere.
- Remove the dough from the bowl and form into a ball. Lightly grease a large mixing bowl with olive oil and place the dough inside, turning it around so that all sides of the dough are coated in the oil. Cover the bowl tightly with aluminum foil and allow to rise in a warm environment for 1-2 hours or until double in size. Coating the dough with olive oil prevents it from drying out and sticking to the bowl as it rises. I use aluminum foil to cover the bowl tightly, creating a warm, humid environment that encourages the yeast to ferment and the dough to double in size. This rising process is critical for developing the dough’s flavor and airy texture. I usually place the bowl in a warm spot in my kitchen, near the oven, to speed up the process.
- Once the dough is ready, lightly flour a large work surface. Remove dough from the bowl, set the bowl and aluminum foil aside (to use later). Gently punch down the dough to remove any air bubbles and roll the dough into a large 15×12-inch rectangle. Spread 1/4 cup of softened butter on top of the dough. Roll it up lengthwise per the photos below. Cut the dough log in half. Form the two pieces of dough into balls and place back into your greased bowl. Cover with aluminum foil and allow to rise in the refrigerator (not in a warm place) for 1 hour until they are puffy as you make the sauce. Punching down the dough releases the built-up carbon dioxide, which prevents the crust from becoming too bubbly. Spreading softened butter over the dough adds richness and flavor and creates flaky layers in the crust. I’ve found that refrigerating the dough after this step slows down the yeast activity, allowing the dough to relax and develop even more flavor.
- Place butter in a medium saucepan over medium heat and allow it to melt. Once melted, add the grated onion, salt, oregano, and red pepper flakes. Once the onion has slightly browned after about 5 minutes, add the garlic, tomatoes, and sugar. Turn the heat down to low-medium and allow it to simmer until it’s hearty, fragrant, and thick- about 30 minutes. You’ll have about 2 and 1/2 cups of sauce at this point. If you have more than that, keep simmering until the amount has reduced. Remove from heat and set aside until ready to be used. You may store the sauce in a tightly covered container in the refrigerator for up to 2 days if planning to make the pizza another day. You may freeze this sauce for up to 2 months as well. Melting the butter creates a base for the sauce, while grating the onion ensures it melts seamlessly into the sauce. Simmering the sauce allows the flavors to meld together and intensifies the tomato flavor, and I’ve found that reducing the sauce to the right consistency is crucial for preventing the pizza from becoming soggy.
- Preheat oven to 425°F (218°C). Preheating the oven ensures that the pizza cooks evenly and that the crust becomes golden brown and crispy. I always use an oven thermometer to ensure my oven is at the correct temperature.
- After the dough balls have risen in the refrigerator, they should be puffy. Keep one ball of dough in the refrigerator as you work with the first one. Roll it out on a lightly floured work surface, working it into a 12-inch circle. Using your rolling pin as a guide (see photos below), place over a 9×2-inch deep dish cake pan. Using your fingers, press the dough into the cake pan. Make sure it is nice and tight fitting inside the pan. Trim any excess dough off the edges with a small knife. Repeat with 2nd dough. Brush the top edges of the dough with a little olive oil, which gives the crust a beautiful sheen. Fill each pizza with 1/2 of the cheese (about 2 cups/8 oz per pizza), then the pepperoni and smoked beef bacon or your desired toppings. Pour about 1 and 1/4 cups (300ml) of sauce evenly on top of each. If you do not like that much sauce, you can reduce to 3/4 cup (180ml) per pizza and have leftover sauce. Sprinkle each with 1/4 cup (22g) of grated parmesan cheese. Keeping the dough chilled while working with it prevents it from becoming too sticky and unmanageable. Pressing the dough firmly into the cake pan ensures that it maintains its shape during baking. Brushing the edges with olive oil adds flavor and helps them crisp up and brown beautifully. The order of toppings is important as well; I always put the cheese on first to create a barrier between the crust and the sauce, preventing it from becoming soggy.
- Place the cake pans on top of a large baking sheet, which will catch anything potentially spilling over the sides of the pans. (Nothing usually does.) Bake for 20-28 minutes or until the crust is golden brown. Feel free to loosely cover the pizzas with aluminum foil after the 15 minute mark to prevent any heavy browning and uneven baking. Remove the pizzas from the oven and allow to cool in the pans placed on a wire rack for 10 minutes. After 10 minutes, slice, serve, and enjoy. Place any leftover pizza in an airtight container and refrigerate for up to 5 days. Reheat leftovers in a 300°F (149°C) oven for 15-20 minutes or until hot. Placing the cake pans on a baking sheet makes it easier to transfer the pizzas to and from the oven, and it also catches any potential spills. Covering the pizzas with aluminum foil prevents the cheese from browning too quickly and ensures that the crust cooks through evenly. Cooling the pizzas slightly before slicing allows the cheese to set and prevents it from running everywhere. I’ve found that reheating leftover pizza in a low oven is the best way to restore its original texture and flavor.
Next, I’ll cover a few frequently asked questions.
Frequently Asked Questions About Chicago Style Pizza
Now that you’ve got the recipe down, I know a few questions might pop up as you prepare to make your own Chicago deep dish. I’ve compiled some of the most common questions I get asked, along with my tried-and-true answers.
Can I make the dough ahead of time?
Yes, absolutely! In fact, I often recommend it. I find that making the dough a day or two in advance allows the flavors to develop even further. After the initial rise, punch it down, wrap it tightly in plastic wrap, and store it in the refrigerator for up to 48 hours. Just be sure to bring it to room temperature for about 30 minutes before rolling it out.
What’s the best way to reheat leftover deep-dish pizza?
I’ve experimented with several methods, and I’ve found that reheating it in a 300°F (149°C) oven for 15-20 minutes works best. This low and slow approach helps to re-crisp the crust without drying out the cheese. I avoid microwaving it because it can make the crust soggy.
Can I freeze the deep dish pizza?
Yes, you can freeze the deep dish pizza either before or after baking. If freezing before baking, assemble the pizza in the pan, wrap it tightly in plastic wrap, and then in aluminum foil. Freeze for up to 2 months. When ready to bake, there is no need to thaw, just add about 15-20 minutes to the baking time. If freezing after baking, allow the pizza to cool completely, then wrap it tightly and freeze for up to 2 months. Reheat directly from frozen in a 325°F (163°C) oven until heated through. I did this once when I was short on time, and it tasted almost as good as freshly baked!
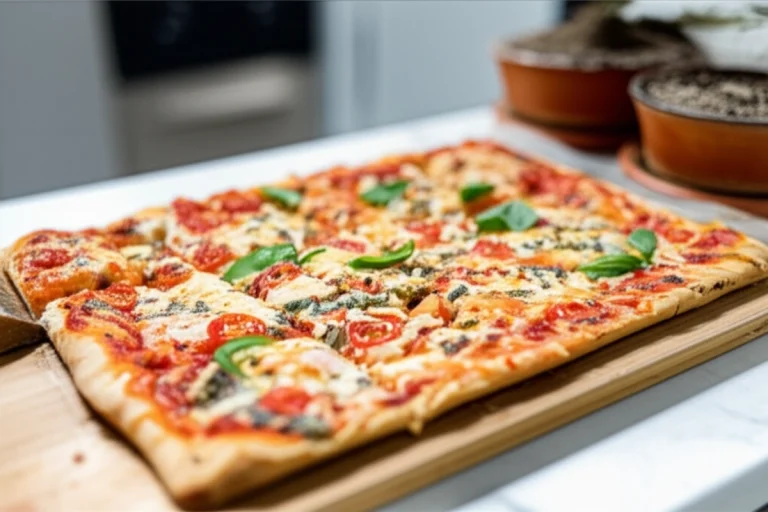
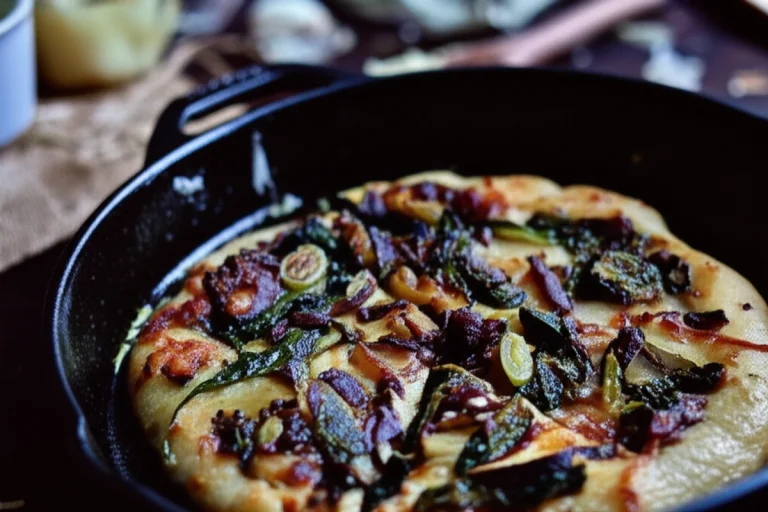
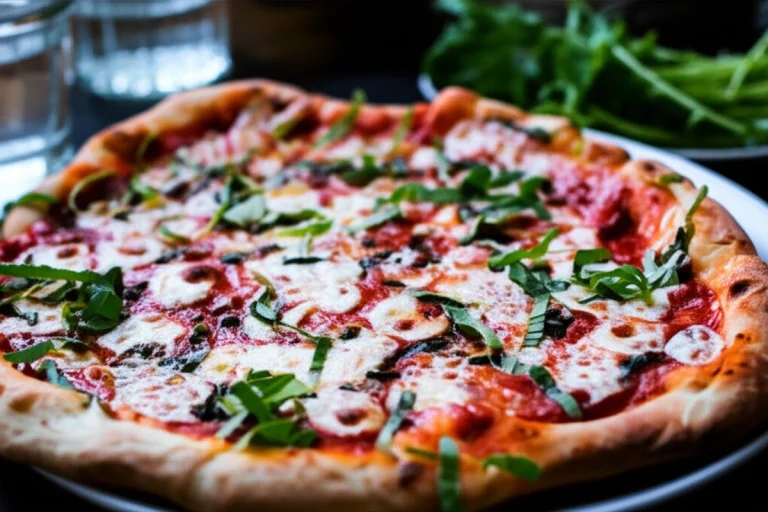
What other toppings can I add to my pizza?
Feel free to get creative with your toppings! I’ve found that Chicago deep dish is incredibly versatile. I’ve tried various combinations, from mushrooms and peppers to spinach and artichokes. The key is to not overload the pizza with too many toppings, as this can make it difficult for the crust to cook evenly. For a vegetarian option, consider a mix of roasted vegetables. I suggest you cook any vegetables you use before using them as toppings. Plus, tomatoes contain vitamins A and C, calcium, and the antioxidant lycopene, a combination of nutrients that transforms tomatoes into what you might call healthy.Up next, I’ll share a few final thoughts.
Conclusion
So, there you have it: my meticulously tested, engineer-approved recipe for authentic Chicago-style deep dish pizza, complete with a smoky twist. I’ve shared the science behind the crust and sauce and my personal touch with the smoked beef bacon. Now, it’s your turn to step into the kitchen and engineer your own delicious masterpiece.
I’m genuinely excited to see what you create. What are your favorite toppings to add to Chicago-style pizza? Did you try the smoked beef bacon, and what did you think? I encourage you to share your results and any variations you try in the comments below. I’m always eager to learn from your experiences.
If you share photos of your pizzas on social media, be sure to use the hashtag #TheRecipiest. I can’t wait to see your creations and celebrate your success in bringing a taste of Chicago to your home. I hope you find this recipe as rewarding as I have. Happy cooking.
How To Make Chicago-Style Deep Dish Pizza
Ingredients
For the crust
- 3.25 cups all-purpose flour (406g) spooned & leveled
- 0.5 cup yellow cornmeal (60g)
- 1.25 tsp salt
- 1 tbsp granulated sugar (12g)
- 2.25 tsp Platinum Yeast from Red Star instant yeast (7g) (1 standard packet)*
- 1.25 cups slightly warm water (300ml)
- 0.5 cup unsalted butter, divided (8 Tbsp; 113g) (1/4 cup melted, 1/4 cup softened to room temperature)
- olive oil for coating
For the sauce
- 2 tbsp unsalted butter (28g)
- 1 small onion, grated (about 1/3 cup)*
- 0.75 tsp salt
- 1 tsp dried oregano
- 0.5 tsp crushed red pepper flakes (optional, but recommended)
- 3 cloves garlic, minced
- 28 oz crushed tomatoes one can (794g)*
- 0.25 tsp granulated sugar
Toppings
- 4 cups shredded mozzarella cheese (about 16 oz)*
- 0.5 cup grated parmesan cheese (45g)
- 0.5 cup sliced pepperoni optional
- 4 slices smoked beef bacon, cooked and crumbled optional
Instructions
Instructions
- Combine the flour, cornmeal, salt, sugar, and yeast in the bowl of your stand mixer fitted with a dough hook attachment. If you do not have a stand mixer, use your hand mixer and a very very large bowl. If you do not have any mixer, you will do this all by hand. Again, use a very large bowl. Give those ingredients a quick toss with your mixer on low or with a large wooden spoon. Add the warm water and 1/4 cup of melted butter. The warm water should be around 90°F (32°C). Make sure it is not very, very hot or it will kill the yeast. Likewise, make sure the butter isn’t boiling hot. If you melt it in the microwave, let it sit for 5 minutes before adding. On low speed, beat (or stir) the dough ingredients until everything begins to be moistened. Continuing on low speed (or remove from the bowl and knead by hand if you do not own a mixer), beat the dough until it is soft and supple and gently pulls away from the sides of the bowl and falls off of the dough hook- about 4-5 minutes. If the dough is too hard (it will be textured from the cornmeal), but if it feels too tough, beat in 1 teaspoon of warm water. Alternatively, if it feels too soft, beat in 1 Tablespoon of flour.
- Remove the dough from the bowl and form into a ball. Lightly grease a large mixing bowl with olive oil and place the dough inside, turning it around so that all sides of the dough are coated in the oil. Cover the bowl tightly with aluminum foil and allow to rise in a warm environment for 1-2 hours or until double in size.
- Once the dough is ready, lightly flour a large work surface. Remove dough from the bowl, set the bowl and aluminum foil aside (to use later). Gently punch down the dough to remove any air bubbles and roll the dough into a large 15×12-inch rectangle. Spread 1/4 cup of softened butter on top of the dough. Roll it up lengthwise per the photos below. Cut the dough log in half. Form the two pieces of dough into balls and place back into your greased bowl. Cover with aluminum foil and allow to rise in the refrigerator (not in a warm place) for 1 hour until they are puffy as you make the sauce.
- Place butter in a medium saucepan over medium heat and allow it to melt. Once melted, add the grated onion, salt, oregano, and red pepper flakes. Once the onion has slightly browned after about 5 minutes, add the garlic, tomatoes, and sugar. Turn the heat down to low-medium and allow it to simmer until it’s hearty, fragrant, and thick- about 30 minutes. You’ll have about 2 and 1/2 cups of sauce at this point. If you have more than that, keep simmering until the amount has reduced. Remove from heat and set aside until ready to be used. You may store the sauce in a tightly covered container in the refrigerator for up to 2 days if planning to make the pizza another day. You may freeze this sauce for up to 2 months as well.
- Preheat oven to 425°F (218°C).
- After the dough balls have risen in the refrigerator, they should be puffy. Keep one ball of dough in the refrigerator as you work with the first one. Roll it out on a lightly floured work surface, working it into a 12-inch circle. Using your rolling pin as a guide (see photos below), place over a 9×2-inch deep dish cake pan. Using your fingers, press the dough into the cake pan. Make sure it is nice and tight fitting inside the pan. Trim any excess dough off the edges with a small knife. Repeat with 2nd dough. Brush the top edges of the dough with a little olive oil, which gives the crust a beautiful sheen. Fill each pizza with 1/2 of the cheese (about 2 cups/8 oz per pizza), then the pepperoni and smoked beef bacon or your desired toppings. Pour about 1 and 1/4 cups (300ml) of sauce evenly on top of each. If you do not like that much sauce, you can reduce to 3/4 cup (180ml) per pizza and have leftover sauce. Sprinkle each with 1/4 cup (22g) of grated parmesan cheese.
- Place the cake pans on top of a large baking sheet, which will catch anything potentially spilling over the sides of the pans. (Nothing usually does.) Bake for 20-28 minutes or until the crust is golden brown. Feel free to loosely cover the pizzas with aluminum foil after the 15 minute mark to prevent any heavy browning and uneven baking. Remove the pizzas from the oven and allow to cool in the pans placed on a wire rack for 10 minutes. After 10 minutes, slice, serve, and enjoy. Place any leftover pizza in an airtight container and refrigerate for up to 5 days. Reheat leftovers in a 300°F (149°C) oven for 15-20 minutes or until hot.
Notes
Reheat leftover deep-dish pizza in a 300°F (149°C) oven for 15-20 minutes. Avoid microwaving it because it can make the crust soggy.
You can freeze the deep dish pizza either before or after baking. If freezing before baking, assemble the pizza in the pan, wrap it tightly in plastic wrap, and then in aluminum foil. Freeze for up to 2 months. When ready to bake, there is no need to thaw, just add about 15-20 minutes to the baking time. If freezing after baking, allow the pizza to cool completely, then wrap it tightly and freeze for up to 2 months. Reheat directly from frozen in a 325°F (163°C) oven until heated through.
Feel free to get creative with your toppings! I’ve found that Chicago deep dish is incredibly versatile. The key is to not overload the pizza with too many toppings, as this can make it difficult for the crust to cook evenly. For a vegetarian option, consider a mix of roasted vegetables. I suggest you cook any vegetables you use before using them as toppings.