Creating gourmet chicken pizza at home might seem intimidating, but I’m here to show you how approachable it can be. I’ve broken down each step into simple, manageable techniques that anyone can master. It’s all about understanding the science behind the ingredients and processes, and the rest is easy!
I still remember the first time I tried caramelizing onions; I cranked up the heat, trying to rush the process. Instead of the sweet, jammy goodness I craved, I ended up with a burnt, acrid mess. That failure taught me a crucial lesson: patience and low heat are key. With this recipe, you’ll skip those rookie mistakes.
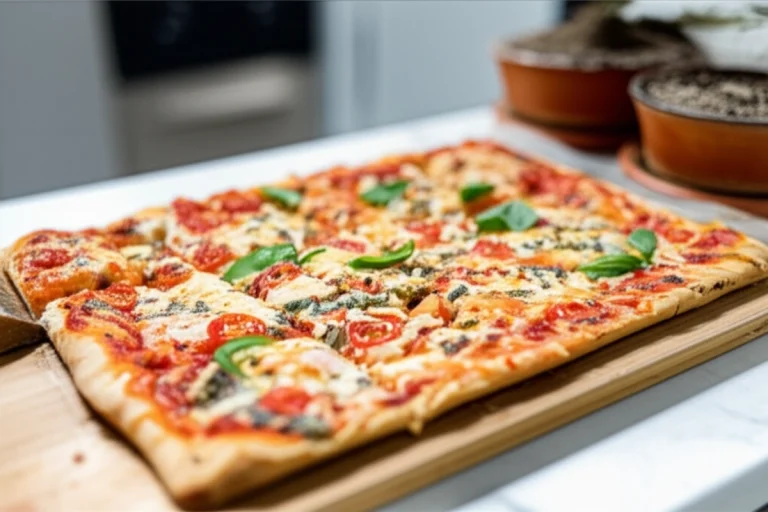
This caramelized onion and garlic herb spinach chicken pizza combines simple ingredients with meticulous technique. The result is a restaurant-quality pizza from your home kitchen. Get ready to transform your pizza night with this recipe, which takes about 45 minutes of prep time and 10-12 minutes of cook time for a total time of about an hour.
Table of Content
Proofing Perfection: Visual Cues for a Dough That Delivers
The secret to an airy, flavorful crust lies in understanding the proofing process. The yeast consumes sugars in the flour, producing carbon dioxide. That, in turn, inflates the dough like a balloon. The longer the dough proofs, the more complex those flavors become, resulting in a crust with real depth.
I’ve found that proofing time dramatically impacts the final product. A shorter proof yields a denser, less flavorful crust, while an extended proof creates a light, airy texture and a tangy taste. Eighteen hours at room temperature has proven optimal in my kitchen, providing the best balance of flavor and texture.
Pro tip: Keep an eye out for visual cues. A perfectly proofed dough should have more than doubled in size and be filled with tiny bubbles. When gently pressed, it should slowly deflate, indicating a well-developed gluten structure.
Factors like temperature and humidity also play a significant role. Warmer temperatures accelerate proofing, while cooler temperatures slow it down. On humid days, I often reduce the amount of water slightly to prevent the dough from becoming too sticky. I also like to use the oven’s proofing setting for consistent results.
If you’re not ready to bake immediately, the dough can be stored in the refrigerator for up to 24 hours. I’ve learned that refrigerating the dough slows down the fermentation process, allowing for even more flavor development. Just be sure to bring it back to room temperature before shaping and baking.
Different flours can influence proofing too. Bread flour, with its higher protein content, creates a chewier crust, while all-purpose flour yields a softer texture. I’ve tested this recipe with both regular and ’00’ flour. My final determination is that all-purpose flour works best for consistent results in most home kitchens.
The Alchemy of Caramelization: Achieving Deep Flavor and Color
The magic behind truly exceptional caramelized onions lies in the Maillard reaction. This complex chemical process occurs when amino acids and reducing sugars are heated. It creates hundreds of different flavor compounds, resulting in the onions’ distinctive sweetness and deep brown color.
Achieving evenly caramelized onions requires a bit of technique. Using a heavy-bottomed pan is essential. It distributes heat evenly, preventing hot spots that can cause burning. I’ve also discovered that stirring infrequently allows the onions to develop a rich, golden crust on their surface, which intensifies their flavor.
One of the most common pitfalls is burning. I prevent this by maintaining a low heat and adding a splash of water or broth if the onions start to stick. A little bit of moisture helps to deglaze the pan, loosening any fond that has formed and adding another layer of flavor to the onions.
Different types of onions will affect the final result. Yellow onions are my go-to for their versatility and balanced flavor. Red onions bring a slightly sweeter taste and a beautiful color, though they do require a bit more attention to prevent burning. I’ve also experimented with Vidalia onions, which caramelize beautifully and offer a particularly mild, sweet flavor. The slow cooking process unlocks and concentrates their inherent sugars.
Pro tip: Don’t overcrowd the pan. If you’re making a large batch, caramelize the onions in batches. This allows them to brown properly instead of steaming. It takes time, but the result is well worth it. The deep flavor and color are a testament to the patient cook.
Ingredients
- for the dough:
- 2 cups (250 grams) all-purpose flour
- 1 tsp sea or kosher salt
- 1/8 tsp active dry yeast* (see Notes)
- 3/4 cup plus 1 tbsp water
- 1 tbsp honey (optional)
- for the garlic paste:
- 2 bulbs garlic
- 1-2 tsp olive oil, plus more for drizzling during roasting
- 2-3 tsp milk or cream
- pinch crushed red chili pepper
- for the toppings:
- 1/2 red onion, sliced thin
- 2 cups spinach
- oil for sautéing
- salt and pepper, to taste
- 1-2 cups shredded mozzarella (sub with half provolone if desired)
- for baking:
- about 1 tbsp cornmeal, or however much is needed to prepare baking surface
- 1-2 tsp olive oil, for brushing the dough before topping
I tested this recipe with both regular and ’00’ flour for the gourmet chicken pizza. While ’00’ flour created a slightly crispier crust, the all-purpose flour was much more accessible and produced a very similar result. That’s why I opted for all-purpose in this recipe to ensure ease and deliciousness.
Instructions
- In a small bowl, combine water and honey, if using, and stir to dissolve. Sprinkle the yeast overtop the water and let proof for a few minutes. In a large bowl, sift together flour and salt, then add the yeast mixture and stir until it forms a sticky dough. (Proofing the yeast isn’t required in Lahey’s recipe or most adaptations of it; you can really just combine all the dough ingredients in a large bowl and mix.)
- Cover bowl with plastic and keep at room temperature for approximately 18 hours, or until the dough has more than doubled. It’s important to let your dough sit for the right amount of time because the proofing process allows the yeast to work its magic, creating those air pockets that are essential for a light, airy crust. Proofing your dough at room temperature for 18 hours is optimal, however, if you’re short on time you can double the yeast to speed up the process.
- About an hour before the dough is ready, start by roasting the garlic. Preheat the oven to 400 degrees. Slice off the top of the garlic bulb so that each clove is exposed. Drizzle a bit of olive oil over top, rubbing each clove to make sure the oil is well-distributed, then wrap in foil and bake for 30 minutes. The garlic should be soft when pressed when it’s done.
- Take the roasted garlic and pop out the cloves by squeezing, or with a fork. Combine with one teaspoon olive oil, two teaspoons of milk, and a sprinkle of crushed red pepper (optional), and mash with a potato masher or whiz in a food processor until it becomes a paste.
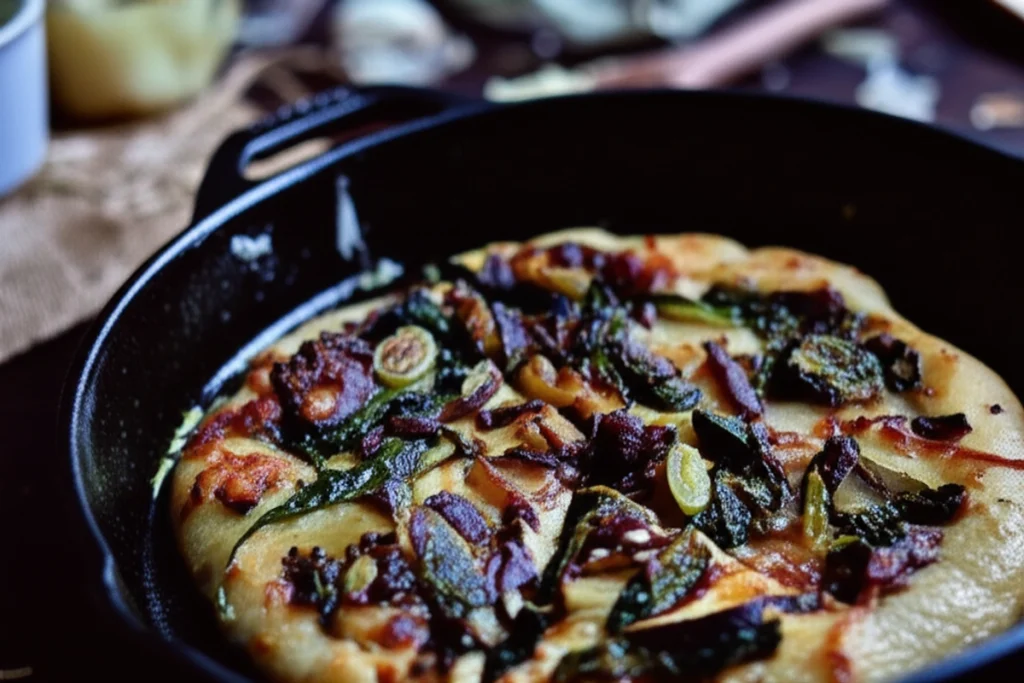
- While the garlic is baking (or after, if you’re bad at multitasking like I am), caramelize the onions. I do this by heating a few teaspoons of oil over medium-low heat in a large cast-iron skillet or saucepan and spreading the onions in a single layer evenly across the pan. Stir until onions are evenly coated with oil, then let the onions sizzle gently in the pan for at least 30 minutes and up to 45-50, stirring no more than once every 5-10 minutes. Once onions are very soft, jammy, and smell deeply sweet, they’re done. In the last five minutes, season with salt and pepper to taste; I also like to drizzle a little bit of balsamic vinegar in the last five minutes to loosen the fond and to add a bit of extra flavor, but you can feel free to use water, chicken stock, or a bit of broth for the same effect. When done, set aside.
- Heat a bit of oil in a saucepan and sauté the spinach until just wilted, seasoning with salt and pepper as desired, drain any liquid, and set aside.
- When the dough is ready, prepare your baking surface by sprinkling it liberally with cornmeal. I used a cast-iron skillet and found it to work wonderfully, though you can also use a baking sheet or, of course, a pizza stone. Preheat your oven to its hottest setting, about 500-550 degrees F. You can preheat the skillet or pizza stone if you like, but I didn’t and found my pizza to be just fine.
- Scrape the dough out of your bowl onto a well-floured surface. It should be quite sticky and soft. Flour the top of the dough, then divide the dough in half and form them into ball shapes by tucking the edges underneath itself. If you’re baking these one at a time, cover one ball of dough with a damp towel while you prepare the other.
- Gently press, shape, and stretch the dough into a flat circle or rectangle however you like (I’m no pizza shaping expert!) Again, I used a 10-inch cast-iron skillet for this, so I shaped the dough into two 10-inch rounds.
- Brush a small amount of olive oil over the dough, then spread the garlic paste in an even layer across it. Sprinkle desired amount of cheese over that (I like a mixture of mozzarella and provolone if I’m feeling spendy), then your caramelized onions and spinach. I’ve also added smoked turkey bacon (or you could use regular bacon).
- Bake at 500 for 10-12 minutes, or until the pizza reaches your desired brownness. Slice and stuff face to enjoy your gourmet chicken pizza!
Troubleshooting Your Pizza: Common Problems and Expert Solutions
Even with a well-tested recipe, pizza-making can present some unexpected challenges. Over the years, I’ve encountered my fair share of pizza problems, so I wanted to share some solutions I’ve found. Here’s a quick guide to common issues and how to fix them, so that you can turn out perfect gourmet chicken pizza every time:
| Problem | Solution |
|---|---|
| Dough is too sticky | Add flour gradually until the dough is manageable. |
| Sauce is too watery | Simmer the sauce longer to reduce excess liquid. |
| Toppings are sliding off | Ensure toppings are dry and not overcrowded. |
| Crust is burning before toppings | Lower the oven temperature or move the pizza to a lower rack. |
| Pizza is sticking to the pan | Make sure to use enough cornmeal to prepare baking surface, and add a little bit of olive oil underneath pizza |
Frequently Asked Questions
What is the best white sauce to use for this pizza?
I’ve experimented with many white sauce variations, and I find a simple béchamel works beautifully without overpowering the other flavors. My béchamel includes a base of milk thickened with a roux of flour and butter. For an extra layer of flavor, I’ll often infuse the milk with garlic cloves and fresh thyme. This subtle infusion adds depth and complexity to the white sauce, complementing the garlic paste and other toppings on this gourmet chicken pizza.
Can I make this pizza in an air fryer?
Yes, you absolutely can! I’ve tested this recipe in the air fryer, and it yields a surprisingly crispy crust. The key is to preheat your air fryer to around 400°F (200°C). Assemble the pizza on a piece of parchment paper cut to fit your air fryer basket. Air fry for about 8-10 minutes, or until the crust is golden brown and the cheese is melted and bubbly. Since air fryers can vary, I check frequently to prevent burning.
What are the best toppings to complement the chicken, spinach, caramelized onion, and garlic?
I find that a sprinkle of goat cheese adds a tangy creaminess that balances the sweetness of the caramelized onions. A few sun-dried tomatoes can also add a burst of intense, concentrated flavor. Sometimes, I’ll add artichoke hearts for a slightly acidic and savory note. When I’m feeling fancy, I even add some toasted pine nuts for a bit of crunch and nutty flavor, which elevates the whole pizza experience.
What type of crust works best (homemade or store-bought)?
While a homemade crust undoubtedly elevates the gourmet chicken pizza, a good quality store-bought crust can work in a pinch. I prefer to make my own, because I can control the thickness and texture. If using store-bought, I suggest looking for a thin-crust variety. I have found it crisps up nicely and won’t overpower the other toppings. One thing I’ve learned is to avoid overly processed crusts.
What wine or side dishes pair well with this pizza?
I find that a crisp, dry wine like Sauvignon Blanc or Pinot Grigio complements the richness of this pizza. The acidity cuts through the cheese and garlic, cleansing the palate. As for side dishes, a simple arugula salad with a lemon vinaigrette provides a refreshing contrast to the savory pizza. I sometimes also like to serve roasted vegetables, such as asparagus or bell peppers, alongside the gourmet chicken pizza.
Storage Instructions and Ingredient Sourcing
This recipe yields one 12-inch pizza or two 10-inch pizzas. If you have leftovers of this gourmet chicken pizza, proper storage is crucial for maintaining its quality. I’ve found that refrigerating it promptly is the best way to preserve its flavors and textures.
For refrigeration, I recommend wrapping the leftover pizza tightly in plastic wrap or storing it in an airtight container. When stored properly, it will maintain quality for up to 3-4 days. I’ve experimented with freezing leftover slices as well, and this method works best if you wrap each slice individually before placing them in a freezer bag. Frozen pizza can last for up to 2 months, though the texture may change slightly upon thawing.
When sourcing ingredients, high-quality mozzarella and fresh spinach make a noticeable difference in the final flavor of the gourmet chicken pizza. For the cheese, a low-moisture, whole-milk variety tends to melt beautifully and has a richer flavor. As for the spinach, I suggest using fresh spinach leaves rather than frozen. They provide a better texture and a more vibrant color.
Conclusion
I hope this detailed guide inspires you to try making your own gourmet chicken pizza at home. From mastering the proofing process to caramelizing onions to perfection, each technique builds upon the last, creating a symphony of flavors and textures. Remember, making pizza is both a science and an art, and with a bit of practice, you can achieve restaurant-quality results in your own kitchen.
If you found this article helpful, I encourage you to share it on social media. Also, please share your experiences and variations in the comments below; I’m always excited to see how others adapt my recipes. With the right approach, anyone can master the art of gourmet pizza!
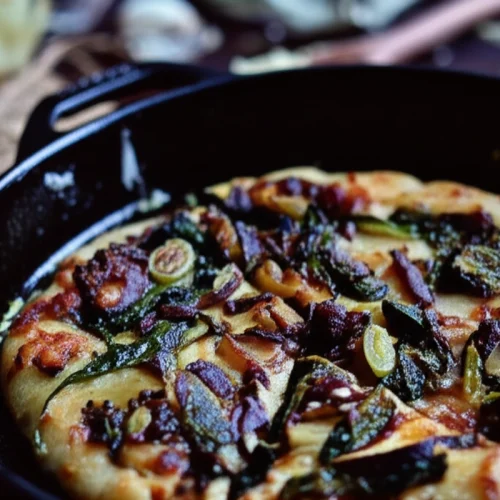
Spinach, caramelized onion & roasted garlic white pizza.
Ingredients
for the dough:
- 2 cups all-purpose flour (250 grams)
- 1 tsp sea or kosher salt
- 1/8 tsp active dry yeast *(see Notes)
- 3/4 cup water plus 1 tbsp
- 1 tbsp honey (optional)
for the garlic paste:
- 2 bulbs garlic
- 1-2 tsp olive oil plus more for drizzling during roasting
- 2-3 tsp milk or cream
- pinch crushed red chili pepper
for the toppings:
- 1/2 red onion sliced thin
- 2 cups spinach
- oil for sautéing
- salt and pepper to taste
- 1-2 cups shredded mozzarella sub with half provolone if desired
for baking:
- 1 tbsp cornmeal or however much is needed to prepare baking surface
- 1-2 tsp olive oil for brushing the dough before topping
Instructions
For the dough
- In a small bowl, combine water and honey, if using, and stir to dissolve. Sprinkle the yeast overtop the water and let proof for a few minutes. In a large bowl, sift together flour and salt, then add the yeast mixture and stir until it forms a sticky dough. (Proofing the yeast isn’t required in Lahey’s recipe or most adaptations of it; you can really just combine all the dough ingredients in a large bowl and mix.)
- Cover bowl with plastic and keep at room temperature for approximately 18 hours, or until the dough has more than doubled. It’s important to let your dough sit for the right amount of time because the proofing process allows the yeast to work its magic, creating those air pockets that are essential for a light, airy crust. Proofing your dough at room temperature for 18 hours is optimal, however, if you’re short on time you can double the yeast to speed up the process.
For the garlic paste
- About an hour before the dough is ready, start by roasting the garlic. Preheat the oven to 400 degrees. Slice off the top of the garlic bulb so that each clove is exposed. Drizzle a bit of olive oil over top, rubbing each clove to make sure the oil is well-distributed, then wrap in foil and bake for 30 minutes. The garlic should be soft when pressed when it’s done.
- Take the roasted garlic and pop out the cloves by squeezing, or with a fork. Combine with one teaspoon olive oil, two teaspoons of milk, and a sprinkle of crushed red pepper (optional), and mash with a potato masher or whiz in a food processor until it becomes a paste.
For the toppings
- While the garlic is baking (or after, if you’re bad at multitasking like I am), caramelize the onions. I do this by heating a few teaspoons of oil over medium-low heat in a large cast-iron skillet or saucepan and spreading the onions in a single layer evenly across the pan. Stir until onions are evenly coated with oil, then let the onions sizzle gently in the pan for at least 30 minutes and up to 45-50, stirring no more than once every 5-10 minutes. Once onions are very soft, jammy, and smell deeply sweet, they’re done. In the last five minutes, season with salt and pepper to taste; I also like to drizzle a little bit of balsamic vinegar in the last five minutes to loosen the fond and to add a bit of extra flavor, but you can feel free to use water, chicken stock, or a bit of broth for the same effect. When done, set aside.
- Heat a bit of oil in a saucepan and sauté the spinach until just wilted, seasoning with salt and pepper as desired, drain any liquid, and set aside.
To bake
- When the dough is ready, prepare your baking surface by sprinkling it liberally with cornmeal. I used a cast-iron skillet and found it to work wonderfully, though you can also use a baking sheet or, of course, a pizza stone. Preheat your oven to its hottest setting, about 500-550 degrees F. You can preheat the skillet or pizza stone if you like, but I didn’t and found my pizza to be just fine.
- Scrape the dough out of your bowl onto a well-floured surface. It should be quite sticky and soft. Flour the top of the dough, then divide the dough in half and form them into ball shapes by tucking the edges underneath itself. If you’re baking these one at a time, cover one ball of dough with a damp towel while you prepare the other.
- Gently press, shape, and stretch the dough into a flat circle or rectangle however you like (I’m no pizza shaping expert!) Again, I used a 10-inch cast-iron skillet for this, so I shaped the dough into two 10-inch rounds.
- Brush a small amount of olive oil over the dough, then spread the garlic paste in an even layer across it. Sprinkle desired amount of cheese over that (I like a mixture of mozzarella and provolone if I’m feeling spendy), then your caramelized onions and spinach. I’ve also added smoked turkey bacon (or you could use regular bacon).
- Bake at 500 for 10-12 minutes, or until the pizza reaches your desired brownness. Slice and stuff face.