My first attempts at Neapolitan pizza were, to put it mildly, humbling. I envisioned light, airy crusts with beautiful leopard spotting, but instead, I ended up with dense, flavorless disappointments. The crusts were always either too tough or too soft.
Then came the “aha!” moment: the realization that cold water and a long fermentation process were the keys I’d been missing. The transformation was astounding; the flavor deepened, the texture became airy and light, and the crust finally had that perfect balance of crispness and chew.
This recipe is my answer to those early struggles: a meticulously tested guide to crafting authentic Neapolitan pizza dough. Consider this less of a recipe and more of a blueprint: The Science of Authentic Neapolitan Pizza: Mastering the Dough for Unmatched Flavor and Texture.
With just 20 minutes of prep time, a quick 2-minute cook, and a total time investment of 24 hours, you’re on your way to pizza perfection with this Neapolitan pizza dough.
Table of Content
The Cold Water Secret: Why Chilled Hydration Creates a Superior Crust
Building on the foundation of a great pizza starts with understanding the ingredients, and water temperature is more critical than many realize. The secret to an exceptional Neapolitan pizza dough lies in using cold water. It’s not just a suggestion; it’s a crucial element that influences the very structure of your crust.
Chilling the water serves two primary functions: controlling yeast activity and managing gluten development. Warmer temperatures encourage rapid yeast growth, which can lead to an over-proofed dough lacking in complex flavors. I discovered that cold water slows down this process, giving the yeast time to work its magic without going into overdrive.
Slower yeast activity translates to a more controlled rise, which ultimately affects the crumb structure. Beyond yeast, cold water also plays a pivotal role in gluten development. Gluten, the protein network that gives dough its elasticity, develops best at cooler temperatures. It allows for a more relaxed and extensible dough that’s easier to stretch.
The 20-Hour Transformation: Unlocking Flavor Through Slow Fermentation
Building on the crucial role of cold water, the next key to unlocking true Neapolitan flavor lies in time: specifically, a long, slow fermentation. It might seem like an insignificant step, but extending the fermentation to around 20 hours is where the magic truly happens.
This extended period is far more than just letting the dough rise. It’s a carefully orchestrated series of biochemical reactions that dramatically alter the flavor and texture of the final crust. Through experimentation, I learned that this long fermentation develops complex flavors, improves dough extensibility, and creates a lighter, more digestible crust.
During this time, enzymes break down complex carbohydrates into simpler sugars, which feed the yeast and produce flavorful byproducts. I found that this process yields acetic and lactic acids, which contribute that subtle tang so characteristic of authentic Neapolitan pizza. Moreover, the prolonged fermentation strengthens the gluten structure, resulting in a more extensible dough that stretches easily without tearing.
Shimmy Shove Mastery: The Physics of Launching Pizza Like a Pro
With the dough properly fermented, the next hurdle is transferring that delicate disc into a blazing hot oven. The “shimmy shove” is the technique I’ve refined over countless pizzas, and it’s essential for preventing sticking and ensuring a smooth launch. It looks simple but requires a feel for the dough and an understanding of the physics involved.
The key is minimizing friction between the dough and the peel. This is why I always ensure my peel is liberally dusted with flour. Think of the flour as tiny ball bearings, allowing the pizza to glide effortlessly.
The “shimmy” part involves gentle, rhythmic movements of the peel, creating small bursts of air that further reduce surface contact. It’s a delicate balance: too little movement, and the pizza will stick; too much, and you risk distorting the shape. I remember one particularly disastrous attempt where, in my overzealousness, I sent half the toppings flying off the pizza!
The “shove” is the final, decisive motion: a swift, confident push that transfers the pizza onto the hot baking stone or tray. Practice on a cold oven is essential; I spent hours perfecting my technique before attempting it with a live, scorching-hot surface. Don’t get discouraged if your first few attempts aren’t perfect. Each slightly misshapen pizza is a lesson learned and a step closer to pizza-launching mastery.
Ingredients
- Flour – 640g
- Water – 360g
- Salt – 14g
- Yeast – 0.3g
- 300g tin of plum tomatoes
- Tomato puree (optional) – a tablespoon
- Salt – sprinkling of table salt or sea salt
- Pepper – freshly ground black pepper
- Mozzarella – 2 x 125g bags of fresh Mozzarella balls
- Parmesan – about 30g
- Olive Oil – a few glugs
- Basil – hand full of fresh leaves
I experimented with kneading times, from 5 to 10 minutes. I found that 5 minutes gave me the best results when following the method of the recipe, preventing over-kneading and maintaining a delicate crumb structure.
Instructions
- Mix all the ingredients into a shaggy mass in a large bowl
- Cover the bowl with cling film
- Leave the dough to rest for around 1 hour
- Turn the dough out onto the counter and knead for around 5 minutes
- Place the dough back into the bowl and cover
- Leave the dough to prove for around 20 hours. This long fermentation develops complex flavours, improves dough extensibility, and creates a lighter, more digestible crust.
- About 4 hours before you intend to cook the pizza, divide the dough into 4 equal parts
- Place each dough ball into a small bowl and cover
- Leave the dough balls to prove again for about 4 hours
- Blend a tin of quality plum tomatoes into a smooth sauce
- Cook the sauce until it reaches the desired thickness
- Add a tablespoon or 2 of tomato puree
- Season with salt and pepper to taste
- Ensure that you baking stone/tray is inside your oven
- Get your oven up to temperature
- Dust a dough ball with plenty of flour and remove from the container
- In the bowl, press down from the centre of the dough towards the edges
- Keep turning the dough as you work the air towards the edges
- Turn the dough over and repeat this process in the bowl
- Remove from the bowl and place on the counter
- Stretch the dough outwards
- Repeat this until you have a base which is about 9 to 10 inches in diameter
- Top the base with around 2 soup spoons of tomato sauce
- Spread about a handful of Mozzarella evenly across the pizza
- Slide the pizza onto a peel
- Load straight onto baking stone/tray
- Cook pizza
- Remove pizza from the oven and place on a chopping board
- Grate parmesan on top and add some torn basil. Finish with a drizzle of olive oil and a sprinkling of black pepper
- Let the pizza cool a little and tuck in!
Frequently Asked Questions
Defining Authentic Neapolitan Pizza
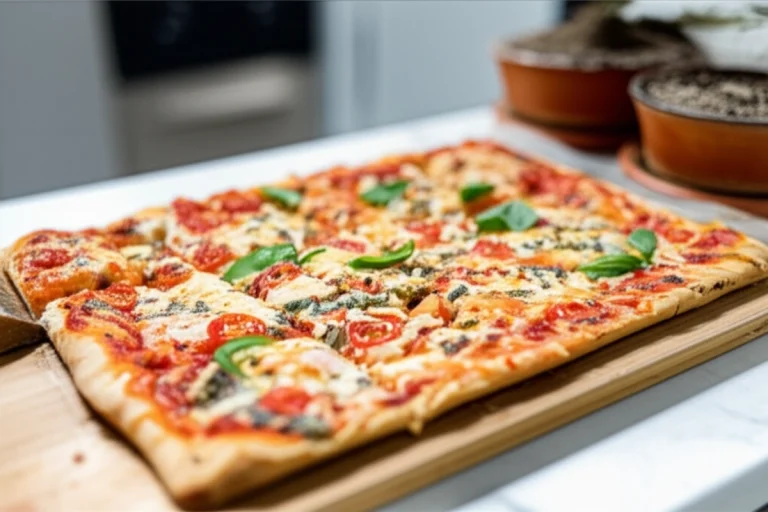
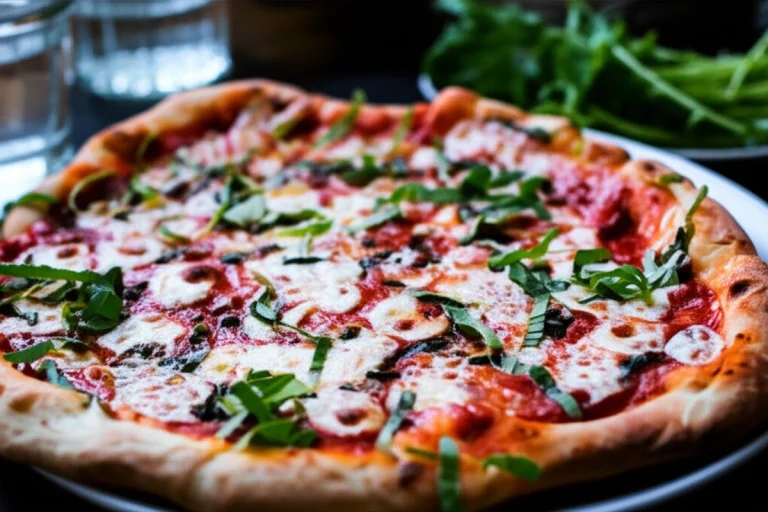
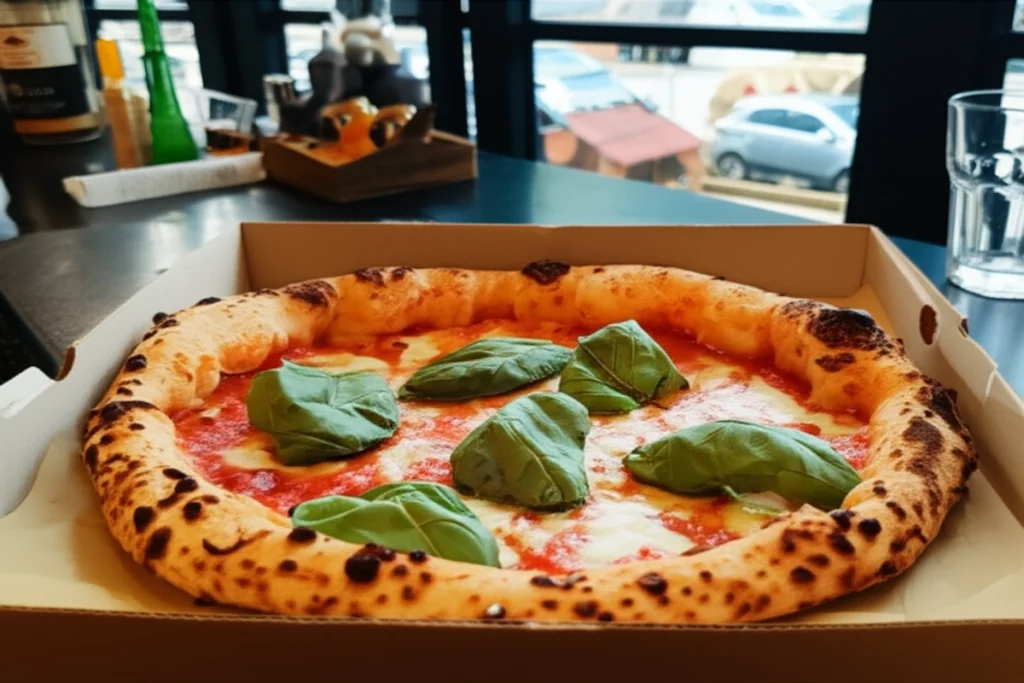
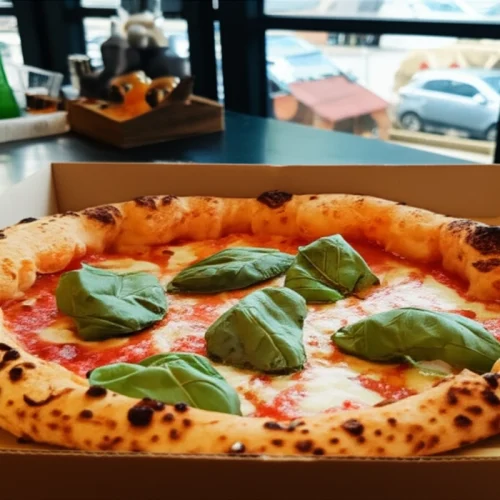
Authentic Neapolitan pizza is defined by a few key characteristics that distinguish it from other thin-crust pizzas. The most important aspect is the crust: it should be thin (around 3mm), soft, and pliable, with a raised, airy cornicione (edge). It must also have the characteristic leopard spotting, which comes from the very high heat of a wood-fired oven. I’ve found that focusing on these characteristics leads to a truly authentic result.
Achieving a Thin, Strong, and Pliable Crust
Achieving that perfect balance of thinness, strength, and pliability in a Neapolitan-style crust requires specific techniques. Using the right flour with a protein content that allows for good gluten development is essential. Also, a long, slow fermentation is vital. I learned through trial and error that this gives the dough strength and extensibility.
Traditional Variations in Ingredients and Toppings
While tradition dictates simplicity, there are some acceptable variations in ingredients and toppings for Neapolitan pizza. The classic Margherita, with tomatoes, Mozzarella, basil, and olive oil, is the gold standard. Marinara, with tomatoes, garlic, oregano, and olive oil, is another acceptable option. After many tests, I believe that high-quality ingredients are the most important thing when making pizza.
The Impact of Cooking Method
The cooking method profoundly impacts the final result of a thin-crust Neapolitan pizza. Ideally, it’s cooked in a wood-fired oven at extremely high temperatures (around 900°F/480°C) for a very short time (60-90 seconds). The high heat creates the signature leopard spotting and gives the crust its characteristic texture. I discovered that replicating this in a home oven requires a baking stone or steel and preheating it for at least an hour to achieve the necessary heat.
Troubleshooting and Tips for Perfect Neapolitan Pizza Dough
Even with the best recipe, things can sometimes go awry. Over the years, I’ve faced my share of pizza dough challenges, and I’ve learned a few tricks to overcome them. Here are some common issues and how I tackle them, plus some practical considerations for your Neapolitan pizza journey.
If your dough is too sticky, it’s likely due to high hydration or insufficient gluten development. I’ve found that gently kneading in a little extra flour, a tablespoon at a time, can help. Also, be sure not to skip the initial rest period; this allows the flour to fully absorb the water.
Crust burning too easily is another frequent problem. The culprit is often too much sugar in the dough or an oven that’s too hot in certain spots. Lowering the oven temperature slightly and ensuring even heat distribution are key. I also rotate the pizza halfway through cooking to prevent localized burning.
Makes four 10-inch pizzas.
Leftover dough balls can be stored in the refrigerator for up to 24 hours. I always wrap them individually in cling film to prevent them from drying out. Before using, allow the dough to come to room temperature for about an hour to relax the gluten.
If you can’t find “00” flour, a good substitute is a blend of all-purpose flour and semolina flour. I use a 3:1 ratio of all-purpose to semolina to mimic the texture and protein content of “00” flour.
Conclusion
At its heart, mastering authentic Neapolitan pizza dough is about understanding the science behind the process. By embracing the cold water secret and the transformative power of a long fermentation, you unlock a depth of flavor and a lightness of texture that elevates your pizza to a new level. It’s The Science of Authentic Neapolitan Pizza: Mastering the Dough for Unmatched Flavor and Texture.
The benefits extend beyond just taste. I found that the cold water slows yeast activity, resulting in a more controlled rise and superior gluten development. The extended fermentation not only creates a complex flavor profile but also makes the crust more digestible. A slice from a 14-inch cheese pizza from a restaurant chain can have 285 calories, 36 grams of carbs, and 640 milligrams of sodium, according to the US.
Now it’s your turn to experience the magic. I encourage you to try this recipe, experiment with the techniques, and share your results in the comments below. What did you discover? What variations did you try? What questions do you still have?
Don’t forget to share your pizza creations on social media! I’m excited to see your Neapolitan masterpieces.
Authentic Neapolitan Pizza Recipe
Equipment
- Large Bowl
- Cling film
- Baking stone/tray
- Oven
- Pizza Peel
- Chopping board
Ingredients
Ingredients
- 640 g Flour
- 360 g Water
- 14 g Salt
- 0.3 g Yeast
- 300 g Plum tomatoes tin of
- 1 tbsp Tomato puree (optional)
- Salt sprinkling of table salt or sea salt
- Pepper freshly ground black pepper
- 2 Mozzarella x 125g bags of fresh Mozzarella balls
- 30 g Parmesan about
- Olive Oil a few glugs
- Basil hand full of fresh leaves
Instructions
Instructions
- Mix all the ingredients into a shaggy mass in a large bowl
- Cover the bowl with cling film
- Leave the dough to rest for around 1 hour
- Turn the dough out onto the counter and knead for around 5 minutes
- Place the dough back into the bowl and cover
- Leave the dough to prove for around 20 hours. This long fermentation develops complex flavours, improves dough extensibility, and creates a lighter, more digestible crust.
- About 4 hours before you intend to cook the pizza, divide the dough into 4 equal parts
- Place each dough ball into a small bowl and cover
- Leave the dough balls to prove again for about 4 hours
- Blend a tin of quality plum tomatoes into a smooth sauce
- Cook the sauce until it reaches the desired thickness
- Add a tablespoon or 2 of tomato puree
- Season with salt and pepper to taste
- Ensure that you baking stone/tray is inside your oven
- Get your oven up to temperature
- Dust a dough ball with plenty of flour and remove from the container
- In the bowl, press down from the centre of the dough towards the edges
- Keep turning the dough as you work the air towards the edges
- Turn the dough over and repeat this process in the bowl
- Remove from the bowl and place on the counter
- Stretch the dough outwards
- Repeat this until you have a base which is about 9 to 10 inches in diameter
- Top the base with around 2 soup spoons of tomato sauce
- Spread about a handful of Mozzarella evenly across the pizza
- Slide the pizza onto a peel
- Load straight onto baking stone/tray
- Cook pizza
- Remove pizza from the oven and place on a chopping board
- Grate parmesan on top and add some torn basil. Finish with a drizzle of olive oil and a sprinkling of black pepper
- Let the pizza cool a little and tuck in!