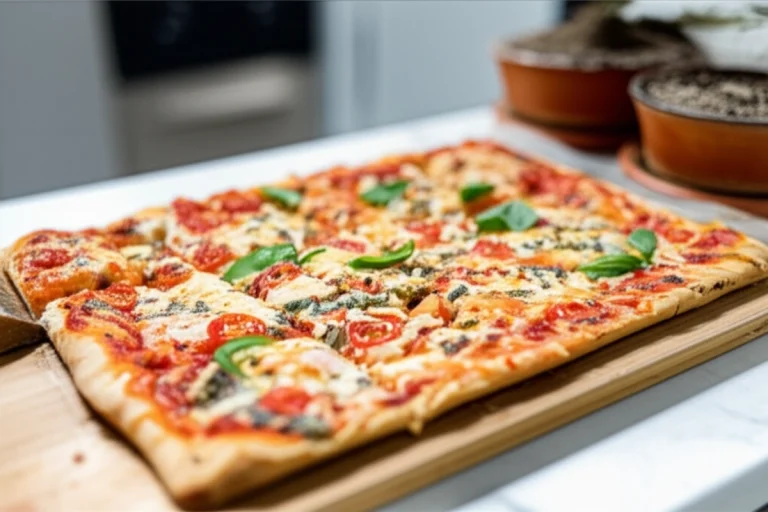
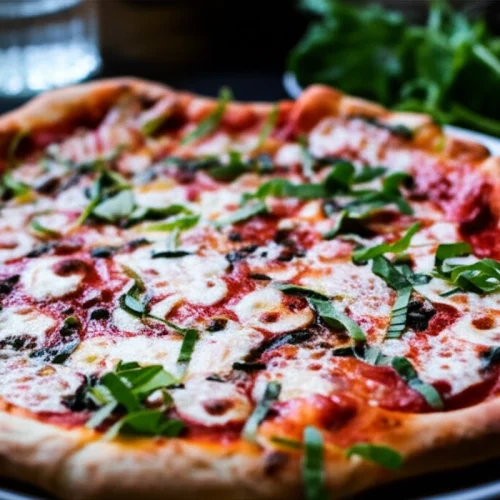
This meticulously tested margherita pizza recipe is the culmination of countless hours spent chasing the perfect slice. Prep time clocks in at 20 minutes, cook time at 15 minutes, and total time, including proofing, is 155 minutes.
My early attempts at a margherita pizza recipe often resulted in either a cracker-crisp base or a gummy, undercooked mess. The sauce lacked depth, and the cheese never seemed to melt quite right. I knew I needed to approach the problem systematically, just like any engineering challenge.
The biggest breakthrough came when I focused on the dough. It’s not enough to simply combine ingredients; the key is understanding the subtle balance between flour, water, and kneading. Through careful experimentation, I discovered the precise cues for perfectly proofed dough: smooth, elastic, and tacky, but never sticky. This margherita pizza recipe is designed to bring that pizzeria-quality experience right to your home kitchen.
Table of Content
Tacky, Not Sticky: The Secret to Perfectly Proofed Dough
That perfectly proofed dough is critical, and its texture is more important than you might think. When kneading, I watch carefully for three telltale signs: a smooth surface, an elastic feel, and a slightly tacky touch. These aren’t just arbitrary goals; they’re indicators that the gluten has developed correctly.
Gluten development is the backbone of a great pizza crust. As you knead, the proteins in the flour (glutenin and gliadin) link together, forming long, strong chains. These chains trap the gases produced by the yeast during proofing, allowing the dough to rise.
The smooth surface tells me the gluten is becoming more organized, creating a uniform structure. Elasticity means the dough can stretch without tearing, essential for that thin, pliable crust. The slight tackiness indicates the right amount of moisture is present; too dry, and the dough will be tough; too wet, and it will be a sticky mess. If you find your dough sticking to the counter, resist the urge to add large quantities of flour. Instead, lightly dust the surface and your hands as needed until the dough no longer clings.
San Marzano & Parmigiano-Reggiano: Why Ingredient Quality Matters for Your Margherita Pizza Recipe
Speaking of the dough, it’s only the foundation. The quality of your toppings will make or break your margherita pizza recipe. That’s why I insist on using San Marzano tomatoes and Parmigiano-Reggiano cheese; they aren’t just fancy names, they’re flavor powerhouses.
Genuine San Marzano tomatoes, grown in the volcanic soil of Italy, possess a unique sweetness and low acidity that canned varieties simply cannot replicate. I’ve tried cheaper alternatives, and the difference in the sauce is undeniable; the San Marzano’s deliver a brighter, cleaner flavor that perfectly complements the other ingredients in this margherita pizza recipe.
Similarly, authentic Parmigiano-Reggiano, with its complex, nutty, and savory notes, elevates the entire pizza experience. It has a distinctive granular texture and a depth of flavor that comes from careful aging. A less expensive grating cheese simply will not deliver the same result. Paying a bit more for these ingredients is an investment in a truly exceptional final product.
Ingredients
- 2½ cups (300 g) unbleached all-purpose flour
- 1 teaspoon granulated sugar
- ½ teaspoon active dry yeast (or SAF instant yeast)
- ¾ teaspoon kosher salt
- 7 ounces (105°F to 115°F) warm water
- 1 tablespoon extra virgin olive oil
- semolina and all-purpose flour (for dusting the pizza peel)
- 1 cup pureed or crushed canned San Marzano tomatoes (or canned Italian plum tomatoes)
- 2-3 fresh garlic cloves (grated with a microplane or pressed)
- 1 teaspoon extra virgin olive oil (plus more for drizzling)
- 2-3 large pinches of kosher salt (to taste)
- ¼ teaspoon freshly ground black pepper
- 2-3 tablespoons finely grated parmigiano-reggiano cheese (plus more for serving)
- 7 ounces fresh mozzarella cheese (not packed in water) (cut into ½-inch cubes)
- 5-6 large fresh basil leaves (plus more for garnishing)
- dried red pepper flakes (optional)
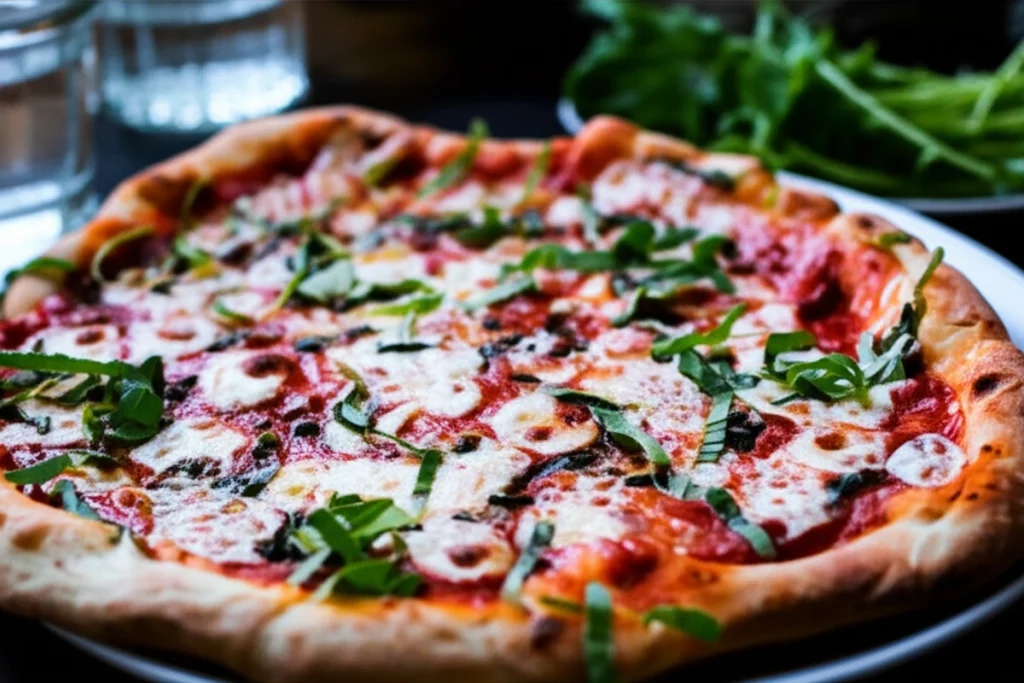
I tested both room temperature and cold mozzarella. The room temperature mozzarella melted faster and more evenly, creating a better visual result. That’s why the recipe specifically calls for it.
Instructions
- Prepare Pizza Dough: In a medium bowl, whisk together the all-purpose flour, sugar, yeast and salt. Add the warm water and olive oil, and stir the mixture with a wooden spoon until the dough just begins to come together. It will seem shaggy and dry, but don’t worry.
- Scrape the dough onto a well-floured counter top and knead the dough for three minutes. The initial kneading develops the gluten structure, which gives the pizza its characteristic chewy texture. Properly developed gluten allows the dough to stretch without tearing and creates the perfect airy crust. Dust the dough with flour as needed (sometimes I will have to do this 2 to 3 times, depending on humidity levels) – it should be slightly tacky, but should not be sticking to your counter top. After about 3 minutes, the dough should be smooth, slightly elastic, and tacky. Lightly grease a large mixing bowl with olive oil, and place the dough into the bowl.
- Cover the bowl with a kitchen towel (or plastic wrap) and allow the dough to rise in a warm, dry area of your kitchen for 2 hours or until the dough has doubled in size. Proofing Tip: If your kitchen is very cold, heat a large heatproof measuring cup of water in the microwave for 2 to 3 minutes. This creates a nice warm environment. Remove the cup and place the bowl with the dough in the microwave until it has risen. [If you are preparing the dough in advance, see the note section for freezing instructions.]
- Preheat Oven and Pizza Steel or Stone: Place the pizza steel (or stone) on the second to top rack of your oven (roughly 8 inches from the broiler element), and preheat the oven and steel (or stone) to 550°F (285°C) for a minumum of 1 hour. If your oven does not go up to 550°F (285°C) or you are using a delicate pizza stone, I recommend heating it to a maximum of 500°F (260°C)
- As the oven is preheating, assemble the ingredients. In a small bowl, stir together the pureed tomatoes, minced garlic, extra virgin olive oil, pepper, and salt. Set aside another small bowl with the cubed mozzarella cheese (pat the cheese with a paper towel to remove any excess moisture). Set aside the basil leaves and grated parmigiano-reggiano cheese for easy grabbing.
- Separate the dough into two equal-sized portions. It will deflate slightly, but that is OK. Place the dough on a large plate or floured counter top, cover gently with plastic wrap, and allow the dough to rest for 5 to 10 minutes.
- Assemble the Pizza: Sprinkle the pizza peel (if you do not own a pizza peel, you can try using the back of a half sheet pan – but it is tricky!) with a tablespoon of semolina and dusting of all-purpose flour. Gently use both hands to stretch one ball of pizza dough into roughly a 10-inch circle (don’t worry if its not perfectly uniform). If the dough springs back or is too elastic, allow it to rest for an additional five minutes. The edges of the dough can be slightly thicker, but make sure the center of the dough is thin (you should be able to see some light through it if you held it up). Gently transfer the dough onto the semolina and flour dusted pizza peel or baking sheet.
- Drizzle or brush the dough lightly (using your fingertips) with olive oil (roughly a teaspoon. Using a large spoon, add roughly ½ cup of the tomato sauce onto the pizza dough, leaving a ½-inch or ¾-inch border on all sides. Use the back of the spoon to spread it evenly and thinly. Sprinkle a tablespoon of parmigiano-reggiano cheese onto the pizza sauce. Add half of the cubed mozzarella, distributing it evenly over the entire pizza. Using your hands, tear a few large basil leaves, and sprinkle the basil over the pizza. At this point, I’ll occasionally stretch the sides of the dough out a bit to make it even thinner. Gently slide the pizza from the peel onto the heated baking stone. Bake for 7 to 8 minutes, or until the crust is golden and the cheese is bubbling and caramelized and the edges of the pizza are golden brown. Note: If you’re looking for more color, finish the pizza under the low or medium broil setting, but watch it carefully! Remove the pizza carefully from the oven with the pizza peel, transfer to a wooden cutting board or foil, drizzle the top with olive oil, some grated parmigiano-reggiano cheese, and chiffonade of fresh basil. Slice and serve immediately and/or prepare the second pizza.
- Serving Tip: If you’re serving two pizzas at once, I recommend placing the cooked pizza on a separate baking sheet while you prepare the other pizza. In the last few minutes of cooking, place the prepared pizza into the oven (on a rack below the pizza stone) so that it is extra hot for serving. Otherwise, I recommend serving one pizza fresh out of the oven, keeping the oven hot, and preparing the second pizza after people have gone through the first one! The pizza will taste great either way, but it is at its prime within minutes out of the oven!.
Frequently Asked Questions
What are the essential ingredients for an authentic Margherita pizza?
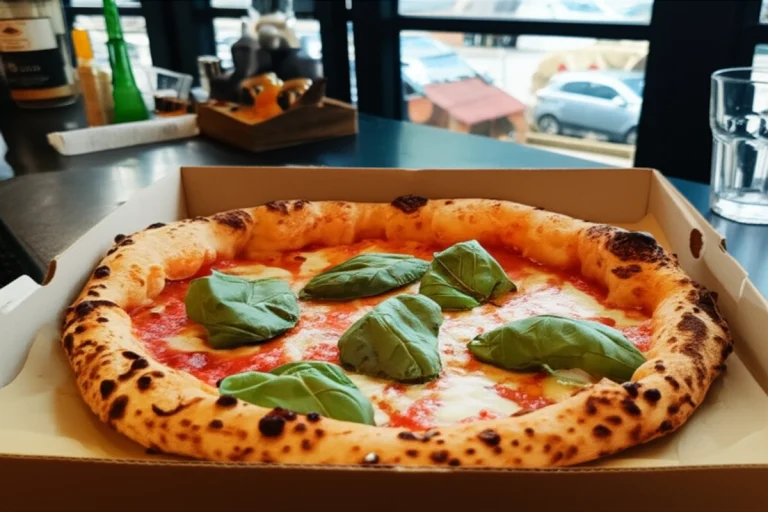
For a truly authentic margherita pizza recipe, I’ve found that you need just a few key ingredients: a simple dough made from flour, water, yeast, and salt; San Marzano tomatoes, fresh mozzarella, basil, and Parmigiano-Reggiano cheese. Each element plays a crucial role in achieving the classic flavor profile. I have found that, without each of these ingredients, you simply will not achieve that perfect Margherita pizza that you’re seeking.
What is the history and meaning behind the ingredients of a traditional Margherita pizza?
Legend has it that the margherita pizza was created in 1889 by a chef in Naples to honor Queen Margherita of Savoy. The colors of the pizza—red tomatoes, white mozzarella, and green basil—were chosen to represent the Italian flag. I think it’s a beautiful story, and it adds to the pizza’s charm.
How can I make a Margherita pizza at home, and what are the key steps?
Making a margherita pizza at home is easier than you might think, and this recipe shows you how! The key steps are preparing the dough and allowing it to proof, preheating your oven with a pizza steel or stone, assembling the pizza with the sauce, cheese, and basil, and baking it until the crust is golden and the cheese is bubbling. Remember to use the freshest ingredients you can find; it truly makes a difference.
What are common mistakes to avoid when making Margherita pizza?
Through trial and error, I’ve found that a few common mistakes can ruin a margherita pizza. Using low-quality ingredients is a big one, as is overworking the dough or using a cold ball of mozzarella. Also, don’t overload the pizza with toppings; the beauty of a margherita lies in its simplicity.
Tips for Perfecting Your Margherita Pizza Recipe
This margherita pizza recipe makes two 10-inch pizzas, perfect for sharing or enjoying leftovers the next day. Getting the process down pat comes with experience, but these tips can help you speed up the learning curve.
For freezing the dough, I divide it into individual portions after the first rise. I wrap each portion tightly in plastic wrap and then place them in a freezer bag. The dough can be frozen for up to 2 months. When ready to use, thaw the dough in the refrigerator overnight and allow it to come to room temperature before stretching.
Leftover pizza, if there is any, should be stored in an airtight container in the refrigerator. I have found that it’s best consumed within 24 hours for optimal taste and texture. Reheating in a skillet on the stovetop helps maintain a crispy crust.
Serving Tip: If you’re serving two pizzas at once, I recommend placing the cooked pizza on a separate baking sheet while you prepare the other pizza. In the last few minutes of cooking, place the prepared pizza into the oven (on a rack below the pizza stone) so that it is extra hot for serving. Otherwise, I recommend serving one pizza fresh out of the oven, keeping the oven hot, and preparing the second pizza after people have gone through the first one! The pizza will taste great either way, but it is at its prime within minutes out of the oven!
Conclusion
This margherita pizza recipe is more than just a set of instructions; it’s an engineered system designed for repeatable success in your home kitchen. I’ve shown you that the secret to an exceptional margherita pizza recipe lies in understanding the science behind the process, from the critical cues for perfectly proofed dough to the quality of your tomatoes and cheese.
Remember, the key is to aim for a smooth, elastic, and tacky dough, and don’t skimp on those San Marzano tomatoes and Parmigiano-Reggiano cheese! These ingredients deliver a depth of flavor that elevates the entire experience.
Now it’s your turn. Try this margherita pizza recipe, and let me know how it goes in the comments below. Share your experiences, ask questions, and, if you love it as much as I do, share this article with your friends and family. What are your favorite pizza toppings, and are you excited to give this recipe a try? I encourage you to rate the recipe once you’ve had a chance to make it. I am excited to hear from you!
Best Homemade Margherita Pizza
Equipment
- medium bowl
- wooden spoon
- Kitchen towel
- Plastic wrap
- pizza steel or stone
- Small bowl
- Pizza Peel
- baking sheet
Ingredients
Ingredients
- 2½ cups unbleached all-purpose flour (300 g)
- 1 teaspoon granulated sugar
- ½ teaspoon active dry yeast (or SAF instant yeast)
- ¾ teaspoon kosher salt
- 7 ounces warm water (105°F to 115°F)
- 1 tablespoon extra virgin olive oil
- semolina and all-purpose flour (for dusting the pizza peel)
- 1 cup pureed or crushed canned San Marzano tomatoes (or canned Italian plum tomatoes)
- 2-3 fresh garlic cloves (grated with a microplane or pressed)
- 1 teaspoon extra virgin olive oil (plus more for drizzling)
- 2-3 large pinches of kosher salt (to taste)
- ¼ teaspoon freshly ground black pepper
- 2-3 tablespoons finely grated parmigiano-reggiano cheese (plus more for serving)
- 7 ounces fresh mozzarella cheese (not packed in water) (cut into ½-inch cubes)
- 5-6 large fresh basil leaves (plus more for garnishing)
- dried red pepper flakes (optional)
Instructions
Instructions
- Prepare Pizza Dough: In a medium bowl, whisk together the all-purpose flour, sugar, yeast and salt. Add the warm water and olive oil, and stir the mixture with a wooden spoon until the dough just begins to come together. It will seem shaggy and dry, but don’t worry.
- Scrape the dough onto a well-floured counter top and knead the dough for three minutes. The initial kneading develops the gluten structure, which gives the pizza its characteristic chewy texture. Properly developed gluten allows the dough to stretch without tearing and creates the perfect airy crust. Dust the dough with flour as needed (sometimes I will have to do this 2 to 3 times, depending on humidity levels) – it should be slightly tacky, but should not be sticking to your counter top. After about 3 minutes, the dough should be smooth, slightly elastic, and tacky. Lightly grease a large mixing bowl with olive oil, and place the dough into the bowl.
- Cover the bowl with a kitchen towel (or plastic wrap) and allow the dough to rise in a warm, dry area of your kitchen for 2 hours or until the dough has doubled in size. Proofing Tip: If your kitchen is very cold, heat a large heatproof measuring cup of water in the microwave for 2 to 3 minutes. This creates a nice warm environment. Remove the cup and place the bowl with the dough in the microwave until it has risen. [If you are preparing the dough in advance, see the note section for freezing instructions.]
- Preheat Oven and Pizza Steel or Stone: Place the pizza steel (or stone) on the second to top rack of your oven (roughly 8 inches from the broiler element), and preheat the oven and steel (or stone) to 550°F (285°C) for a minumum of 1 hour. If your oven does not go up to 550°F (285°C) or you are using a delicate pizza stone, I recommend heating it to a maximum of 500°F (260°C)
- As the oven is preheating, assemble the ingredients. In a small bowl, stir together the pureed tomatoes, minced garlic, extra virgin olive oil, pepper, and salt. Set aside another small bowl with the cubed mozzarella cheese (pat the cheese with a paper towel to remove any excess moisture). Set aside the basil leaves and grated parmigiano-reggiano cheese for easy grabbing.
- Separate the dough into two equal-sized portions. It will deflate slightly, but that is OK. Place the dough on a large plate or floured counter top, cover gently with plastic wrap, and allow the dough to rest for 5 to 10 minutes.
- Assemble the Pizza: Sprinkle the pizza peel (if you do not own a pizza peel, you can try using the back of a half sheet pan – but it is tricky!) with a tablespoon of semolina and dusting of all-purpose flour. Gently use both hands to stretch one ball of pizza dough into roughly a 10-inch circle (don’t worry if its not perfectly uniform). If the dough springs back or is too elastic, allow it to rest for an additional five minutes. The edges of the dough can be slightly thicker, but make sure the center of the dough is thin (you should be able to see some light through it if you held it up). Gently transfer the dough onto the semolina and flour dusted pizza peel or baking sheet.
- Drizzle or brush the dough lightly (using your fingertips) with olive oil (roughly a teaspoon. Using a large spoon, add roughly ½ cup of the tomato sauce onto the pizza dough, leaving a ½-inch or ¾-inch border on all sides. Use the back of the spoon to spread it evenly and thinly. Sprinkle a tablespoon of parmigiano-reggiano cheese onto the pizza sauce. Add half of the cubed mozzarella, distributing it evenly over the entire pizza. Using your hands, tear a few large basil leaves, and sprinkle the basil over the pizza. At this point, I’ll occasionally stretch the sides of the dough out a bit to make it even thinner. Gently slide the pizza from the peel onto the heated baking stone. Bake for 7 to 8 minutes, or until the crust is golden and the cheese is bubbling and caramelized and the edges of the pizza are golden brown. Note: If you’re looking for more color, finish the pizza under the low or medium broil setting, but watch it carefully! Remove the pizza carefully from the oven with the pizza peel, transfer to a wooden cutting board or foil, drizzle the top with olive oil, some grated parmigiano-reggiano cheese, and chiffonade of fresh basil. Slice and serve immediately and/or prepare the second pizza.
- Serving Tip: If you’re serving two pizzas at once, I recommend placing the cooked pizza on a separate baking sheet while you prepare the other pizza. In the last few minutes of cooking, place the prepared pizza into the oven (on a rack below the pizza stone) so that it is extra hot for serving. Otherwise, I recommend serving one pizza fresh out of the oven, keeping the oven hot, and preparing the second pizza after people have gone through the first one! The pizza will taste great either way, but it is at its prime within minutes out of the oven!.