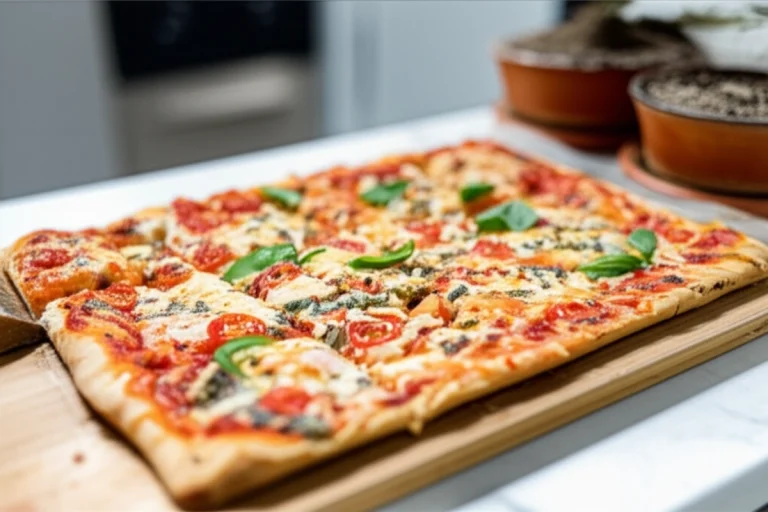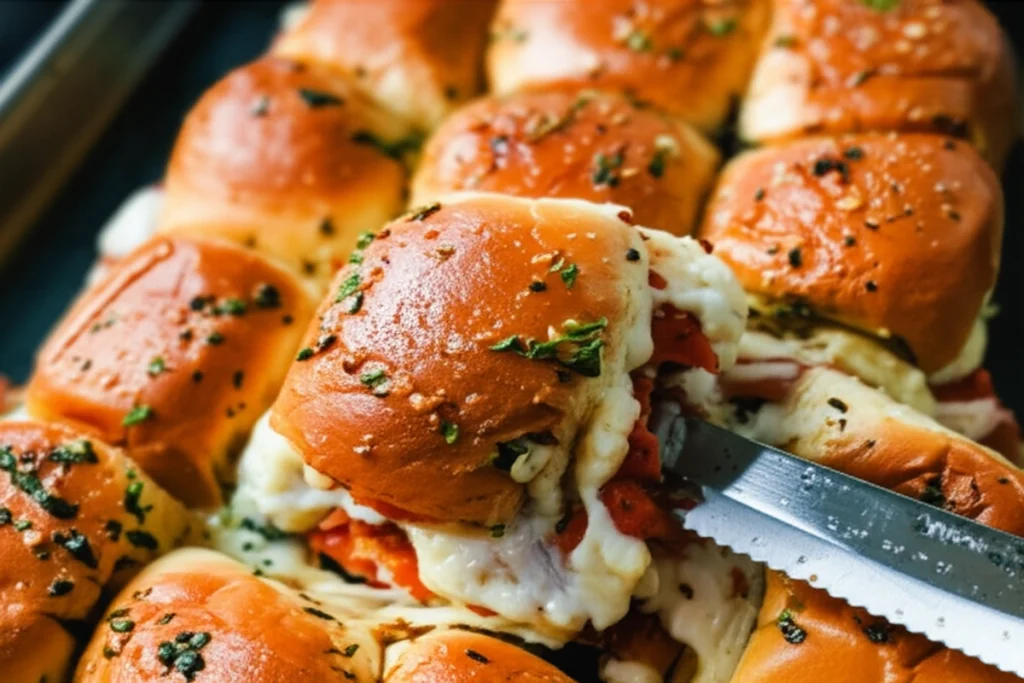
I have always enjoyed making pizza sliders, especially for parties. I will never forget the time I made a batch using pizza sauce directly on the bottom of the rolls; they were a soggy mess. That experience taught me a valuable lesson. The best pizza sliders demand a moisture barrier and a flavor boost.
That’s why I now use garlic butter as a base. It not only prevents the dreaded soggy bun, but it also infuses every bite with rich, savory goodness. This recipe for Smoked Beef Bacon Pizza Sliders is my expert guide to achieving pizza slider perfection. With a prep time of just 10 minutes and a cook time of 24 minutes, you’ll have a crowd-pleasing appetizer ready in no time.
Table of Content
Garlic Butter vs. Pizza Sauce: The Secret to Avoiding Soggy Sliders
The secret to exceptional pizza sliders lies in moisture control, starting with the base. I’ve found that choosing between garlic butter and pizza sauce can make or break your sliders. Here’s a breakdown of why I exclusively use garlic butter.
| Garlic Butter | Pizza Sauce | |
|---|---|---|
| Pros | Creates a moisture barrier, preventing soggy buns. Infuses a rich, savory flavor. Enhances the aroma and overall taste. | Adds a classic pizza flavor. Can be easily sourced. |
| Cons | Requires melting butter and combining ingredients. Adds a distinct garlic flavor that might not appeal to everyone. | High moisture content leads to soggy buns. Can mask the flavor of other ingredients. |
The high moisture content in pizza sauce almost guarantees soggy sliders. That’s why I always opt for garlic butter. The melted butter creates a hydrophobic barrier. This prevents the rolls from absorbing excess moisture during baking. The garlic also infuses the rolls, complementing the smoked beef bacon and cheeses.
Smoked Beef Bacon: Why It’s a Flavor Game-Changer
Switching from pepperoni to smoked beef bacon is one of the most impactful changes I have made to my pizza sliders. The swap transforms the entire flavor profile from basic to gourmet. This seemingly simple ingredient introduces a depth of flavor that regular pepperoni simply can’t match.
The richness of the smoked beef bacon offers a more complex, nuanced smokiness that complements the garlic butter and cheeses beautifully. The slightly salty and deeply savory notes create a symphony of flavors that dance on the palate. The overall slider experience is elevated by the ingredient’s distinctive taste and aroma.
Pro tip: To further enhance the smoky flavor, I sometimes add a pinch of smoked paprika to the garlic butter mixture. It amplifies the savory notes and adds an extra layer of complexity that my guests always rave about. The key to a perfect pizza slider is all about layering flavors.
Ingredients
Here’s what you’ll need to create these crowd-pleasing pizza sliders:
- (1) 12-count pkg. Hawaiian Sweet Rolls
- 4 ounces Sliced Smoked Beef Bacon
- 6 slices Provolone Cheese
- 2 cups Mozzarella Cheese
- 1/2 cup Butter
- 3 Garlic Cloves, minced ((or 1/2 teaspoon garlic powder))
- 1/2 teaspoon Red Chili Flakes
- 1 teaspoon Fresh Oregano, diced ((or 1/2 teaspoon dried))
- Marinara Sauce (warmed) ((for dipping))
I experimented with both fresh and dried oregano in the garlic butter. While dried oregano is convenient, the fresh oregano offers a brighter, more vibrant flavor that complements the smoked beef bacon perfectly. That’s why I strongly recommend fresh oregano, if possible.
Instructions
- Preheat oven to 350 degrees. Line a 9 x 13 baking pan or sheet with aluminum foil and spray with cooking spray. This is an important step because the cheese will melt and can stick to the foil.
- In a microwave-safe bowl, melt the butter. Add the garlic, red chili flakes, and oregano. Stir to combine. The melted butter acts as a binder for the garlic, red pepper flakes, and oregano, ensuring even distribution of flavor across the sliders.
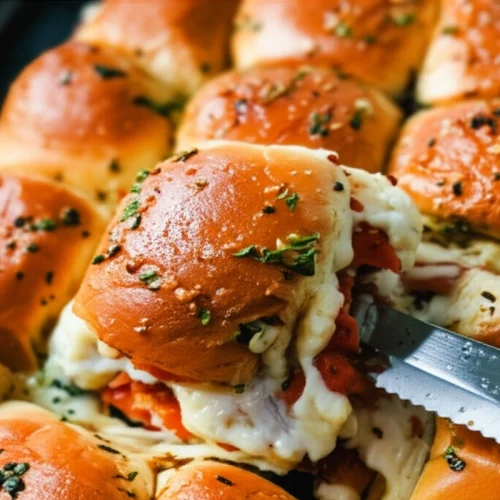
- Use a long serrated knife to slice the rolls in half, lengthwise, so you have a slab of rolls. Don’t pull the rolls apart or individually slice them because you want the rolls to be completely connected. Place the bottom side of the rolls in the pan
- Brush 1/3 of the garlic butter on the bottom half of the roll. Layer with provolone cheese, smoked beef bacon, and then sprinkle with mozzarella cheese. Place the top half of the rolls on the top. Brush with remaining garlic butter, ensuring to cover the rolls.
- Cover with aluminum foil and bake covered for about 20-22 minutes or until the cheese is melted. Uncover the foil and bake for 3 to 5 minutes longer. Cut into pieces and serve hot! Serve with a bowl of warmed marinara sauce for dipping.
Frequently Asked Questions
What type of cheese works best in pizza sliders?
Through my testing, I’ve discovered that a combination of cheeses yields the best results for pizza sliders. I use provolone and mozzarella. The provolone offers a slightly sharp, savory base that complements the smoked beef bacon. The mozzarella provides that classic, melty, cheesy pull we all love. I’ve experimented with other cheeses, but this blend consistently delivers the most satisfying flavor and texture.
What side dishes pair well with Hawaiian roll pizza sliders?
I have found that the best side dishes offer a balance to the richness of the pizza sliders. A fresh, vibrant salad with a light vinaigrette provides a refreshing contrast. Alternatively, I’ve served mine with a tangy coleslaw. The acidity cuts through the richness of the cheese and bacon, enhancing the overall meal.
What are the best practices for storing and reheating leftover sliders?
Proper storage is crucial to prevent your Hawaiian roll pizza sliders from becoming soggy. I allow the sliders to cool completely before storing them in an airtight container. If you stack them, place a layer of parchment paper between the layers to prevent sticking. When reheating, I prefer using the oven at 350°F for about 10-15 minutes to restore their crispiness. While microwaving is faster, it can make the rolls a bit soft, so I typically avoid it unless I’m in a hurry.
Serving Suggestions for Pizza Sliders
When serving pizza sliders, I like to offer side dishes that complement their rich, savory flavors. A simple green salad with vinaigrette provides a crisp, refreshing contrast to the sliders, balancing the richness of the cheese and smoked beef bacon. Another favorite pairing of mine is creamy coleslaw; the tangy dressing cuts through the richness, cleansing the palate between bites. For a more casual option, consider serving them with kettle-cooked potato chips, adding a satisfying crunch.
For leftovers, the pizza sliders can be stored in an airtight container in the refrigerator for up to three days. When reheating, I suggest using the oven to maintain the best texture. These pizza sliders make 12 servings, so be sure to store them accordingly!
How to Store and Reheat Your Pizza Sliders
After making a batch of these pizza sliders, proper storage and reheating are key to preserving their taste and texture. I’ve found that careful handling prevents the rolls from becoming soggy. Here’s my method for keeping these sliders as delicious as the moment they came out of the oven.
For storage, I always let the pizza sliders cool completely before placing them in an airtight container. Excess heat can create condensation, leading to soggy buns. I often line the container with a paper towel to absorb any extra moisture.
When it comes to reheating, I strongly recommend using the oven to revive your pizza sliders. Place them on a baking sheet and reheat at 350°F (175°C) for about 10-15 minutes. This method helps to re-crisp the rolls and melt the cheese.
Microwaving is an option if you’re short on time, but it tends to make the rolls softer. If using a microwave, I wrap each slider in a paper towel and heat in 30-second intervals until warmed through. Remember, proper storage from the beginning will make reheating much more successful, preventing those dreaded soggy buns. These pizza sliders make 12 servings, so store them appropriately to enjoy later!
Conclusion
In summary, mastering the art of pizza sliders comes down to avoiding soggy buns and elevating flavor. I’ve found that using garlic butter as a moisture barrier, and opting for smoked beef bacon, are the two most important steps. These ensure a truly exceptional slider experience every time. The unique combination transforms this simple appetizer into something truly special, and a guaranteed crowd-pleaser for any occasion.
Now it’s your turn. What are your favorite ways to prepare pizza sliders using Hawaiian rolls? I’d love to hear about your variations and experiences with this recipe. Please share your tips, tricks, and photos in the comments below. I am always looking for new approaches!
Smoked Beef Bacon Pizza Sliders
Equipment
- 9 x 13 baking pan
- Aluminum foil
- Microwave-safe bowl
- Serrated knife
Ingredients
Ingredients
- 1 pkg Hawaiian Sweet Rolls 12-count
- 4 ounces Sliced Smoked Beef Bacon
- 6 slices Provolone Cheese
- 2 cups Mozzarella Cheese
- 1/2 cup Butter
- 3 cloves Garlic Cloves, minced ((or 1/2 teaspoon garlic powder))
- 1/2 teaspoon Red Chili Flakes
- 1 teaspoon Fresh Oregano, diced ((or 1/2 teaspoon dried))
- Marinara Sauce (warmed) ((for dipping))
Instructions
Instructions
- Preheat oven to 350 degrees. Line a 9 x 13 baking pan or sheet with aluminum foil and spray with cooking spray. This is an important step because the cheese will melt and can stick to the foil.
- In a microwave-safe bowl, melt the butter. Add the garlic, red chili flakes, and oregano. Stir to combine. The melted butter acts as a binder for the garlic, red pepper flakes, and oregano, ensuring even distribution of flavor across the sliders.
- Use a long serrated knife to slice the rolls in half, lengthwise, so you have a slab of rolls. Don’t pull the rolls apart or individually slice them because you want the rolls to be completely connected. Place the bottom side of the rolls in the pan
- Brush 1/3 of the garlic butter on the bottom half of the roll. Layer with provolone cheese, smoked beef bacon, and then sprinkle with mozzarella cheese. Place the top half of the rolls on the top. Brush with remaining garlic butter, ensuring to cover the rolls.
- Cover with aluminum foil and bake covered for about 20-22 minutes or until the cheese is melted. Uncover the foil and bake for 3 to 5 minutes longer. Cut into pieces and serve hot! Serve with a bowl of warmed marinara sauce for dipping.