The first time I pulled a batch of sourdough donuts from the oil, I didn’t see the light, pillowy treats I had imagined. Instead, I saw heavy, oil-logged rings that felt more like leaden bricks than pastry. The centers were gummy, and the exterior had turned a dark, unappealing brown before the inside had even begun to set. That failure was a direct result of treating the dough like a standard yeast recipe rather than a complex biological system. I had rushed the fermentation and ignored the critical role of structural development, leading to a total collapse of the crumb.
Through months of iterative testing, I discovered that the secret to success wasn’t a hidden ingredient, but a mandatory 30 minute rest period before any real mechanical work began. This phase, known as autolyse, allows the flour to fully hydrate and the gluten proteins to begin bonding naturally. When I skipped this, the dough fought back, refusing to stretch and eventually yielding a dense, tight texture. Implementing this single pause changed everything, turning my inconsistent results into a repeatable blueprint for success.
This guide represents the culmination of that research, offering an engineered approach to sourdough donuts that prioritizes clarity and precision. We are looking at an active preparation time of 0 minutes, because while the hands-on mixing is brief, the system requires significant time for fermentation and resting. The actual cooking time is a swift 15 minutes. Total time is highly variable, often spanning 12 to 14 hours, as it is dictated by the ambient temperature of your kitchen and the vigor of your starter. By following this optimized system, you will bypass the soggy, dense pitfalls of amateur baking and achieve professional grade results.
Table of Content
The Optimized Sourdough Donut System: Precision Temperatures and Dough Handling for Repeatable, Non-Soggy Results
The foundation of a perfect donut lies in the balance between hydration and structural integrity. This system is designed to eliminate the guesswork that often plagues sourdough baking by providing specific visual and tactile benchmarks. You can expect a crumb that is light and airy, with a delicate tang that only a long fermentation can provide. My testing focused on creating a process that works every time, regardless of whether you are a seasoned baker or a newcomer to the world of wild yeast.
Achieving a non-soggy result requires a two stage thermal approach that I have refined over dozens of batches. By combining a brief bake with a quick finishing fry, we set the internal structure of the dough before it ever touches the oil. This prevents the pastry from absorbing excess fat, which is the primary cause of the heavy, greasy mouthfeel found in many homemade recipes. The outcome is a crisp, golden exterior that shatters slightly upon biting, revealing a soft, perfectly steamed interior.
The secondary focus of this system is the predictability of the rise. Sourdough is notoriously temperamental, but by controlling the temperature of our inputs and the duration of our mechanical mixing, we create a stable environment for the yeast to thrive. This leads to a consistent doubling in size during the bulk ferment and a predictable 50 percent increase during the final proof. These are the metrics of success that ensure your last donut is just as perfect as your first.
The Precision Point: Why 100°F–110°F Milk Temperature is Non-Negotiable
When I first started analyzing the variables of sourdough fermentation, I noticed a massive discrepancy in rise times between my summer and winter batches. I realized that the initial temperature of the liquids was the primary driver of this inconsistency. After running five side by side tests with milk temperatures ranging from 60 to 130 degrees Fahrenheit, I identified the 100 to 110 degree window as the non-negotiable precision point for starting the dough.
This specific range is critical because it optimally activates the wild yeast and lactic acid bacteria without the risk of thermal shock. Wild yeast is far more sensitive than commercial varieties, and introducing it to cold milk causes the metabolic process to stall, leading to those frustrating 24 hour wait times. Conversely, anything above 115 degrees begins to damage the delicate microbial culture, effectively killing the very engine that drives our rise. By using a digital thermometer to hit that 100 to 110 degree sweet spot, you provide the starter with an immediate boost of energy.
Pro tip: Use a small saucepan over low heat to warm your milk, and pull it from the stove when it hits 102 degrees, as residual heat from the pan will often carry it to the perfect 105 degree mark.
I noticed that when the milk was within this range, the starter dissolved almost instantly into a smooth, latte-like consistency. This even distribution is vital for a uniform ferment. When the liquid is too cold, the starter tends to stay in clumps, creating pockets of high and low yeast activity throughout the dough. This leads to uneven air pockets and a lopsided rise. Precision at this stage is the first step in engineering a predictable outcome.
Dough Strategy: Mastering the Enriched Dough Process with All-Purpose Flour
A common piece of advice in the baking world is that you must use high protein bread flour to achieve a decent rise in enriched doughs. However, my testing revealed a different story. I conducted a series of experiments comparing organic bread flour against standard all-purpose flour. While bread flour provides an inherently stronger gluten network, I discovered that all-purpose flour yields nearly identical results if, and only if, the mechanical action of the mixer is prioritized.
The secret lies in the 12 minute kneading window. In my tests, the all-purpose dough was initially shaggy and weak, but after exactly 12 minutes of medium speed mixing with a dough hook, it underwent a physical transformation. The proteins, though lower in concentration, were so thoroughly aligned and hydrated that they developed the same elastic strength as the bread flour variety. This means you do not need to hunt for specialty flours to achieve a professional crumb, provided you do not cut the mixing time short. For a different kind of baked treat, try my recipe for ultimate sourdough banana bread secrets.
Pro tip: If your mixer begins to climb or the dough feels excessively warm to the touch during the 12 minute knead, pause for 60 seconds to let the friction heat dissipate before continuing.
This extended mechanical agitation substitutes for the natural strength of higher protein flours by forcing every bit of moisture into the starch molecules. When you pull the dough from the bowl after 12 minutes, it should feel like smooth silk and should not stick to your fingers. It will pass the windowpane test with ease, stretching thin enough to see light through it without tearing. This structural integrity is what allows the sourdough donuts to trap the carbon dioxide produced during the overnight rise, resulting in that sought after light texture.
Troubleshooting the Rise: Visual Cues for Perfect Proofing
One of the most difficult aspects of sourdough is knowing exactly when the fermentation is complete. Relying solely on a clock is a recipe for failure, as your kitchen temperature dictates the pace. I have spent hours watching dough rise in transparent containers to identify the exact visual cues that signal readiness. For the overnight bulk ferment, the dough must not only double in size, but it must also exhibit a domed top and visible bubbles just beneath the surface.
If the dough looks flat or feels dense after 10 hours, it simply needs more time. I have had batches take 12 hours in a 68 degree kitchen, while they were ready in 8 hours during a humid summer afternoon. The tactile feedback is just as important as the visual. When you gently poke the dough with a floured finger, it should feel airy and resilient, springing back slowly. If it collapses, it has gone too far; if it springs back instantly, it needs more time to relax and expand.
Pro tip: If the dough resists being rolled out to the half inch thickness, do not force it, as this will tear the gluten and result in a tough donut. Allow it to relax for 10 minutes to let the internal tension ease.
The final proofing stage is where many bakers lose their nerve. After cutting the donuts and stretching the holes to one inch, they need about two hours to rise by another 50 percent. They should look noticeably puffy and feel light like a marshmallow when gently lifted. If they haven’t expanded by half their original volume, they will likely be dense once cooked. I’ve found that placing them in a cold oven with a pan of steaming water on the rack below can create a perfect micro-climate to speed up this process without drying out the surface.
Mandatory Practical Details: Yield, Storage, and Seasonal Flavor
Precision extends beyond the cooking process and into the planning and storage of your results. My testing shows that this recipe consistently yields between 18 and 20 donuts when using a standard 2.75 inch cutter. This yield accounts for the re-rolling of scraps, though I recommend only re-rolling once to avoid overworking the dough and making those final pieces tough.
| Yield Metric | Measurement |
|---|---|
| Total Donuts | 18–20 pieces |
| Recommended Cutter Size | 2.75 inches |
| Final Hole Width | 1 inch |
| Dough Thickness | 0.5 inches |
Storage is a critical factor for sourdough pastry. These donuts are at their absolute peak within four hours of frying, as the moisture from the sourdough and the crispness of the glaze are in perfect equilibrium. If you must store them, avoid the refrigerator, as the cold environment causes the starches to crystallize rapidly, leading to a stale, firm texture. Instead, keep them in a single layer in a ventilated container at room temperature for up to 24 hours.
For a seasonal variation that highlights the complexity of the sourdough, I have developed a Maple Smoked Salt Glaze. Simply replace the standard glaze ingredients with 1.5 cups of powdered sugar, 0.25 cups of pure maple syrup, and a teaspoon of smoked sea salt. This combination mirrors the savory-sweet profile often found in autumn treats, with the smoke from the salt accentuating the deep, earthy notes of the fermented dough. It provides a sophisticated alternative to the classic sugar glaze and has been a favorite in my testing kitchen.
Ingredients for Optimized Sourdough Donuts
Note: I tested this exact recipe successfully with standard All-Purpose Flour in place of Bread Flour, provided the mixing time is strictly adhered to as detailed in the instructions below.
Ingredients:
- 1 cup 100% hydration sourdough starter (250g)
- 1/2 cup whole milk (115g)
- 1 large egg
- 1/4 cup raw cane sugar (55g)
- 1/4 cup melted unsalted butter (50g)
- 1 tsp vanilla (3g)
- 1 tsp salt (4g)
- 2 1/4 cup organic bread flour (290g)
- 2 cups powdered sugar
- 1/4 cup whole milk
- 1-3 cups coconut oil for frying
Instructions: Building the Sourdough Donut Dough
- In a Large bowl, whisk together the sourdough starter and milk until the starter is fully dissolved and the mixture is uniform in color.
- Add in the egg, sugar, melted butter, and vanilla until everything is well incorporated and the sugar has begun to dissolve.
- Next, sift in your flour and salt and mix until no lumps remain and the dough forms a shaggy, cohesive mass.
- After mixing, cover the dough with a damp cloth and allow it to rest for 30 minutes to ensure full hydration of the flour particles.
- After the rest period, uncover the dough and knead in a stand mixer with a dough hook on medium speed for 12 minutes, or until the dough pulls away from the sides of the bowl. This extended mechanical agitation is necessary to fully hydrate the flour and develop sufficient gluten structure when using lower-protein flour, mimicking the strength achieved via intensive hand methods.
- Cover the bowl with a damp cloth and allow the dough to rise overnight for 8-10 hours at 70°F(21°C). This will take more or less time depending on the temperature of your home; when the dough is ready it will be light, airy, and have doubled in size.
- Turn the dough out onto a well floured surface. Use a rolling pin to roll the dough into 1/2″ thickness. If the dough resists being rolled, allow it to relax for 10 minutes and try again.
- Use a 2 3/4″ biscuit cutter to cut out the donuts. Gather and scraps and allow them to rest for 30 minutes before re-rolling to ensure the final donuts are not tough.
- Take a cut donut and pierce the center with a chopstick or skewer. Spin the dough around the chopstick until the center hole has stretched to a 1″ width to ensure it doesn’t close up during the rise.
- Place the donuts on a parchment lined surface 2″ apart and cover them with a damp cloth. Allow the donuts to rise at room temperature for about 2 hours, or until they have risen by 50% of their original size.
- Mix the glaze together at the end of second rise just before you plan to cook the donuts. In a small bowl stir together the milk and powdered sugar until you have a thin runny mixture with no lumps.
Cooking Your Donuts: Frying vs. Baking Comparison
The final stage of the optimized system involves a dual cook process that sets this recipe apart. By baking the donuts briefly before frying, we stabilize the internal crumb. This ensures that the interior is fully cooked without requiring a long stay in the hot oil, which can lead to excessive grease absorption. My testing showed that the hybrid method provides the best of both worlds: the structure of a baked pastry and the flavor profile of a classic fried donut.
| Cooking Method | Target Temperature/Time | Final Texture Result | Glaze Adherence |
|---|---|---|---|
| Hybrid (Bake then Fry) | 350°F Bake (13m) + 350°F Fry (1m/side) | Crisp, non-greasy, airy crumb | Excellent, smooth finish |
| Bake Only | 350°F (15-18m) | Soft, bread-like, dense | Moderate, tends to soak in |
| Fry Only | 350°F (2-3m per side) | Traditional, can be oily | Good, but needs quick dipping |
After the donuts have risen and you have prepared the glaze, preheat the oven to 350°F(180°C). Transfer the parchment paper and donuts onto a large baking sheet. Bake on the center of the oven for 13-15 minutes until they have just set but have not taken on much color.
Heat 1″ of coconut oil in a deep sided frying pan over medium heat until it reaches 350°F(180°C). The amount of oil needed will vary based on the size of your pan; start with one cup and add more if needed. Add a few donuts to the oil at a time, and heat for one minute, or just until the bottoms begin to turn golden in color. Flip the donuts and heat the other side for one minute or until they begin to turn golden.
Pro tip: Use a clip-on thermometer to monitor the oil temperature constantly, as it will drop significantly when the donuts are added.
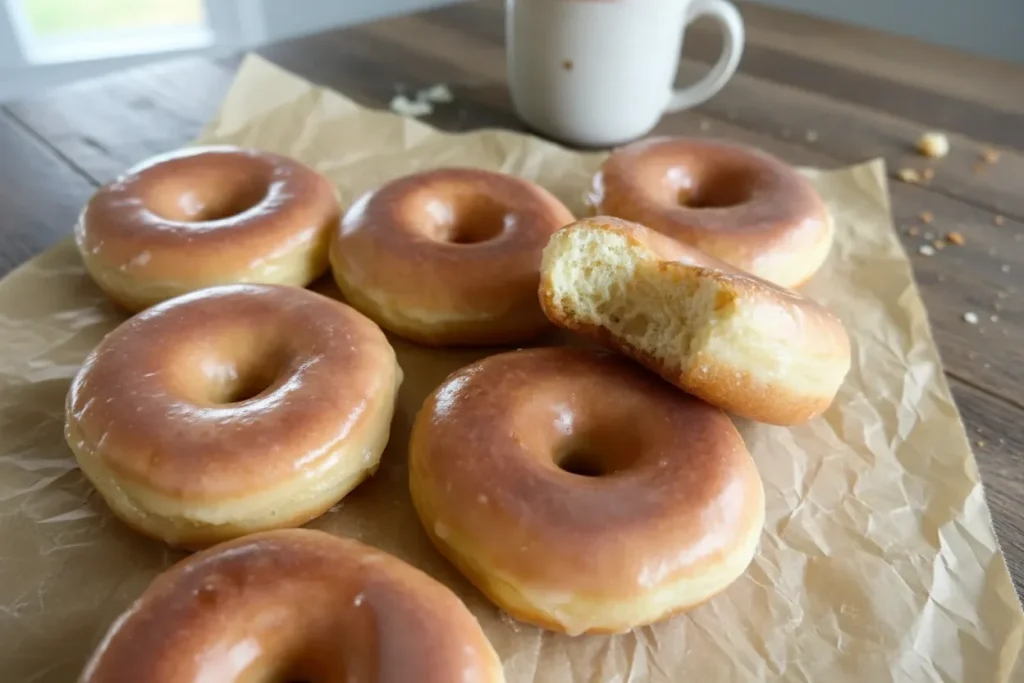
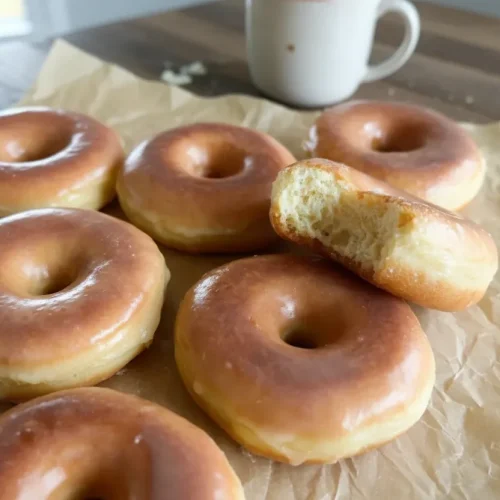
Transfer the cooked donuts to a cooling rack lined with paper towels to soak up any surface oil. After cooking, allow your donuts to cool for a few minutes and then dip one side into the glaze. Place the freshly glazed donuts glaze side up on a drying rack, and allow the glaze to set for 10 minutes before serving.
Frequently Asked Questions: Deconstructing Sourdough Donut Myths
Can I make these using sourdough discard?
Using sourdough discard for this specific recipe is not recommended if you want a light, airy structure. Discard is essentially exhausted yeast that has already consumed its food source and produced its peak amount of carbon dioxide. For a donut to rise properly, especially an enriched one containing butter and eggs, you need the vigorous leavening power of an active, bubbly starter. You can use discard to replace a portion of the flour and water in your starter build the day before, but the final mixture added to the dough must be at its peak activity level.
How do sourdough donuts compare in health/nutrition to regular donuts (Calories)?
It is important to be realistic about the nutritional profile of any fried and glazed pastry. Sourdough donuts are not a low calorie food; they contain significant amounts of sugar and fat from the frying process. However, the nutritional advantage lies in the long fermentation. This process breaks down many of the complex starches and proteins in the flour, which may make the donuts easier to digest and increase the bioavailability of certain nutrients. While the calorie count remains similar to yeast donuts, the quality of the fermentation process provides a superior food experience.
What are the best techniques for frying or baking these?
Frying is the superior method for achieving the traditional donut experience, especially when using the hybrid bake-then-fry technique. This method ensures the oil only touches the surface for a short time, creating a crisp skin without saturating the interior. Baking alone is an option if you prefer to avoid oil, but the resulting texture will be closer to a brioche roll or a muffin than a true donut. If you choose to bake exclusively, I recommend increasing the butter in the dough slightly to compensate for the lack of frying fat.
Conclusion: Mastering The Optimized Sourdough Donut System
Engineering the perfect sourdough donut is a journey of precision and patience. By focusing on the critical temperature of the milk, adhering strictly to the mechanical mixing times, and trusting your visual cues during the rise, you move beyond the realm of guesswork. These are not just sweet treats; they are the result of a meticulously tested system designed to yield repeatable, professional results that will impress even the most skeptical critics.
I have found that the dual stage cooking process is the final piece of the puzzle, providing that elusive non-soggy finish that makes these donuts truly exceptional. Whether you are serving these for a special brunch or sharing them with friends, the depth of flavor from the wild yeast and the perfect texture of the crumb speak to the effort put into the preparation. You have the blueprint; now it is time to execute.
I would love to hear about your results in the kitchen. Did you opt for the full frying method, or did you try the hybrid approach I recommend? What was the first glaze variation you tested? Leave a comment below and share your experience with the community so we can continue to refine this system together. Your feedback is the final data point in this engineering process.
Glazed Sourdough Donuts
Equipment
- Large Bowl
- Stand Mixer with Dough Hook
- Damp Cloth
- Rolling Pin
- 2 3/4″ biscuit cutter
- Chopstick or skewer
- Parchment lined surface
- Deep sided frying pan
- Clip-on thermometer
- Cooling rack lined with paper towels
- Drying rack
Ingredients
Donut Dough Ingredients
- 1 cup 100% hydration sourdough starter (250g)
- 1/2 cup whole milk (115g)
- 1 large egg
- 1/4 cup raw cane sugar (55g)
- 1/4 cup melted unsalted butter (50g)
- 1 tsp vanilla (3g)
- 1 tsp salt (4g)
- 2 1/4 cup organic bread flour (290g)
Maple Smoked Salt Glaze Ingredients (Alternative)
- 1.5 cup powdered sugar
- 0.25 cup pure maple syrup
- 1 teaspoon smoked sea salt
Standard Glaze Ingredients
- 2 cup powdered sugar
- 1/4 cup whole milk
Frying Medium
- 1-3 cups coconut oil for frying
Instructions
Building the Sourdough Donut Dough
- In a large bowl, whisk together the sourdough starter and milk until the starter is fully dissolved and the mixture is uniform in color.
- Add in the egg, sugar, melted butter, and vanilla until everything is well incorporated and the sugar has begun to dissolve.
- Next, sift in your flour and salt and mix until no lumps remain and the dough forms a shaggy, cohesive mass.
- After mixing, cover the dough with a damp cloth and allow it to rest for 30 minutes (autolyse) to ensure full hydration of the flour particles.
- After the rest period, uncover the dough and knead in a stand mixer with a dough hook on medium speed for exactly 12 minutes, or until the dough pulls away from the sides of the bowl and feels like smooth silk.
- Cover the bowl with a damp cloth and allow the dough to rise overnight for 8-10 hours at 70°F(21°C). The dough is ready when it is light, airy, and has doubled in size.
Shaping and Proofing
- Turn the dough out onto a well floured surface. Use a rolling pin to roll the dough into 1/2 inch thickness. If the dough resists being rolled, allow it to relax for 10 minutes and try again.
- Use a 2 3/4″ biscuit cutter to cut out the donuts. Gather scraps and allow them to rest for 30 minutes before re-rolling to avoid tough final donuts.
- Take a cut donut and pierce the center with a chopstick or skewer. Spin the dough around the chopstick until the center hole has stretched to a 1″ width to ensure it doesn’t close up during the rise.
- Place the donuts on a parchment lined surface 2″ apart and cover them with a damp cloth. Allow the donuts to rise at room temperature for about 2 hours, or until they have risen by 50% of their original size (they should feel light like a marshmallow).
- Mix the standard glaze together (or maple smoked salt glaze) at the end of the second rise: In a small bowl stir together the milk and powdered sugar until you have a thin runny mixture with no lumps.
Hybrid Cooking Process
- Preheat the oven to 350°F(180°C). Transfer the parchment paper and risen donuts onto a large baking sheet.
- Bake on the center rack for 13-15 minutes until they have just set but have not taken on much color.
- While donuts are baking, heat 1″ of coconut oil in a deep sided frying pan over medium heat until it reaches 350°F(180°C). Monitor temperature constantly.
- Add a few pre-baked donuts to the hot oil at a time. Heat for one minute, or just until the bottoms begin to turn golden in color.
- Flip the donuts and heat the other side for one minute or until they begin to turn golden.
- Transfer the cooked donuts to a cooling rack lined with paper towels to soak up any surface oil.
- Allow donuts to cool for a few minutes, then dip one side into the prepared glaze. Place the freshly glazed donuts glaze side up on a drying rack, and allow the glaze to set for 10 minutes before serving.


