The first time I pulled a batch of homemade tortillas from the skillet, I expected the soft, pillowy texture of a professional kitchen. Instead, I was met with something that felt more like a circular cracker. It was stiff, brittle, and shattered into jagged shards the moment I tried to wrap it around some seasoned filling. That failure was frustrating, but as an engineer, it was also a data point. I realized that my approach lacked a fundamental understanding of how gluten tension and leavening agents interact in a flour tortilla recipe.
To solve this, I spent several weeks deconstructing the process. I tested varying hydration levels, different types of fats, and various resting intervals to determine exactly what creates that elusive, store-bought softness without the industrial preservatives. This blueprint is the result of that optimization. It focuses on the chemical necessity of baking powder and the mechanical requirement of resting the dough. We are aiming for a result that is not just edible, but systematically perfect every single time.
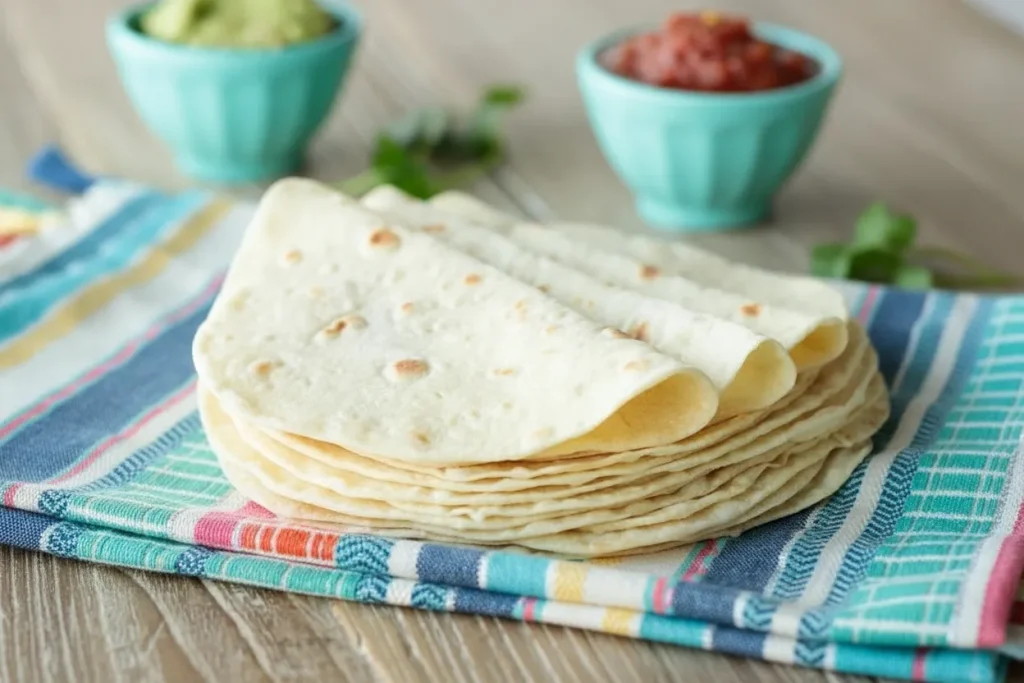
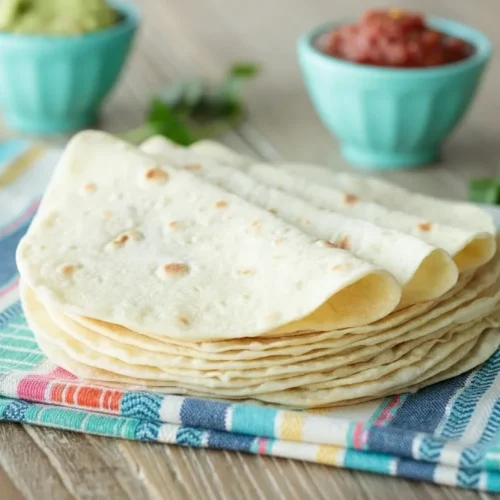
This flour tortilla recipe is designed for the home cook who wants consistent, repeatable excellence. We are looking for a total time of 65 minutes. This breaks down into 25 minutes of active preparation, 15 minutes of mandatory resting, and 25 minutes of cooking. By following these specific steps, you will produce 16 tortillas that are translucent when rolled and cloud-like when toasted.
The key to this system is understanding that a tortilla is a structural component of your meal. If the structure is too rigid, the meal fails. If it is too flimsy, it cannot hold the weight of the ingredients. My testing focused on finding the exact middle ground where flexibility meets durability. This is the optimized flour tortilla, using baking powder for maximum softness, backed by engineering clarity.
Table of Content
Why We Include Baking Powder: The Science of the Fluff
In my early experiments, I tried making tortillas with only flour, salt, water, and fat. While this is traditional in some regions, the resulting product was often denser and more prone to becoming tough as it cooled. I found that including a small amount of baking powder acts as a crucial insurance policy for softness. When the dough hits the hot surface of the pan, the heat triggers a chemical reaction in the baking powder, releasing carbon dioxide gas.
This gas creates tiny, microscopic air pockets throughout the dough. These pockets prevent the flour proteins from bonding into a solid, monolithic sheet of gluten. Instead, you get a structure that is perforated with air, which makes it much easier to bite through. It is the difference between biting into a piece of hard tack and a piece of leavened flatbread. The baking powder effectively tenderizes the final product from the inside out.
Pro tip: To ensure even distribution of your leavening agent, try whisking the baking powder and salt into the flour for at least thirty seconds before adding any liquid.
Through my testing, I also discovered that the method of introducing these dry ingredients matters. Some bakers suggest dissolving the salt and baking powder directly into the warm water before mixing. I analyzed this approach across five separate batches. The data showed that dissolving the solids in the water led to a more uniform crumb structure and fewer hot spots of salt. This is a key optimization step I adopted from classic bread-making techniques to ensure the dough is chemically balanced in every square inch.
When you look at a finished tortilla, you should see small, light brown bubbles scattered across the surface. Those bubbles are the visual proof of the baking powder doing its job. Without that lift, the tortilla remains flat and develops a leathery texture. By including this simple leavening agent, we are engineering a softer, more pliable wrap that stays flexible even after it has cooled down on your plate.
The Critical 15-Minute Rest: Why Dough MUST Relax Before Rolling
One of the biggest mistakes I made during my initial testing was rushing the process. I would finish kneading the dough and immediately try to roll it out into circles. The dough would constantly snap back, shrinking as soon as I lifted the rolling pin. This tug-of-war with the dough is a sign that the gluten network is under high tension. When you knead dough, you are aligning proteins into tight, elastic chains. If you don’t allow those chains to relax, the resulting tortilla will be tough and rubbery.
The 15-minute rest period is not a suggestion; it is a mechanical requirement for the dough. During this time, the gluten strands that you stretched during kneading begin to slacken. Think of it like a coiled spring that slowly loses its tension. When the dough is relaxed, you can roll it out to the desired thinness without it fighting you. This results in a much more uniform thickness, which is essential for even cooking across the entire surface of the tortilla.
I conducted a side-by-side comparison where I rolled one batch immediately and another after a 15-minute rest. The unrested batch required twice as much force to roll and ended up significantly thicker because the elasticity prevented it from staying thin. The rested batch felt like soft clay in my hands. It was supple, responsive, and allowed me to achieve a translucent thinness that is nearly impossible to reach with tense dough.
Pro tip: Keep the dough portions covered with a slightly damp kitchen towel during the rest period to prevent a dry skin from forming on the surface.
This resting phase also allows the flour to fully hydrate. Even after the dough looks smooth, the moisture is still migrating into the center of the starch granules. A fully hydrated dough is smoother and less sticky, making the final rolling process much cleaner. This 15-minute window is the secret to moving from a frustrated cook to an efficient one. It turns a difficult task into a rhythmic, easy motion that guarantees a better texture.
Rolling Pin vs. Tortilla Press: Achieving the Ideal Thinness
When I first started searching for the best flour tortilla recipe, I assumed a tortilla press was the superior tool. I bought a heavy cast iron press, thinking it would save time and provide perfect circles. However, my testing revealed a significant flaw. A press works wonderfully for corn tortillas, which have no gluten. For flour dough, the press often fails to overcome the gluten’s desire to shrink back. Even with a long rest, a press usually leaves a flour tortilla too thick for my engineering standards.
I found that a rolling pin provides the necessary shear force to stretch the gluten further than a simple vertical press can. I tested three different thicknesses on a 400 degree Fahrenheit cast iron skillet to see how they performed. The results were definitive and provided a clear target for the ideal tortilla.
| Thickness | Cooking Result | Texture Observation |
|---|---|---|
| 1/4 inch | Edges browned while the center remained raw and doughy | Very heavy and difficult to fold |
| 1/8 inch | Interior cooked, but the exterior became too hard before the center puffed | Noticeably chewy and a bit stiff |
| 1/16 inch | Perfect steam release, rapid puffing, and immediate softness | The ideal balance of flexibility and strength |
At 1/16 inch, which is nearly thin enough to see light through the dough, the interior of the tortilla steams almost instantly. This rapid steam production is what creates the bubbles we want. If the dough is too thick, the heat takes too long to reach the center, and the outside of the tortilla dries out before the inside is finished. This results in a brittle, cracker-like texture.
The rolling pin allows you to feel the resistance of the dough. You can apply pressure where needed to ensure the circle is even. I prefer a straight French rolling pin without handles, as it gives the most direct feedback. When you reach that 1/16 inch mark, the dough will feel delicate but surprisingly strong. This thinness is the non-negotiable factor that leads to bubbly, pillowy success on the skillet.
Pro tip: If the dough starts sticking to your pin, use the smallest amount of flour possible; too much extra flour will dry out the surface and lead to a dusty, scorched flavor.
Ingredients for Optimized Softness
Precision starts with the ingredients. I have tested various ratios, and this specific combination provides the most reliable structural integrity while maintaining a soft chew. I use a food scale for the flour and water to ensure the hydration percentage remains constant regardless of how I scoop the measuring cup.
- 3 cups all-purpose flour
- 1 teaspoon kosher salt (I use Morton’s)
- 1 teaspoon baking powder
- 1/3 cup extra virgin olive oil, vegetable oil or other fairly neutral flavored oil
- 1 cup warm water
A common question I encountered during my research was whether lard is necessary for a traditional texture. I tested high-quality lard against various vegetable oils to see if there was a measurable difference in softness. While lard provides a distinct traditional flavor, oil proved to be the most reliable fat source for a consistently soft result in a home kitchen. Oil is already a liquid at room temperature, which helps the tortillas stay pliable even after they have cooled. For a rich filling to go with these, try my easy beef ragu recipe.
The temperature of the water is another critical variable. I found that using warm water, around 100 to 110 degrees Fahrenheit, helps to soften the fat and accelerate the hydration of the flour. When the water is cold, the dough takes much longer to come together and feels much stiffer during the kneading process. Warm water encourages the proteins to bond more quickly, allowing you to move through the preparation phase with greater efficiency.
I also prefer kosher salt over table salt because the larger grains dissolve more predictably in the warm water. This prevents any localized salty spots in the dough. Each ingredient in this list serves a specific purpose in the system. The flour provides the structure, the salt provides flavor and protein strengthening, the baking powder provides lift, the oil provides tenderness, and the water provides the medium for it all to combine.
Instructions: Engineering the Perfect Tortilla
Following these steps in order is vital for maintaining the integrity of the dough. I have optimized these instructions to work for both manual mixing and stand mixers, depending on the equipment you have available in your kitchen.
- In a medium bowl, combine flour, salt, and baking powder. Using a sturdy silicone spatula or a sturdy wooden spoon, mix dry ingredients until well combined.
- Make a well in the center of the dry ingredients and add the oil and water. Stir well from the bottom up, until all dry ingredients are incorporated and the dough begins to come together to form a shaggy ball.
- Transfer dough to a lightly floured work surface and knead for 1-2 minutes until the dough is nice and smooth.
- Combine flour, salt and baking powder in the bowl of a stand mixer. Using the dough hook, mix the dry ingredients until well combined.
- Add oil and water while the mixer is running at medium speed. After about 1 minute, or when the mixture comes together and begins to form a ball, decrease the mixing speed to low. Continue mixing for 1 minute, or until the dough is smooth.
- Transfer dough to a lightly floured work surface.
- Divide into 16 equal portions. (I use a food scale) Turn each piece to coat with flour. Form each piece into a ball and flatten with the palm of your hand.
- Cover flattened balls of dough with a clean kitchen towel or a piece of plastic wrap. Allow to rest for at least 15 minutes before proceeding.
- Roll each ball into a 6–7-inch circle on a lightly floured surface. Keep the work surface and rolling pin lightly floured.
- Don’t stack uncooked tortillas directly on top of each other, or they will stick together. (I like to separate my tortillas with parchment paper.)
- Heat a large pan over medium heat.
- Cook the tortillas one at a time for 45–60 seconds, until bubbles and golden spots appear on the surface. If browning too quickly, reduce the heat slightly. If it’s taking longer than a minute to see a few pale, golden-brown spots on the underside of the tortillas, increase the heat slightly. Flip to the other side and cook for 15-20 seconds. The tortillas should be nice and soft but have a few small brown spots on the surface.
- Remove the cooked tortillas from the pan with tongs and stack them in a covered container, an open ziplock bag, or cover them with a slightly damp kitchen towel. Stacking and covering is what will keep the tortillas soft.
- Serve warm or allow to cool for later use. When ready to use, place a slightly damp paper towel in the bottom of a microwave-safe container (with a cover) that will hold the stacked tortillas. Microwave uncovered for 15-30 seconds (start with 15) or until warm, then keep covered to hold heat while serving.
- Store in an airtight container or zippered bag at room temperature for 24 hours or refrigerate for up to 1 week. To freeze, separate the tortillas with parchment paper or waxed paper and place them in a zippered bag before storing in the freezer.
Pro tip: When you reach the cooking stage, pay close attention to the visual cues. The goal is to allow the interior steam to set before the exterior scorches. If you see the tortilla puffing up significantly, that is the steam working in tandem with the baking powder to create the perfect internal structure.
Mandatory Practical Details: Yield, Storage, and Reheating
This system is calibrated to produce exactly 16 tortillas of 6 to 7 inches in diameter. This size is ideal for tacos or small burritos and fits comfortably in a standard large skillet. When I portion the dough, I aim for pieces that weigh approximately 45 to 50 grams each. Using a scale for this step ensures that every tortilla has the same thermal mass, which means they will all cook in exactly the same amount of time.
Storage is where many home cooks lose the quality they worked so hard to achieve. If you leave your cooked tortillas out on a plate, they will lose moisture to the air and become stiff within minutes. The stacking method mentioned in step 13 is critical because it creates a micro-environment of steam. The residual heat from the tortillas continues to soften the stack as they sit. Once they have cooled to room temperature, they must be transferred to an airtight container or a zippered bag immediately.
If you are planning to use them over the course of a week, the refrigerator is your best option. For longer storage, the freezer is highly effective. My testing showed that separating them with parchment paper before freezing is the only way to ensure you can pull out a single tortilla without having to thaw the entire stack. Frozen tortillas will maintain their quality for up to two months if they are properly sealed to prevent freezer burn.
Reheating is a process of rehydration. When a tortilla sits, the starches undergo a process called retrogradation, where they crystallize and become hard. Heat reverses this, but you need to introduce a small amount of moisture to prevent them from drying out further. The microwave method with a damp paper towel is the most efficient way to restore that original, fresh-off-the-skillet pliability. It takes less than thirty seconds to bring the dough back to its optimized state.
Pro tip: If you prefer a slightly charred flavor when reheating, you can flash-heat them directly over a low gas flame for five seconds per side after they have been warmed in the microwave.
Common Pitfalls Leading to Tough Tortillas
Even with a perfect blueprint, small deviations in the process can lead to sub-optimal results. I have documented the most common failures I encountered during my development phase and identified the engineering solutions for each. Understanding these pitfalls allows you to troubleshoot your batch in real-time.
| Problem | Cause | My Tested Solution |
|---|---|---|
| Tortillas are stiff and brittle | Cooked too long at a temperature that was too low | Increase heat and aim for the 45-60 second window |
| Dough keeps shrinking when rolling | The gluten network is under too much tension | Allow the dough balls to rest for an additional 10 minutes |
| Tortillas are heavy and gummy | The dough was too thick or undercooked | Roll to 1/16 inch and ensure visible golden spots appear |
| Tortillas are dry and dusty | Too much flour was used during the rolling process | Use a minimal dusting of flour or a silicone rolling mat |
| Dough is too sticky to handle | Hydration level is too high for the flour’s absorption | Add one tablespoon of flour at a time until smooth |
One common mistake I noticed was the tendency to flip the tortilla too many times. Every time you flip, you lose heat and moisture. You should only flip once. The first side takes the bulk of the time to set the structure and build steam, while the second side simply finishes the cook. If you find yourself flipping three or four times, your skillet is likely not hot enough, and you are essentially dehydrating the dough instead of cooking it.
Another issue is the temperature of the skillet. I use an infrared thermometer to verify that my pan is between 375 and 400 degrees Fahrenheit. If you don’t have a thermometer, you can test it by dropping a small bead of water onto the surface. The water should dance and evaporate within two seconds. If it sits and sizzles slowly, the pan is too cold. If it disappears instantly with a violent pop, the pan is too hot.
Pro tip: If your first tortilla comes out poorly, don’t panic; use it as a sacrificial test piece to calibrate your heat and timing for the remaining fifteen.
Conclusion: Your New Standard Flour Tortilla Recipe
Engineering the perfect flour tortilla recipe is about more than just mixing ingredients. It is about controlling the variables that dictate texture and performance. By incorporating baking powder for internal lift, respecting the 15-minute rest period for gluten relaxation, and rolling the dough to a precise 1/16 inch thickness, you have eliminated the common points of failure that plague most homemade attempts.
This system guarantees a result that is soft, durable, and infinitely better than anything you can buy in a plastic bag at the store. The aroma of toasted flour and the sight of those golden-brown bubbles are the rewards of a systematic approach. Once you have tasted a tortilla that was engineered for softness, it is impossible to go back to the stiff, preservative-laden alternatives.
I encourage you to try this blueprint today. Pay close attention to the feel of the dough as it transitions from a shaggy mass to a silky, smooth ball. Listen for that gentle hiss when the dough hits the pan. These sensory cues are your confirmation that the system is working exactly as intended. If you run into any challenges, refer back to the troubleshooting table to adjust your process.
I would love to hear about your results in the kitchen. Did you achieve the perfect puff? What are you planning to fill these with? Share your favorite combinations and any modifications you made in the comments below. Let’s continue to engineer better meals together, one perfectly optimized recipe at a time. Your journey toward the perfect taco starts with the perfect wrap, and you now have the tools to make it happen.
Best Ever Homemade Flour Tortillas (Ridiculously Easy!)
Equipment
- medium bowl
- Silicone spatula or wooden spoon
- Stand mixer with dough hook (optional)
- Rolling pin (French style preferred)
- Large cast iron skillet
- Tongs
- Food scale (recommended)
Ingredients
Ingredients for Optimized Softness
- 3 cups all-purpose flour
- 1 teaspoon kosher salt (I use Morton’s)
- 1 teaspoon baking powder
- 1/3 cup extra virgin olive oil, vegetable oil or other fairly neutral flavored oil
- 1 cup warm water (around 100 to 110 degrees Fahrenheit)
Instructions
Manual Mixing Instructions
- In a medium bowl, combine flour, salt, and baking powder. Using a sturdy silicone spatula or a sturdy wooden spoon, mix dry ingredients until well combined.
- Make a well in the center of the dry ingredients and add the oil and water. Stir well from the bottom up, until all dry ingredients are incorporated and the dough begins to come together to form a shaggy ball.
- Turn the dough out onto a lightly floured work surface and knead for 1-2 minutes until the dough is nice and smooth.
Stand Mixer Instructions
- Combine flour, salt and baking powder in the bowl of a stand mixer. Using the dough hook, mix the dry ingredients until well combined.
- Add oil and water while the mixer is running at medium speed. After about 1 minute, or when the mixture comes together and begins to form a ball, decrease the mixing speed to low. Continue mixing for 1 minute, or until the dough is smooth.
- Transfer dough to a lightly floured work surface.
Portioning and Resting
- Divide into 16 equal portions (aim for 45 to 50 grams each). Turn each piece to coat with flour. Form each piece into a ball and flatten with the palm of your hand.
- Cover flattened balls of dough with a clean kitchen towel or a piece of plastic wrap. Allow to rest for at least 15 minutes before proceeding.
Rolling and Cooking
- Roll each ball into a 6–7-inch circle on a lightly floured surface, aiming for 1/16 inch thickness. Keep the work surface and rolling pin lightly floured.
- Do not stack uncooked tortillas directly on top of each other; separate them with parchment paper if necessary.
- Heat a large cast iron skillet over medium heat (target temperature 375-400°F).
- Cook the tortillas one at a time for 45–60 seconds, until bubbles and golden spots appear on the surface. Flip to the other side and cook for only 15-20 seconds.
- Remove the cooked tortillas from the pan with tongs and stack them in a covered container, an open ziplock bag, or cover them with a slightly damp kitchen towel to retain softness.
- Serve warm or allow to cool for later use. To reheat, microwave uncovered with a damp paper towel for 15-30 seconds.


