The first time I attempted to transform a jar of surplus starter into something edible, the result was a complete structural failure. I followed a generic online guide that promised quick results with a high-heat blast, but the outcome was a culinary disaster. The outer edges of the sheet were burnt to a bitter, blackened charcoal, while the center remained a pale, leathery mass that refused to snap. It was a classic example of a system under stress with no calibration for heat distribution or moisture evaporation.
My engineering background immediately kicked in to diagnose the problem. A cracker is essentially a dehydration project. You are taking a high-hydration fermented batter and attempting to remove nearly all its moisture while developing flavor through the Maillard reaction. If the heat is too high, the exterior seals before the interior moisture can escape, leading to that dreaded soggy middle. If the spread is uneven, the thin spots incinerate while the thick spots stay soft. I realized that achieving a uniform, shatteringly crisp texture required more than just a recipe; it required a precise blueprint.
I spent the next several weeks deconstructing the process, testing variables like fat ratios, oven temperatures, and scoring techniques. I measured the thickness of the batter down to the millimeter and timed the moisture loss at five-minute intervals. What I discovered was a method that eliminates the guesswork and produces a consistent, professional-grade result every single time. This optimized system for sourdough discard crackers focuses on a low and slow baking approach that prioritizes even dehydration over raw speed. For another great dessert, try my Amazing Sourdough Pop Tarts: The Flakiest Crust Ever!.
Prep Time: 10 minutes Cook Time: 60 minutes Total Time: 70 minutes
This approach is about more than just avoiding waste. It is about creating a snack that rivals any high-end artisanal product you would find in a specialty market. By understanding the mechanics of how the starter interacts with heat and fat, you can produce a cracker that has a deep, complex tang and a crunch that can be heard across the room.
Table of Content
The Optimized Sourdough Discard Cracker: Simple Ingredients, Exact Temperatures, and the End to Soggy or Burnt Crackers
The primary goal of this blueprint is to provide a guaranteed path to crispness. Many home cooks struggle with sourdough discard crackers because the hydration of the starter varies so significantly from one kitchen to the next. A starter that was fed twelve hours ago behaves differently than one that has been sitting in the back of the refrigerator for a week. My method accounts for these variables by using a specific baking temperature and a visual-first approach to doneness.
We are solving the two most common points of failure in cracker making: uneven browning and internal dampness. By using a controlled temperature of 325 degrees Fahrenheit, we allow the moisture to evacuate the center of the cracker at a rate that matches the browning of the edges. This creates a uniform structural integrity throughout the entire sheet. You will no longer have to sort through a pile of crackers to find the few that actually crunch.
Pro tip: Use an off-set spatula to ensure the batter is spread to a uniform thickness of about one-sixteenth of an inch. Any variations in thickness will lead to uneven baking times across the sheet.
This recipe relies on the simplest possible inputs to allow the fermented flavor of the sourdough to shine. We are not hiding behind layers of artificial flavorings. Instead, we are using high-quality fat and salt to enhance the natural lactic acid profile of the discard. The result is a clean, savory finish that pairs perfectly with cheese or stands alone as a sophisticated snack.
The Butter Advantage: Why We Skip Olive Oil for Perfect Cracker Flavor
In my early testing phases, I compared several different fats to determine which provided the best structural support and flavor profile. While many recipes call for olive oil, I found that melted butter offers a distinct chemical advantage in this specific application. Olive oil is a liquid at room temperature and remains relatively fluid even after baking. Butter, however, contains milk solids and a specific fatty acid profile that contributes to a more robust, short texture.
When the butter is incorporated into the sourdough discard, it creates a delicate emulsion. As the crackers bake, the water content in the butter evaporates, leaving behind tiny pockets of fat that interfere with the gluten network. This creates a “short” crumb, which translates to a crisp snap rather than a hard, tooth-cracking bite. Olive oil versions often felt greasy to the touch and lacked the structural rigidity needed to hold up to heavy dips.
From a flavor perspective, the choice is even clearer. The nutty, toasted notes of melted butter complement the sour tang of the starter in a way that olive oil cannot. As the butter bakes for nearly an hour at 325 degrees, it undergoes its own transformation, almost mimicking the flavor of browned butter. This adds a layer of complexity to the sourdough discard crackers that makes them feel much more substantial than a simple flour-and-water snack.
| Fat Source | Texture Result | Flavor Profile | Structural Integrity |
|---|---|---|---|
| Melted Butter | Short, crisp snap | Rich, nutty, toasted | High, holds up to dips |
| Olive Oil | Harder, slightly oily | Fruity, can be bitter | Medium, can be brittle |
| Coconut Oil | Very brittle | Distinctly tropical | Low, prone to shattering |
Testing different fats taught me that the saturated fats in butter are essential for that professional mouthfeel. The way the cracker shatters into clean pieces instead of crumbling into dust is a direct result of the butter’s interaction with the sourdough proteins.
Ingredients for Foolproof Sourdough Discard Crackers
To achieve the results I am promising, you must use these exact ingredients in these specific proportions. Deviating from these measurements can throw off the moisture-to-fat ratio, which will compromise the final crunch.
- 3/4 cup discarded sourdough starter (stirred down)
- 2 tablespoons butter (melted)
- 1/4 teaspoon fine sea salt
- 2 teaspoons dried herbs (Herbs de Provence)
- 1/4 teaspoon salt for sprinkling on top
I spent a significant amount of time testing the exact moment to score these crackers. In my first few trials, I tried to score the raw batter before it hit the oven. This was a tactical error. The high hydration of the sourdough caused the lines to simply bleed back together, resulting in a solid sheet that had to be broken by hand into jagged, unattractive shards.
I then tried scoring the crackers after they were fully baked, which was even worse. The crackers were so crisp that they shattered uncontrollably under the knife, leaving me with a pile of crumbs. The breakthrough came when I introduced a mid-bake scoring step. By baking the sheet for exactly ten minutes first, the proteins in the flour set just enough to hold their shape, but the interior remains pliable. This allows you to slice clean, precise lines into the dough that will remain separate as the baking process continues.
Pro tip: Use a pizza cutter for the scoring step rather than a knife. The rolling motion prevents the blade from dragging through the partially set batter, ensuring your squares remain perfectly uniform.
When you weigh your ingredients, ensure the butter has cooled slightly after melting. If the butter is too hot when it hits the cold starter, it can cause the fat to seize into small clumps rather than forming a smooth emulsion. You want a homogenous, glossy batter that looks almost like a thick pancake mix.
Procedure Calibration: Achieving Golden-Brown Crispness Without the Guesswork
Follow these instructions precisely. The timing and temperature have been calibrated to ensure maximum moisture removal without scorching the delicate herbs or the flour.
- Preheat your oven to 325°F (162°C) and line a baking sheet with parchment paper. Melt the butter in a mixing bowl and let cool.
- Weigh the sourdough discard, dried herbs and salt into the bowl of melted butter and mix thoroughly until well combined. Use an off-set spatula to spread the mixture in a thin, even layer onto the parchment paper. Sprinkle the top with salt.
- Bake for 10 minutes. Remove from oven and score the crackers. Bake for an additional 20-50 minutes or until the crackers are golden brown. Let cool completely before breaking into squares. (Oven temperatures vary, check the crackers after 20 minutes into baking to make sure they do not over bake. See notes.)
The reason I provide such a wide window for the final bake time (20 to 50 minutes) is that no two sourdough starters are identical. A starter kept at room temperature will have a different viscosity and moisture content than one pulled from a cold refrigerator. Furthermore, home ovens are notorious for having hot spots or being improperly calibrated. Your primary cue must be visual and tactile rather than purely chronological.
You are looking for a deep, golden amber color that extends all the way to the center of the sheet. If the edges are dark but the center is still a pale wheat color, the crackers are not done. The aroma will shift from a raw, floury scent to a rich, toasted fragrance that fills the kitchen. When you think they are close, gently press the center of a cracker with your finger. It should feel firm and resistant, not soft or spongy.
Common Mistake: Many people pull the crackers too early because they fear the dark golden color means they are burning. In reality, that deep color is where the flavor lives. A pale cracker is a soggy cracker. As long as the edges are not turning black, let them continue to bake until the entire sheet has reached a uniform bronze.
The cooling process is the final stage of the dehydration system. As the crackers sit on the hot baking sheet outside the oven, the remaining residual heat continues to draw out microscopic amounts of steam. Do not attempt to break them apart until the sheet is completely cold to the touch. This patience results in a cleaner snap and a better shelf life.
Critical Storage Instructions to Prevent Moisture Absorption
Once you have achieved the perfect level of crispness, your new mission is to protect that texture from atmospheric moisture. Crackers are hygroscopic, meaning they will actively pull humidity from the air around them. If left out on a counter in a humid kitchen, your hard-won crunch will vanish within hours, leaving you with a stale, chewy product.
The first step in proper storage is ensuring the crackers are 100 percent cool. If you place even slightly warm crackers into a container, they will release a tiny amount of steam. In a sealed environment, that steam has nowhere to go but back into the cracker, ruining the texture instantly. I recommend letting the crackers sit on a wire cooling rack for at least thirty minutes after they have reached room temperature to ensure every bit of internal moisture has escaped.
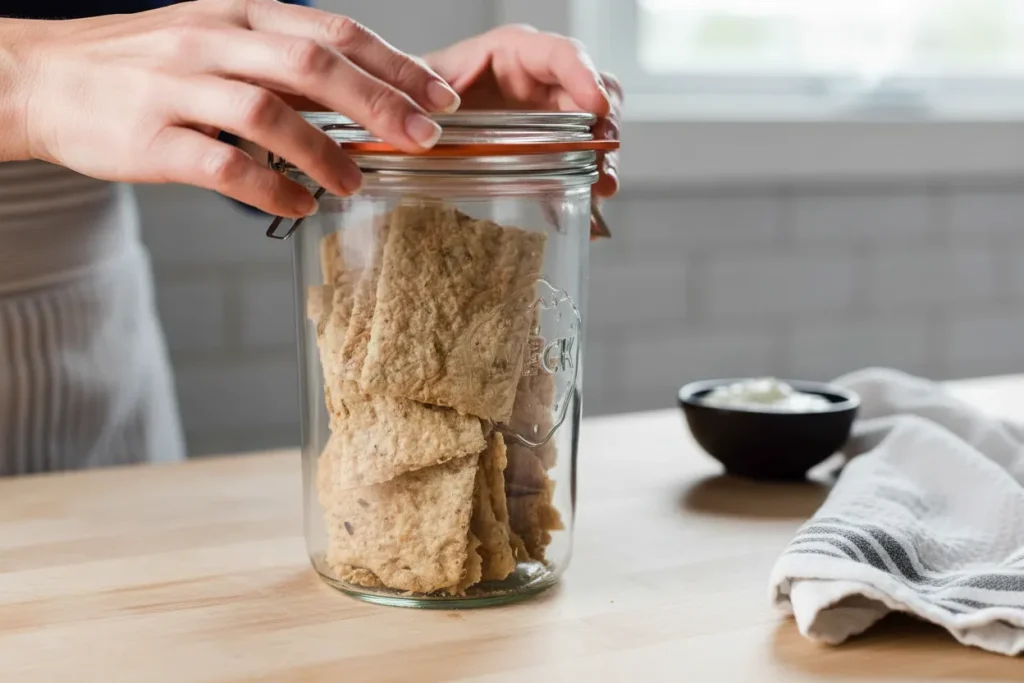
Once cooled, move them into an airtight glass jar or a high-quality plastic container with a silicone seal. I have found that glass provides a better barrier against odors and moisture than thin plastic bags. If you live in a particularly humid climate, you can even include a small, food-safe desiccant packet in the jar to act as an insurance policy.
Common Mistake: Storing crackers in the refrigerator is a mistake I see far too often. The refrigerator is a high-humidity environment that will cause the crackers to soften almost immediately. Keep them in a cool, dark pantry instead.
When stored correctly, these sourdough discard crackers will maintain their peak quality for up to two weeks. If you do find that they have lost some of their snap, you can easily re-crisp them. Simply place them back in a 300 degree Fahrenheit oven for three to five minutes. This short blast of heat will drive off any surface moisture and restore that original auditory crunch.
Flavor Optimization: Simple Additions for the Ultimate Sourdough Cheese Cracker Variation
While the base recipe using Herbs de Provence is a classic, the engineering of this batter allows for several successful variations. Through my testing, I have identified the ideal ratios for adding cheese, spices, and seeds without compromising the structural integrity of the final cracker.
| Addition Type | Quantity | Minor Procedural Adjustment |
|---|---|---|
| Hard Cheese (Parmesan) | 1/2 cup finely grated | Reduce added salt in the batter by 1/4 tsp |
| Smoked Paprika & Garlic | 1 tsp each | No adjustment needed to base recipe |
| Everything Bagel Seasoning | 2 tablespoons | Omit the salt sprinkle on top of the batter |
| Sesame or Poppy Seeds | 3 tablespoons | Mix half into batter, sprinkle half on top |
| Chili Flakes & Lime Zest | 1/2 tsp flakes, 1 tsp zest | Add zest to melted butter first to infuse oils |
When adding cheese, it is vital to use a hard, aged variety like Parmesan or Pecorino. These cheeses have a low moisture content. Using a soft cheese like cheddar or mozzarella will introduce too much oil and moisture, which will prevent the crackers from becoming truly crisp. The cheese should be grated as finely as possible so it integrates into the batter smoothly.
Pro tip: If you are making the cheese variation, watch the oven closely during the last ten minutes of baking. The proteins in the cheese can brown faster than the flour, and you want to catch them right as they reach a deep gold.
The seed variations add a wonderful tactile element to the snack. I especially like the combination of black and white sesame seeds, which provides a visual contrast against the golden sourdough. Because seeds contain their own oils, they can become quite fragrant and nutty when toasted for an hour in the oven.
Practical Details: Yield and Discard Utilization Context
This recipe is designed to be efficient. One batch yields approximately two to three full baking sheets of crackers, depending on how thin you spread the batter and the size of your pans. For a standard household, this is the perfect amount to last through a week of snacking without the crackers going stale.
One of the most frequent questions I receive is whether this recipe requires an active, bubbly starter. The answer is a definitive no. In fact, this recipe is specifically optimized for discard. We are not looking for the leavening power of active yeast; we are looking for the acidity and the broken-down starches that come from fermentation. The discard provides a depth of flavor that a fresh flour-and-water slurry simply cannot match.
The acidity of the discard also contributes to the digestibility of the crackers. The long fermentation process that the starter has already undergone helps break down the phytic acid in the grain, making the nutrients more bioavailable. While we are making a snack, it is a snack with a much better nutritional profile than a highly processed, store-bought alternative.
Using your discard in this way is also a major win for kitchen sustainability. Instead of washing that valuable fermented grain down the drain, you are transforming it into a high-value pantry staple. It turns a chore—maintaining your starter—into an opportunity for culinary engineering. If you are interested in more ways to transform starter efficiently, check out my guide on Proven Sourdough Discard Recipes: Quick Loaf.
Pro tip: If your discard has a layer of gray liquid (hooch) on top, simply stir it back in before measuring. That liquid contains a high concentration of acid and flavor that will enhance the final result.
Conclusion: Mastering Repeatable Cracker Perfection
Engineering the perfect sourdough discard crackers is about understanding the relationship between moisture, fat, and heat. By moving away from the “cook until done” mentality and adopting a system based on visual cues and calibrated temperatures, you can ensure success in every batch. We have eliminated the variables that lead to failure by choosing butter for structural integrity, implementing a mid-bake scoring technique, and allowing for a wide dehydration window in the oven.
The result is a cracker that is more than just a byproduct of bread making. It is a deliberate, technically sound snack that features a complex fermented tang, a rich buttery finish, and a shatteringly crisp texture. Whether you stick with the classic herb profile or experiment with the cheese and spice variations, the underlying physics remains the same.
I encourage you to take this blueprint into your own kitchen and see the results for yourself. Pay close attention to the visual transformations in the oven and listen for that sharp, clean snap when you break the cooled sheet into squares. These are the indicators of a perfectly engineered cracker.
Once you have mastered the process, I would love to hear about your experience. Every oven and starter is unique, and sharing your exact bake times and observations helps the entire community refine their technique. Leave a comment below with your results, and let’s continue to optimize these recipes together. Happy baking!

Sourdough Discard Crackers Recipe
Equipment
- baking sheet
- Parchment paper
- mixing bowl
- Off-set spatula
- Pizza Cutter
- Wire cooling rack
Ingredients
Base Cracker Ingredients
- 3/4 cup discarded sourdough starter stirred down
- 2 tablespoons butter melted
- 1/4 teaspoon fine sea salt
- 2 teaspoons dried herbs Herbs de Provence
- 1/4 teaspoon salt for sprinkling on top
Instructions
Procedure Calibration
- Preheat your oven to 325°F (162°C) and line a baking sheet with parchment paper. Melt the butter in a mixing bowl and let cool.
- Weigh the sourdough discard, dried herbs and salt into the bowl of melted butter and mix thoroughly until well combined. Use an off-set spatula to spread the mixture in a thin, even layer onto the parchment paper. Sprinkle the top with salt.
- Bake for 10 minutes.
- Remove from oven and score the crackers (using a pizza cutter is recommended).
- Bake for an additional 20-50 minutes or until the crackers are golden brown and uniformly crisp. Let cool completely before breaking into squares.


