The first time I pulled a sourdough pastry from the oven and realized it had the texture of a dinner roll, I knew my engineering instincts had failed me. I had assumed that using a vibrant, active starter would translate into a more complex flavor profile and a superior rise. Instead, I ended up with a tough, bread-like structure that lacked any of the delicate shattering qualities that define a world-class crust. This failure launched a rigorous investigation into the mechanics of sourdough pie crust chemistry.
I spent weeks deconstructing the relationship between yeast activity and gluten development in laminated doughs. My goal was to create our sourdough pie crust: the engineer’s guide to maximum flavor with minimum steps, yielding one perfect crust. This system is designed for efficiency and repeatable success in any home kitchen. The metrics for this recipe are precise: the prep time is exactly 10 minutes, the cook time is 0 minutes for the raw crust, and the total time is 2 hours 10 minutes.
Through systematic testing, I discovered that the presence of active yeast in a pie dough is actually a point of failure. When the starter is bubbly and warm, it begins to ferment the flour immediately, creating a chewy network of gluten that ruins the flakiness. The breakthrough came when I swapped the active starter for cold sourdough discard. This shift provided the acidic tang and depth of flavor I craved without the unwanted leavening.
This blueprint represents the final optimized version of those experiments. It eliminates the guesswork and focuses on the thermal management of fats and the chemical inhibition of gluten. By following this method, you are not just making a recipe; you are executing a proven system for pastry excellence.
Table of Content
Why Sourdough Discard Beats Active Starter for Flaky Pastry
In my early prototypes, I noticed a consistent issue with structural toughness whenever I used a fed starter. The biological activity of a peak starter is designed to build strength and elasticity, which are the two primary enemies of a tender pie crust. When you use an active starter, the yeast begins consuming sugars and producing carbon dioxide and alcohols the moment it touches the flour. This process encourages the proteins to link together, resulting in a bread-like consistency rather than a friable, flaky one.
I conducted a side-by-side trial comparing active starter against cold discard from my refrigerator. The active starter batch required significantly more effort to roll out, showing a stubborn elasticity that caused the dough to shrink back from the edges of the pie plate. The discard batch, however, remained relaxed and cooperative. This is because the discard has a higher acidity and lower yeast vitality, which works to tenderize the dough. The acid actually breaks down some of the gluten bonds, acting as a natural insurance policy against over-working the mixture.
The speed of this system is another critical advantage of using discard. A traditional fermented crust might require twelve to twenty-four hours of cold proofing to develop flavor. By using sourdough discard, you are essentially “back-loading” that flavor. The discard has already spent days or weeks developing its complex aromatic profile in the back of your fridge. When you incorporate it into the flour, you get an immediate injection of aged flavor without the need for a long fermentation period in the final dough.
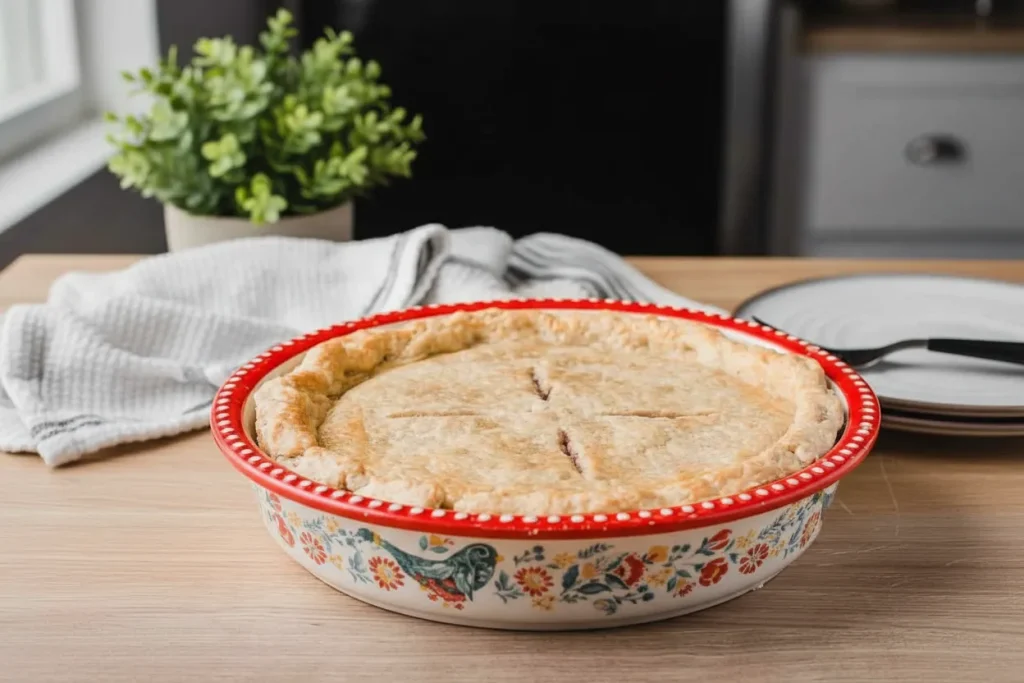
This makes it a perfect quick sourdough pastry solution for those who want artisanal results on a shorter timeline. My testing confirmed that even a two-hour rest is sufficient for the hydration to level out across the flour particles. The result is a crust that smells like a slow-fermented boule but shatters like a classic French puff pastry. It is the ultimate compromise between high-level flavor and practical kitchen logistics.
The Essential Ingredients for Your Quick Sourdough Pie Crust
Achieving a repeatable result requires strict adherence to ingredient specifications. I have narrowed this list down to the fundamental components that provide the best structural and flavor outcomes. Every item serves a specific mechanical purpose in the final bake.
- 1 cup + 1 teaspoon all-purpose flour
- 8 tablespoons butter (cold)
- 1/2 teaspoon fine sea salt
- 1/2 teaspoon granulated sugar
- 1 teaspoon white vinegar (or apple cider vinegar)
- 1/2 cup sourdough starter discard (cold)
During my testing phase, I investigated the impact of temperature on the final crumb. I deliberately allowed one batch of mixed dough to sit on the counter for fifteen minutes before moving it to the refrigerator. When I finally rolled it out, I observed the butter beginning to bleed into the flour, creating a greasy, translucent film. This eliminated the distinct layers of fat and flour that are necessary for steam production. The key takeaway from this experiment is that the butter must remain ice cold throughout every second of the process.
I also received several inquiries during my testing regarding the use of alternative fats. While oil is a convenient pantry staple, it fails to create the necessary layers for a flaky crust because it is liquid at room temperature. It coats the flour particles too thoroughly, leading to a mealy texture rather than a laminated one. For those looking for alternatives, lard or high-quality shortening are acceptable solid fat substitutes because they maintain their physical structure under pressure. However, for the specific flavor profile we are targeting, cold butter remains the gold standard in this system.
The inclusion of vinegar is not for flavor, but for its chemical properties. The acetic acid in the vinegar works in tandem with the acidity of the sourdough discard to further inhibit gluten formation. This ensures that even if you accidentally over-mix the dough, the crust will remain tender. I found that white vinegar provides a cleaner finish, while apple cider vinegar adds a very subtle fruity undertone that pairs well with autumn fillings. For a very different flavor profile that still requires precision, try my ultimate vibrant chimichurri sauce.
The Cold Crumble Technique: Cutting Butter the Right Way
The most common failure point in pastry production is the uneven distribution of fat. Most recipes suggest cubing the butter into half-inch pieces, but I found that this leads to inconsistent hydration. Large chunks of butter take longer to incorporate, which often leads to the cook over-handling the dough and melting the fat with their body heat. To solve this, I moved to a grating method which increases the surface area of the butter.
- Use a cheese grater to grate the cold butter into a large mixing bowl.
- Add the flour, salt and sugar and use a fork to toss the ingredients together, making sure the butter is coated and separated.
- Use a bench scraper or a pastry cutter to cut the butter into the flour mixture, until it forms large crumbles.
Grating the butter is superior to cubing because it creates uniform shards that are easily insulated by the flour. When you toss these shards with the dry ingredients, each piece of fat is immediately protected by a coating of starch. This prevents the pieces from clumping together and ensures that when the heat of the oven hits the crust, thousands of tiny steam pockets expand simultaneously. This is the physics behind a superior final flake structure.
Pro tip: Place your grater and your mixing bowl in the freezer for ten minutes before you begin. This helps maintain the thermal mass of the ingredients and prevents the butter from softening during the grating process.
When you use the bench scraper to cut the butter further, you are looking for a specific visual cue. The mixture should resemble coarse meal with some pieces as large as peas. If the pieces are too small, the crust will be sandy and crumbly like a shortbread. If they are too large, the fat will melt and run out of the crust during the bake, leaving you with a greasy mess. The goal is a balanced distribution of varying sizes to create a complex internal architecture.
Assembling and Chilling the Perfect Sourdough Pastry Disk
Once the fat is properly integrated, the focus shifts to hydration. This is where many cooks become hesitant, fearing that adding too much liquid will ruin the dough. However, an under-hydrated dough will crack and crumble during the rolling process, making it impossible to achieve a clean drape over the pie plate.
- Add the sourdough discard and vinegar to the bowl and then use a fork to incorporate them into the mixture.
- Switch to your hands and press the dough together until there are no dry bits left in the bowl.
- If the dough is too dry, add a teaspoon of ice water to reach the correct consistency.
- Form the dough into a disk shape and wrap in plastic wrap.
- Use a rolling pin to flatten the disk through the plastic, which will help smooth the edges.
- Chill for at least 2 hours or up to 4 days.
Using your hands for the final assembly is a critical sensory step. You need to feel the point where the dough transitions from a collection of crumbles into a cohesive mass. You should feel a slight dampness, but the dough should not stick to your skin. If you see white streaks of dry flour, it needs more moisture. Adding water in one-teaspoon increments is the only way to maintain control over the hydration levels.
The rolling pin trick is an engineering solution for cleaner edges. By flattening the disk while it is already inside the plastic wrap, you force the edges to compress and smooth out. This prevents the “cracked earth” look that occurs when you try to roll out a thick, cold disk later on. It also ensures that the cold air of the refrigerator can penetrate the center of the dough more quickly.
The chilling period is non-negotiable. During these two hours, the flour proteins undergo a process called autolyse, where they fully absorb the moisture from the discard and vinegar. This allows the gluten to relax after the agitation of mixing. My testing showed that a crust chilled for the minimum two hours performed beautifully, but the flavor peaked at the forty-eight-hour mark. This window of up to four days provides significant flexibility for meal planning.
Troubleshooting Your Dough: From Sticky Mess to Rollable Disk
Even with a perfect system, variables like kitchen humidity or the thickness of your sourdough discard can impact the final result. I have compiled my testing observations into this troubleshooting guide to help you course-correct in real time.
| Symptom/Issue | Engineered Solution | The Scientific Rationale |
|---|---|---|
| Dough is too sticky or wet to handle | Wrap tightly and chill for an extra 30 minutes before attempting to roll | This allows the flour time to fully and evenly hydrate, pulling moisture into the starch granules and away from the surface |
| Dough is too crumbly and cracks when pressed | Add exactly 1 tsp of ice water and gently fold the dough over itself | This addresses the too dry test result by providing just enough moisture to create a cohesive protein bond without overworking the gluten |
| Butter is visible as large, greasy smears | Place the entire bowl in the freezer for 10 minutes | The thermal mass has been compromised, and the fat must be re-solidified to maintain structural integrity during the bake |
| Dough feels rubbery and snaps back | Allow the dough to rest at room temperature for 5 to 10 minutes | The gluten is too tight from cold or over-mixing, and a slight temperature increase allows the proteins to relax |
When working with sourdough pie crust, the most important factor is your tactile response to the dough. If something feels off, it usually is. Most issues can be solved by either adjusting the temperature or the hydration.
Pro tip: If your kitchen is particularly warm, work on a chilled surface like a marble slab or even a baking sheet that has been sitting in the fridge. This keeps the ambient temperature from melting your hard-earned butter layers.
One common mistake I observed during my trials was the tendency to keep adding flour to a sticky dough. This is a trap. Adding raw flour at the end of the process changes the fat-to-flour ratio and results in a tough, dusty crust. Instead of adding flour, use the refrigerator. Cold is your best tool for managing a difficult dough.
Yield, Storage, and Pairing Suggestions
This recipe is engineered to produce exactly one 9-inch single crust. If you are making a double-crust pie, such as a traditional apple or cherry pie, you will need to double the measurements and divide the final dough into two equal disks before chilling.
Yield and Storage Specifications:
- Yield: Exactly one 9-inch single crust.
- Refrigeration: Store wrapped in plastic for up to 4 days.
- Freezing: For long-term storage, wrap the disk in plastic and then in foil. It will maintain its quality for up to 3 months. Thaw overnight in the refrigerator before use.
When it comes to flavor pairings, this crust is a versatile workhorse. Because of the mild, balancing tang provided by the sourdough discard, I find it particularly well-suited for savory applications. The acidity cuts through rich, fatty fillings with remarkable precision.
Pairing Recommendations:
- Savory: This is my absolute favorite base for a chicken pot pie or a classic quiche. The sourdough notes complement the umami of the meat and the creaminess of the eggs.
- Sweet: It works beautifully with stone fruits like peaches or plums, where the tang of the crust acts as a foil to the natural sugars of the fruit.
- Galettes: Because this dough is so robust, it is perfect for free-form galettes where you need the edges to hold their shape without the support of a pie tin.
Pro tip: If you are using this for a sweet pie, you can sprinkle a little extra granulated sugar over the crust edges after brushing with an egg wash. The sugar crystals provide a crunch that contrasts beautifully with the tender, sourdough-scented pastry.
Conclusion: Your Foolproof Sourdough Pie Crust Blueprint
By treating your kitchen like a laboratory and focusing on the mechanical properties of your ingredients, you have moved beyond the “hope for the best” method of baking. This recipe works because it respects the physics of cold fat and the chemistry of acidic tenderizers. We have bypassed the common pitfalls of sourdough baking by utilizing the stable, flavorful nature of cold discard rather than the unpredictable energy of an active starter.
The “Cold Crumble” technique ensures that every bite of your finished pie will be a testament to your precision. You have created a crust that is both structurally sound and aesthetically pleasing, with a flavor profile that generic store-bought or standard flour-water-butter recipes simply cannot match. This is the power of an engineered approach to cooking.
I want to hear about your success with this system. The true test of any blueprint is how it performs in the field. Once you have pulled your golden, flaky masterpiece from the oven, come back and leave a comment below. I am curious to know which filling you chose to pair with this crust. Did you go with a savory pot pie or a seasonal fruit tart?
If you are proud of your results, share a photo on social media and tag TheRecipiest. There is nothing I enjoy more than seeing these techniques come to life in your kitchens. Let’s continue to deconstruct the classics and engineer better ways to eat. Happy baking.
Sourdough Pie Crust Recipe
Equipment
- cheese grater
- Large mixing bowl
- Fork
- Bench scraper or pastry cutter
- Rolling Pin
- Plastic wrap
Ingredients
Essential Ingredients
- 1 cup + 1 teaspoon all-purpose flour
- 8 tablespoons butter cold
- 1/2 teaspoon fine sea salt
- 1/2 teaspoon granulated sugar
- 1 teaspoon white vinegar (or apple cider vinegar)
- 1/2 cup sourdough starter discard cold
Instructions
The Cold Crumble Technique: Cutting Butter the Right Way
- Use a cheese grater to grate the cold butter into a large mixing bowl. (Pro tip: Place the grater and bowl in the freezer for ten minutes beforehand.)
- Add the flour, salt and sugar and use a fork to toss the ingredients together, making sure the butter is coated and separated.
- Use a bench scraper or a pastry cutter to cut the butter into the flour mixture, until it forms coarse meal with some pieces as large as peas.
Assembling and Chilling the Perfect Sourdough Pastry Disk
- Add the sourdough discard and vinegar to the bowl and then use a fork to incorporate them into the mixture.
- Switch to your hands and press the dough together until there are no dry bits left in the bowl. If the dough is too dry, add a teaspoon of ice water to reach the correct consistency.
- Form the dough into a disk shape and wrap in plastic wrap.
- Use a rolling pin to flatten the disk through the plastic, which will help smooth the edges.
- Chill for at least 2 hours or up to 4 days.


