The first time I attempted to solve the structural integrity of a low-carb beef loaf, the result was a catastrophe that ended up as a pile of loose, greasy crumbles on a serving platter. I had followed a popular method using almond flour as the primary binder, assuming it would mimic the role of traditional breadcrumbs. Instead, the almond flour reached a saturation point where it could no longer hold the rendered fats and moisture from the beef. When I tried to slice it, the entire loaf disintegrated. This wasn’t just a culinary failure; it was a systemic failure of the binding agents I had chosen.
As a former engineer, I knew I couldn’t just guess my way to a better result. I needed to analyze the physics of a meatloaf. A successful loaf requires a matrix that can trap moisture while providing enough tensile strength to withstand the pressure of a knife. Most keto meatloaf recipes rely on almond flour because it is easy, but my testing showed that it creates a grainy, dense texture that lacks the elastic properties needed for a clean slice. I spent weeks deconstructing the components, testing different ratios of fat to lean meat, and experimenting with various crumb alternatives.
The breakthrough came when I looked at the absorption rates of different protein-based crumbs compared to nut-based flours. The solution I engineered utilizes a specific combination of ingredients that creates a repeatable, high-quality result every single time. This recipe is the culmination of those trials.
Prep Time: 5 minutes. Cook Time: 55 minutes (40 initial + 15-20 glaze). Total Time: 1 hour.
By the end of this article, you will understand exactly why your previous attempts might have failed and how to apply these structural principles to achieve a perfect, sliceable result. For another great dessert, try my Amazing Sourdough Pop Tarts: The Flakiest Crust Ever!.
Table of Content
The Optimized Keto Meatloaf: How Structural Binders Deliver a Structure That Almond Flour Can’t Match
This is not just another recipe; it is a structurally superior blueprint designed to eliminate the most common points of failure in low-carb cooking. When people look for keto meatloaf recipes, they are usually trying to find a way to replace the starch of breadcrumbs without losing the mouthfeel. Through my testing, I discovered that the binder needs to do more than just add bulk. It needs to create a network of proteins that can hold onto the liquid released by the beef as it cooks.
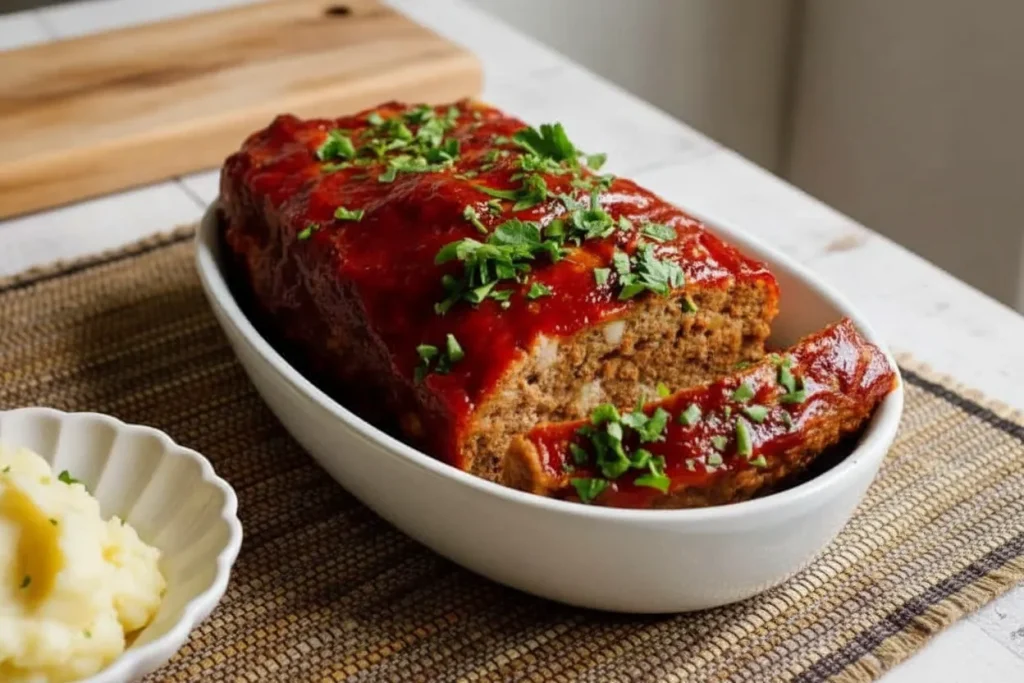
I tested this recipe side-by-side with a batch using finely ground high-protein keto crumbs versus a batch using almond flour. The almond flour version required longer initial baking to set and still resulted in a slightly gummy texture near the base. The almond particles simply do not absorb the fat in the same way. In contrast, the high-protein keto crumbs provided a classic, slightly crisp crust structure after the final glaze set. This structural difference is why this specific loaf holds together perfectly when sliced, allowing you to serve beautiful, uniform portions rather than a pile of meat.
| Binder Type | Texture Result | Moisture Retention | Slicing Integrity |
|---|---|---|---|
| Almond Flour | Grainy/Gummy | Moderate | Low (crumbles easily) |
| Coconut Flour | Dry/Spongy | High (absorbs too much) | Moderate |
| Keto Bread Crumbs | Classic/Tender | Optimal | High (clean slices) |
Pro tip: To ensure the best texture, always crush your keto crumbs into a fine meal rather than leaving large chunks, as this creates more surface area for the eggs and milk to bind.
The Binder Showdown: Why We Chose Specific Crumbs Over Almond Flour
When answering the question of what are the best keto substitutes for traditional breadcrumbs, the answer depends entirely on the physics of moisture absorption. Almond flour is essentially just ground nuts, which means it is high in fat. When you add more fat from 80/20 beef, the mixture becomes oversaturated. This leads to the common problem of the meatloaf swimming in a pool of grease.
The keto bread crumbs I recommend act as a sponge. They are designed to expand slightly as they soak up the milk and the juices from the onions. This creates a hydrated matrix that keeps the meat fibers apart, preventing the loaf from becoming a tough, solid brick of protein. It is this specific interaction between the binder and the liquids that determines the final success of the dish.
In my experiments, I noticed that the crumb-based loaf had a much more pleasant resistance when bitten into. It mimics the “bounce” of a traditional meatloaf that you usually only get from high-carb fillers. If you use almond flour, you lose that bounce and get a texture more similar to a dense hamburger patty. By choosing a protein-heavy crumb, we are engineering a better bite.
Pro tip: If you find your keto crumbs are very dry, let them sit in the milk and egg mixture for five minutes before adding the meat to ensure they are fully hydrated.
Deconstructing the Bake: Why the 40-Minute Initial Steam in the Loaf Pan Is Critical for Moisture Retention
The thermal processing of the meat is where many cooks go wrong. I have seen many keto meatloaf recipes that suggest baking the loaf free-form on a sheet pan. My testing proved that this is a mistake for this specific ingredient profile. When you bake the loaf in a 9×5-inch pan, you are creating a controlled environment where the meat can steam in its own juices for the first 40 minutes.
This initial phase is critical because it allows the proteins to set without the exterior drying out too quickly. I use 80/20 ground beef because the 20 percent fat content is the lifeblood of the loaf. Leaner meat, like 90/10 or 95/5, will inevitably result in a dry, stringy texture because there isn’t enough internal lubrication to survive the hour-long cook time. The fat renders out and circulates within the pan, effectively braising the bottom of the loaf while the top sets.
During the first 40 minutes, you will hear a steady sizzle coming from the oven. This is the sound of the fat rendering and the water from the onions evaporating. The aroma at this stage should be deeply savory, with the garlic and onions beginning to mellow out. If you smell something burning at the 30-minute mark, your oven temperature may be calibrated too high, or your pan isn’t deep enough to contain the juices.
Pro tip: Always use a standard metal loaf pan for the best heat conductivity, as glass or ceramic can take longer to heat up and may result in an uneven cook.
The Non-Negotiables: Room Temperature Eggs and Resting Time Explained Through Emulsion Science
One of the most overlooked variables in meatloaf construction is the temperature of the secondary ingredients. Cold eggs are a common point of failure. When you drop two ice-cold eggs into a bowl of 80/20 beef, the fat in the meat immediately begins to seize and clump. This prevents the eggs from forming a smooth, uniform emulsion with the meat and the milk.
To get the most out of your binder, you need a perfect emulsion. This ensures that every millimeter of the meat is coated in the binding agent. This is why I insist that eggs come to room temperature before they are introduced to the system. You can see the difference visually: a room-temperature mix looks glossy and cohesive, while a cold-egg mix looks chunky and separated.
The final step in the engineering process is the rest period. When the meatloaf reaches an internal temperature of 160 degrees Fahrenheit, the muscle fibers are tightened and the juices are under pressure. If you cut into the loaf immediately, those juices will dump onto the cutting board, leaving you with dry meat. By resting the loaf for 10 minutes, the fibers relax and reabsorb that moisture. The internal temperature will naturally rise to the safe 165 degrees Fahrenheit during this time.
Pro tip: Use a digital probe thermometer to check the center of the loaf at the 50-minute mark so you can pull it out the exact moment it hits the target temperature.
Ingredients for the Superior Keto Meatloaf
The success of this system depends on using the exact proportions listed below. These measurements have been calibrated to ensure the binder-to-protein ratio provides maximum structural stability.
- 2 lbs ground beef (80/20 * See notes)
- 1 medium onion (grated/finely chopped)
- 2 cloves garlic (minced)
- 2 large eggs
- 1/4 cup sugar free ketchup
- 1/4 cup + 1 tablespoon milk of choice (I used unsweetened coconut milk)
- 2 tablespoon parsley (freshly chopped)
- 3/4 cup keto bread crumbs
- 1 teaspoon salt
- 1/2 teaspoon pepper
- 3/4 cup sugar free ketchup
- 1 1/2 teaspoon white vinegar
- 2 1/2 tablespoon brown sugar substitute
I recommend using high-quality keto bread crumbs for this binder, as detailed in my structural testing against almond flour. The choice of milk is also important; while I used coconut milk, any unsweetened variety will provide the necessary hydration without adding unwanted carbohydrates.
Step-by-Step Instructions for Foolproof Assembly
Follow these steps precisely to ensure the engineering of the loaf remains intact from start to finish.
- Preheat the oven to 190C/375F. Line and grease a 9 x5-inch pan and set aside.
- In a large mixing bowl, add all the meatloaf ingredients and mix well. Add the meatloaf to the greased pan and shape it into the loaf shape.
- Transfer the meatloaf into the oven and bake for 40 minutes. While it is baking, prepare the glaze by whisking together all the ingredients until combined.
- After 40 minutes, remove the meatloaf and spread with the glaze on top. Bake for a further 15-20 minutes.
- Remove the meatloaf from the oven and let it rest for 10 minutes, before slicing. Drizzle with baking juices from the pan. Sprinkle with extra parsley.
I advise against applying the glaze too early. If applied before the loaf structure is semi-set (around 40 minutes), the high sugar content in the glaze will caramelize too quickly, potentially burning before the internal temperature reaches the target 160 degrees Fahrenheit. Waiting until the final 15-20 minutes allows the glaze to thicken into a tacky, sweet-and-tangy layer that adheres perfectly to the meat.
Common Mistake: Over-mixing the meat. When you combine the ingredients, use your hands or a sturdy spoon to mix just until everything is incorporated. If you work the meat too much, you will break down the proteins too far, resulting in a rubbery, tough texture rather than a tender loaf.
Yield, Storage, and Expert Variations
This recipe serves 8 people comfortably, making it an excellent option for meal planning or a larger family gathering. One of the reasons I love this specific beef loaf is how well it stores. Because we used 80/20 beef, the fat content acts as a preservative for the texture.
To store leftovers, I recommend wrapping individual slices in parchment paper before placing them in an airtight container. This prevents the slices from sticking together and makes it easier to remove just what you need. In the refrigerator, the loaf will stay fresh for up to four days.
For reheating, the oven or an air fryer is superior to the microwave. A microwave tends to vibrate water molecules so fast that they escape the meat, leading to a dry result. If you use an air fryer at 350 degrees Fahrenheit for 4 minutes, the exterior glaze will re-caramelize, and the edges of the meat will get a slight crispness that is actually quite delicious.
If you want to try a variation that adds a different flavor profile, I have tested an herb-crusted version. Instead of the glaze, I used a mixture of dried thyme, rosemary, and a bit of extra parmesan cheese on top during the final 20 minutes. This creates a savory, crusty exterior that pairs beautifully with roasted vegetables. Another tested variation is a cheese-stuffed center, where you place half the meat in the pan, add a layer of mozzarella, and then cover with the remaining meat.
Pro tip: For the cleanest slices when reheating, slice the loaf while it is cold and then heat the individual pieces.
Frequently Asked Questions About Keto Meatloaf
What is the most effective method or ingredient to bind the meatloaf without high-carb fillers?
Through my testing, I have found that a combination of room-temperature eggs and keto bread crumbs is the most effective system. The eggs provide the protein “glue,” while the crumbs provide the bulk and moisture absorption. This combination creates a much stronger structure than using almond flour or flaxseed alone, ensuring the loaf doesn’t fall apart during slicing.
Which ground meat combinations work best for keto meatloaf?
I have found that a straight 80/20 ground beef is the gold standard for flavor and moisture. However, if you want to experiment with flavor insurance, a blend of 50% beef and 50% ground lamb or ground turkey (provided the turkey isn’t too lean) can work well. The key is maintaining a high fat-to-lean ratio. If you use a leaner meat blend, you must increase the amount of milk or grated onion to compensate for the loss of moisture.
What are popular keto-compliant topping or sauce options?
The glaze provided in this recipe, using sugar-free ketchup, vinegar, and a brown sugar substitute, is the most traditional and effective option. It provides the necessary acidity to cut through the richness of the 80/20 beef. Other options include a savory mushroom gravy made with heavy cream or a simple topping of sugar-free barbecue sauce if you prefer a smokier profile.
Conclusion: Your Structurally Perfect Keto Meatloaf Blueprint
Engineering a perfect keto meatloaf is a matter of understanding how binders and fats interact under heat. By moving away from the grainy texture of almond flour and embracing the structural benefits of keto bread crumbs, you are setting yourself up for a victory in the kitchen. This recipe solves the crumbly, dry issues that plague so many other keto meatloaf recipes by focusing on the science of the 40-minute initial bake and the importance of room-temperature emulsions.
I have done the testing, I have analyzed the failures, and I have refined the process so that you don’t have to. When you pull this loaf from the oven, the deep golden-brown glaze and the savory aroma of caramelized onions will tell you everything you need to know before you even take the first bite. The slice will be clean, the meat will be juicy, and the texture will be exactly what you remember from a classic home-cooked meal.
I want to hear about your results with this optimized method. Did the 40-minute initial bake make a difference in your moisture levels? Did the binder hold up as well as I promised? Leave a comment below with your feedback or any engineering questions you might have about the process. Let’s continue to engineer better results in the kitchen together.
Best Ever Keto Meatloaf
Equipment
- 9×5-inch loaf pan
- Large mixing bowl
- Digital probe thermometer
Ingredients
The Structural Meatloaf Base
- 2 lbs ground beef 80/20 fat ratio
- 1 medium onion grated/finely chopped
- 2 cloves garlic minced
- 2 large eggs must be room temperature
- 1/4 cup sugar free ketchup
- 1/4 cup milk of choice Unsweetened coconut milk used in testing
- 1 tablespoon milk of choice additional amount
- 2 tablespoon parsley freshly chopped
- 3/4 cup keto bread crumbs crushed finely
- 1 teaspoon salt
- 1/2 teaspoon pepper
The Structural Glaze
- 3/4 cup sugar free ketchup
- 1 1/2 teaspoon white vinegar
- 2 1/2 tablespoon brown sugar substitute
Instructions
Assembly and Initial Bake
- Preheat the oven to 190C/375F. Line and grease a 9 x5-inch pan and set aside.
- In a large mixing bowl, add all the meatloaf base ingredients and mix well (mix just until everything is incorporated to avoid tough texture).
- Add the meatloaf mixture to the greased pan and shape it into the loaf shape.
- Transfer the meatloaf into the oven and bake for 40 minutes. This initial phase is critical for moisture retention.
Glazing and Final Bake
- While the meatloaf is baking, prepare the glaze by whisking together all the glaze ingredients until combined.
- After 40 minutes, remove the meatloaf and spread with the prepared glaze on top.
- Bake for a further 15-20 minutes, allowing the glaze to set into a tacky layer.
Resting and Serving
- Remove the meatloaf from the oven and let it rest for 10 minutes before slicing. This allows muscle fibers to relax and reabsorb juices.
- Drizzle with any baking juices collected in the pan and sprinkle with extra parsley before serving.


