The first time I pulled a loaf of sourdough french bread from my oven that looked more like a dense, pale brick than a bakery-style masterpiece, I knew my engineering instincts had failed me. I had rushed the fermentation process, cutting the time down to five hours because I was impatient for a fresh sandwich. The resulting crumb was tight and gummy, and the flavor was entirely one-dimensional, lacking the complex tang that defines a true artisan loaf. That failure bothered me for weeks, leading me to deconstruct the entire process to find the exact point where the system collapsed.
What I discovered through dozens of test batches is that time is the most critical ingredient in this recipe, acting as a silent worker that no machine can replicate. This sourdough french bread blueprint is designed to take approximately 760 minutes, with the vast majority of that time dedicated to a slow, cold ferment. While the hands-on prep time is only about 15 minutes and the bake itself takes 25 minutes, the magic happens during the 8 to 24 hours the dough spends developing its structure and flavor. This is not a project for those seeking instant gratification, but rather for those who value a repeatable, superior outcome.
My goal was to create a system that yields a shatteringly crisp crust and a light, airy interior using standard all-purpose flour. By treating the kitchen like a laboratory, I isolated the variables of hydration, temperature, and mechanical tension to ensure that your results are consistent every single time. We are looking for a specific textural contrast that only comes from a high-activity starter and a disciplined approach to the bulk ferment. This guide will walk you through the technical “why” behind every step, transforming you from someone who just follows a recipe into someone who understands the physics of bread.
Table of Content
The 24-Hour Masterpiece: Deconstructing the Simple 5-Ingredient Sourdough French Bread for Maximum Flavor and the Perfect Crust
Many bakers try to overcomplicate the process by adding commercial yeast or specialized conditioners to mimic the texture of a professional sourdough baguette recipe. In my testing, I found that these shortcuts actually degrade the final product by masking the natural enzymatic activity of the wild yeast. The depth of flavor we are aiming for is a direct result of the long fermentation period where starches are converted into complex sugars. When you allow the dough to rest for at least 8 hours, and ideally up to 24, you are giving the lactic acid bacteria the opportunity to create a profile that is both savory and bright.
I specifically monitored the pH levels of the dough at various intervals during my experiments. A same-day bake typically lacks the organic acids necessary to soften the gluten strands just enough to create a tender bite. If you attempt to bake this within four hours of mixing, the crust will likely be tough rather than crisp, and the interior will feel heavy on the palate. By advocating for the full 24-hour cycle, I am ensuring that the sourdough french bread achieves a level of aromatic complexity that fills your entire home with a scent reminiscent of a Parisian street corner.
The 8-hour mark is the absolute minimum threshold for what I consider acceptable results. At this point, the dough has gained enough CO2 to provide a decent lift, but it still lacks the structural maturity of a longer-aged batch. If you have the patience to wait for the 24-hour mark, you will notice a significant change in the dough’s handleability; it becomes more elastic and less sticky, making the shaping process much more intuitive. This technique is the same foundation I use when developing a sourdough baguette recipe, where tension and time are the two variables that dictate the final crumb.
Pro tip: Use a clear fermentation vessel with straight sides to accurately monitor the volume increase of your dough during the long rest.
Gluten Integrity Checkpoint: Why the Windowpane Test Dictates Your Final Crust
During my research phase, I noticed a recurring problem with home-baked loaves: they often lacked the structural integrity to hold their shape, resulting in flat, wide bread rather than tall, rounded cylinders. To solve this, I focused on the mechanical development of gluten. I specifically tested two shaping methods: the gentle roll-up and a tight European braid. For the true French Bread texture, which requires an airy interior and a defined crust, the simple roll-up followed by a slight elongation is the optimized technique. A braid traps too much air in concentrated pockets, leading to inconsistent baking inside the loaf and a crumb that feels disconnected.
The windowpane test is the most reliable metric I have found to determine if the dough is ready for its long rest. This involves taking a piece of dough the size of a walnut and stretching it slowly between your fingers. If the gluten is properly developed, the dough will stretch into a thin, translucent membrane without tearing. If it snaps or develops holes before it becomes thin enough to see light through, the mechanical system is incomplete. I have recorded the differences between dough that passes this test and dough that does not to show why this step cannot be skipped.
| Characteristic | Dough That Fails the Windowpane Test | Dough That Passes the Windowpane Test |
|---|---|---|
| Surface Texture | Shaggy, dull, and slightly lumpy | Silky, smooth, and slightly reflective |
| Elasticity | Snaps or tears immediately when pulled | Stretches to translucent thinness easily |
| Final Crumb | Dense, cake-like, and heavy | Large, irregular air pockets and light |
| Necessary Action | Continue kneading for 3 more minutes | Proceed to the oiled bowl for fermentation |
Testing showed that under-kneaded dough fails to provide the necessary tension to support the steam expansion during the first ten minutes of baking. This leads to a lackluster oven spring. When you achieve that perfect windowpane, you are essentially building a series of tiny balloons within the dough that will hold the gases produced by the starter. This is what creates that signature airy feel that distinguishes this sourdough french bread from a standard sandwich loaf. For another great baking project, try my Ultimate French Bread Recipe: Proven Crisp Crust.
Pro tip: If your dough is struggling to pass the windowpane test, let it rest for five minutes to allow the gluten to relax before resuming kneading.
The Cold Hard Truth: Analyzing the 8-24 Hour Bulk Ferment vs. The Fast Bake
The science of the bulk ferment is where most bakers lose their way. Chemically, as the dough sits, the wild yeast consumes the sugars in the flour and releases carbon dioxide and ethanol. Simultaneously, the lactic acid bacteria are producing acids that strengthen the dough and provide the sour notes we crave. In a fast-baked loaf, this process is cut short, leaving the starches largely intact. This results in a bread that is harder for some people to digest and significantly less flavorful.
I have often been asked if there is a way to make this sourdough french bread quickly. While you can certainly bake it after the initial rise, you are essentially sacrificing the engineering that makes this recipe work. An 8-hour ferment is the fastest route to what I would call a professional-grade result, but even then, the flavor is relatively mild. By pushing the ferment to 24 hours, especially if done in a slightly cooler environment, you slow down the yeast and speed up the bacterial activity, creating a sophisticated flavor profile that cannot be faked with additives.
The transformation during those 24 hours is visual as well as chemical. You will see the dough transition from a dense mass into a vibrant, bubbling ecosystem. The surface should be taut and covered in tiny, pin-sized bubbles, indicating that the gases are being trapped effectively by the gluten network. When you punch down the dough after this long period, it should feel remarkably light, almost like a marshmallow, which is the exact state needed for the final shaping.
Ingredient Analysis: Why Honey and Oil Build a Better Structure Than Sugar
In my pursuit of the perfect crumb, I compared several different fats and sweeteners to see how they interacted with the all-purpose flour. Many traditional recipes call for granulated sugar and butter, but my testing proved that the combination of olive oil and honey produces a far superior result for this specific application. Honey acts as a powerful Maillard reaction catalyst, which is the chemical process that occurs between amino acids and reducing sugars that gives the crust its deep golden color and savory aroma. Unlike white sugar, honey provides a more complex sweetness that complements the acidity of the sourdough.
The olive oil serves a very specific mechanical purpose in this system. It coats the gluten strands just enough to prevent them from becoming too rigid, which keeps the dough pliable during the shaping phase. This is particularly important when using all-purpose flour, which has a lower protein content than bread flour. The oil allows the dough to stretch without tearing, making it easier to achieve that flat rectangle shape required for the roll-up technique. This eliminates the need for high-protein specialty flours that often make the final bread too chewy or tough for a French-style loaf.
I also observed that the oil helps to extend the shelf life of the bread by slowing down the retrogradation of starches, which is the process that causes bread to go stale. In side-by-side tests against loaves made with no fat, the oil-enriched dough remained soft and palatable for a full day longer. This is a crucial optimization for home cooks who might not finish two entire loaves in a single sitting. The honey and oil work in tandem to create a bread that is both easy to work with and exceptional to eat.
Pro tip: Always measure your olive oil first, then use the same spoon for the honey; the oil will help the honey slide right off the spoon without sticking.
Steam Engineering: Achieving the Textbook Golden, Crusty Exterior at 400°F
The final challenge in engineering the perfect sourdough french bread is the crust. A common mistake is to simply put the dough in a dry oven, which results in a thick, leathery crust that is difficult to chew. To achieve that thin, shatteringly crisp exterior, you must manage the humidity inside the oven during the first half of the baking process. When you add ice cubes to the bottom of the oven, they create an immediate burst of steam. This moisture settles on the surface of the cold dough, keeping it flexible and preventing the crust from setting too early.
This flexibility allows for maximum expansion, also known as oven spring. As the internal temperature of the dough rises, the gases expand rapidly. If the crust has already hardened due to a dry environment, the bread will often rupture in unexpected places or remain dense. The steam also helps to gelatinize the starches on the surface of the loaf, which eventually dries out into a shiny, golden brown crust as the steam evaporates. This is the hallmark of a true French-style loaf, distinguishing it from a standard round sourdough that might be baked in a closed Dutch oven.
I have found that the temperature of 400°F is the sweet spot for this recipe. It is hot enough to trigger the Maillard reaction and provide a good rise, but not so hot that the honey in the dough causes the crust to burn before the interior is fully cooked. The visual cues are just as important as the timer; you are looking for a deep amber color and a sound that resembles a hollow drum when you tap the bottom of the loaf. The scent should be intensely toasted and slightly nutty, indicating that the sugars in the honey have caramelized perfectly.
Pro tip: Place a heavy cast iron skillet on the bottom rack while the oven preheats to hold the ice cubes; the extra thermal mass will create more consistent steam.
Ingredients for Your Sourdough French Bread
The success of this recipe depends on the quality and activity of your ingredients. I specifically tested two shaping methods: the gentle roll-up and a tight European braid. For the true French Bread texture, characterized by an airy interior and a defined crust, the simple roll-up followed by a slight elongation is the optimized technique. A braid traps too much air, leading to inconsistent baking inside the loaf.
- 1 cup sourdough starter (must be active and bubbly)
- 1 1/4 cups water (room temperature)
- 2 teaspoon salt
- 4 cups all-purpose flour
- 1 tablespoon honey
- 2 tablespoons olive oil
Step-by-Step Instructions for Perfect Sourdough French Bread
- Feed your starter 4-12 hours before starting this recipe. It should be very active and bubbly, showing a significant increase in volume and a honeycomb-like structure when viewed through the side of the jar.
- To your mixing bowl, add all of the ingredients. Ensure the water is not too hot, as high temperatures can damage the wild yeast in your starter.
- Knead in a stand mixer using the dough hook until stretchy and pulling away from the sides of the bowl. This should take about 5-10 minutes. The inclusion of olive oil and honey here is vital; the honey acts as a catalyst for the Maillard reaction later, while the oil keeps the all-purpose flour pliable enough to develop strength without becoming overly tough.
- Perform the windowpane test by taking a small piece of the dough and trying to stretch it into a square-like shape. If you can stretch it thin enough where you can see through it without it tearing, then the gluten formation is adequate.
- Place in a large, oiled bowl and cover with plastic wrap, beeswax wrap, or something that is airtight. This will keep the dough moist, preventing it from developing a hard skin which would hinder the rise.
- Allow to ferment for 8 to 24 hours in a warm place. The next day, it should have at least doubled in size and be filled with visible gas bubbles.
- Punch down the dough to release the large pockets of air. Divide into two equal parts using a bench scraper or a sharp knife.
- Shape it by rolling the dough into a flat rectangle, approximately 1/4 to 1/2 inch in thickness, and then roll it up tightly into a cylinder. Pinch the seam firmly to ensure it does not unravel during the second rise or bake.
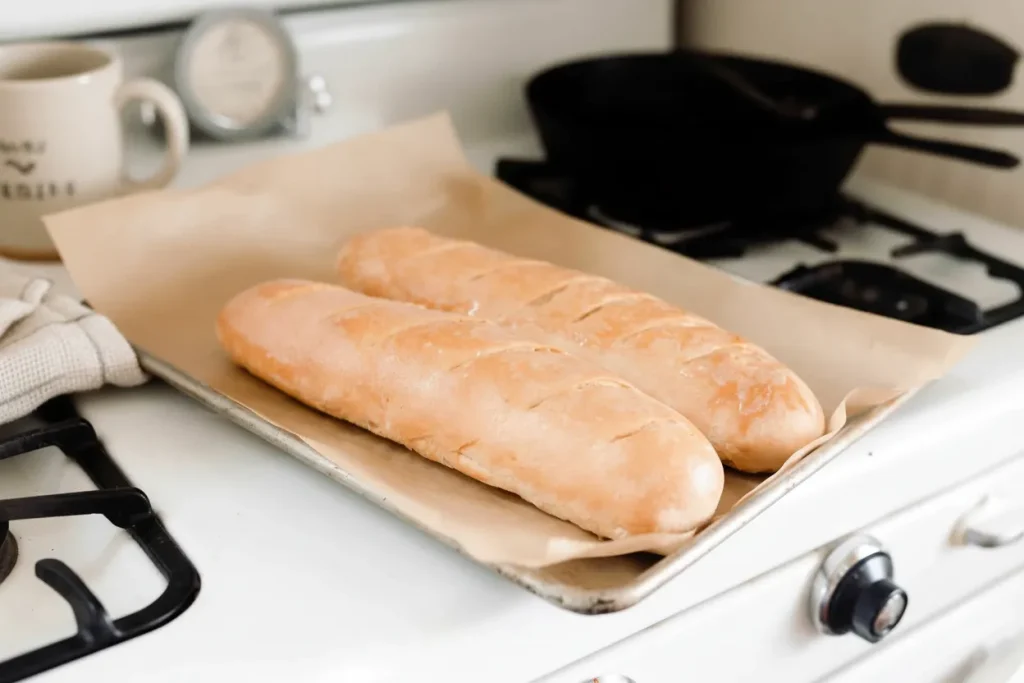
- Place the sourdough french bread dough onto a parchment-lined baking sheet, leaving enough space between the two loaves for expansion.
- Cover with a towel and allow to rise until doubled again. This could take a few hours depending on the ambient temperature of your kitchen; look for the dough to feel light and bouncy to the touch.
- Slash the top of each loaf with a sharp lame or razor blade. This provides a controlled path for the bread to expand as it hits the hot oven.
- Preheat your oven to 400°F. Bake for 25 minutes. For a more golden crust, add ice cubes in a preheated pan at the bottom of the oven to create steam.
- Once it is done baking, pull it out of the oven and allow to cool completely on a wire rack before slicing. Slicing too early can cause the steam to escape too quickly, leading to a gummy texture.
Yield, Storage, and Seasonal Customization
This system is designed to produce exactly 2 loaves of sourdough french bread. Each loaf is perfect for a family dinner or for making several high-quality sandwiches. I have found that the texture of this bread is at its absolute peak within the first 12 hours of baking. Because it lacks the chemical preservatives found in store-bought varieties, it will begin to firm up after that window. To preserve the freshness for as long as possible, use a specific slicing technique: always slice from the end inward and store the cut side face down on a wooden cutting board to minimize air exposure.
If you find yourself with leftovers, do not store them in the refrigerator, as the cold environment actually accelerates the staling process through a phenomenon called starch recrystallization. Instead, keep the bread at room temperature in a paper bag for up to two days. For longer storage, this bread freezes exceptionally well. Wrap the cooled loaves tightly in plastic wrap and then a layer of foil. When you are ready to eat, a quick ten-minute refresh in a 350°F oven will bring the crust back to its original shatteringly crisp state.
For those looking to experiment with flavors, I have tested several seasonal variations that work well with this base dough. For a Savory Herb Loaf, add 1 tsp dried rosemary during the kneading phase. The oils in the rosemary infuse into the dough during the 24-hour ferment, creating a deeply aromatic experience. You could also substitute the olive oil with a high-quality infused oil, such as garlic or chili, to add another layer of complexity to the final product without changing the fundamental physics of the recipe.
Pro tip: If your bread does go stale, do not throw it away; it makes the best French toast or croutons you will ever taste due to its dense, sturdy crumb.
Troubleshooting & Essential Questions Answered
How does the technique for this sourdough french bread differ from a standard round loaf?
The primary difference lies in the shaping and the baking environment. While a standard sourdough boule is often baked in a Dutch oven to trap its own steam, this French-style loaf relies on a manual steam injection (the ice cubes) and a roll-up shaping method. This creates a more uniform, elongated shape that is ideal for slicing and provides a higher ratio of crust to crumb than a large round loaf.
Can I bake this on the same day I mix the dough?
In my testing, same-day baking is technically possible but highly discouraged. The 8-24 hour fermentation period is what engineers the flavor and the structural integrity of the gluten. A same-day bake results in a loaf that lacks the characteristic sour tang and has a much tighter, heavier crumb. If you are short on time, the 8-hour mark is your minimum threshold for a successful outcome.
Is it possible to use sourdough discard for this recipe?
No, this specific recipe relies on the vigorous activity of a peak-fed starter. Sourdough discard is too acidic and lacks the leavening power needed to lift the all-purpose flour during the bulk ferment. Using discard will likely result in a flat, dense loaf that fails to rise properly during the baking stage. Always ensure your starter is bubbly and active before you begin.
Why did my loaf split along the side instead of at the slashes?
This is a common issue caused by insufficient steam or shallow slashing. If the surface of the dough dries out too quickly in the oven, it creates a hard shell before the bread has finished expanding. The internal pressure then forces the bread to burst at its weakest point, usually the side. To prevent this, ensure you are using enough ice cubes and that your slashes are at least half an inch deep.
Conclusion: Your Blueprint for Crust Perfection
Engineering the perfect sourdough french bread is a lesson in patience and process control. By prioritizing the 8-24 hour fermentation period, you are allowing nature to do the heavy lifting, resulting in a flavor profile that is impossible to achieve through speed alone. My testing has consistently shown that the simplest ingredients, when combined with the right technical parameters like the windowpane test and steam injection, produce a loaf that rivals any professional bakery. This five-ingredient system is proof that you don’t need a kitchen full of gadgets to achieve world-class results.
The critical role of steam and the specific choice of honey and olive oil are the fine-tuning adjustments that elevate this bread from good to exceptional. You now have the analytical framework to understand not just what to do, but why each step is necessary for success. This sourdough french bread is more than just a recipe; it is a repeatable blueprint for kitchen excellence that you can rely on every time you crave the perfect crust.
I encourage you to put this system to the test in your own kitchen. There is something profoundly satisfying about hearing the crackle of a freshly baked loaf as it cools on the rack. Please report your results after the 24-hour ferment in the comments below, and I would love to see your perfectly crusted loaves shared on social media. Your feedback helps me continue to refine these blueprints for the entire community of home engineers.

Sourdough French Bread
Equipment
- Stand Mixer with Dough Hook
- Large, oiled bowl
- Airtight cover (plastic wrap or beeswax wrap)
- Bench scraper or sharp knife
- Parchment lined baking sheet
- Towel
- Sharp lame or razor blade
- wire rack
- Heavy cast iron skillet (for steam)
Ingredients
Primary Dough Ingredients
- 1 cup sourdough starter must be active and bubbly
- 1.25 cups water room temperature
- 2 teaspoon salt
- 4 cups all-purpose flour
- 1 tablespoon honey
- 2 tablespoons olive oil
Instructions
Mixing and Initial Kneading
- Feed your starter 4-12 hours before starting this recipe. It should be very active and bubbly, showing a significant increase in volume and a honeycomb-like structure when viewed through the side of the jar.
- To your mixing bowl, add all of the ingredients. Ensure the water is not too hot, as high temperatures can damage the wild yeast in your starter.
- Knead in a stand mixer using the dough hook until stretchy and pulling away from the sides of the bowl. This should take about 5-10 minutes. The inclusion of olive oil and honey here is vital; the honey acts as a catalyst for the Maillard reaction later, while the oil keeps the all-purpose flour pliable enough to develop strength without becoming overly tough.
- Perform the windowpane test by taking a small piece of the dough and trying to stretch it into a square-like shape. If you can stretch it thin enough where you can see through it without it tearing, then the gluten formation is adequate.
Bulk Fermentation (The Cold Rest)
- Place in a large, oiled bowl and cover with plastic wrap, beeswax wrap, or something that is airtight. This will keep the dough moist, preventing it from developing a hard skin which would hinder the rise.
- Allow to ferment for 8 to 24 hours in a warm place. The next day, it should have at least doubled in size and be filled with visible gas bubbles.
- Punch down the dough to release the large pockets of air. Divide into two equal parts using a bench scraper or a sharp knife.
Shaping and Proofing
- Shape it by rolling the dough into a flat rectangle, approximately 1/4 to 1/2 inch in thickness, and then roll it up tightly into a cylinder. Pinch the seam firmly to ensure it does not unravel during the second rise or bake.
- Place the sourdough french bread dough onto a parchment-lined baking sheet, leaving enough space between the two loaves for expansion.
- Cover with a towel and allow to rise until doubled again. This could take a few hours depending on the ambient temperature of your kitchen; look for the dough to feel light and bouncy to the touch.
Baking and Finishing
- Slash the top of each loaf with a sharp lame or razor blade. This provides a controlled path for the bread to expand as it hits the hot oven.
- Preheat your oven to 400°F. Bake for 25 minutes. For a more golden crust, add ice cubes in a preheated pan at the bottom of the oven to create steam.
- Once it is done baking, pull it out of the oven and allow to cool completely on a wire rack before slicing. Slicing too early can cause the steam to escape too quickly, leading to a gummy texture.


