The first time I attempted to make sourdough pasta, I produced a batch that was nothing short of a culinary disaster. I pulled a shaggy, brittle mass of dough from my mixer bowl and assumed I had botched the hydration levels. It felt dry and stubborn, refusing to come together into the silky ball I had envisioned in my mind.
At that moment, my engineering instincts kicked in, and I realized I was treating this like a standard egg pasta rather than the complex biological system it actually is. I spent weeks deconstructing the mechanics of how fermented flour interacts with protein and moisture.
The result of that obsession is this guide, which I call the Optimized System for Sourdough Pasta. This isn’t just a list of ingredients; it is a meticulously calibrated blueprint designed to produce predictable texture and deep flavor every single time.
This recipe requires a total time of 65 minutes, which includes 30 minutes of active prep time and approximately 5 minutes of cook time. By following this specific protocol, you will avoid the common pitfalls that lead to gummy or fragile noodles.
My breakthrough came when I stopped adding more liquid and instead increased the mechanical energy input. I discovered that sourdough pasta dough requires a full 10 minutes of continuous machine work to properly align the gluten strands.
The lactic acid in the starter changes the elasticity of the dough, making it feel deceptively dry at the five minute mark. If you stop then, your pasta will shatter in the machine. You must trust the system and the timer to reach the necessary state of elasticity.
Table of Content
Why We Skip Salt and Oil: Deconstructing the Essential 3-Ingredient Dough
When I began analyzing pasta structures, I noticed that many recipes call for a teaspoon of salt or a drizzle of olive oil in the initial mix. Through my testing, I found that these additions often introduce variables that compromise the structural integrity of a fermented dough.
Salt is a hygroscopic substance, meaning it pulls moisture away from the flour and towards itself. In a sourdough pasta system, this can interfere with how the starter and eggs hydrate the starches. I prefer to season the cooking water heavily instead, which allows the salt to penetrate the noodle during the gelatinization phase.
Oil is another common additive that I have eliminated from this blueprint. While oil can make a dough feel softer to the touch, it acts as a lubricant between gluten sheets. This often results in a dough that is too slick for the rollers of a manual pasta machine to grip effectively.
Pro tip: Season your boiling water until it tastes like a seasoned broth, as this is your only opportunity to deeply flavor the interior of the noodle without compromising the dough structure.
I also made a conscious decision to optimize this recipe for volume measurements rather than weight. While my engineering background usually demands a scale, I recognized that most home kitchens are calibrated for cups and counts.
I spent several sessions measuring and re-measuring 3 cups of all-purpose flour against 4 large eggs. This specific ratio accounts for the average protein content found in standard supermarket flour brands. It creates a baseline that works for the widest possible range of home cooks.
By sticking to these three core ingredients, you are maintaining a clean chemical environment for the sourdough starter to provide its characteristic tang. Adding fats or minerals at this stage only serves to muffle the nuanced flavor profile we are trying to achieve.
The Optimized System: Deconstructing the Perfect Sourdough Pasta Dough for Predictable Texture and Flavor
To arrive at this specific formula, I conducted a series of controlled experiments using three distinct hydration levels. I tested a low moisture version with three eggs, a medium moisture version with four eggs, and a high moisture version with five eggs.
The three egg batch was a failure from the start, as the dough remained in a granular, sandy state even after extended mixing. The five egg batch was too tacky, sticking to my fingers and requiring excessive amounts of bench flour that eventually made the final noodle tough.
The four egg ratio, combined with 1 cup of sourdough starter and 3 cups of flour, proved to be the precise calibration point. It provides enough moisture to fully hydrate the flour while allowing the starter to act as a secondary binder.
When you begin the process, the dough will initially look like it will never come together. You might hear the motor of your stand mixer straining slightly as the dough hook moves through the dense mass. This is the stage where most people make the mistake of adding water.
Pro tip: Resist the urge to add water during the first four minutes of mixing, as the eggs need time to fully penetrate the starch granules before the dough achieves its final consistency.
You will see the transformation happen around the seven minute mark. The shaggy fragments will suddenly begin to cling to the dough hook, forming a single, cohesive unit that clears the sides of the bowl. The surface of the dough will transition from a matte, dull finish to a slight, healthy sheen.
This specific ratio ensures that the dough has the tensile strength to be rolled out as thin as a sheet of parchment paper. Without this structural foundation, the lactic acid from the sourdough starter would cause the dough to tear during the thinning process. For a different but equally rewarding sauced dish, try my recipe for Easy Meat Sauce Spaghetti: The Ultimate Recipe.
Ingredients
This recipe is designed to yield approximately 8 servings of fresh pasta. The simplicity of the ingredient list belies the complex flavor profile developed through the inclusion of the fermented starter.
- 1 cup sourdough starter (discard or fed)
- 3 cups all-purpose flour
- 4 large eggs
I tested this recipe with three different hydration levels of discard, including low, medium, and high moisture varieties. The dough only achieved the stated smooth and stretchy condition when using the 4-egg count with the specified 3 cups of AP flour.
Any less egg resulted in a shaggy dough that would not properly incorporate during the machine stages, proving this ratio is precisely calibrated. Using a fed starter will provide a milder flavor, while a long-stored discard will offer a sharper, more pronounced sourdough tang.
The eggs should be at room temperature to ensure they emulsify more easily with the starter. When you crack them into the bowl, you should see a vibrant orange or deep yellow yolk, which contributes to the classic golden hue of the finished noodles.
The Texture Matrix: Visual Cues for Kneading Time and Dough Hydration
Understanding the visual and tactile state of your dough is more important than simply watching the clock. I have developed a texture matrix to help you identify exactly where your dough stands during the critical 10-minute kneading window.
| State | Visual Appearance | Tactile Sensation |
|---|---|---|
| Under-Kneaded | Surface is lumpy with visible dry flour spots; dough looks shaggy and torn. | Feels dense and resists stretching; it snaps quickly when pulled apart. |
| Perfectly Elastic | Surface is completely smooth with a satin-like sheen; no visible seams. | Feels like a firm stress ball; it bounces back slowly when poked with a finger. |
| Over-Kneaded | Surface begins to look shiny or sweaty; dough may start to look translucent. | Feels extremely tough and rubbery; it becomes difficult for the mixer to turn. |
The goal is to stop the mixer the moment you reach the perfectly elastic state. In my kitchen, this consistently happens between the 9 and 11 minute mark depending on the ambient humidity of the room.
When you touch the dough at this stage, it should feel cool and slightly resilient. It should not stick to your thumb, yet it should feel hydrated and supple. If you see the dough beginning to climb the hook and look overly smooth, you are approaching the over-kneaded territory.
Pro tip: If your kitchen is particularly dry, you can lightly mist the dough with a spray bottle of water during the first minute of mixing, but do not exceed two or three sprays.
Achieving this state of elasticity is what allows the sourdough pasta to maintain its bite once cooked. Sourdough naturally tenderizes gluten, so we must build a very strong foundation to ensure the noodles do not turn to mush in the boiling water.
Instructions: Your Blueprint for Homemade Sourdough Pasta
Following these steps in the exact order provided is essential for maintaining the system’s integrity. Each phase of the process serves a specific mechanical or chemical purpose.
- Place the ingredients in a stand mixer with a dough hook.
- Mix on low/medium until the dough is smooth and stretchy, about 10 minutes.
- Allow the dough to rest for 30 minutes.
- Divide dough into 8 equal parts.
- Lightly dust a clean surface with flour.
- Roll the dough out as thin as possible with a rolling pin and cut with a sharp knife or pizza cutter. I like to roll the dough up before cutting to make it easier.
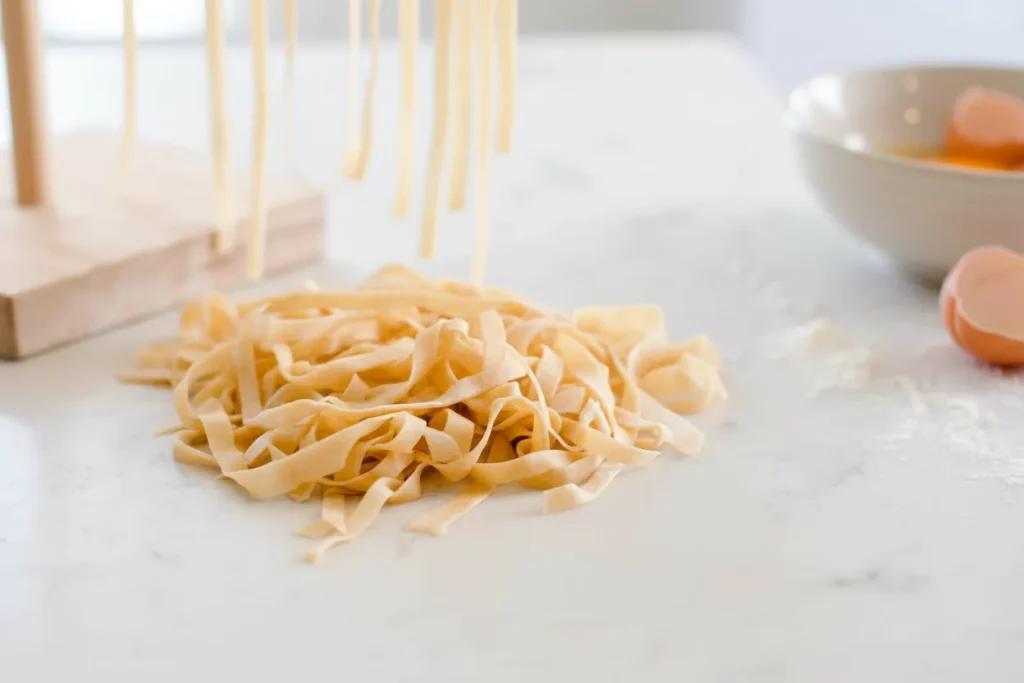
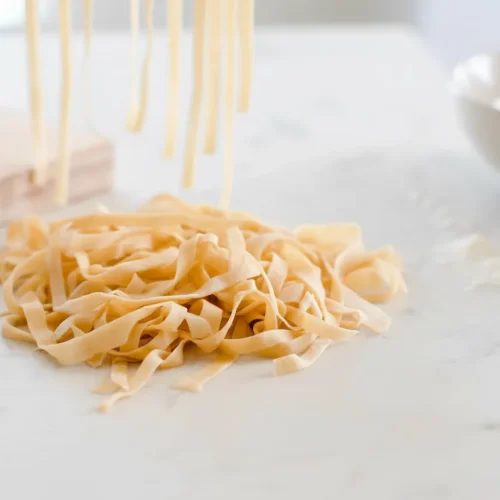
- Move the pasta to a towel and lay flat to dry, or hang on a pasta drying rack and allow to dry for at least 30 minutes (and up to 2 hours).
- Flour a clean surface and pat out dough balls until it forms a 4 inch by 4 inch square.
- Place the pasta through the pasta maker on the thickest setting, catching it as it goes through.
- Fold into thirds, lengthwise, then run through the thickest setting again.
- Continue running the dough through the pasta maker, changing the setting lower and lower each time.
- Once the dough has passed through the thinnest setting, change out the attachment to the pasta cutter.
- Run dough one last time through the cutter, guiding it and catching the pasta strands as they come out.
- Lay flat to dry on a towel, or hang on a pasta drying rack and allow to dry for at least 30 minutes (up to 2 hours).
- Fill a large pot with water, season well with salt, and bring to a boil.
- Add the fresh pasta to boiling water and boil for 4-5 minutes stirring with a fork to loosen up the noodles.
- When the noodles have reached al dente texture and are cooked through, strain and add your favorite sauce.
During step 2, it is important to understand the chemistry at play. Standard pasta dough relies entirely on the mechanical action of kneading to develop gluten. In this recipe, the lactic acid present in the sourdough starter slightly tenderizes the gluten structure as it mixes.
This tenderizing effect is why a full 10 minutes of machine kneading is required. We are essentially building the structure up while the acid is simultaneously softening it. This creates a noodle that is both strong enough to hold its shape and tender enough to have a superior mouthfeel.
When you reach the rolling and cutting stages in steps 9 through 13, you should notice that the dough handles with remarkable ease. It should not shrink back aggressively when passed through the rollers. If it does, it simply needs another 10 minutes of resting time.
Pro tip: When running the dough through the cutter attachment, hold your hand flat underneath the machine to catch the strands, allowing them to drape naturally over your fingers to prevent clumping.
Rest vs. Dry: Optimizing the 30-Minute Windows for Gluten Relaxation and Surface Hardening
In the world of pasta making, time is as much an ingredient as flour or eggs. I have identified two distinct 30-minute windows that are non-negotiable for success. The first is the relaxation rest, and the second is the surface drying period.
The initial 30-minute rest after kneading allows the gluten network to undergo molecular relaxation. During the high-energy kneading process, the gluten strands become tightly coiled and stressed. If you try to roll the dough immediately, it will behave like a rubber band, snapping back and refusing to thin out.
During this rest period, I always wrap the dough tightly in plastic wrap to prevent a skin from forming. The ambient temperature of your kitchen will gently allow the moisture to redistribute evenly throughout the mass. When you unwrap it, the dough should feel noticeably softer and more pliable than when it first left the mixer.
The second 30-minute window occurs after the pasta has been cut. This is the drying phase, and it serves an entirely different purpose. We are looking to establish surface tension on the exterior of each noodle.
By allowing the strands to dry for 30 minutes to 2 hours, you are creating a protective barrier that prevents the noodles from sticking together the moment they hit the boiling water. The air circulation around the hanging or laid-out pasta evaporates just enough surface moisture to make the noodles handle like ribbons of silk.
Pro tip: If you are in a very humid environment, you may need the full 2 hours of drying time to ensure the noodles feel slightly leathery to the touch before they are cooked.
If you skip this drying stage, the high starch content on the surface of the fresh dough will turn into a glue-like substance in the pot. This results in clumps of doughy pasta rather than individual, distinct strands. Patience during these two windows is the hallmark of a disciplined cook.
Storage Instructions: Preserving Your Fresh Sourdough Noodles
Once your pasta has completed its drying phase, you have several options for storage depending on when you plan to serve it. Because this dough contains fresh eggs and active cultures, temperature control is a critical safety and quality factor.
If you plan to cook the pasta within the next 4 hours, you can leave it on the drying rack at room temperature. The surface will continue to harden, which actually improves the al dente bite of the cooked noodle. Ensure the area is free from strong kitchen odors, as the porous dough can absorb scents from the air.
For short-term storage of up to two days, I recommend the refrigeration method. Once the pasta is dry to the touch, gently nestle the strands into small bundles or nests and place them in an airtight container. Line the container with a paper towel to absorb any residual moisture that might cause the nests to fuse together.
For long-term storage, the freezer is your best friend. Place the pasta nests on a baking sheet and freeze them solid before transferring them to a heavy-duty freezer bag. This prevents the delicate strands from breaking during handling.
When you are ready to eat, you can drop the frozen pasta directly into the boiling water. Do not thaw the noodles first, as they will become mushy and lose their structural integrity. Simply add 1 to 2 minutes to the total boiling time to account for the temperature difference.
I have tested dried sourdough pasta stored at room temperature for longer periods, but I found that the flavor profile begins to shift toward an overly acidic note after about 24 hours. Stick to the fridge or freezer for the best flavor preservation.
Vegan/Egg-Free Substitution: No Egg Variations Explained
While the egg-based version is my primary recommendation for texture, I have spent time testing substitutions for those who prefer a vegan or egg-free system. Replacing four large eggs requires a binder that can replicate both the moisture and the protein structure of the original.
The most successful substitution I have found involves a combination of water and ground flaxseeds. The flaxseeds create a mucilaginous texture that mimics the viscosity of egg whites, helping to hold the sourdough starter and flour together.
| Substitute | Ratio for 3 Cups Flour | Texture Result |
|---|---|---|
| Flax Egg Mixture | 4 tbsp ground flax + 12 tbsp water | Denser, slightly nuttier flavor; more fragile during the rolling process. |
| Aquafaba | 12 tbsp whipped chickpea liquid | Lighter and airier; requires very careful handling through the machine. |
| Water Only | 3/4 cup water (adjust as needed) | Very chewy and rustic; lacks the golden color and richness of egg pasta. |
If you choose to use the flax egg mixture, allow the flax and water to sit for at least 15 minutes until it reaches a gel-like consistency before adding it to the mixer. You should also expect the dough to be slightly more prone to tearing.
Pro tip: When making vegan sourdough pasta, increase the initial rest time from 30 minutes to 1 hour to allow the plant-based binders to fully hydrate the flour.
The lack of fat from the egg yolks will result in a noodle that has a more pronounced sourdough flavor, as there is no richness to balance the acidity. I recommend serving vegan versions with a hearty, olive oil-based sauce to compensate for the leaner dough.
Frequently Asked Questions
Is sourdough pasta healthier than traditional pasta?
The primary health benefit of this recipe lies in the fermentation process that occurs within the sourdough starter. During fermentation, wild yeast and bacteria begin to break down some of the gluten and phytic acid present in the flour. While this is a quick-cook pasta and not a long-fermented loaf of bread, the presence of these enzymes can make the noodles easier to digest for some individuals. However, the nutritional profile remains similar to traditional egg pasta in terms of caloric density and macronutrients.
Should I buy pre-made sourdough pasta instead?
I have tested several commercial options, including well known brands often found in health food stores. While these products are convenient, they consistently lack the vibrant, complex flavor and resilient texture of a homemade batch. Commercial varieties are often extruded and dried at high temperatures for long shelf lives, which can dull the nuances of the sourdough. My optimized system allows you to control the tanginess and the thickness of the noodle, providing a superior culinary experience that commercial brands simply cannot replicate. For a different flavor profile but similar simplicity, explore my Reliable One-Pot Cajun Chicken Pasta blueprint.
Conclusion
Mastering the art of sourdough pasta is a journey of understanding how mechanical force and biological fermentation work in tandem. By adhering to the 10-minute kneading rule and respecting the 30-minute rest and dry windows, you have moved beyond simple cooking into the realm of culinary engineering.
The strength of this system is its predictability. You no longer have to wonder if your dough will be too dry or if your noodles will stick together in the pot. You now possess a blueprint that accounts for the variables and provides a clear path to success.
I encourage you to pay close attention to the sensory cues I have described. Listen for the sound of the mixer changing as the dough comes together, and feel the satin-like texture of a perfectly rested ball of dough. These are the details that separate a good cook from an expert.
Once you have produced your first batch of perfectly golden, tangy noodles, I would love to hear about your results. Did you find the 10-minute knead as transformative as I did? What sauce did you choose to complement the sourdough flavor?
Please share your experiences and any unique adjustments you made in the comments below. Your feedback helps refine the system for everyone in TheRecipiest community. Now, go forth and engineer something truly delicious.
Sourdough Pasta
Equipment
- Stand Mixer
- Dough Hook
- Pasta Maker (or rolling pin and knife)
- Towel or Pasta Drying Rack
- Large pot
Ingredients
Essential 3-Ingredient Dough
- 1 cup sourdough starter (discard or fed)
- 3 cups all-purpose flour
- 4 large eggs (room temperature)
Instructions
Mixing and Resting
- Place the ingredients (starter, flour, eggs) in a stand mixer fitted with a dough hook.
- Mix on low/medium speed until the dough is smooth and stretchy, approximately 10 minutes total machine time. (Do not add water during the first four minutes.)
- Allow the dough to rest for 30 minutes, wrapped tightly in plastic wrap, to allow gluten relaxation.
Hand Shaping and Initial Rolling (Alternative/If not using a machine)
- Divide dough into 8 equal parts.
- Lightly dust a clean surface with flour.
- Roll the dough out as thin as possible with a rolling pin and cut with a sharp knife or pizza cutter. (Tip: Roll the dough up before cutting to make it easier.)
- Move the pasta to a towel and lay flat to dry, or hang on a pasta drying rack and allow to dry for at least 30 minutes (and up to 2 hours).
Machine Processing (Recommended for Optimal Texture)
- Lightly dust a clean surface and pat out dough balls until each forms a 4 inch by 4 inch square.
- Place the pasta through the pasta maker on the thickest setting, catching it as it goes through.
- Fold into thirds, lengthwise, then run through the thickest setting again.
- Continue running the dough through the pasta maker, changing the setting lower and lower each time until the desired thinness is achieved.
- Once the dough has passed through the thinnest setting, change out the attachment to the pasta cutter.
- Run dough one last time through the cutter, guiding it and catching the pasta strands as they come out.
- Lay flat to dry on a towel, or hang on a pasta drying rack and allow to dry for at least 30 minutes (up to 2 hours) to establish surface tension.
Cooking
- Fill a large pot with water, season well with salt (until it tastes like a seasoned broth), and bring to a boil.
- Add the fresh pasta to boiling water and boil for 4-5 minutes, stirring with a fork to loosen up the noodles.
- When the noodles have reached al dente texture and are cooked through, strain and add your favorite sauce.