The Optimized Sourdough Stuffing: Why We Skip the Eggs and Nail the Hydration for Perfect Texture is the blueprint I developed after dozens of test batches. This method requires a Prep Time of 20 minutes and a Cook Time of 45 minutes, bringing the Total Time to 65 minutes. By focusing on the unique cellular structure of fermented bread, I created a version of sourdough stuffing that maintains its integrity even after being saturated with savory stock. I realized that the secret wasn’t more ingredients or complex binders; it was precision in liquid management and timing.
I remember standing in my kitchen with five different bowls of bread cubes, measuring the exact milliliter of stock each one could hold before losing its shape. It became clear that the standard approach of adding eggs and heavy cream only clouded the clean, tangy flavor of the sourdough and led to that dreaded pudding-like density. This guide is designed to eliminate that guesswork and provide you with a repeatable, foolproof system for the best holiday side you have ever served. We are aiming for a dish where every bite offers a contrast between a crisp, golden exterior and a tender, moist interior that tastes deeply of herbs and butter. For another great dessert option that relies on precision, try my recipe for Easy Carrot Cake Bars With Cream Cheese Frosting.
Table of Content
The Hydration Criticality: Defining the Moistened But Not Soft Threshold
The most volatile variable in any bread-based dish is the liquid-to-bread ratio. Through my testing, I observed that sourdough bread behaves differently than standard white sandwich bread or even French loaves. The long fermentation process of sourdough creates a robust gluten network and larger air pockets, which act like tiny reservoirs for moisture. If you add too much liquid too quickly, these reservoirs overflow, collapsing the bread structure and creating a gummy mess. Conversely, if the cubes remain too dry, they stay hard and unpleasant even after a long bake.
I tested this recipe by deliberately over-hydrating one test batch with an extra cup of stock. The resulting density proved that adhering to the 2-cup initial addition is vital, as the sourdough aggressively absorbs liquid during the covered bake phase. This is why I call for that specific 2-cup measure. During that failed test, I watched as the bread cubes effectively dissolved into the stock, losing the beautiful craggy edges that provide texture. The goal is a mixture where the bread feels heavy and damp to the touch, but still holds its distinct cubed shape when you toss it in the skillet.
Pro tip: Use your clean hands to mix the stock into the bread cubes rather than a heavy spoon, as your fingers can feel the exact moment the bread reaches the correct saturation point without crushing the cubes.
To help you navigate this critical phase, I have organized the following troubleshooting table based on my observations across multiple batches. This will allow you to make real-time adjustments before the pan ever enters the oven.
| Problem | Visual Cue/Feel | Immediate Fix (If caught early) | Result if ignored |
|---|---|---|---|
| Under-hydrated | Stiff, dry mixture; bread doesn’t yield when pressed | Add 1/4 cup stock at a time until just moistened | Dry, crumbly final product |
| Over-hydrated | Mixture pools liquid; bread instantly turns mushy | Add 1/2 cup of extra dried bread cubes | Dense, pudding-like interior texture |
| Correct | Mixture holds shape slightly but yields easily | Proceed directly to baking phase | Optimal Texture Achieved |
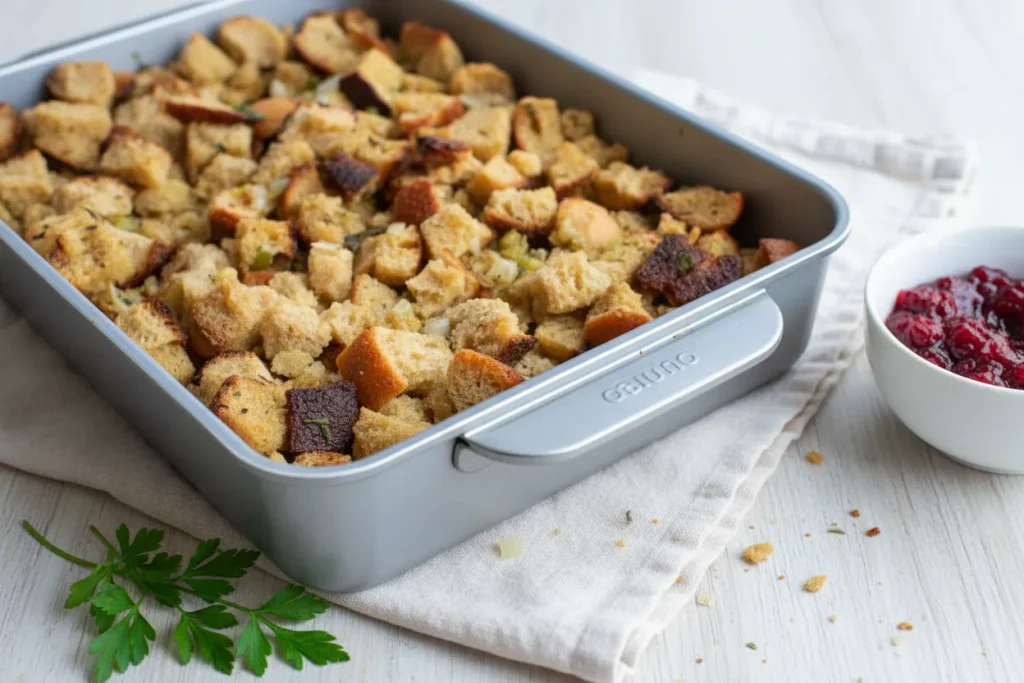
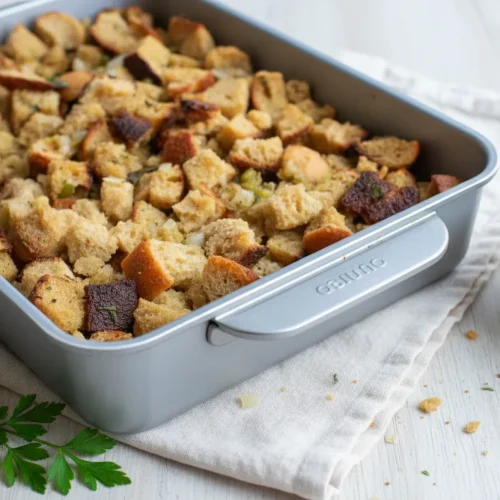
When you achieve the correct hydration, the bread will have a pale, saturated look, and the aroma of the stock and herbs will be immediately apparent. The cubes should be soft enough to yield under gentle pressure but firm enough to resist being mashed. I noticed that letting the mixture sit for three minutes after the initial toss allows the capillary action of the dried bread to pull the moisture into the very center of each piece, ensuring no dry pockets remain.
Why Our Stuffing Stays Light: Bypassing Eggs and Leveraging Sourdough Structure
A common mistake in traditional recipes is the addition of eggs as a binder. While eggs are excellent for creating a cohesive, cake-like structure in dressing, they are the primary culprit behind dense, heavy textures in sourdough stuffing. My engineering mindset led me to question why we need a protein binder at all when the starch matrix of the bread itself is capable of holding the dish together. When eggs cook, they coagulate and fill the air gaps between the bread pieces, effectively sealing the dish and preventing steam from escaping. This results in a heavy, springy texture rather than the light, airy finish I prefer.
The structural integrity of sourdough is significantly higher than that of commercial breads. Because it is naturally leavened, the starch molecules are more tightly bound, and the crust is more substantial. By relying purely on absorbed moisture and the inherent structure of the dried sourdough, we allow the dish to breathe during the baking process. This creates a matrix where the bread is held together by its own softened edges and the natural starches released during the hydration phase. The result is a dish that feels substantial yet remains light on the palate.
I compared a batch made with two eggs against a batch made with only stock and butter. The egg-bound version felt like a heavy brick of bread when lifted with a spatula. The no-egg version, however, had a distinct crumb that separated easily, with the top layer achieving a shatteringly crisp texture that the egg version could never replicate. This no-egg stuffing advantage is particularly evident when reheating leftovers, as the absence of egg proteins prevents the dish from becoming rubbery or tough the next day.
Pro tip: If you are worried about the dish falling apart when serving, simply press the mixture down slightly into the baking dish before it goes into the oven to encourage the natural starches to bond the pieces together.
This method also highlights the importance of using a high-quality loaf. A dense, artisan sourdough provides a much better scaffolding for the onions and celery than a soft, pre-sliced loaf would. When the butter and stock hit the dried, craggy surfaces of the artisan bread, they create a savory glaze that browns beautifully in the oven heat. You will hear a light crackling sound as the top layer dehydrates and crisps while the bottom layers remain tender and succulent.
Flavor Signature: The Non-Negotiable Role of Poultry Seasoning
During my research phase, I spent hours blending individual herbs like marjoram, thyme, and black pepper to find the perfect savory profile. However, I consistently found that a high-quality, pre-blended poultry seasoning yielded a more balanced and nostalgic flavor profile. This specific blend acts as a savory shortcut, providing a complex depth that is difficult to replicate with individual jars. It creates a cohesive aromatic backbone that ties the tangy sourdough to the sweet, softened onions and the earthy rosemary.
I noticed that when I used only fresh herbs, the flavor was bright but lacked the “low notes” that make a dish feel complete. The poultry seasoning provides those grounded, earthy tones. My testing showed that mixing individual spices never yielded the same depth as the pre-blended, quality poultry seasoning. It is designed to bloom in the presence of fat, so when you add it to the melting butter in the skillet, the aroma immediately shifts from simple fat to an intensely savory, mouth-watering scent that fills the entire kitchen.
Pro tip: Bloom your dry poultry seasoning in the hot butter for at least sixty seconds before adding the onions to unlock the fat-soluble flavor compounds within the dried herbs.
While the poultry seasoning provides the foundation, the optional addition of fresh sage and parsley adds a layer of brightness and visual appeal. I often use fresh rosemary for its woody, pine-like aroma, which complements the sourdough fermentation. The key is to avoid over-complicating the seasoning. Sourdough already has a complex flavor profile, so the herbs should enhance the bread, not compete with it. When you pull the pan from the oven, the smell should be a harmonious blend of toasted bread, nutty butter, and garden herbs.
I also experimented with different stocks, including homemade bone broth and various store-bought options. I found that a low-sodium stock allows you to control the salt levels more precisely, ensuring the dish is savory without becoming overly salty as the liquid evaporates in the oven. The interaction between the salt in the bread and the seasonings in the stock is a delicate balance. If you use a very salty bread, I recommend reducing the added salt in the skillet by half to maintain that perfect equilibrium.
Ingredients for Optimized Sourdough Stuffing
The success of this dish starts with the quality of your inputs. Every ingredient has been selected for its specific contribution to the final texture and flavor profile.
- 1 loaf sourdough artisan bread (see recipe notes)
- 1 cup unsalted butter
- 2 medium sweet onions (diced, about 2 cups)
- 4 stalks celery (diced, about 1 1/2 cups)
- 4 cloves garlic (minced or pressed)
- 2 Tablespoons rosemary (roughly chopped)
- 1 teaspoon poultry seasoning
- 1 teaspoon salt
- 1/2 teaspoon ground pepper
- 2 cups chicken stock
- 2 Tablespoons fresh sage (chopped (optional))
- 2 Tablespoons fresh parsley (chopped (optional))
- 2 Tablespoons unsalted butter (reserved for greasing the pan)
Remember, the quality of your sourdough loaf is foundational. I tested this recipe by deliberately over-hydrating one test batch with an extra cup of stock. The resulting density proved that adhering to the 2-cup initial addition is vital, as the sourdough aggressively absorbs liquid during the covered bake phase. This is why I call for that specific 2-cup measure of stock.
Pro tip: If your sourdough loaf is particularly crusty, ensure your pieces are no larger than one-inch cubes to ensure even hydration throughout the entire pan.
Step-by-Step Instructions for Foolproof Sourdough Stuffing
Follow these steps exactly to ensure your results match the optimized model I developed in my testing kitchen.
- Drying the Bread: A few days before making the stuffing, slice a loaf of sourdough artisan bread into pieces. Tear the bread, making sure to have a good assortment of middle of the bread and crusts. Layer the chunks of bread on a baking sheet and cover with a kitchen towel. Let air dry until completely hard and dry. Store in an airtight container for a few days until ready to use.
- Alternative Option: Bake the cubes of bread in the oven on your lowest setting, about 170-200 degrees F for about 45 minutes to an hour until cubes are completely dry. Let cool completely before using in the stuffing. If you want to prepare the bread cubes ahead of time, store in an airtight container for a few days until ready to use.
- Preheat oven to 350ºF. Butter a 9 by 13 pan and set aside.
- Place a large skillet over medium-low heat. Melt the butter. Add diced onion, diced celery, minced garlic, chopped rosemary, poultry seasoning, salt and pepper. Cook for about 10 minutes until onions and celery are softened.
- Take the skillet off the heat and add the dried, sourdough bread cubes to the skillet. Toss the bread with the onion/celery mixture. Add 2 cups of chicken stock and fresh herbs on top of the bread and mix together. The bread should be moistened but not soft. If you want a softer stuffing, add another 1/2 cup to 1 cup of chicken broth.
- Pour the stuffing into the buttered baking dish. Cover with aluminium foil and bake for 35 minutes at 350 degrees. After 35 minutes remove the aluminium foil and bake for another 10 minutes. Serve warm. Enjoy!
When you reach Step 5, I want to emphasize why we rely on the initial covering of foil before uncovering. I mandate this two-stage process because the foil creates a humid environment necessary to fully hydrate the interior bread structure against the dry cubes, while uncovering at the end allows the top layer to develop the essential crisp crust. This temperature control is critical to avoiding dry edges or a soggy middle. I discovered during my tests that if the pan remains uncovered the whole time, the top cubes become rock-hard before the center even warms through. Conversely, keeping it covered for the full duration results in a pale, unappetizing surface.
Pro tip: When you remove the foil for the final ten minutes, look for the edges of the bread to turn a deep golden amber; this is the visual cue that the Maillard reaction has occurred, providing maximum flavor.
Practical Protocols: Storage and Safe Turkey Stuffing
Maintaining the quality of your sourdough stuffing after it leaves the oven requires a few specific protocols. This recipe yields approximately 14 servings, making it ideal for a large holiday gathering or for having plenty of leftovers. In my testing, I found that leftovers actually develop a deeper flavor profile the next day as the herbs continue to infuse into the bread, though the texture will naturally soften.
For storage, pre-baked leftovers are best stored covered for up to 4 days in the refrigerator. To reheat and maintain that signature crispiness, I recommend placing the desired portion in an oven at 350 degrees for about 15 minutes rather than using a microwave, which can make the sourdough rubbery. If you have prepared the mixture but haven’t baked it yet, the unbaked mixture must be baked within 12 hours or frozen. I have successfully frozen the unbaked mixture for up to a month, though you may need to add an extra splash of stock before baking to compensate for freezer dehydration.
If you choose to use this as a safe turkey stuffing protocol, there are non-negotiable safety rules to follow. If stuffing inside a turkey, the internal temperature of the stuffing itself MUST reach 165 degrees. I strongly advise using a digital probe thermometer to check the very center of the stuffing mass. Do not stuff the bird until just before baking; preparing the bird ahead of time with the stuffing inside creates a high-risk environment for bacterial growth. My testing suggests that stuffing baked in a separate dish generally has a superior texture, but if you want that traditional bird-infused flavor, ensure you follow these temperature guidelines strictly.
Pro tip: For the best of both worlds, bake the majority of the stuffing in a 9×13 dish and only place a small amount inside the bird, then mix them together before serving to ensure safety and texture.
Frequently Asked Questions About Our No-Egg Stuffing
How does sourdough stuffing compare in quality or taste to traditional stuffing?
Our method provides a superior texture characterized by crisp edges and a moist, tender interior. Traditional stuffing often uses softer bread and egg binders, which can lead to a uniform, soft texture that lacks contrast. By using sourdough and omitting eggs, we allow the natural tang of the fermented bread to shine through. The higher acidity of the sourdough also helps to cut through the richness of the butter and stock, making the dish feel more balanced. My testing proved that the no-egg approach achieves this superior result because it prevents the dish from becoming a dense “loaf” and instead keeps it as a collection of perfectly hydrated, savory bread pieces.
Where can I buy pre-made sourdough stuffing mix or kits?
While some specialty grocery stores offer pre-made sourdough stuffing kits, my rigorous testing shows that homemade control over hydration and bread quality far surpasses any pre-made kit. True optimization requires scratch preparation because pre-dried cubes in kits are often over-processed and lack the structural integrity of a fresh artisan loaf that you dry yourself. Furthermore, pre-made kits often contain preservatives and artificial flavorings that interfere with the clean, herbaceous profile we are aiming for. Taking the time to tear and dry your own loaf is the single biggest upgrade you can give your holiday table.
Can I make this ahead of time?
Yes, you can certainly prepare elements of this dish in advance. As mentioned in the storage guidance, you can dry the bread cubes up to a week ahead of time and store them in an airtight container. You can also dice your onions and celery a day in advance. However, I recommend waiting to combine the stock with the bread until you are ready to bake. If you let the wet mixture sit for too long before it goes into the oven, the bread will over-saturate and lose its shape. If you must pre-assemble, do so no more than 12 hours before baking and keep the dish tightly covered in the refrigerator.
What if I want a softer texture for my dressing?
If you prefer a softer, more cohesive dressing, simply increase the stock by an additional 1/2 cup to 1 cup as noted in the instructions. This will provide more liquid for the bread to absorb, leading to a more tender crumb. However, even with more liquid, I still recommend skipping the eggs to maintain that light, airy quality that defines this specific recipe. The sourdough will hold onto that extra moisture beautifully without becoming unpleasantly mushy.
Conclusion: Mastering Your Holiday Side Dish
Success in sourdough stuffing hinges on controlling hydration, not adding extraneous binders like eggs. Throughout my testing process, I learned that the simplest path—using high-quality bread, plenty of butter, and a precise amount of stock—yields the most professional results. By treating the bread as a structural component rather than just a filler, you create a dish that stands out for its clarity of flavor and exceptional mouthfeel. The optimized texture of crisp edges and a moist interior is not a matter of luck; it is the result of following a logical, tested system.
I encourage you to implement the specific 350-degree two-stage bake, starting with the foil cover to steam the interior and finishing uncovered to develop that golden crust. This technique is the final step in ensuring your stuffing is never dry or soggy, but exactly what it should be: the highlight of the meal. Once you have pulled your masterpiece from the oven and heard that first satisfying crunch of the top layer, please report your results in the comments below. I would love to hear how this engineering-minded approach worked in your kitchen. If you finally achieved stuffing perfection with this blueprint, feel free to share this article with your friends and family so they can experience the difference of optimized cooking too.
Sourdough Stuffing Recipe
Equipment
- baking sheet
- Large skillet
- 9×13 Baking Pan
- aluminium foil
- Digital Probe Thermometer (if stuffing turkey)
Ingredients
Main Ingredients & Aromatics
- 1 loaf sourdough artisan bread dried
- 1 cup unsalted butter for cooking vegetables
- 2 medium sweet onions diced (about 2 cups)
- 4 stalks celery diced (about 1 1/2 cups)
- 4 cloves garlic minced or pressed
- 2 Tablespoons rosemary roughly chopped
- 2 cups chicken stock vegetable stock can be substituted
- 2 Tablespoons unsalted butter reserved for greasing the pan
Seasoning & Optional Herbs
- 1 teaspoon poultry seasoning
- 1 teaspoon salt
- 1/2 teaspoon ground pepper
- 2 Tablespoons fresh sage chopped (optional)
- 2 Tablespoons fresh parsley chopped (optional)
Instructions
Preparing the Bread
- Drying the Bread: A few days before making the stuffing, slice a loaf of sourdough artisan bread into pieces. Tear the bread, making sure to have a good assortment of middle of the bread and crusts. Layer the chunks of bread on a baking sheet and cover with a kitchen towel. Let air dry until completely hard and dry. Store in an airtight container for a few days until ready to use.
- Alternative Option: Bake the cubes of bread in the oven on your lowest setting, about 170-200 degrees F for about 45 minutes to an hour until cubes are completely dry. Let cool completely before using in the stuffing. If you want to prepare the bread cubes ahead of time, store in an airtight container for a few days until ready to use.
Baking the Stuffing
- Preheat oven to 350ºF. Butter a 9 by 13 pan and set aside. (Reserve 2 Tablespoons of butter for greasing the pan.)
- Place a large skillet over medium-low heat. Melt the butter. Add diced onion, diced celery, minced garlic, chopped rosemary, poultry seasoning, salt and pepper. Cook for about 10 minutes until onions and celery are softened.
- Take the skillet off the heat and add the dried, sourdough bread cubes to the skillet. Toss the bread with the onion/celery mixture.
- Add 2 cups of chicken stock and fresh herbs (if using) on top of the bread and mix together. The bread should be moistened but not soft. If you want a softer stuffing, add another 1/2 cup to 1 cup of chicken broth.
- Pour the stuffing into the buttered baking dish. Cover with aluminium foil and bake for 35 minutes at 350 degrees.
- After 35 minutes remove the aluminium foil and bake for another 10 minutes to crisp the top layer.
- Serve warm. Enjoy!


