The first time I pulled a batch of sourdough hamburger buns from my oven, I felt a wave of genuine disappointment. They were flat, dense, and had a texture more reminiscent of a heavy biscuit than a soft, airy roll. I had followed a popular recipe to the letter, yet the result was a structural failure that couldn’t even support a standard patty without crumbling. As an engineer, I knew that a recipe is simply a system of inputs and processes, and mine was clearly broken.
I spent the next several months deconstructing the mechanics of enriched sourdough. I tested various hydration levels, adjusted the fat content, and experimented with different fermentation schedules. I realized that the secret to achieving that coveted brioche richness without the common sourdough mushiness came down to two critical factors: precise gluten development and a strategic temperature-controlled schedule.
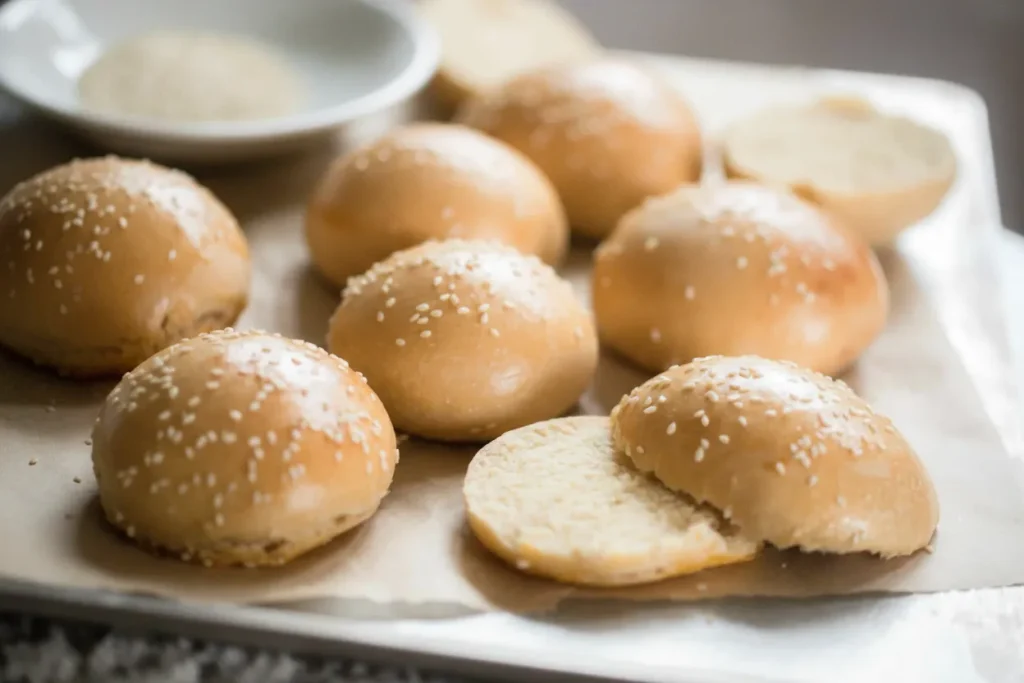
This recipe is the result of that optimization process. It is designed to produce a bun that is sturdy enough for a juicy burger but soft enough to melt in your mouth. We are looking at a preparation time of 15 minutes and a cook time of 20 minutes. However, the total process spans 1475 minutes, primarily due to the essential overnight chill that transforms the dough’s handling and flavor profile.
My goal with this guide is to move beyond the vague instructions often found in baking. We are not just making bread; we are engineering a specific crumb structure. By understanding how the ingredients interact and why certain steps are non-negotiable, you can achieve repeatable success in your own kitchen. Let’s look at the science behind the system.
Table of Content
The Brioche Equation: Understanding the Role of Egg and Fat in Our Texture
When we talk about brioche-style rolls, we are describing a dough that has been significantly enriched with fats and proteins. In this specific system, the melted butter or coconut oil and the whole egg serve as the primary enriching agents. From a chemical perspective, fats are both a blessing and a challenge for the bread baker.
Fats work by coating the flour’s proteins, specifically glutenin and gliadin. This coating action physically interferes with the proteins’ ability to link together and form long, elastic gluten strands. While this is what creates the tender, “short” crumb we love in a bun, it also makes the dough inherently weaker and more prone to collapsing if not managed correctly.
My testing revealed that because these fats hinder gluten development, the mechanical energy provided by the stand mixer is vital. You cannot simply stir this dough and hope for the best. You need the sustained, rhythmic stretching of the dough hook to force those proteins to bond despite the presence of the lipids.
The honey in this recipe does more than just provide a subtle sweetness. It acts as a humectant, which means it attracts and holds onto moisture. This is the engineering secret to a bun that stays soft for days rather than turning into a dry rock by the next morning. It also provides a ready source of simple sugars for the wild yeast to consume during the long fermentation.
I also observed that the egg serves as an emulsifier. The lecithin in the yolk helps the fats and the water-based components of the dough to integrate more thoroughly. This results in a much smoother, more cohesive dough that is significantly easier to handle once it has been chilled. For another great application of rich flavors, try my recipe for Easy Beef Ragu: The Ultimate Flavor Secret.
Pro tip: Ensure your egg and honey are at room temperature before starting, as cold ingredients can cause the melted butter or coconut oil to seize into small clumps, leading to an uneven dough consistency.
Ingredients for Superior Sourdough Hamburger Buns
Precision in your inputs is the first step toward a successful output. I have refined this list to ensure the perfect balance of hydration and richness. Using a digital scale is always my recommendation for the flour and water to ensure the 3 cups and 3/4 cup measurements are consistent every time.
- 1/2 cup sourdough starter (active and bubbly )
- 3/4 cup warm water
- 3 cups all-purpose flour
- 1/4 cup melted coconut oil or butter
- 3 tablespoons honey
- 1 teaspoon salt
- 1 egg
- 1 egg yolk
- 1 tablespoon water
- sesame seeds (optional)
I specifically tested the shaping method against two common techniques: heavy flour dusting and water-dampened hands. The heavy flour resulted in a dense, dry outer layer, while using only water on my fingertips when creating the final surface tension yielded the softest, most uniform crumb structure. That precision is why I insist on the damp hand technique for the final shaping when we get to the instructions.
The quality of your starter is the most important variable here. It must be at its peak of activity, which I define as having doubled in volume and showing a surface covered in small, popping bubbles. If your starter is sluggish, the high fat content of this dough will overwhelm it, resulting in a poor rise and a dense finished product.
I prefer melted butter for the classic dairy flavor, but my tests with coconut oil showed nearly identical structural results. The coconut oil version tends to have a slightly higher smoke point, which can be beneficial if you prefer a darker, more toasted crust. Both options provide the necessary fat to interfere with gluten just enough to create that tender bite.
The salt is not just for flavor; it also serves to regulate the yeast activity and strengthen the gluten network. Never skip or reduce the salt measurement, as it provides the necessary ionic bonds to help the proteins stick together more effectively.
Precision Shaping: How to Manage Highly Enriched, Sticky Sourdough Dough
Mastering the shaping of sourdough hamburger buns is often where home cooks encounter the most frustration. Because this dough is enriched with honey and fat, it is naturally stickier than a standard sourdough loaf. This stickiness is not a sign that the recipe is wrong; it is a sign that the dough is rich and full of moisture.
I view shaping as a mechanical process designed to create surface tension. Without this tension, the gases produced by the yeast will expand outward rather than upward, leaving you with flat discs. The goal is to create a tight, smooth outer skin that acts like a balloon, holding the air inside as the buns rise and bake.
After the overnight chill, the dough will be much easier to handle because the fats have solidified. Work quickly while the dough is still cold. Once the dough reaches room temperature, the fats will soften, and the stickiness will increase significantly.
| Problem | Engineered Solution |
|---|---|
| Dough won’t hold shape | Needs 10 more minutes of bulk fermentation; Check fridge time was too short |
| Surface tears easily | Increase kneading time to ensure full gluten development |
| Buns spread too wide in the oven | Not enough surface tension created during tucking step |
To shape effectively, follow these physical steps:
- Gently flatten the divided piece of dough into a small disc.
- Fold the edges toward the center, as if you are making a small pouch.
- Flip the dough over so the seam side is down.
- Using the edge of your hand and the friction of the counter, rotate the ball in a circular motion.
This rotation is the critical “tucking” step. You are essentially pulling the top of the dough tight across the surface. If you see the dough starting to tear, stop immediately and let it rest for five minutes before trying again.
Pro tip: Avoid using excess flour on your work surface during the final rotation, as a small amount of friction against the counter is actually necessary to pull the skin tight.
Instructions: The Step-by-Step Blueprint for Perfectly Structured Buns
This sequence of steps has been optimized to ensure the sourdough culture has enough time to work while the structural components of the dough are properly developed.
- In a stand mixer with a dough hook, add sourdough starter, warm water, all purpose flour, melted butter or coconut oil, honey, salt and egg. Knead for 5-10 minutes with dough hook until smooth and elastic. I have found that kneading the high-fat/egg dough for a full 10 minutes is required to properly develop the gluten matrix needed to support the richness without deflating. You will notice the dough transition from a shaggy, breaking mass to a smooth, shiny ball that clears the sides of the bowl.
- Place dough in a greased bowl and cover with a damp towel or plastic wrap for 8 hours. This is your bulk fermentation phase. During this time, the yeast is beginning to colonize the dough. You are looking for a visible increase in volume, but more importantly, a softening of the dough’s texture and the appearance of small bubbles beneath the surface.
- Transfer the dough to the refrigerator and chill covered overnight. This step is non-negotiable for the mechanical handling of the dough. The cold temperature halts the rapid expansion and allows the gluten to relax while the fats solidify, creating a dough that can be shaped with precision.
- Divide the dough into eight equal pieces. For the most professional results, use a digital scale to ensure each piece is exactly the same weight. This ensures that every bun in the batch bakes at the same rate, preventing some from being undercooked while others are overdone.
- Shape the buns by creating a flat surface on top and tucking the remaining dough underneath. I also like to create a little tension by rotating each bun slightly on a lightly floured surface. As discussed in the ingredients section, use the damp hand technique here if you find the dough becoming too difficult to manage. The goal is a taut, smooth dome.
- Cover the buns with plastic wrap or a damp tea towel and allow to rise until doubled. This final proof can take anywhere from 2 to 4 hours depending on the temperature of your kitchen. Do not rush this step. If you bake them before they have doubled, the lack of internal air will lead to a dense, chewy bun that lacks the necessary lightness.
- Beat the egg yolk and water and brush the tops of the buns with the mixture. This egg wash provides a concentrated protein source on the surface, which undergoes the Maillard reaction more aggressively. This results in a deep, mahogany shine that is characteristic of premium rolls.
- Sprinkle with sesame seeds. (optional) The egg wash acts as a glue, ensuring the seeds stay attached even after the buns have cooled and been handled.
- Bake the buns for 25-30 minutes at 350 degrees. You want them to be golden on top. This specific temperature is optimized for enriched doughs. It is low enough to prevent the exterior from burning before the interior structure sets, yet high enough to create a gentle steam expansion inside the dough.
Pro tip: Once the buns are finished baking, immediately transfer them to a wire cooling rack. Leaving them on the hot baking sheet will cause the bottoms to steam and become soggy as they cool.
Why the Overnight Chill is Non-Negotiable: Flavor Development vs. Speed Trade-Offs
In our modern world, the urge to find a shortcut is constant. Many people ask if they can skip the overnight refrigerator step to get their sourdough hamburger buns on the table faster. My answer is a firm no. Attempting to rush this schedule sacrifices the very things that make sourdough superior to commercial yeast bread.
The overnight chill serves two primary engineering functions. First, it manages the biology of the sourdough culture. While the yeast activity slows down in the cold, the lactic acid bacteria continue to work, albeit at a slower pace. This long, cold proof maximizes the development of complex organic acids. This is how you achieve that signature tangy depth that perfectly offsets a savory, fatty burger.
Secondly, the cold rest is essential for hydration. Flour is not like a sponge that absorbs water instantly; it is a complex organic material that takes time to fully saturate. During the overnight rest, the starches and proteins in the flour have a chance to fully bond with the moisture. This results in a more stable dough and a more uniform crumb.
When you rush the fermentation by keeping the dough at room temperature for the entire process, the yeast often produces carbon dioxide faster than the gluten can develop enough strength to hold it. This leads to large, uneven holes in the crumb and a bun that feels hollow rather than soft and substantial.
By choosing the long, cold method, you are choosing quality over convenience. The result is a roll with a sophisticated flavor profile and a physical structure that can withstand the weight and moisture of condiments, toppings, and meat without falling apart.
Pro tip: If your dough hasn’t visibly puffed up after the 8-hour room temperature bulk ferment, let it go another hour or two before putting it in the fridge. The cold will pause the rise, so you want to ensure the fermentation is well underway before the temperature drop.
Practical Application: Yield, Storage, and Seasonal Variations
Once you have mastered the base recipe, you can adapt it to fit different scenarios. This system is designed to be versatile and reliable.
- Yield: This recipe makes 8 buns. Each bun is approximately the size of a standard large hamburger roll.
- Storage Instructions: Store at room temp for 2 days, freeze for longer. Because of the honey and fat content, these buns maintain their moisture better than lean doughs. To freeze, wrap them individually in plastic wrap and place them in a heavy-duty freezer bag. They will stay fresh for up to three months.
- Seasonal Variation: For Summer BBQs, brush with melted garlic butter instead of egg wash. This gives the exterior a savory, aromatic punch that pairs beautifully with grilled meats.
When reheating, I recommend cutting the bun in half and lightly toasting the cut side in a pan with a small amount of butter. This creates a moisture barrier that prevents the juices from the burger from soaking too deeply into the crumb.
If you are planning to serve these for a large gathering, you can easily double the recipe. However, be aware that the kneading time in Step 1 may need to increase by 2 to 3 minutes to account for the larger mass of dough in the mixer bowl.
For a softer crust, you can place a shallow pan of water on the bottom rack of your oven during the first ten minutes of baking. The resulting steam keeps the outer skin flexible for longer, allowing for maximum expansion before the crust begins to brown.
Pro tip: If you want a more decorative finish, use a sharp razor or lame to score a shallow “X” into the top of the bun just before applying the egg wash.
Troubleshooting Your Sourdough Hamburger Buns
Even with a perfect blueprint, variables like humidity and starter strength can cause deviations. Here are the most common issues I have diagnosed during my testing phases.
Can I Substitute Sourdough Discard?
I have found that this recipe requires an active, bubbly starter for predictable results. Sourdough discard has a high acidity and weakened yeast population, which can lead to a dough that smells sour but lacks the lifting power to overcome the heavy fats and eggs. If you must use discard, you will likely need to add a pinch of commercial yeast to ensure the buns don’t turn out like dense lead weights.
Can These Be Made 100% Yeast-Free?
Yes, this recipe is 100% naturally leavened and contains no commercial yeast. The strength of the rise depends entirely on the health of your wild yeast colony and your patience during the proofing stages. If your kitchen is particularly cold, the final rise after shaping may take longer than expected, but as long as the dough is active, it will eventually double in size.
The Most Common Shaping Mistakes to Avoid
The most frequent failure I see is a lack of surface tension. If the top of your bun looks lumpy or has visible seams after shaping, those imperfections will expand and crack during the bake. Remember that tension is key. Use the friction of the counter to pull the skin tight. If the dough is sliding around too much, wipe your counter with a damp cloth to create just a tiny bit of “grip” for the dough.
Another common mistake is over-proofing. If the buns rise too far, the gluten structure becomes overstretched and weak. When they hit the heat of the oven, they will collapse instead of springing upward. You are looking for a gentle “spring back” when you lightly poke the dough with a finger; if the indentation stays and doesn’t bounce back, they are likely over-proofed and should be moved to the oven immediately.
Conclusion: The Blueprint for Your Next Perfect Batch
Building the perfect sourdough hamburger buns is a journey of understanding how moisture, fat, and fermentation interact. By moving away from the “guesswork” of traditional baking and embracing a more analytical approach, you can create a roll that is truly superior to anything found on a grocery store shelf.
The combination of brioche-like richness and the complex depth of sourdough creates a flavor profile that elevates the simplest hamburger into a gourmet meal. The success of this recipe lies in the non-negotiable overnight chill and the mechanical creation of surface tension during shaping. These steps may take time, but the structural integrity and taste they provide are well worth the wait.
I encourage you to execute this recipe with the precision of an engineer. Pay attention to the sensory cues: the sound of the mixer clearing the bowl, the silky feel of the cold dough, and the deep, savory aroma that fills your kitchen during the final ten minutes of baking. These are the indicators of a system working exactly as intended.
I would love to hear about your successes with this blueprint. Did you find the damp hand technique as helpful as I did? Did you try the garlic butter variation? Please share your results in the comments below or post a photo of your perfectly structured buns on social media. Your feedback helps refine the system for everyone in TheRecipiest community. Let’s keep engineering better meals together.
Sourdough Buns
Equipment
- Stand Mixer with Dough Hook
- Digital Scale
- Greased Bowl
- Wire cooling rack
Ingredients
Dough Ingredients
- 1/2 cup sourdough starter active and bubbly
- 3/4 cup warm water
- 3 cups all-purpose flour
- 1/4 cup melted coconut oil or butter
- 3 tablespoons honey
- 1 teaspoon salt
- 1 egg
Egg Wash and Topping
- 1 egg yolk
- 1 tablespoon water
- as needed sesame seeds optional
Instructions
Mixing and Kneading
- In a stand mixer with a dough hook, add sourdough starter, warm water, all purpose flour, melted butter or coconut oil, honey, salt and egg.
- Knead for 5-10 minutes with dough hook until smooth and elastic. (Note: Full 10 minutes is often required for high-fat/egg doughs to develop the necessary gluten matrix.) You will notice the dough transition from a shaggy, breaking mass to a smooth, shiny ball that clears the sides of the bowl.
Fermentation and Chilling
- Place dough in a greased bowl and cover with a damp towel or plastic wrap for 8 hours for bulk fermentation.
- Transfer the dough to the refrigerator and chill covered overnight. This step is non-negotiable for proper structure and flavor development.
Dividing and Shaping
- Divide the cold dough into eight equal pieces using a digital scale for consistency.
- Shape the buns by gently flattening the dough into a small disc, folding the edges toward the center to create a pouch.
- Flip the dough over so the seam side is down.
- Using the edge of your hand and the friction of the counter, rotate the ball in a circular motion to create surface tension (the critical ‘tucking’ step). Use the damp hand technique if the dough becomes too sticky, avoiding excess flour.
Final Proof and Baking
- Cover the shaped buns with plastic wrap or a damp tea towel and allow to rise until doubled in size (2 to 4 hours).
- Preheat oven to 350 degrees F.
- Beat the egg yolk and water together and brush the tops of the buns with the mixture.
- Sprinkle with sesame seeds, if using.
- Bake the buns for 20 minutes, or until golden on top. (Note: The schema specifies 20 minutes cook time, while the text states 25-30 minutes; using the shorter time derived from the schema’s PT20M). Place a shallow pan of water on the bottom rack for the first ten minutes for a softer crust, if desired.
- Immediately transfer the finished buns to a wire cooling rack.


