The first time I pulled a sourdough loaf from my oven, I did not find a beautiful, airy bread. Instead, I found a pale, rock-hard disc that was more of a dental hazard than a meal. I had followed a popular online recipe to the letter, yet the crust was leathery and the interior was dense enough to use as a blunt weapon. It was a humbling failure for someone who spent years as an industrial engineer optimizing complex systems. I realized that baking, much like engineering, is often taught as a list of steps without explaining the critical variables that dictate success.
That failed loaf launched a three-month obsession where I treated my kitchen like a laboratory. I deconstructed the mechanics of fermentation, the physics of steam, and the chemistry of gluten development. I wanted to create a blueprint that eliminated the guesswork for home bakers who do not have professional steam-injection ovens or decades of experience. What I discovered was that a tiny adjustment in the fat content and a shift from watching the clock to feeling the dough could transform a frustrating hobby into a repeatable science.
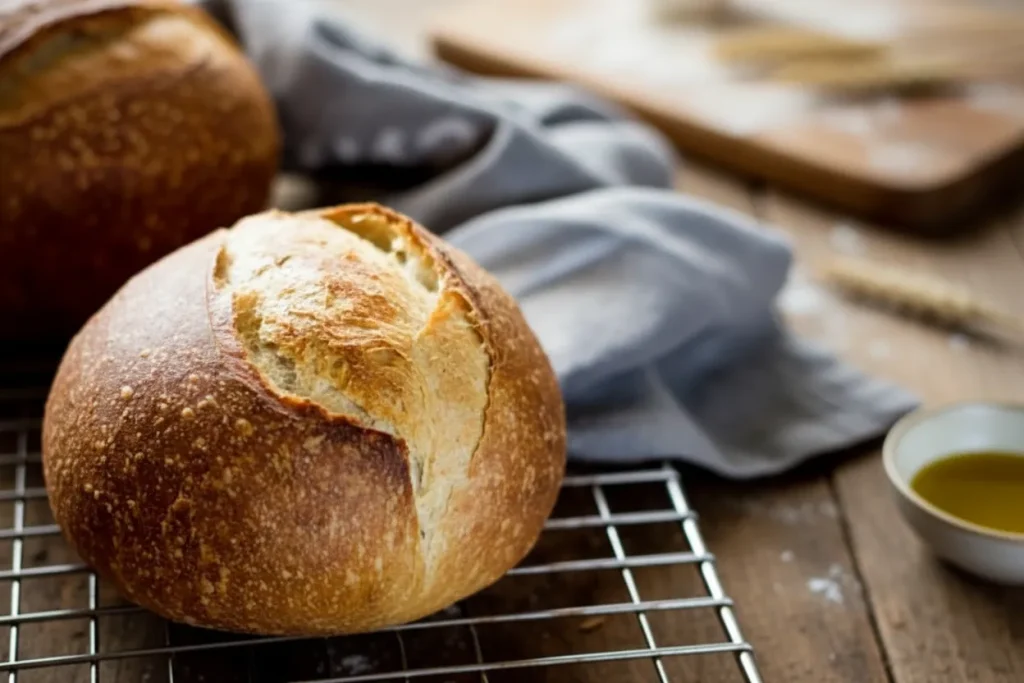
This article presents what I call the Artisan Sourdough Blueprint. It is a meticulously tested system designed for the sourdough artisan bread that actually works in a standard home kitchen. This recipe requires thirteen hours of preparation time and one hour of active cooking, totaling a fourteen-hour journey from starter to slice. By introducing 25 grams of olive oil as a stabilizing component, we can create a loaf that is significantly more forgiving and yields a tender, accessible crumb. This is not just a recipe; it is an engineering-grade breakdown of the tactile cues and scientific principles required for a perfect result every single time.
Table of Content
The Olive Oil Advantage: Why This is the Goldilocks Sourdough
In the world of traditional bread making, a lean dough consists only of flour, water, salt, and yeast. While this produces a classic profile, it often results in a crust that is too thick or leathery for the average home toaster or sandwich. Through my testing phases, I experimented with dozens of batches to find a way to soften the bite without losing the characteristic chew of a sourdough artisan bread. The solution was the addition of 25 grams of high-quality olive oil.
The oil acts as a lubricant for the gluten strands during the mixing and fermentation phases. By coating the proteins slightly, it prevents the gluten from becoming too rigid, which results in a crumb that feels like soft velvet rather than a dry sponge. I tested this specific formula using three distinct types of flour: a high-protein professional variety, a standard national grocery brand, and a budget-friendly unbleached flour. The results were remarkably consistent across all three, proving that the oil provides a necessary buffer against flour variations.
At the baseline hydration level of 250 grams of water, the dough handles like soft, pliable clay. This is a critical discovery for beginners because high-hydration doughs often feel like sticky porridge, leading many new bakers to add too much extra flour and ruin the hydration balance. This specific ratio creates a dough that holds its shape during the final stages, ensuring that your loaf grows upward in the oven rather than spreading into a flat pancake.
Pro tip: Use a high-quality extra virgin oil that smells peppery and fresh, as the subtle floral notes will remain in the finished bread, enhancing the sour tang of the starter.
Calibrating Your Hydration: The Newbie vs. Advanced Paths
One of the most common points of failure in bread making is choosing a hydration level that exceeds the baker’s current skill level. Hydration is simply the ratio of water to flour, and even a small increase can fundamentally change how the dough behaves under your hands. During my research, I compared the standard 250-gram water path against an increased 325-gram version to see how the structural integrity shifted.
The table below outlines the specific differences I observed during these experiments. For your first few attempts at sourdough artisan bread, I strongly recommend sticking to the 250-gram baseline. It offers what I call tactile precision, meaning the dough responds predictably to your touch and doesn’t require advanced handling techniques to keep it from sticking to your workspace.
| Water Amount | Difficulty Level | Dough Texture | Rise Method |
|---|---|---|---|
| 250 Grams | Beginner / Intermediate | Feels like soft clay; easy to shape | Dutch Oven (Free-form) |
| 325 Grams | Advanced | Stretchy, elastic, and very sticky | Proofing Basket (Required) |
If you choose the 325-gram path, you are entering the territory of the open crumb, which features those large, airy pockets often seen in professional bakeries. However, this version requires a floured, cloth-lined proofing basket to maintain its structural integrity during the second rise. Without the support of the basket, the high-moisture dough will simply flow outward like lava. The 250-gram version is sturdy enough to rise free-form on a piece of parchment paper directly inside your Dutch oven, making it the most reliable starting point for most home cooks.
Beyond the Clock: The Tactile Guide to Bulk Fermentation
The greatest lie in most bread recipes is the instruction to let dough rise for a specific number of hours. Fermentation is a biological process fueled by living wild yeast, and those organisms do not own watches. They respond to the temperature of your kitchen, the humidity in the air, and the vigor of your starter. In my testing, I found that a rise could take four hours in a humid July kitchen but up to twelve hours on a cold January evening.
To master sourdough artisan bread, you must stop looking at the clock and start looking for specific physical milestones. Bulk fermentation is the phase where flavor and structure are built, and it ends when the dough has transformed from a dense, heavy mass into a light, aerated organism. You will know it is ready when the surface tension is high enough that the dough no longer looks matte or dull but has a slight sheen and a few visible air bubbles trapped just beneath the skin.
| Stage | Visual Cue (What you see) | Tactile Cue (What you feel) |
|---|---|---|
| Early Rise | Flat surface; dough looks dense and heavy | Resists stretching; feels like wet mud |
| Mid-Point | Surface begins to dome; edges look rounded | Becomes more elastic; starts to feel bouncy |
| Completion | Dough has nearly doubled; tiny bubbles visible | Feels like a cold marshmallow; airy and light |
When you reach the completion stage, the dough should feel significantly lighter when you slide your hand underneath it. If you poke it gently with a floured finger, the indentation should spring back slowly but leave a slight dimple. If it collapses, it has gone too far; if it springs back instantly, it needs more time. Mastering this sensory feedback is the secret to achieving consistent results regardless of the season or the temperature of your home.
Pro tip: If your kitchen is consistently cold, place the dough inside an oven that is turned off but has the interior light left on to create a gentle, warm micro-climate.
Engineering the Crust: The Science of Steam and the Dutch Oven
The iconic, shattering crust of a sourdough artisan bread is not a product of high heat alone; it is a product of steam management. In professional bakeries, ovens are equipped with steam injectors that keep the surface of the dough moist during the first half of the bake. This moisture allows the dough to expand fully before the crust sets, a phenomenon known as oven spring. In a home kitchen, we achieve this by using a 5 1/2 or 6-quart Dutch oven. For another bread that prides itself on a similar exterior, explore my proven French Bread Recipe with a shatteringly crisp crust.
After the initial twenty-minute phase, you must remove the lid to begin the process of engineering the crust. With the steam gone, the dry heat of the oven triggers the Maillard reaction, a chemical process between amino acids and reducing sugars that creates the deep, golden-brown color and the complex, nutty flavors of the crust. I have found that a full forty minutes of uncovered baking is usually necessary to reach the ideal internal temperature of 205 to 210 degrees Fahrenheit.
Pro tip: If you want an even crispier bottom, sprinkle a small amount of fine ground cornmeal on the parchment paper before placing the dough into the pot to create a heat-conductive barrier.
Ingredients
Success in bread making begins with precision. While many old-fashioned recipes rely on volume measurements like cups and spoons, those are notoriously inaccurate because the density of flour can vary wildly. For this sourdough artisan bread blueprint, I have provided weight in grams. I strongly recommend using a digital scale to ensure your ratios are exact every time you bake.
- 150g bubbly, active sourdough starter
- 250g warm water (use up to 325g for the advanced version)
- 25g olive oil
- 500g bread flour (not all purpose flour)
- 10g fine sea salt
- fine ground cornmeal or non-stick parchment paper
I tested this recipe using several major brands of bread flour, including premium unbleached options and standard grocery store varieties. While the professional-grade flours often provided a slightly loftier rise due to their higher protein content, the blueprint is calibrated to work with any standard bread flour. Do not substitute all-purpose flour here, as it lacks the protein strength required to support the long fermentation and the weight of the sourdough starter. If you’re looking to cultivate a more robust starter, consider my expert method for creating a reliable sourdough starter using a stiff paste technique.
Instructions
- In a large bowl, add the sourdough starter, water, and olive oil. Mix with a fork to combine, then add the flour and salt. Continue mixing until the dough becomes stiff, then squish it together with your hands to incorporate all the flour. The dough will be rough and shaggy.
- Cover the bowl with plastic wrap, reusable wrap, or a very damp kitchen towel. Let rest for 30 minutes to 1 hour. This is the autolyse phase, an enzymatic hydration process where the flour fully absorbs the water. This stage is critical because it begins gluten development without any physical work on your part, making the later stretching phases much more effective.
- After resting, return to the bowl and work the dough into a rough ball, about 15 seconds.
- Cover the bowl with lightly oiled plastic wrap. Alternatively, transfer the dough to a high-sided dough tub. Let it rise in a warm place, ideally 70-75 F. The dough is ready when it no longer looks dense and has almost doubled in size. Remember that this bulk rise time varies significantly based on temperature; watch the dough and not the clock.
- During the bulk fermentation, you can do a series of stretch and folds to strengthen the dough. Start 30 to 45 minutes in: lift a portion of the dough, stretch it upwards, and fold it over itself. Rotate the bowl a quarter turn and repeat until you have come full circle (this equals one set). Do 1 to 2 additional sets, spaced about 1 hour apart.
- Note that dough made with 250g water will feel stiffer and more resistant, while 300 to 325g water will be more stretchy and elastic. If the dough resists stretching, let it rest longer between sets to allow the gluten to relax.
- Remove the dough onto a lightly floured surface. Starting at the top, fold the dough over toward the center. Turn slightly, and then fold over the next section. Repeat until you have come full circle. Flip the dough over, seam side down. Gently cup the sides and rotate in a circular motion to tighten the shape. The goal is to build surface tension to create a tight ball. Be careful not to use too much flour on the work surface, or the dough will simply slide around instead of gripping the surface to create tension.
- Now the dough needs to rise again. If you have used 250g water, you can do a free-form second rise in the Dutch oven. Line the pot with a piece of parchment paper or coat with cornmeal. Place the dough inside, cover and let rise for about 30 minutes to 1 hour. It is ready when slightly puffy, but not double in size. Preheat your oven to 450 F during this time.
- If your dough contains more than 250g water, skip the free-form rise in the pot. Your dough will spread too much. Instead, use a floured, cloth-lined proofing basket to help hold its shape during this final rest.
- Right before baking, make a shallow 2 to 3 inch slash in the center of the dough using a bread lame, razor blade, or small sharp knife. The cut should be about a quarter-inch deep to guide the expansion of the loaf.
- Place the bread in the oven on the center rack with the lid on and reduce the temperature to 400 F. Bake for 20 minutes, then remove the lid and continue to bake uncovered for another 40 minutes, until deep, golden brown. Every oven is different, so minor adjustments may be needed based on your specific appliance.
- Check for doneness with a digital thermometer; you are looking for an internal temperature of 205 to 210 F for sourdough.
- Remove the bread from the hot Dutch oven and cool on a wire rack for at least an hour before slicing. This cooling period is essential as the interior of the bread is still setting; cutting it too early will result in a gummy texture.
What distinguishes artisan bread from a standard loaf?
The primary differences lie in the fermentation time and the baking environment. A standard sandwich loaf is often forced to rise quickly using commercial yeast and is baked in a dry oven, resulting in a soft, uniform crust. Sourdough artisan bread relies on a long, slow fermentation process that develops complex organic acids and deep flavor. The use of a Dutch oven to trap steam is also a hallmark of the artisan style, creating the thick, crackling crust and airy interior that defines the genre.
Why use olive oil in sourdough?
Traditional sourdough can sometimes have a crust that is so hard it is difficult to eat. Through my testing, I found that adding 25 grams of olive oil acts as a tenderizing agent. It coats the gluten strands and slows down the staling process, resulting in a crumb that remains soft and pliable for several days. It also makes the dough much easier to handle for beginners because it reduces the stickiness that often leads to frustration during the shaping process.
How do I know when the bulk rise is actually done without a clock?
You must rely on visual and tactile cues rather than a timer. The dough should look aerated, with a few small bubbles visible on the surface. When you tilt the bowl, the dough should pull away from the sides with a web-like appearance. Most importantly, the volume should have nearly doubled, and the dough should feel incredibly light and bouncy to the touch. If it still feels heavy or looks flat, it needs more time, regardless of how many hours have passed.
How do I achieve professional-looking scores and sourdough bread designs?
The secret to clean sourdough bread designs is a very sharp blade and cold dough. If you have the time, refrigerating your dough for the last hour of the rise makes it much easier to score. Use a bread lame or a fresh razor blade and commit to your cuts with a swift, confident motion. A quarter-inch depth is usually sufficient to allow the bread to expand. For more decorative patterns, use very shallow nicks on the surface that do not go deep enough to cause significant expansion.
Yield, Storage, and Seasonal Variations
This recipe yields one large boule, which typically provides between fifteen and twenty slices depending on your thickness preference. Because this is a natural sourdough artisan bread without commercial preservatives, its shelf life is slightly different from store-bought varieties. On the first day, the crust will be at its peak crispness. I recommend storing the loaf on the counter in a simple brown paper bag to allow the bread to breathe while protecting the interior from drying out.
If you do not plan to finish the loaf within three days, the best storage method is to slice the bread completely and freeze it. You can then pull individual slices directly from the freezer and pop them into the toaster. In my testing, I found that freezing the slices immediately after the initial cooling period preserved the flavor and texture far better than leaving the loaf on the counter for a week. Or, if you have excess starter, my quick sourdough discard recipes offer a great way to make another loaf efficiently.
One of the most critical failure points for home bakers is failing to account for seasonal timing. During the summer, when my kitchen is around 80 degrees Fahrenheit, the bulk rise can be completed in as little as two to four hours. In the dead of winter, when the temperature drops to 68 degrees, that same process can take twelve hours. You must remain flexible and monitor the dough’s progress based on the tactile milestones discussed earlier.
Pro tip: To refresh a day-old loaf, lightly mist the crust with water and place it in a 350-degree oven for five to eight minutes to restore the crunch.
Conclusion
Mastering the Artisan Sourdough Blueprint is about moving away from the rigid constraints of a timer and embracing the tactile reality of the dough. By understanding the science of the olive oil buffer and the mechanics of steam in a Dutch oven, you are no longer just following a recipe; you are engineering a successful outcome. The transition from a dense, leathery loaf to a professional-grade sourdough artisan bread is simply a matter of calibrating your process and paying attention to the sensory cues of the fermentation.
The beauty of this system is that it grows with you. Once you have mastered the 250-gram hydration path and feel comfortable with the “marshmallow” texture of a perfectly fermented dough, you can challenge yourself with the advanced hydration levels to achieve that sought-after open crumb. The fundamental principles remain the same; you are simply increasing the variables as your skill set expands.
I encourage you to take the leap and start your first batch today. There is a unique satisfaction in hearing the crackle of a fresh crust as it cools on the rack, knowing that you controlled every variable to achieve that result. I would love to see your progress. Please share a photo of your crust’s ear or the interior crumb in the comments below, and let me know if you started with the newbie-friendly path or jumped straight into the advanced hydration challenge. Every loaf is a lesson, and I look forward to hearing about your journey toward the perfect slice.
Sourdough Bread: A Beginner’s Guide
Equipment
- Large Bowl
- Digital Scale
- Plastic wrap or reusable wrap
- 5 1/2 or 6-quart Dutch oven
- Bread lame, razor blade, or small sharp knife
- wire rack
Ingredients
Sourdough Blueprint Ingredients
- 150 g bubbly, active sourdough starter
- 250 g warm water (use up to 325g for the advanced version)
- 25 g olive oil
- 500 g bread flour (not all purpose flour)
- 10 g fine sea salt
For Baking
- fine ground cornmeal or non-stick parchment paper
Instructions
Mixing and Autolyse
- In a large bowl, add the sourdough starter, water, and olive oil. Mix with a fork to combine, then add the flour and salt. Continue mixing until the dough becomes stiff, then squish it together with your hands to incorporate all the flour. The dough will be rough and shaggy.
- Cover the bowl with plastic wrap, reusable wrap, or a very damp kitchen towel. Let rest for 30 minutes to 1 hour. This is the autolyse phase, an enzymatic hydration process where the flour fully absorbs the water.
- After resting, return to the bowl and work the dough into a rough ball, about 15 seconds.
Bulk Fermentation and Strengthening
- Cover the bowl with lightly oiled plastic wrap. Alternatively, transfer the dough to a high-sided dough tub. Let it rise in a warm place, ideally 70-75 F. The dough is ready when it no longer looks dense and has almost doubled in size (watch the dough, not the clock).
- During the bulk fermentation, do a series of stretch and folds to strengthen the dough. Start 30 to 45 minutes in: lift a portion of the dough, stretch it upwards, and fold it over itself. Rotate the bowl a quarter turn and repeat until you have come full circle (this equals one set). Do 1 to 2 additional sets, spaced about 1 hour apart.
- If the dough resists stretching, let it rest longer between sets to allow the gluten to relax.
Shaping and Final Proof
- Remove the dough onto a lightly floured surface. Starting at the top, fold the dough over toward the center. Turn slightly, and then fold over the next section. Repeat until you have come full circle. Flip the dough over, seam side down. Gently cup the sides and rotate in a circular motion to tighten the shape. The goal is to build surface tension to create a tight ball.
- If you have used 250g water, line a Dutch oven with a piece of parchment paper or coat with cornmeal. Place the dough inside, cover, and let rise for about 30 minutes to 1 hour. It is ready when slightly puffy, but not double in size. Preheat your oven to 450 F during this time.
- If your dough contains more than 250g water, skip the free-form rise in the pot. Instead, use a floured, cloth-lined proofing basket to help hold its shape during this final rest.
Baking
- Right before baking, make a shallow 2 to 3 inch slash in the center of the dough using a bread lame, razor blade, or small sharp knife. The cut should be about a quarter-inch deep to guide the expansion of the loaf.
- Place the bread in the oven on the center rack with the lid on and reduce the temperature to 400 F. Bake for 20 minutes (this creates steam inside the Dutch oven).
- Remove the lid and continue to bake uncovered for another 40 minutes, until deep, golden brown. Check for doneness with a digital thermometer; you are looking for an internal temperature of 205 to 210 F.
- Remove the bread from the hot Dutch oven and cool on a wire rack for at least an hour before slicing.


