The first time I attempted to bake sourdough breadsticks, I expected the same predictable timeline I used for my standard yeast-based rolls. I set a timer for ninety minutes, walked away, and returned to find a bowl of dough that looked exactly as it had when I left it.
The surface was flat, the texture was heavy, and the characteristic airy lift I craved was nowhere to be found. I realized then that I was treating a biological system like a mechanical clock, ignoring the environmental variables that actually dictate success.
As an engineer, I couldn’t accept this inconsistency, so I spent the next several months deconstructing the fermentation process to create a foolproof blueprint. I stopped looking at the clock and started looking at the dough, focusing on the cellular structure and the activity of the wild yeast cultures.
This recipe for sourdough breadsticks is the result of that optimization, designed to give you professional results in a home kitchen. We are looking at a Prep Time of 20 minutes, a Cook Time of 20 minutes, and a Total Time that spans approximately 820 minutes when accounting for the essential long fermentation.
By the end of this guide, you will understand how to manage your kitchen’s climate and how to develop a gluten matrix strong enough to hold its shape. We are moving away from guesswork and toward a system of repeatable, delicious outputs.
Table of Content
Analyzing the Sourdough Variable: How to Gauge Bulk Fermentation Success Without Relying on the Clock
Traditional baking recipes often fail because they provide a specific time for rising without accounting for the ambient temperature of your kitchen. Through my testing, I discovered that the speed of your sourdough breadsticks is entirely dependent on the thermal energy available to the wild yeast.
I conducted a controlled experiment comparing two identical batches of dough at different temperatures to see how the fermentation window shifted. At an ambient temperature of 68°F, the dough required a full 11 hours to reach the necessary volume and texture.
When I increased the temperature to 78°F using a proofing box, that same dough was ready in just 6.5 hours. This 4.5-hour difference proves why following a recipe’s “four-hour rise” instruction can lead to a dense, under-proofed product if your house happens to be chilly.
| Kitchen Temp Range | Expected Bulk Fermentation Time | Visual Cue for Readiness |
|---|---|---|
| Below 70°F (21°C) | 10-14 Hours | Dough has visibly increased by 75-100% |
| 70°F – 78°F (21°C – 25.5°C) | 6-9 Hours | Dough is visibly doubled and jiggly |
| Above 78°F (25.5°C) | 4-6 Hours | Dough shows significant dome/air pockets |
Pro tip: Use a clear, straight-sided container for your bulk fermentation so you can accurately measure the percentage of volume increase rather than guessing.
You are looking for a dough that feels alive under your fingertips, possessing a certain jiggle when the bowl is gently shaken. The aroma should be mildly tangy but still sweet, indicating that the yeast has consumed enough sugars to produce carbon dioxide without becoming overly acidic.
If you find yourself needing to speed up the process, placing the dough near a warm appliance can help, but avoid high heat which can kill the delicate cultures. The goal is steady, controlled expansion that builds flavor and structure simultaneously. For another great dessert option, try my ultimate sourdough banana bread secrets.
Achieving Maximum Structure: The 10-Minute Knead and Why the Windowpane Test is Non-Negotiable
The most common point of failure for sourdough breadsticks is a lack of structural integrity, leading to pieces that are limp or overly chewy. Sourdough starter has a naturally lower protein activity compared to commercial dry yeast, which means we must work harder to develop the gluten.
I have found that a standard five-minute knead is simply insufficient for this specific dough composition. To achieve a light, airy crumb within a slender breadstick, you must commit to at least 10 minutes of active kneading on a medium speed.
During this process, watch the dough transition from a shaggy, sticky mass into a glossy, unified ball that pulls away cleanly from the sides of the bowl. The surface should eventually look like polished satin, indicating that the gluten strands have aligned into a strong, elastic web.
Pro tip: If your stand mixer starts to feel warm to the touch during the long knead, turn it off for two minutes to let the motor rest while the dough undergoes a mini-autolyse.
To confirm the dough is ready, I always perform the windowpane test, which is the gold standard for gluten development. Pull a small piece of dough and gently stretch it between your fingers until it is thin enough for light to pass through without tearing.
If the dough snaps or creates a jagged hole before it becomes translucent, you must continue kneading for another two to three minutes. This strong gluten matrix is what traps the gas bubbles produced during the long rise, preventing the breadsticks from collapsing in the oven.
Without this step, the sourdough breadsticks will lack the necessary internal pressure to expand, resulting in a flat profile. The tactile sensation of well-developed dough is unmistakable; it will feel resilient and bouncy, resisting your pull with a gentle, rubbery tension.
The Overnight Optimization: Turning Shape-and-Proof Time into Controlled Cold Fermentation
One of the greatest challenges for the home baker is fitting a twelve-hour fermentation process into a busy daily schedule. I solved this by implementing a cold retardation step that allows you to pause the process whenever you need.
After the initial bulk rise, you can shape the dough into logs and place them on your baking sheet, then immediately slide them into the refrigerator. This cold environment slows the yeast activity to a crawl, giving you a window of up to 24 hours before you need to bake.
Not only does this provide flexibility, but the cold fermentation also improves the flavor profile of these sourdough breadsticks. The enzymes have more time to break down complex starches into simple sugars, which results in a deeper golden color during baking and a more nuanced sourdough tang.
Pro tip: When pulling shaped dough from the fridge, allow it to sit at room temperature for at least 45 minutes to “wake up” the yeast before it hits the hot oven.
If you choose to bake them fresh without the fridge step, ensure they have a full one to two hours to puff up and look nearly doubled in size. They should look almost fragile, like they are filled with tiny air pockets that will expand rapidly once the heat hits them.
For the best results post-bake, storage is key to maintaining that perfect texture. I have observed that sourdough breadsticks are best when eaten within an hour, but they can be revived beautifully the next day.
To reheat, brush them with a light coating of olive oil and place them in a 350°F oven for five minutes until the crust regains its initial shatter. Avoid the microwave, as it will turn the carefully developed gluten structure into a rubbery, unappealing texture.
Ingredients for Optimal Sourdough Breadsticks
Success in this recipe depends heavily on the protein content of your flour and the activity level of your starter. My testing confirms that using standard bread flour provides the necessary structural integrity for this dish.
I experimented with a 50/50 mix of all-purpose and bread flour, but the resulting pieces often collapsed under the weight of the long fermentation. The higher protein levels in bread flour are essential for maintaining that slender, upright shape during the final proof and bake.
- 1 cup water (236 grams)
- 1/2 cup sourdough starter (113 grams, bubbly and active)
- 2 tablespoons sugar (24 grams)
- 1 1/2 teaspoon salt (11 grams)
- 3 tablespoons unsalted butter (42 grams, melted)
- 2 3/4 cups bread flour (413 grams)
For the Topping:
- 3 tablespoons unsalted butter (melted)
- 1/4 teaspoon salt
- 1/4 teaspoon garlic powder
- 1 teaspoon dried herb of choice (italian blend, parsley, basil, rosemary)
I recommend using a kitchen scale for all measurements, as volume can vary significantly based on how you pack your flour. Even a ten percent discrepancy in flour weight can turn a perfect dough into something that is either too dry to knead or too wet to shape.
Pro tip: Ensure your water is filtered and at room temperature; chlorine in tap water can occasionally inhibit the growth of sensitive wild yeast cultures.
The butter used in the dough should be melted but allowed to cool slightly before adding it to the bowl. If the butter is too hot, it can damage the yeast cells, leading to a sluggish rise that takes much longer than the expected timeframe.
Step-by-Step Instructions for Predictable Results
- Feed sourdough starter 4-12 hours before starting the dough. It should be a bubbly starter that passes the float test, meaning a small spoonful floats on top of water rather than sinking.
- Add all the ingredients to a bowl of a stand mixer with a dough hook attachment.
- Knead on medium speed until you have a soft, smooth dough that is glossy and elastic. It can take over 10 minutes for this to be accomplished. It must pass the windowpane test to confirm the gluten structure is strong enough to trap the carbon dioxide produced during the long bulk rise without tearing.
- Place a lid, plastic wrap, damp tea towel, or beeswax wrap over the bowl and allow to rise at room temperature until it doubles in size. Rising time can be anywhere from 6-12 hours depending on the temperature of your house and the strength of your starter.
- Pour bread dough onto a clean and lightly floured work surface.
- Divide into 12 evenly sized balls using a bench scraper or a sharp knife to ensure clean cuts without tearing the gluten.
- Roll each piece of dough into a log 8 inches long, applying even pressure to maintain a consistent thickness from end to end.
- Place parchment paper on a baking sheet and carefully place the shaped breadstick dough onto the parchment, leaving at least an inch of space between each one.
- Cover with a towel and allow to rise for 1-2 hours until puffy and about doubled in size. At this stage, they can also be refrigerated for up to a day for enhanced flavor.
- Bake breadsticks in a preheated oven at 400°F for 20 minutes, until they are a consistent golden brown on top.
- Meanwhile, while the breadsticks are baking, make the topping by combining the melted butter, garlic powder, and salt.
- Brush the topping on the breadsticks as soon as they are done baking and still hot to allow for maximum absorption. Sprinkle with your chosen herbs immediately so they adhere to the butter.
Pro tip: When rolling the dough into 8-inch logs, if the dough keeps snapping back, let it rest for five minutes to allow the gluten to relax before trying again.
Troubleshooting and Flavor Variations
One of the most frequent questions I receive is whether sourdough discard can be used in place of an active starter. For these sourdough breadsticks, a discard that has been sitting in the fridge for a week will not have the leavening power required for a light texture.
If you only have discard on hand, you must incorporate it into your normal feeding schedule for at least one or two cycles until it is active and passes the float test. Using an inactive starter will result in heavy, leaden breadsticks that fail to expand, regardless of how long you let them sit on the counter.
If you are aiming for that iconic, savory profile reminiscent of popular Italian restaurant chains, the secret lies in the butter application. You must brush the garlic butter mixture onto the breadsticks the second they exit the oven while the crust is still porous and steaming.
This allows the fat and garlic flavor to penetrate the outer layer of the bread rather than just sitting on top of a cooled surface. The heat from the breadstick also helps to bloom the dried herbs, releasing their aromatic oils for a more intense sensory experience.
For a Spicy Kick: Add 1/2 tsp red pepper flakes to the final butter wash for a lingering heat that cuts through the richness of the butter.
Common Mistake: Not allowing the oven to fully preheat. If the oven isn’t at a true 400°F when the dough enters, you won’t get the initial “oven spring” needed to set the height, leading to a flatter, denser product.
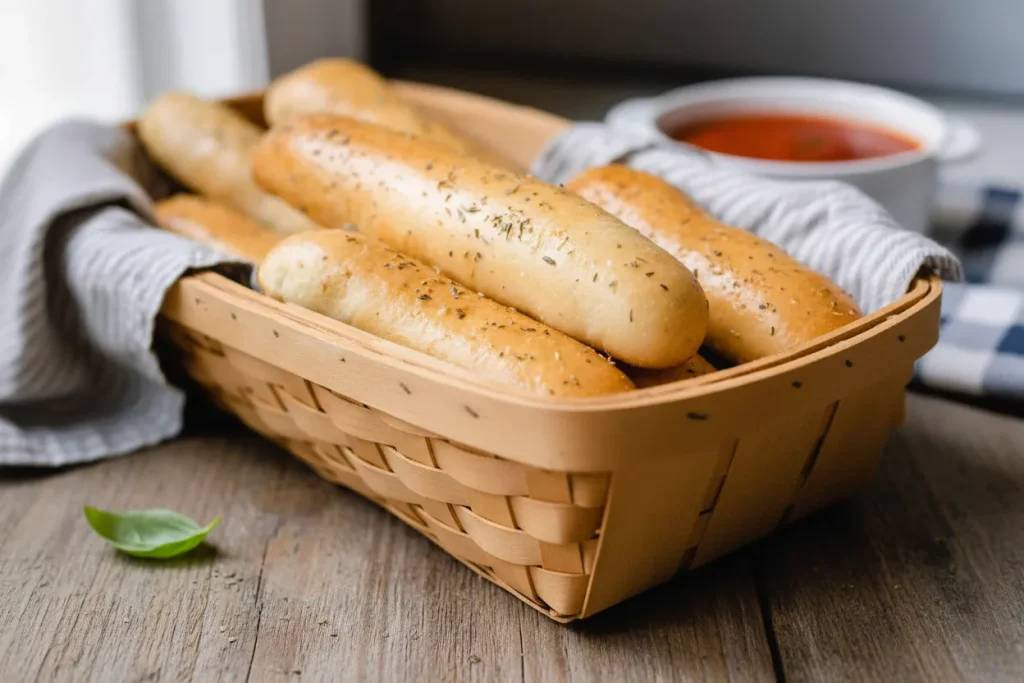
This blueprint yields exactly 12 breadsticks, each one approximately 8 inches long. If you find your yield is significantly different, check your measurements or ensure you are rolling the logs to the correct length and thickness.
Another common issue is the dough sticking to the work surface during the shaping phase. Use the smallest amount of flour possible; too much flour incorporated at this stage will make the dough dry and prevent the logs from sealing properly when rolled.
Conclusion: Finalizing Your Sourdough Breadstick Blueprint
Mastering sourdough breadsticks is less about following a rigid timeline and more about understanding the biological and physical systems at play. By focusing on gluten development through a 10-minute knead and monitoring the volume increase rather than the clock, you ensure a consistent outcome every time.
The engineering mindset teaches us that we can control our variables to achieve the best possible output. Whether you choose the same-day bake or the overnight cold fermentation, you now have the technical knowledge to troubleshoot and optimize your process.
I have found that the most rewarding part of this recipe is the moment you pull the tray from the oven. The sound of the crust crackling as it meets the cool air, combined with the aroma of garlic and toasted grain, is the ultimate proof of a successful system.
I encourage you to take these techniques into your own kitchen and see how your specific environment affects the fermentation times. Every kitchen has its own unique “personality” based on humidity and temperature, and learning yours is part of the journey.
Please leave a comment below and let me know how long your bulk fermentation took and what temperature your kitchen was at during the process. I am always looking for more data to refine these blueprints, and your feedback helps the entire community of home bakers succeed.
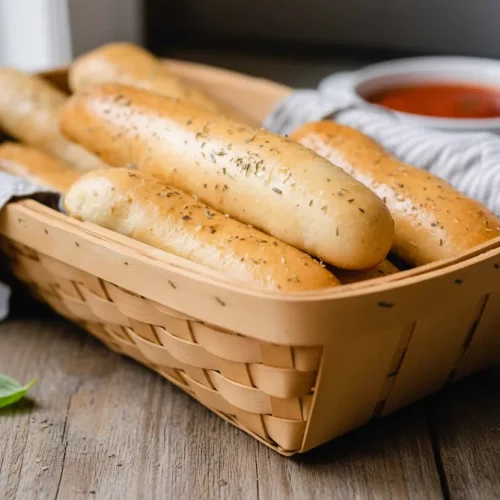
Sourdough Breadsticks
Equipment
- Stand Mixer with Dough Hook
- Clear, straight-sided container (for bulk fermentation)
- baking sheet
- Bench scraper or sharp knife
- Kitchen scale (recommended)
Ingredients
For the Dough
- 1 cup water (236 grams)
- 1/2 cup sourdough starter (113 grams, bubbly and active)
- 2 tablespoons sugar (24 grams)
- 1 1/2 teaspoon salt (11 grams)
- 3 tablespoons unsalted butter (42 grams, melted)
- 2 3/4 cups bread flour (413 grams)
For the Topping
- 3 tablespoons unsalted butter melted
- 1/4 teaspoon salt
- 1/4 teaspoon garlic powder
- 1 teaspoon dried herb of choice (italian blend, parsley, basil, rosemary)
Instructions
Dough Preparation and Kneading
- Feed sourdough starter 4-12 hours before starting the dough. It should be a bubbly starter that passes the float test, meaning a small spoonful floats on top of water rather than sinking.
- Add all the dough ingredients to a bowl of a stand mixer with a dough hook attachment.
- Knead on medium speed until you have a soft, smooth dough that is glossy and elastic. It can take over 10 minutes for this to be accomplished. It must pass the windowpane test to confirm the gluten structure is strong enough to trap the carbon dioxide produced during the long bulk rise without tearing.
Bulk Fermentation
- Place a lid, plastic wrap, damp tea towel, or beeswax wrap over the bowl and allow to rise at room temperature until it doubles in size. Rising time can be anywhere from 6-12 hours depending on the temperature of your house and the strength of your starter.
Shaping and Final Proof
- Pour bread dough onto a clean and lightly floured work surface.
- Divide into 12 evenly sized balls using a bench scraper or a sharp knife to ensure clean cuts without tearing the gluten.
- Roll each piece of dough into a log 8 inches long, applying even pressure to maintain a consistent thickness from end to end.
- Place parchment paper on a baking sheet and carefully place the shaped breadstick dough onto the parchment, leaving at least an inch of space between each one.
- Cover with a towel and allow to rise for 1-2 hours until puffy and about doubled in size. At this stage, they can also be refrigerated for up to a day for enhanced flavor (cold retardation).
Baking and Finishing
- Bake breadsticks in a preheated oven at 400°F for 20 minutes, until they are a consistent golden brown on top.
- Meanwhile, while the breadsticks are baking, make the topping by combining the melted butter, garlic powder, and salt.
- Brush the topping on the breadsticks as soon as they are done baking and still hot to allow for maximum absorption. Sprinkle with your chosen herbs immediately so they adhere to the butter.


